How to Measure a Pipe Thread: Quick Guide for Accurate Fits
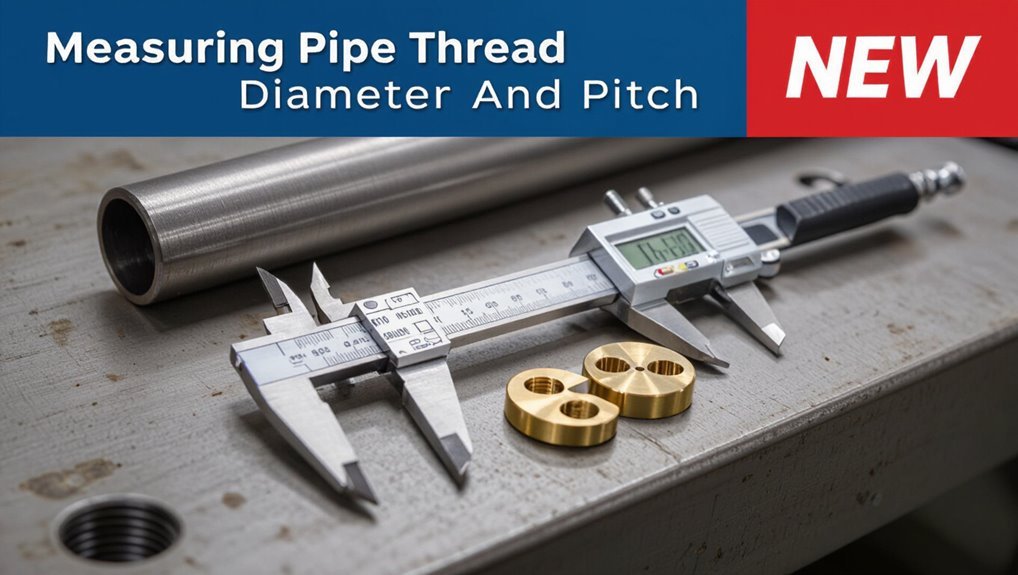
To accurately measure a pipe thread, you’ll need to check three key factors: diameter, pitch, and taper. Start by using calibrated calipers to measure the outer diameter (OD) of male threads or the inner diameter (ID) of female threads at various depths, then average your readings for consistency. Next, determine the thread pitch using a pitch gauge to find either the threads per inch (TPI) or the metric pitch in millimeters, while also verifying the profile angle. To assess taper, take axial diameter measurements or refer to standard taper charts. Finally, confirm the fit with Go/No-Go gauges to ensure compatibility. For further guidance, explore step-by-step methods, relevant standards, and tips for ordering the correct pipe thread components.
Quick How‑To: Measure a Pipe Thread in 3 Steps
To begin, gather a caliper, thread gauge (or pitch gauge), and a clean sample of the fitting or pipe.
First, measure the outside diameter (OD) for male threads or the inside diameter (ID) for female threads with the caliper, recording the dimension to the nearest 0.01 mm or 0.001 in.
Second, use the thread gauge to match tooth profile and count threads per inch (TPI) or measure pitch in millimeters; confirm whether threads are tapered or straight.
Third, note thread form and standard (NPT, BSP, etc.) by comparing OD, pitch, and taper characteristics for accurate identification.
Tools You Need: Calipers, Pitch Gauges, and Go/No‑Go
Accurate thread measurement depends on three basic tools.
Calipers determine the major diameter, a pitch gauge identifies the thread pitch, and go/no‑go plug gauges verify fit.
Each tool provides a specific, objective check to confirm compatibility.
Calipers For Major Diameter
A set of calipers is the primary tool for measuring a thread’s major diameter, the largest outside measurement that determines fit.
The technician positions jaws across crests, verifies zero, and reads to the nearest practical unit. Consistent contact pressure and perpendicular alignment prevent distortion. Measurements may be taken at several axial points to detect taper or wear; the largest consistent reading defines the major diameter used for sizing and matching fittings.
- Use digital or vernier calipers with fine resolution.
- Clean threads before measuring.
- Avoid measuring on damaged crests.
- Record multiple readings and average.
Pitch Gauge For Threads
How does one confirm a thread’s pitch quickly and reliably? A pitch gauge matches the spacing of threads to determine threads per inch or millimeters per thread. The inspector selects the gauge leaf series, lays a leaf across the threads, and verifies full contact along crest and root without rocking.
Proper lighting and slight magnification improve accuracy. Combined with a caliper’s diameter measurement, the pitch identification narrows the standard and size. Retracting damaged or worn threads prevents false readings.
A pitch gauge is portable, fast, and essential for identifying compatible fittings before trial assembly or ordering replacements.
Go/No‑Go Plug Gauges
With a calibrated set of Go/No‑Go plug gauges, an inspector can quickly verify whether an internal thread meets size and tolerance limits without time‑consuming measurements.
Go gauge should enter fully, confirming minimum material condition and correct form; No‑Go must not enter beyond its limit, indicating the maximum permissible size is not exceeded.
Proper use reduces inspection time and rejects out‑of‑tolerance parts early.
Gauges must be traceable, clean, and handled to avoid wear.
Periodic calibration preserves reliability.
Training guarantees consistent technique and interpretation.
- Guarantee traceability to standards
- Clean threads and gauges before use
- Follow insertion technique guidelines
- Record results and calibrations
Identify Thread Type: NPT, BSP, or Metric
The inspector compares thread form and flank angle to distinguish NPT, BSP, and metric threads, since NPT uses a 60° form with tapered profile while BSP uses a 55° form and metric threads use a 60° form with straight or tapered variants.
Pitch and major diameter are measured with a pitch gauge and calipers to confirm the suspected standard. Combining profile angle with pitch and diameter measurements yields a definitive identification.
Thread Form And Angle
By examining the thread form and included angle, one can distinguish NPT, BSP, and metric pipe threads: NPT uses a 60° V-profile that is tapered for sealing, BSP comes in parallel (BSPP) or tapered (BSPT) forms with a 55° Whitworth-style angle, and metric threads employ a 60° ISO metric profile and are generally parallel or tapered depending on the standard.
Identification relies on visual inspection and angle confirmation with gauges; proper recognition prevents mismatching. Consider form, angle, and taper together when classifying threads for fittings, adapters, or replacement components.
- Profile shape (V versus Whitworth)
- Included angle (60° or 55°)
- Parallel versus tapered form
- Standard marking and context
Measure Pitch And Diameter
When identifying NPT, BSP, or metric pipe threads, measuring pitch and diameter provides the quantitative basis for classification: pitch (threads per inch or millimeters per thread) and major diameter distinguish metric from imperial forms, while combined with thread angle and taper they confirm the specific standard.
Using a caliper, record the major diameter across crests. Use a thread pitch gauge or measure distance over several threads and divide to get pitch accurately.
Compare measured pitch and diameter to standard tables: NPT uses imperial TPI with tapered profile, BSP may be BSPP or BSPT with British pitch sizes, and metric threads report millimeter pitch values.
Measure Male Threads: Outside Diameter (OD)
To measure a male pipe thread’s outside diameter (OD), place calipers across the thread crests at several points along the length and record the largest consistent reading; this guarantees the measurement reflects the effective major diameter used for thread identification.
The technician verifies caliper zeroing, aligns jaws perpendicular to the thread axis, and avoids measuring across peaks with damage or burrs. Multiple readings confirm concentricity and wear. Record the value to the nearest practical unit, then compare with standard thread charts to determine nominal size and compatible fittings.
- Use digital or vernier calipers
- Measure at several axial positions
- Avoid damaged crests
- Compare to charts
Measure Female Threads: Inside Diameter (ID)
After obtaining the male thread OD, the technician shifts focus to measuring the female thread’s inside diameter (ID) to confirm compatibility.
Using calipers, they measure the bore at several depths to account for chamfers or irregularities, recording the maximum functional ID where threads engage.
For accuracy, measurements are taken at perpendicular orientations and averaged.
The recorded ID is compared to the nominal OD of mating parts plus thread allowances specified by the standard in use.
Notes include measurement tool resolution, temperature, and any corrosion or deformation that could alter fit.
Proper ID measurement prevents leaks and guarantees reliable thread engagement.
Count Threads or Measure Pitch: TPI and Mm Pitch
Begin by determining the thread density: count the crests over a known length for imperial threads (threads per inch, TPI) or measure the linear distance between adjacent crests for metric threads (millimeter pitch). The observer records whether measurements align with common standards (e.g., 14 TPI, 1.0 mm). Use a caliper or thread gauge for repeatable results and note handedness separately. When documenting, include nominal size and measured pitch for clear matching.
- Use a calibrated caliper or dedicated pitch gauge.
- Measure over several turns to reduce error.
- Record units explicitly (TPI or mm).
- Cross-check against manufacturer tables.
Tapered vs. Parallel Threads: Detect and Why It Matters
How can one tell whether a pipe thread tapers or remains parallel along its length?
Visual inspection combined with simple measurements reveals the difference: measure diameter near the thread start and again toward the end. A decreasing diameter indicates a tapered thread; consistent diameter indicates a parallel (straight) thread.
Common tapered standards seal by wedging; parallel threads rely on a gasket or sealant.
Identifying taper affects coupling selection, torque, and sealing method. Use calipers and note change per inch or millimeter to classify.
Correct identification prevents leaks, cross-threading, and mismatched fittings that compromise pressure integrity and service life.
Match Measurements to Standards and Order the Right Size
Once the thread type — tapered or parallel — is confirmed, the next step is to match measured dimensions to the appropriate standard so the correct replacement or mating fitting can be ordered.
The technician compares major/minor diameters, pitch or threads-per-inch, and thread form against standards such as NPT, BSP, BSPT, or ISO metric. Reference charts and calibrated gauges guarantee conversion between fractional, decimal, and metric listings.
Confirm material, pressure rating, and sealing method before purchase. Ordering the precise standard prevents leaks and rework.
- Verify diameter and pitch against a standard chart
- Use calibrated gauges for accuracy
- Note taper and thread angle
- Confirm material and pressure class
Conclusion
After following three simple steps and consulting a stack of gauges, the reader can now proudly declare expertise in pipes — at least until a mystery fitting proves otherwise. Measuring OD, ID and pitch sounds almost trivial; yet the real achievement is surviving tapered vs. parallel debates and matching standards without starting a plumbing war. Armed with calipers and humor, one will order the right size and perhaps impress someone who cares about threads.