How to Loosen Plumbing Fittings: 10 Proven Techniques for Stubborn Pipes
To effectively loosen stubborn plumbing fittings, start by assessing the type and material of the fitting. Ensure the water supply is shut off, and gather necessary tools such as wrenches, penetrating oil, and heat sources. Techniques like applying penetrating oil, using proper leverage, applying gentle taps, and using heat can help. Additionally, consider freeze contraction for metal fittings or strap wrenches for plastic ones. Always stabilize with two wrenches and protect surrounding surfaces. Proceed carefully to avoid damaging threads or pipes, and refer to detailed step-by-step methods for best results.
Why Plumbing Fittings Get Stuck and When to Proceed Cautiously
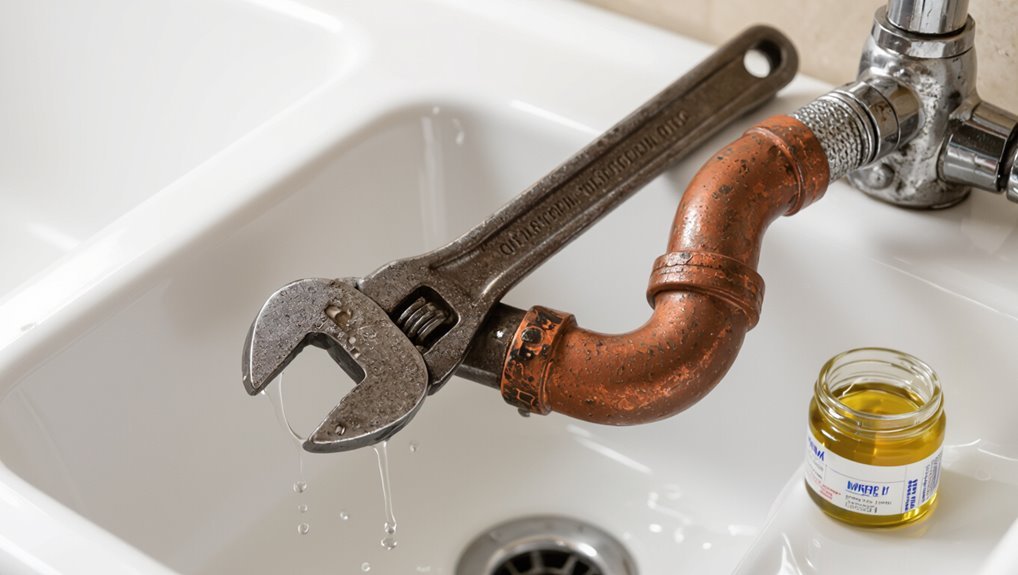
Plumbing fittings can seize for several reasons, including corrosion, mineral buildup, paint overgrowth, or simple overtightening.
Forcing a stuck fitting risks stripping threads, cracking pipes, or causing leaks and personal injury.
The reader should weigh the complexity and potential damage to decide when to continue with careful DIY techniques and when to call a professional.
Common causes of seized fittings (corrosion, mineral buildup, paint, overtightening)
Several factors commonly cause fittings to seize, each demanding a different approach: corrosion eats metal threads and joints over time, mineral deposits from hard water harden into stubborn crusts, multiple coats of paint can glue parts together, and overtightening strips threads or compresses seals.
Identifying the cause guides how to loosen plumbing fittings—chemical descalers for minerals, penetrating oil for corrosion, careful paint removal, or thread repair.
Safety and damage risks when forcing fittings
Exerting force on a stuck fitting can free it—but it can also shear threads, crack pipes, rupture seals, or twist soft metal, creating leaks or necessitating costly replacements.
Excessive torque risks cosmetic and structural damage: warped flanges, stripped connections, and fractured solder joints.
Thermal or chemical methods can harm finishes and nearby materials.
Proceed with controlled force, inspection, and protective padding to limit collateral damage.
When to call a professional vs DIY
After noting the risks of forcing a fitting—sheared threads, cracked pipes, ruptured seals, and damaged finishes—the question becomes when a homeowner should continue attempting a repair and when to enlist a professional.
Minor corrosion, accessible valves, and basic tools suit DIY.
Persistent leaks, hidden failures, galvanized or soldered joints, gas lines, or lack of confidence warrant a licensed plumber to prevent expensive, unsafe consequences.
Quick Assessment: Identifying the Type of Fitting and Material
A quick visual and tactile assessment helps determine whether a fitting is threaded, compression, sweat (soldered), or push-fit and reveals the pipe material—copper, brass, PVC/CPVC, PEX, or galvanized steel.
The inspector should use basic tools such as wrenches, a flashlight, and an inspection mirror to confirm joint types and access tight spots.
Identifying these characteristics before applying force guides the correct loosening method and reduces risk of damage.
Differentiating threaded, compression, sweat (soldered), and push-fit fittings
Quick visual and tactile checks help determine whether a fitting is threaded, compression, sweat (soldered), or push-fit:
Threaded fittings show visible spiral threads and often need two wrenches.
Compression fittings have a nut and slight seam where the ferrule sits.
Sweat joints display solder residue and smooth joints.
Push-fit connectors are plastic or brass with grab-ring openings and no nuts or solder, allowing quick disengagement.
Identifying pipe materials: copper, brass, PVC/CPVC, PEX, galvanized steel
When evaluating a plumbing run, the technician first looks for color, texture, and fittings to distinguish copper, brass, PVC/CPVC, PEX, and galvanized steel.
Copper appears reddish-brown and may show greenish corrosion. Brass is yellow-gold and softer. PVC/CPVC is smooth, white or cream plastic with solvent-welded joints. PEX is flexible colored tubing often stamped with size and oxygen-barrier markings. Galvanized steel is gray, heavy, and threaded with visible flaking or rust.
Technicians note joining methods, pipe diameter markings, and magnetism—galvanized steel attracts a magnet—to confirm material before choosing loosening techniques.
Tools needed for assessment (wrenches, flashlight, inspection mirror)
Several basic tools enable a rapid, accurate assessment of fittings and materials: adjustable and pipe wrenches for grip and leverage, a bright flashlight to reveal color, corrosion, and joint types, and a small inspection mirror for hidden or awkward angles.
A compact notepad, tape measure, and digital camera help record dimensions and conditions; gloves and safety glasses protect while probing and manipulating components.
Ten Proven Techniques to Loosen Stubborn Plumbing Fittings
A concise set of practical methods can help free fittings seized by corrosion, debris, or thermal expansion. The following techniques focus on loosening joints safely and effectively using lubrication, proper tools, controlled heat, impact, and thermal contraction.
Each method should be chosen based on fitting material and surrounding conditions to minimize damage.
- Apply penetrating oil and allow dwell time
- Use the correct-sized wrench and proper leverage
- Heat the joint safely with a torch or heat gun
- Tap the fitting with a hammer to break corrosion
Technique 1 Apply penetrating oil and allow dwell time
Spray a liberal coat of penetrating oil onto the joint and surrounding threads, ensuring the chemical reaches visible corrosion or hardened deposits.
Allow extended dwell time—typically 10–30 minutes or longer for severe rust—so the solvent penetrates. Reapply if necessary, then tap fittings lightly to help breakthrough.
Clean excess oil before attempting loosening. Choose compatible oils for plumbing materials to avoid damage.
Technique 2 Use the correct-sized wrench and proper leverage
Once penetrating oil has softened corrosion, attention turns to using the correct-sized wrench and applying proper leverage to break the joint free.
The technician selects a snug-fitting wrench—adjustable, pipe, or basin—avoiding slipping. They position the tool to pull toward the long handle, secure a counter-hold on the mating fitting, and apply steady, controlled force to prevent rounding or damage while preserving nearby fixtures.
Technique 3 Heat the joint safely with a torch or heat gun
Although heat can quickly break down corrosion and old solder, it must be applied carefully to avoid damaging pipes, seals, or nearby materials.
The operator heats the joint evenly with a torch or heat gun, watching temperature and nearby combustibles. Use a heat shield, keep flame moving, and allow expansion before attempting to turn.
Cool and inspect seals after loosening.
Technique 4 Tap the fitting with a hammer to break corrosion
Strike the fitting gently with a hammer to fracture rust and mineral deposits that lock threads or mating surfaces together.
Use light, controlled taps with a brass or nylon mallet when possible to avoid damage. Tap around the circumference to distribute impact, then attempt to turn with the appropriate wrench.
Repeat as needed, combining with penetrating oil and patience to free the joint.
Technique 5 Freeze expansion method (ice/CO2) for metal shrinkage
One effective approach uses rapid cooling—via ice packs or a CO2 duster—to slightly contract the stuck metal fitting so it releases from its mating part.
The colder metal shrinks minutely, loosening corrosion grip. Apply controlled cooling, protect surrounding materials, and attempt gentle rotation or backing with the appropriate wrench.
Reapply cooling as needed; avoid overchilling plastics or seals to prevent damage.
Technique 6 Use strap wrench or basin wrench for awkward locations
After using controlled cooling to shrink a seized metal fitting, attention often turns to access and leverage in confined or awkward spaces where standard wrenches can’t reach or grip.
A strap wrench protects finishes and wraps around irregular shapes; a basin wrench reaches nuts behind sinks and in tight vertical clearances.
Both provide controlled torque without damaging fittings; choose size and grip for the specific access constraint.
Technique 7 Cut and rethread or replace section when irreparable
Cutting out and rethreading—or replacing—a damaged pipe section becomes the practical choice when fittings are corroded, warped, or stripped beyond safe repair.
The technician measures, marks, and cuts the affected length, then rethreads with appropriate dies or installs a matched replacement segment.
Proper sealing, alignment, and pressure testing follow to guarantee leak-free restoration and code-compliant integrity.
Technique 8 Use two-wrench stabilization to prevent twisting pipe
When a corroded or replaced section is secure but adjacent fittings remain stubborn, two-wrench stabilization prevents the entire assembly from twisting and damaging seals or joints.
One wrench holds the nearby fitting or pipe steady while the other applies turning force to the stuck nut or coupling. This isolates torque, protects soldered or glued joints, and reduces risk of leaks or further damage.
Technique 9 Apply chemical descaler for mineral deposits
Apply a commercial chemical descaler to dissolve mineral buildup that often locks fittings in place, following the product instructions and safety precautions.
Allow recommended dwell time, then rinse thoroughly. Use appropriate PPE and ventilate the area.
Protect nearby finishes and nonmetallic components. Repeat application if necessary, but avoid prolonged exposure to brass or plated surfaces.
Dispose of residues per local regulations.
Technique 10 Use impact tools (low-torque impact driver) cautiously
After chemical descalers have softened mineral deposits, a low-torque impact driver can be used to break remaining corrosion or seized threads without excessive force.
The operator should select appropriate bits, support the fitting to prevent twisting, and apply short bursts.
Avoid high torque, plastic pipes, and delicate fixtures.
Inspect threads afterward, clean debris, and retap if necessary before reassembly.
Step-by-Step Procedures for Common Scenarios
The following section outlines clear step-by-step procedures for four common situations: freeing a stuck compression fitting on copper, separating a soldered (sweat) joint safely, removing corroded galvanized fittings, and working with plastic fittings (PVC/CPVC/PEX) without causing damage.
Each scenario presents specific risks and tools, so instructions prioritize safety, preservation of pipe material, and minimizing follow-up repairs.
Readers are guided through concise sequences that match the typical tools and conditions encountered in the field.
Loosening a stuck compression fitting on copper pipe
When a compression fitting on copper pipe refuses to turn, methodical steps and the right tools are required to avoid damaging the pipe or fitting.
Begin by shutting water, supporting the pipe, and applying penetrating oil.
Use two adjustable wrenches—one to hold the valve body, one to turn the nut—adding controlled heat if needed.
Inspect and replace the olive and nut if deformed.
Separating a soldered (sweat) joint safely
Begin by isolating the section of plumbing and draining any remaining water to prevent steam and reduce heat transfer.
Then protect surrounding materials and prepare proper tools and safety gear before attempting to separate a soldered (sweat) joint.
Heat the joint evenly with a torch until solder liquefies.
Apply controlled twisting with pliers, cool and clean surfaces, and replace or re-solder as needed.
Removing corroded fittings on galvanized steel
After addressing soldered joints, attention shifts to galvanized steel, where corrosion and rust seize fittings and require different tactics.
Apply penetrating oil, let soak several hours, then tap fittings lightly to fracture rust.
Use pipe wrench with firm, steady force; heat cautiously with a propane torch if safe.
If removal fails, cut the pipe and replace nipple and fittings with appropriate adapters.
Working with plastic fittings (PVC/CPVC/PEX) without damage
Handle plastic fittings with care to prevent cracking, warping, or losing solvent-welded bonds; different materials—PVC, CPVC, and PEX—have distinct limits for heat, solvents, and mechanical force, so selection of tools and techniques must match the material.
Use strap wrenches, heat cautiously for softened joints (CPVC limited), avoid pipe grips that bite, cut and replace damaged sections, and purge debris before reassembly.
Tools and Materials Recommended for Each Technique
The section lists the specific hand tools, power tools, chemicals, and safety gear useful for each loosening method and explains when to choose penetrating oil, heat, or cutting. It compares effectiveness, risks, and typical use cases to guide selection. The table summarizes key matches between techniques and recommended items.
| Technique / Situation | Recommended items |
|---|---|
| Stuck but intact fittings | Penetrating oil, adjustable wrench, flare/nut wrenches |
| Corroded or frozen joints | Heat source (propane torch), heat-resistant gloves |
| Severely damaged or seized parts | Cutting tool (reciprocating saw/angle grinder), eye protection |
| General worksite safety | Safety goggles, gloves, fire extinguisher |
Hand tools, power tools, chemicals, safety gear
Gathering appropriate tools and safety gear before attempting to loosen plumbing fittings guarantees the task proceeds efficiently and reduces risk.
Recommended hand tools include adjustable wrenches, basin wrenches, pipe wrenches, and strap wrenches.
Power options: cordless impact drivers and oscillating multi-tools with metal blades.
Chemicals: penetrating oil and pipe-safe rust removers.
Safety gear: gloves, eye protection, respirator and knee pads.
When to use penetrating oil vs heat vs cutting
After assembling the tools and safety gear, a decision must be made between penetrating oil, applied heat, or cutting to free stubborn plumbing fittings; each method suits different failure modes and materials.
Penetrating oil first for rusted, corroded threads and delicate fittings.
Apply heat for soft solder joints or seized metal unions, with flame control and thermal protection.
Cut when threads are stripped or components are irreparable.
Preventing Future Seizures and Best Practices
Proper assembly torque and correct thread sealing are emphasized to prevent fittings from seizing and to maintain leak-free joints.
Use of anti-seize compounds and dielectric fittings is recommended where dissimilar metals meet to avoid galvanic corrosion.
Scheduled inspections and cleaning help prevent corrosion and mineral buildup that can lock fittings over time.
Proper assembly torque and thread sealing techniques
When reassembling plumbing fittings, correct torque and reliable thread sealing are the two most important defenses against future seizures and leaks.
Technicians should follow manufacturer torque specs, use calibrated tools, and avoid over-tightening.
Apply appropriate thread sealant—pipe dope or PTFE tape—neatly and sparingly on male threads, ensuring thread engagement remains smooth.
Inspect joints for proper alignment before final torque.
Anti-seize compounds and dielectric fittings for dissimilar metals
Corrosion and galvanic action between dissimilar metals are common causes of seized plumbing fittings; using anti-seize compounds and dielectric fittings mitigates those reactions and eases future disassembly.
Apply a thin layer of suitable anti-seize on threaded connections, avoid petroleum-based greases on plastics, and install dielectric unions or bushings where copper meets steel or brass to electrically isolate metals and reduce long-term corrosion.
Routine maintenance to prevent corrosion and mineral buildup
Having applied anti-seize compounds and installed dielectric fittings, ongoing care keeps fittings from re-seizing and limits mineral buildup.
Regular inspections, gentle cleaning with vinegar or descaler, and periodic tightening prevent deterioration.
Replace worn washers and corroded sections promptly.
Maintain water softeners where hard water exists and flush lines annually.
Document maintenance dates to track trends and address issues before fittings seize again.
Common Mistakes That Cause More Damage
Common errors often turn a simple loosening task into a costly repair. Excessive heat applied near fixtures or pipes can warp materials, while heavy-handed force without stabilizing adjacent components can shear threads or crack joints.
Using inappropriate chemicals on plastic fittings or finished surfaces frequently causes swelling, discoloration, or surface damage.
Overheating nearby fixtures or pipes
Several incidents of excessive heat application to fittings result from using a torch or high-heat soldering without protecting adjacent fixtures or pipes. This damages seals, warps soft metals, and can ignite insulation or nearby materials.
Surrounding components should be shielded with heat guards, wet rags, or flame-resistant barriers. Controlled, incremental heating minimizes collateral damage and preserves adjacent plumbing integrity.
Applying excessive force without stabilization
Heat damage is only one way repair attempts can worsen a job; applying excessive force without stabilizing the plumbing often produces stripped threads, cracked fittings, or twisted pipes.
Technicians should brace adjacent components, use proper wrenches, and apply steady, controlled torque.
Sudden jerks or leverage against unsecured sections transfer stress to joints and seals, increasing leak risk and requiring more extensive repairs.
Using wrong chemicals on plastics or finished surfaces
Mistakenly applying harsh solvents, bleach, or acidic cleaners to plastic components and finished surfaces can quickly cause discoloration, warping, crazing, or loss of protective coatings.
Technicians should identify materials before cleaning, use manufacturer-recommended products, test solvents on hidden areas, and prefer mild detergents or isopropyl alcohol when appropriate.
Incorrect chemicals can necessitate replacement, increase repair costs, and void warranties.
Estimated Time, Cost, and When Replacement Is More Practical
A brief comparison of time and cost helps determine whether attempting to free a stuck fitting or cutting in a new section is more efficient.
Simple DIY techniques often take 30–90 minutes and minimal expense for tools or penetrating oil, while full replacement can require several hours and higher material and labor costs.
Immediate replacement is usually advised when fittings show severe corrosion, cracks, persistent leaks, or when nearby pipe sections are compromised.
Time and expense comparison of DIY techniques vs replacement
Compare estimated time and cost to decide whether attempting to loosen a stubborn plumbing fitting or replacing it outright is the more efficient route.
DIY loosening often costs little—basic tools and penetrating oil—taking one to three hours.
Replacement requires parts, potential new fittings, and possibly professional labor, costing more but saving time if corrosion or damage is extensive.
Choose by complexity and risk.
Signs a fitting or pipe section must be replaced
After weighing time and cost between loosening attempts and full replacement, the next consideration is recognizing when replacement is unavoidable.
Indicators include extensive corrosion, cracked or deformed fittings, persistent leaks after tightening, compromised threads, contaminated water, or repeated failures.
Estimate replacement time (often 30–90 minutes) and cost (parts plus labor) and prioritize replacement when repairs recur or safety and water quality are affected.
Final Safety Checklist Before and After Loosening Fittings
Before loosening any fitting, the technician confirms the main water supply is shut off, drains the affected lines, and secures absorbent materials or a bucket to prevent leaks.
After repairs, the technician gradually restores water pressure while observing joints for seepage.
A final test of the repair under normal pressure verifies a watertight seal and correct function.
Shutting off water, draining lines, and preventing leaks
When preparing to loosen plumbing fittings, the technician first shuts off the appropriate water supply, isolates affected fixtures, and relieves pressure by opening nearby faucets or valves; this sequence minimizes water loss and reduces the risk of spray when joints are disturbed.
Next, they drain residual water, plug drains, position towels and a catch pan, and apply thread sealant or temporary caps to prevent leaks during disassembly.
Testing the repair and restoring water pressure
Confirm system integrity and water containment before restoring pressure.
Inspect repaired fittings for visible gaps, properly seated seals, and tightened connections.
Gradually reopen the main valve while monitoring for leaks and unusual sounds.
Check downstream fixtures for steady pressure and air pockets; bleed lines as needed.
Verify no dripping after a full-pressure test and document any persistent issues for rework or professional assessment.
Conclusion
Like a frozen hinge slowly warmed by sunlight, a stubborn fitting can yield when patience and the right touch are applied. The reader leaves equipped with diagnostic sight—seeing metal type, thread, and corrosion—and a toolkit of ten techniques to coax movement without tearing the pipe’s skin. With caution as a steady hand and prevention as steady glue, future repairs become less like battle and more like gentle restoration of flow.