How to Loosen Galvanized Pipe Without Damaging Threads: Proven Tips and Tools
To loosen galvanized pipe joints without damaging the threads, use patient and controlled techniques. First, shut off and drain the line, then apply penetrating oil and let it soak. Employ strap or pipe wrenches with steady torque, protecting the threads with caps or a rag. You may also use measured heat bursts or light vibration to help break corrosion. After loosening, gently clean and chase the threads. Follow proper tool usage and safety precautions to avoid gouging. For detailed steps and troubleshooting, see below.
How to Loosen Galvanized Pipe Without Damaging Threads Quick Overview
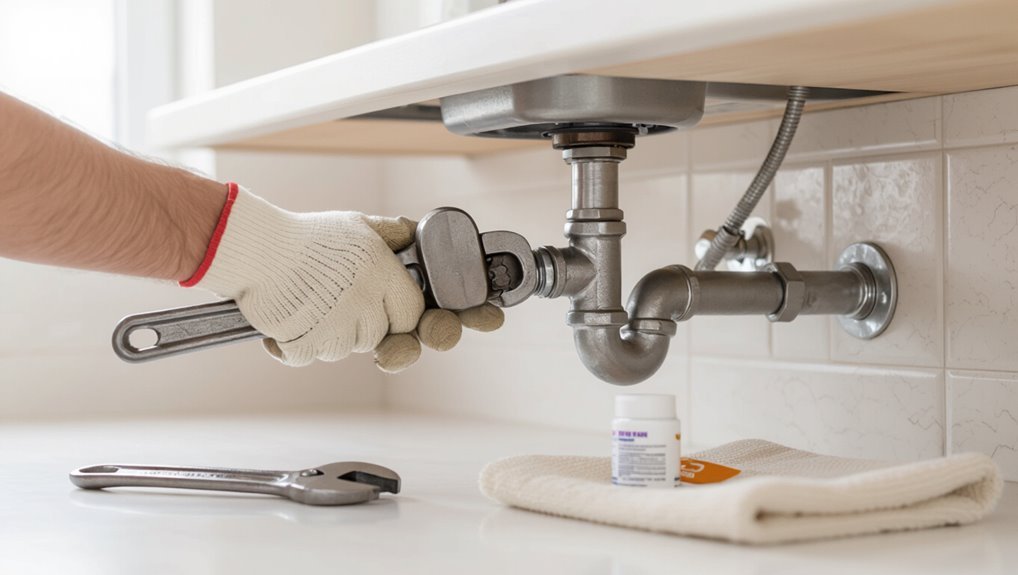
Loosening galvanized pipe is required when repairs, replacements, or access to fittings are needed, especially after long-term corrosion or paint buildup has seized joints.
For most situations, the quickest safe method is to apply penetrating oil, allow it to soak, and use a properly sized pipe wrench with steady, controlled force.
These steps minimize the risk of thread damage while restoring movement.
When and why you need to loosen galvanized pipe
In many plumbing repairs or modifications, it becomes necessary to free a section of galvanized pipe to replace fittings, clear a blockage, or reconfigure a run without compromising the pipe’s threaded ends.
Technicians need guidance on how to loosen galvanized pipe when corrosion, paint, or overtightening binds joints. Proper timing—during remodels, leak repair, or maintenance—reduces damage risk and prevents costly replacements.
Quick safe answer: best immediate method for most situations
After identifying the need to free a section of galvanized pipe, the quickest safe approach for most situations is to apply penetrating oil, allow it to soak, and then use two properly sized pipe wrenches to back the joint apart while protecting the threads with cloth or a thin sacrificial sleeve.
If stubborn, tap opposing sides with a hammer, reapply oil, and use steady, controlled force to avoid thread damage.
Understanding Galvanized Pipe and Thread Vulnerabilities
Galvanized pipe has a zinc coating that protects against corrosion but can mask or alter original thread profiles, reducing metal-to-metal engagement if excessively thick or uneven.
Threads commonly suffer flattening, galling, cross-threading, and zinc flaking, typically caused by overtightening, improper alignment, or aggressive forcing with the wrong tools.
Wrenches, pipe grips, and harsh chemicals can damage threads, while soft-jaw tools, proper padding, and corrosion-inhibiting lubricants help protect them.
What galvanized coating is and how it affects thread strength
A zinc-rich metallic coating is applied to steel pipe to prevent corrosion and extend service life by forming a barrier and sacrificial anode.
Galvanizing adds thickness to threads, slightly altering fit and pitch engagement. The coating hardens differently than base steel, making edges brittle and susceptible to flaking under torque.
Proper handling preserves the coating and maintains thread sealing and mechanical integrity.
Common thread damage types and how they occur
Several distinct types of thread damage commonly affect galvanized pipe, each arising from specific mechanical or environmental stresses.
Common forms include abrasion from cross-threading or grit, galling from metal-on-metal friction, deformation from overtightening, and corrosion-induced pitting or thread loss from prolonged exposure to moisture or chemicals.
Fatigue cracks can form at stress concentrations, compromising seal integrity and strength.
Tools and materials that can harm versus protect threads
Differentiate between tools and materials that accelerate thread wear and those that preserve integrity to prevent costly failures.
Hardened steel pipe wrenches, cheater bars, and abrasive cleaners gouge galvanizing and deform threads.
Appropriate choices include smooth-jaw or strap wrenches, padded grips, anti-seize compounds, and penetrating oil designed for metal.
Soft brass or nylon tools minimize scoring; lubricant selection prevents corrosion and eases removal.
Preparing the Job Safely
Before loosening any galvanized pipe, the worker gathers required safety gear and arranges a clear, well-lit workspace to prevent injury and contamination.
They inspect thread condition and joint history for signs of corrosion, paint, or past repairs that affect removal technique.
Finally, they determine when to shut off water, isolate the section, and fully drain the line to avoid leaks and pressure-related hazards.
Required safety gear and workspace setup
Personal protective equipment and a well-organized workspace are essential to reduce injury and damage when loosening galvanized pipe.
The technician should wear safety glasses, chemical-resistant gloves, hearing protection, and sturdy footwear; consider a dust mask if corrosion is present.
Clear the area of tripping hazards, provide stable lighting, secure the pipe and fittings, and keep tools, penetrating oil, and containment for drips within reach.
How to assess thread condition and joint history
A careful inspection of the threaded joint and its service history determines the approach and tools required for loosening galvanized pipe.
The inspector notes visible corrosion, paint, sealant residues, thread deformation, and alignment. Records of past repairs, frequency of movement, and exposure to chemicals inform strategy.
Documented findings guide selection of penetrating oil, heat, mechanical advantage, or professional referral to avoid thread damage.
When to shut off water and drain the system
Typically, the water supply must be shut off and affected lines drained before attempting to loosen galvanized pipe to prevent flooding, reduce pressure, and reveal internal corrosion that can affect the joint.
The technician isolates the appropriate shutoff(s), opens nearby faucets and a drain valve to remove standing water, then verifies zero pressure at the joint before using tools.
Tools and Materials You’ll Need
A concise set of tools and materials is essential for loosening galvanized pipe efficiently and safely. The list below groups the primary hand tools, specialty aids, and protective materials typically required for the task.
Proper selection minimizes damage and speeds the job.
- Hand tools: pipe wrenches, strap wrench, adjustable wrench
- Specialty tools: cheater bar, heat source, penetrating oil, pipe extractor
- Protective materials: rags, tape, thread protectors, anti-seize
Hand tools (wrenches, pipe wrenches, strap wrench, adjustable wrench)
Gathering the right hand tools is the first practical step in loosening galvanized pipe: a heavy-duty pipe wrench for gripping round surfaces, an adjustable wrench for flats, and a strap wrench to protect finished surfaces or plastics.
Select appropriately sized, quality wrenches; verify pipe wrench jaws are sharp and adjusted for a secure bite.
Use the strap wrench when thread protection is essential.
Specialty tools (cheater bar, heat source, penetrating oil, pipe extractor)
After selecting the appropriate wrenches, attention should turn to specialty tools that resolve common stubbornness in galvanized pipe joints.
A cheater bar increases leverage; apply penetrating oil and allow dwell time. Controlled heat (propane torch) expands metal and breaks corrosion bonds.
If threads seize, a pipe extractor or internal remover can grip and turn without cutting threads, minimizing damage when used correctly.
Protective materials (rags, tape, thread protector, anti-seize)
Prepare a small kit of protective materials to prevent damage to fittings and protect nearby surfaces while working on galvanized pipe joints.
Include clean rags for wiping debris and protecting finishes, plumber’s tape to cover exposed threads, a thread protector for fragile ends, and anti-seize compound to coat threads before reassembly.
These items minimize scoring, contamination, and galling during loosening and reinstalling.
Step-by-Step Methods to Loosen Galvanized Pipe Without Damaging Threads
The section outlines five practical approaches for loosening galvanized pipe while protecting threads:
a penetrating-oil soak with manual turning,
non-marring strap or pipe-clamp use to spread force,
controlled heat application with safety steps,
vibration/tapping methods to break corrosion,
and a decision guide for cutting and replacing versus preserving threads.
Each method is presented step-by-step with tips to minimize thread damage and avoid common mistakes.
Readers are encouraged to assess joint condition and choose the least invasive option first.
Method 1 Penetrating oil soak and manual loosening
Soak the joint with a penetrating oil and allow time for the solvent to work its way into the threads; this is the gentlest first step for freeing galvanized pipe while minimizing the risk of thread damage.
After soaking, tap fittings lightly with a mallet, reapply oil if needed, then attempt hand and wrench turns using steady, increasing torque.
Clean threads and inspect for corrosion after removal.
Method 2 Using a strap wrench or pipe clamp to distribute force
If penetrating oil and gentle tapping do not free the joint, a strap wrench or pipe clamp offers a way to apply even pressure without biting into the galvanized coating.
Position the strap or clamp around the fitting, tighten evenly, and turn slowly while stabilizing the adjoining pipe.
Reverse direction if resistance spikes.
Inspect threads and rewrap with tape or sealant before reassembly.
Method 3 Controlled heat to break corrosion bond (step-by-step and safety tips)
Apply controlled heat to the joint to expand metal and break the rust bond, using measured bursts rather than continuous flame.
The technician heats evenly with a propane torch, avoids direct flame on seals, periodically tests movement with a wrench, and allows cooling intervals.
Safety goggles, gloves, fire extinguisher, and flammable-clearance are mandatory.
Proceed slowly to prevent thread damage or galvanized coating degradation.
Method 4 Vibration and tapping techniques to free seized joints
Tap or vibrate the joint to break rust and mineral deposits loose without excessive torque that risks thread damage.
Use a rubber mallet to deliver controlled taps around the fitting, or apply a vibration tool at low amplitude.
Work gradually, alternating penetrating oil and brief impacts.
Inspect movement frequently; stop when loosened to avoid sudden jerks that could shear or deform threads.
Method 5 Cutting and replacing vs. trying to preserve threads (decision steps)
Decide whether to preserve the existing threads or cut and replace the section based on thread condition, access, and risk of further damage.
Inspect threads for corrosion, flattening, or cross-threading. If damage is minor and access allows careful backing-off with penetrating oil and heat, preserve.
If threads are scored, inaccessible, or removal risks cracking, cut out and replace the section to guarantee a reliable, leak-free joint.
When to Use Each Method Selection Guide
Selection of a loosening method depends on corrosion level, accessibility, and thread condition, with each factor shifting the balance between time and risk. The following quick guide compares common approaches so readers can match method to situation. Use the table to weigh speed, safety, and suitability before proceeding.
| Corrosion Level | Access | Thread Condition |
|---|---|---|
| Light — quick methods work | Easy — leverage tools fit | Intact — minimal risk |
| Moderate — use penetrants + heat | Restricted — use compact tools | Worn — gentle methods preferred |
| Severe — consider cutting or replacement | Tight — riskier techniques | Damaged — higher risk of thread loss |
Choosing based on corrosion level, access, and thread condition
When choosing a method to loosen galvanized pipe, the extent of corrosion, the degree of access to the joint, and the condition of the threads determine the safest and most effective approach; light surface rust and clear threads often allow for manual tools and penetrating oil.
Moderate corrosion favors mechanical assistance such as pipe wrenches or heat, and severely seized or thread-damaged fittings usually require cutting or replacement to avoid further damage.
Assess accessibility, thread integrity, and surrounding materials before selecting manual, mechanical, or destructive options.
Time vs. risk trade-offs for each approach
Having assessed corrosion, access, and thread condition, the user must balance time and risk to choose an appropriate loosening method.
Fast options (heat, aggressive impact) save time but raise thread damage and coating loss.
Moderate methods (penetrants, careful wrenching, controlled heat) offer balance.
Slow approaches (soaking, gradual mechanical advantage) minimize damage but require patience and repeated effort.
Choose by urgency and thread value.
Protecting Threads During and After Loosening
Careful alignment and controlled torque prevent cross-threading and gouging when applying force to galvanized pipe connections.
Thread protectors, plumber’s tape, and anti-seize compounds can be applied before loosening and reassembly to shield threads and ease future removal.
After disassembly, threads should be inspected and any minor damage dressed or chased with a die or file before reuse.
How to avoid cross-threading and gouging while applying force
Apply steady, controlled force and deliberate alignment to prevent cross-threading or gouging the threads while loosening galvanized pipe.
Inspect thread engagement visually, start turns by hand to confirm correct alignment, then use appropriately sized wrench with smooth, even pressure.
Avoid sudden jerks or excessive leverage.
Back off if resistance changes; re-seat and realign before continuing to minimize deformation and preserve thread integrity.
Using thread protectors, tape, and anti-seize compounds
Once threads are cleanly engaged and loosened without damage, protecting those threads during and after work preserves fit and prevents future seizure.
Use plastic thread protectors or caps during storage and transport.
Apply PTFE tape to male threads for a clean seal and to reduce galling.
Finish exposed threads with a light coat of high-temperature, compatible anti-seize compound to inhibit corrosion and ease future disassembly.
Inspecting and repairing minor thread damage
Inspect threads immediately after loosening to identify nicks, burrs, flattened crests, or cross-threading that can compromise seal and engagement.
Use a magnifier and light; remove surface corrosion with a brass brush or fine steel wool.
Dress minor burrs with a triangular file or fine-thread chaser, matching pitch.
Test-fit components; apply pipe dope or PTFE tape and retighten gently to verify proper seating.
Troubleshooting Stubborn or Broken Joints
When a galvanized joint resists movement or shows cracked fittings, it may be unsafe to continue applying force and removal should stop.
Techniques such as cutting back to solid pipe, using extractors or internal pipe cutters, and protecting adjacent threads can remove broken or snapped sections without causing further damage.
If corrosion is extensive, the pipe is sealed behind walls, or the repair exceeds basic tools, a professional plumber should be called.
Signs a joint is beyond safe loosening
Recognition of failure is critical before applying more force to a galvanized pipe joint.
Visible thread damage, severe corrosion pitting, audible cracking, or movement limited to the fitting rather than the pipe indicate compromised integrity.
Leaks that worsen when stressed, deformed fittings, or a seized coupling that yields only by twisting the entire system are signs the joint is beyond safe loosening.
Techniques for removing broken or snapped pipes without further damage
Start by evaluating the break to choose the least invasive removal method: determine whether the pipe has snapped flush with a fitting, left a jagged stub, or remains threaded but stripped.
Then select tools and techniques—internal extractors, cutting and reaming, or heat and penetrating oil—that minimize stress on surrounding fittings and preserve usable threads.
Use proper extractors, rotary cutting with reaming, and gentle heat plus penetrating oil to free remnants.
When to call a professional plumber
How should one decide whether a stubborn or broken galvanized joint warrants professional help?
If multiple attempts fail, threads are severely damaged, fittings crack, or surrounding plumbing risks leaking, a professional should be contacted.
Also call a plumber when corrosion is extensive, pipe removal requires cutting near hazardous materials, or water supply shutoff is unclear.
Professionals prevent leaks, verify code compliance, and restore reliable connections.
Preventative Measures to Avoid Future Seizing
To prevent future seizing, the text outlines proper assembly practices and torque guidelines that minimize stress and guarantee correct thread engagement.
It also reviews lubricants and protective coatings that reduce galvanic corrosion and wear at joints.
Finally, a concise maintenance checklist is presented to schedule inspections and reapply protective measures before problems start.
Proper assembly practices and torque guidelines
Apply correct assembly techniques and specified torque values to minimize galling and future seizure of galvanized pipe joints.
Technicians should align threads, avoid cross-threading, and hand-start fittings before final tightening.
Use calibrated torque wrenches and follow manufacturer or code torque specs for pipe size and material.
Controlled, incremental tightening prevents overstress and guarantees reliable seals while reducing risk of irreversible binding.
Lubricants and coatings that extend joint life
Preventive lubrication and protective coatings greatly reduce the risk of galvanized pipe joints seizing by creating barriers against corrosion, metal-to-metal galling, and abrasive wear.
Recommended options include silicone-based anti-seize, copper or nickel anti-seize compounds compatible with zinc, and PTFE pipe dope for threaded connections.
Thin-film corrosion inhibitors and zinc-rich paints protect exposed fittings.
Select products rated for potable water when applicable.
Regular maintenance checklist for galvanized piping
Following lubrication and protective coatings, a regular maintenance checklist keeps galvanized piping from seizing by catching wear and corrosion early and ensuring coatings remain effective.
Inspect joints, threads, and fittings quarterly; clean debris and scale; verify coating integrity; reapply lubricant or protective compound as needed; test for leaks and galvanic action; torque check connections; document findings and schedule corrective action to prevent future binding.
Cost, Time, and Safety Considerations
Typical methods for loosening galvanized pipe are compared by estimated time and material or labor cost to set reader expectations.
A brief risk assessment contrasts DIY approaches with hiring a licensed plumber, noting common safety hazards and potential for costly mistakes.
Disposal requirements and environmental considerations for removed pipe and residues are highlighted to inform proper handling and local compliance.
Estimated time and cost for common methods
Several common methods for loosening galvanized pipe—penetrating oil and soak, heat application, mechanical persuasion (wrenching or hammering), and section cutting—differ considerably in time, cost, and safety implications.
Penetrating oil: 30–120 minutes, $5–20.
Heat: 10–30 minutes, $10–50 (tool rental).
Wrenching/hammering: 5–30 minutes, minimal cost.
Cutting: 15–60 minutes, $20–150 (tools, disposal).
Safety gear adds modest expense.
Risk assessment for DIY vs. hiring a pro
After comparing time, cost, and safety profiles for penetrating oil, heat, mechanical force, and cutting, homeowners must weigh the risks of attempting galvanized pipe loosening themselves against hiring a professional.
DIY can save money but increases injury, tool, and thread-damage risks and may void warranties.
Professionals cost more yet offer expertise, faster completion, liability coverage, and reduced likelihood of collateral damage.
Disposal and environmental considerations for removed pipe
When removed, galvanized pipe requires disposal choices that balance cost, time, and environmental responsibility. Homeowners should evaluate recycling options, landfill fees, and the effort to decontaminate or segregate materials.
Assess local scrap metal yards, curbside pickup rules, and hazardous coating disposal. Factor transport time, potential savings from recycling, and PPE or cleaning needed to prevent contamination.
Document receipts for compliance.
Visual Guide and Tool Reference
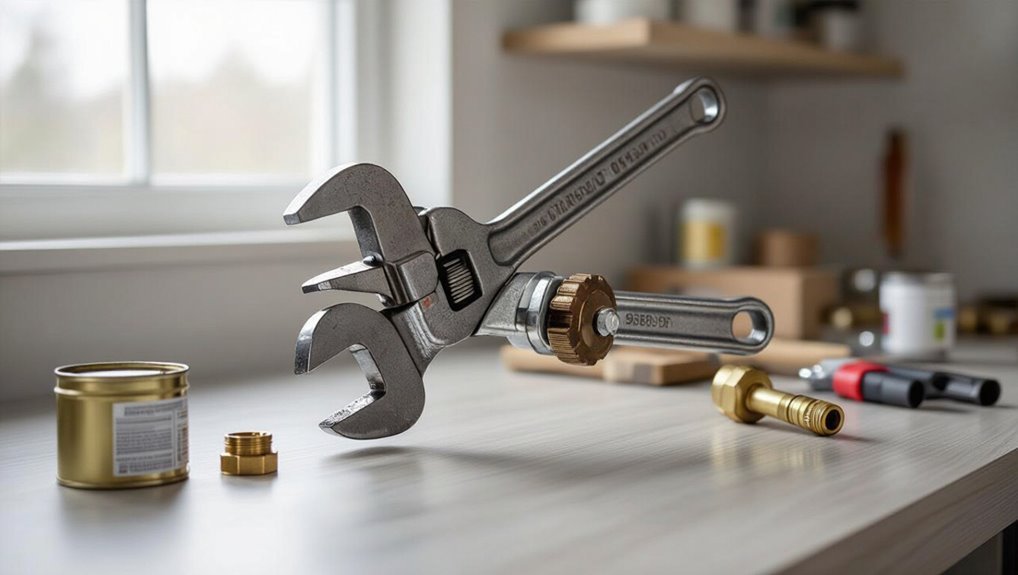
The section presents clear diagrams that indicate correct wrench placement and where to apply heat for safe loosening.
Close-up images illustrate common thread damage types and annotated repair examples.
Readers are guided to use the visuals alongside tool descriptions for accurate assessment and technique.
Diagrams showing correct wrench placement and heat application
Begin by identifying the pipe section and fittings to be worked on. Then refer to diagrams that mark exact wrench contact points and recommended heat zones.
These visuals clarify where to grip with a pipe wrench or adjustable wrench and where to apply a torch flame or heat gun to loosen galvanized joints without damaging threads or nearby components.
Diagrams show torque direction, back-up wrench placement, safe heat distance, and insulated shielding.
Close-ups of thread damage types and repair examples
Inspects of threaded connections reveal several distinct damage patterns—crushed or flattened crests, hooked or torn threads, corrosion pitting at the root, and cross-threading—that each require different repair approaches.
Photographic close-ups illustrate severity levels; matching taps, thread files, and die nut inserts are recommended for repairs.
Minor crest damage can be dressed with a file; severe deformation often needs replacement or rethreading with a proper die.
Conclusion
After a valiant duel with rust and hubris, the homeowner accepts that patience, penetrating oil, and the correct wrench beat brute force and theatrics. Threads remain intact if respect, heat, and a touch of persuasion are applied—preferably without invoking ancient plumbing curses. If all else fails, call a pro before the whole system becomes a sculpture of seized fittings. Victory tastes like liberated pipe and slightly less self-inflicted regret.