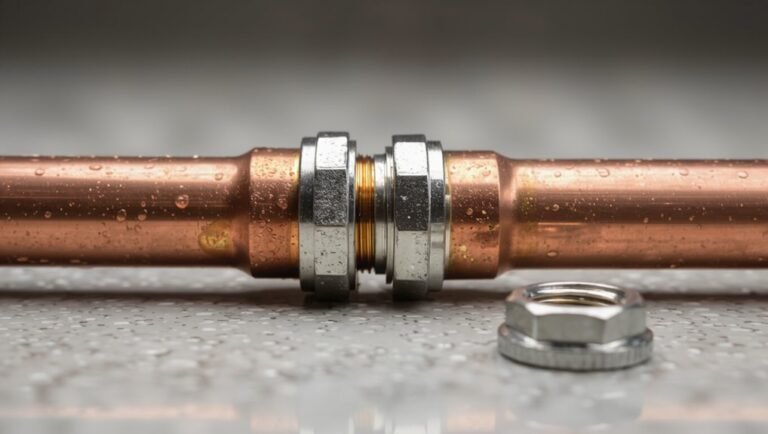
How to Find a Slab Leak Fast: 7 Simple Signs and Steps to Locate It
If you’re trying to locate a slab leak quickly, look for signs like unexplained wet or warm spots on the floor, sudden spikes in your water bill, continuous movement of your water meter, patches of lush grass in your yard, unusual sounds, soft flooring, or new cracks in your foundation. To pinpoint the leak, conduct shut-off tests, check your meter, use acoustic listening devices, or apply infrared and moisture scanning techniques. Follow these steps for effective detection and repair options.
What a slab leak is and why finding one fast matters
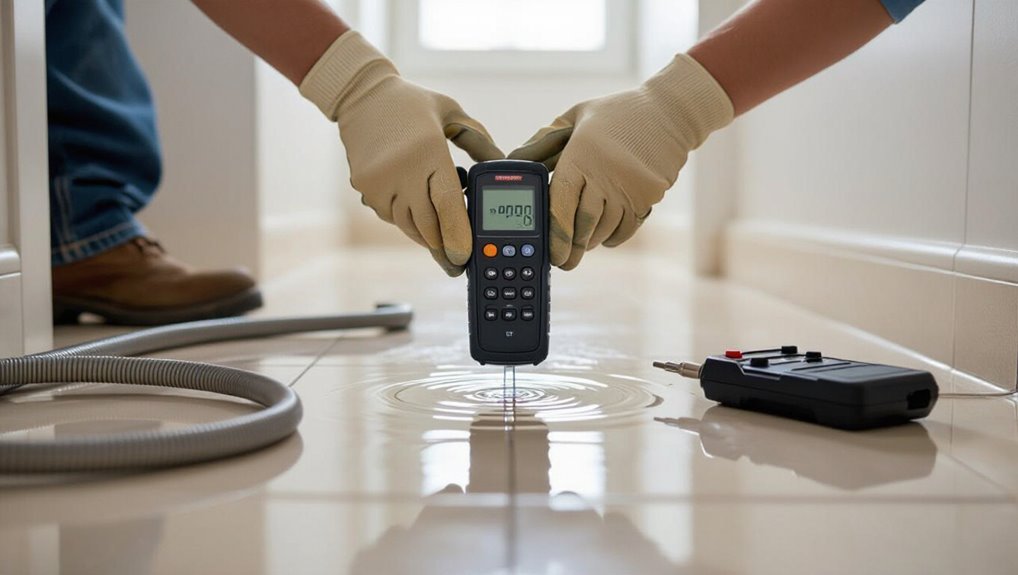
A slab leak is a break or perforation in water lines or sewer pipes located under a concrete foundation, commonly caused by corrosion, shifting soil, poor installation, or abrasive bedding.
Left undetected, such leaks can undermine structural integrity, promote mold growth, and produce unexpectedly high water bills.
Leaks typically occur along supply lines beneath bathrooms, kitchens, and laundry areas, but can also involve sewer or waste pipes with different detection and repair needs.
Definition and common causes of slab leaks
When a water line beneath a building’s concrete foundation develops a crack or rupture, it is known as a slab leak—an often hidden but potentially severe plumbing failure.
Typically caused by corrosion, shifting soil, poor installation, or freezing, slab leaks often begin small and worsen.
Prompt detection matters; homeowners learn how to find slab leak sources using listening devices, thermal imaging, or professional leak detection services.
Risks of delayed detection (structural damage, mold, high water bills)
Because slab leaks often start small and go unnoticed beneath concrete, delayed detection quickly amplifies consequences.
Persistent moisture undermines foundations, causing cracks, settling, and expensive structural repairs.
Damp conditions foster mold and mildew, risking health and requiring remediation.
Continuous leakage also drives sharply increased water bills and potential utility penalties.
Early discovery minimizes repair complexity, cost, and long-term property damage.
Typical locations and types of slab leaks (supply line vs. sewer/pipe)
Slab leaks occur when water lines or waste pipes running beneath a concrete foundation develop cracks, pinholes, or failed joints.
Distinguishing between supply-line leaks and sewer or drain failures is critical because each requires different detection methods and repairs.
Supply-line leaks (hot/cold potable lines) often cause localized wet spots, corrosion, or pressure drops.
Sewer/drain breaches produce odor, sewage backups, and broader contamination risks needing excavation or liner repairs.
Quick checklist to confirm you might have a slab leak
Begin by noting immediate indoor signs such as unexplained water stains, hot spots on the floor, or unusually high water usage.
Next, inspect exterior and yard indicators like soggy patches, sinkholes, or lush strips of grass near the foundation.
Gather tools and information before diagnosing: a water meter reading, recent bills, a flashlight, and a moisture meter can speed confirmation.
Immediate signs to check inside the home
How can a homeowner quickly tell if a slab leak is likely? Immediate interior signs include unexplained water bills, persistent damp spots, and unusual sounds.
Inspect areas near fixtures, walls, and floors for soft spots, paint bubbles, and mold. Check water meter for flow when all fixtures are off.
- Unexplained high water bill
- Damp or warm floor areas
- Continuous meter movement when idle
Exterior and yard indicators to inspect
A quick walk around the property can reveal exterior clues that point to a slab leak: pooling or consistently wet soil, unusually lush or soggy patches of grass, depressions or settling in the yard, and unexplained wet spots near foundation walls or exterior plumbing.
Inspect these signs promptly and note locations for a plumber.
- Visible wet patches or standing water
- Soft, spongy ground
- New foundation cracks or sinkage
Tools and information to gather before diagnosing (water meter, bills, flashlight, moisture meter)
Gather essential tools and information before attempting any diagnosis: a functioning water meter reading, recent utility bills, a reliable flashlight, and a moisture meter are the core items.
The checklist helps confirm suspicion: compare meter readings with bills, note unexplained usage spikes, inspect dark corners and slab edges with the flashlight, and scan concrete for elevated moisture.
Record findings for professionals.
7 simple signs that indicate a slab leak
The following signs commonly point to a slab leak and warrant prompt attention. They include an unexplained spike in the water bill, persistent damp or warm spots on floors, and soft, sinking, or cracked flooring or tiles.
Musty odors or visible mold near floors and continuous running water or reduced water pressure are additional indicators to check.
Unexplained increase in water bill
When monthly water charges climb without a corresponding change in household usage, it often signals an underlying issue such as a slab leak. Homeowners noticing an unexplained spike should compare recent bills, check for steady increases, and rule out simple causes like irrigation cycles or guests before assuming a major problem.
Persistent unexplained billing rises warrant a meter check, shutoff tests, and professional leak detection to confirm hidden slab leaks.
Persistent damp or warm spots on floors
If patches of flooring feel persistently damp or warmer than surrounding areas, they can indicate a slab leak beneath the concrete.
Such localized temperature or moisture differences often trace to pressurized hot or leaking cold lines. Observers should note pattern, size, and progression of affected areas, avoid disturbing finishes, and report findings to a plumber for noninvasive detection like acoustic or infrared scanning.
Soft, sinking, or cracked flooring or tiles
Noticing persistent damp or warm patches often precedes visible structural effects on flooring; soft, sinking, or cracked tiles and floorboards can follow as moisture undermines the substrate.
Areas may feel spongy, uneven, or hollow when walked upon. Tile grout may separate, grout lines widen, and boards can cup or buckle.
Such localized deterioration strongly suggests hidden water intrusion beneath the slab.
Musty odors or visible mold growth near floors
A persistent musty smell or visible mold growth along baseboards and floor edges often signals moisture seeping from beneath a concrete slab.
Occupants may notice localized discoloration, peeling paint, or fuzzy mold clusters near seams and grout lines.
Such biological indicators warrant prompt inspection, as concealed leaks create ideal conditions for mold proliferation and structural damage if left unaddressed.
Continuous running water or reduced water pressure
Listen for persistent water flow or observe diminished faucet pressure; both can signal a slab leak beneath the foundation.
Continuous meter movement or unexplained increases in water bills alongside weak showers, toilets that refill slowly, or inconsistent hot water delivery suggest pressure loss from an underground breach.
Such signs merit prompt inspection, as undetected leaks can worsen, damaging slab integrity and increasing repair complexity.
Sound of water running beneath the floor (listening test)
Following signs like continuously running water or low pressure, an audible flow beneath the floor offers another clear indicator of a slab leak.
A quiet, persistent gurgle, drip or whoosh heard with fixtures off suggests escaping water inside the slab.
Use listening devices or a stethoscope, compare sounds in rooms, and trace louder areas to narrow the leak’s approximate location for professional confirmation.
Water pooling or damp soil near foundation or slab
Pooling water or persistently damp soil next to the foundation or slab often signals an underground leak rather than surface runoff.
Inspecting for unexplained wet patches, pooling after dry weather, or spongy ground helps differentiate slab leaks from drainage issues.
Tracing the wet area toward utilities, checking nearby meter readings, and noting vegetation thriving unusually well can narrow the leak location for professional assessment.
Step-by-step method to locate a slab leak fast
The technician begins by ruling out fixtures with shut-off tests and then checks the water meter for continuous flow to confirm a slab leak.
Next, listening and acoustic methods—ranging from simple stethoscopes to electronic correlators—help pinpoint the general area.
Final checks use infrared scans and moisture meters or probes to locate exact wet spots for repair.
Step 1 Confirm leak vs. plumbing fixture issues (shut-off tests)
Begin by isolating potential sources to determine whether water loss originates from within the slab or from an accessible fixture.
Close valves to toilets, sinks, irrigation zones and appliance supplies one at a time, noting pressure or meter changes.
Inspect visible piping and fixture bases for dampness.
If shutting fixtures stops loss, repair that fixture; if not, proceed to slab-focused diagnostics.
Step 2 Use the water meter to detect continuous flow
If shutting off visible fixtures did not stop the loss, attention shifts to the main water meter to confirm continuous underground flow.
The inspector records the meter reading, waits 10–30 minutes with all water off, then rechecks for movement.
Any unexplained sweep or tiny dial motion indicates hidden leakage.
Document readings and time, then notify a professional for targeted locating and repair.
Step 3 Perform listening and acoustic tests (simple and advanced)
Move on to active listening and acoustic testing to pinpoint the leak’s general area beneath the slab.
Technicians use handheld listening devices, electronic ground microphones, and correlators to detect pipe noise. Simple methods include listening plates and stethoscopes; advanced tools compare sound timing between sensors to triangulate location.
Mark suspected spots for targeted probing or verification before any invasive work.
Step 4 Inspect floors with infrared camera or thermal imaging
One practical way to narrow down a slab leak quickly is to perform a systematic infrared scan of the floor surface with a thermal camera, looking for temperature differentials that indicate moist, cooling areas above a leaking hot- or cold-water line.
The inspector should move slowly, record thermal images, compare with ambient baseline, and mark suspected zones for follow-up testing or targeted excavation.
Step 5 Use moisture meter and probe for precise wet spots
Begin by confirming suspected zones identified with thermal imaging using a moisture meter and probe to pinpoint the wettest areas with greater accuracy.
The technician scans systematically, recording readings across tiles, grout lines, and baseboards.
Use a pin or non‑invasive moisture probe depending on finish, marking high readings.
Repeat measurements over time to verify rising moisture indicative of an active slab leak.
Step 6 Conduct pressure testing of lines (how and precautions)
When pressure testing begins, the technician isolates the suspect circuit, secures all valves and fixtures, and attaches a calibrated pressure gauge and pump to introduce water or air at a controlled rate.
Readings are then monitored for drops that indicate leakage. Testing follows manufacturer pressure limits, uses isolation plugs to protect appliances, records baseline and decay, and avoids overpressurizing lines to prevent pipe or fitting damage.
Step 7 Call professional leak detection if noninvasive methods fail
If pressure testing and other noninvasive checks fail to pinpoint the leak, calling a professional leak-detection service is the next practical step.
Technicians use acoustic sensors, thermal imaging, and tracer gases to locate leaks beneath slabs accurately. They minimize unnecessary demolition, provide clear diagnostics, estimate repair scope and cost, and guarantee safety and plumbing code compliance before invasive repairs commence.
DIY tools and techniques for homeowners (what to use and how)
A homeowner can start with basic tools—reading the water meter, performing a bucket test, checking visible pipes with a flashlight, and using a wrench for minor shutoffs—to confirm a suspected slab leak.
For more precise locating, portable detection devices such as acoustic listening sticks, ground microphones, and thermal cameras help pinpoint sounds or temperature differences.
Decisions about renting versus buying should be based on frequency of need, equipment cost, and the homeowner’s comfort level with using specialized tools.
Basic tools: water meter, bucket test, flashlight, wrench
Several simple tools—most importantly a water meter, a bucket for the bucket test, a bright flashlight, and an adjustable wrench—give homeowners the ability to detect and confirm slab leaks without specialized equipment.
The water meter reveals unseen flow; the bucket test isolates fixtures; the flashlight inspects slabs, basements, and pipe routes; the wrench shuts off or tightens valves safely during testing and repairs.
Detection devices: acoustic listening sticks, ground microphones, thermal cameras
Many homeowners can improve slab-leak detection by using affordable acoustic listening sticks, ground microphones, and consumer thermal cameras.
Acoustic sticks amplify pipe sounds through floors; ground microphones pick up subsurface leakage vibrations when moved slowly.
Thermal cameras reveal temperature anomalies from wet areas or warm water lines.
Combine methods: listen first, confirm vibration, then scan thermally to narrow the repair zone.
When and how to rent versus buy equipment
After using acoustic sticks, ground microphones, and thermal cameras to narrow a leak, homeowners must decide whether to rent specialty equipment or buy tools for future use.
Rent expensive, occasional-use items like sewer cameras and line locators; buy reusable basics such as leak detection dye, handheld thermal imagers, and pipe wrenches; consider cost, storage, and frequency before committing.
- Rent high-cost specialty gear
- Buy everyday essentials
- Weigh cost versus frequency
When to call a professional leak detection service
When visible damage, persistent unexplained water loss, or failed DIY attempts occur, homeowners should stop and contact a professional leak detection service.
These specialists use electronic leak detection, hydrostatic testing, and camera inspection to locate and assess slab leaks accurately.
Prospective contractors should be asked about methods, experience, guarantees, expected timeline, and inspection procedures so homeowners know what to expect during the visit.
Signs you should stop DIY and hire a pro
How can a homeowner tell the point at which a DIY attempt should stop and a professional leak detection service should be called?
Persistent unexplained water stains, rising utility bills, multiple failed repairs, visible foundation movement, or mold growth despite remediation signal escalation.
If locating the leak risks structural damage, involves complex plumbing under slab, or requires invasive access, hiring experienced technicians is prudent rather than continuing DIY attempts.
What professional services provide (electronic leak detection, hydrostatic testing, camera inspection)
Call-out signs that DIY efforts have failed should prompt homeowners to engage professional leak detection services, which deploy specialized methods—electronic leak detection, hydrostatic testing, and camera inspection—to pinpoint leaks beneath slabs with minimal excavation.
Technicians trace signals to locate piping, isolate sections to verify pressure loss, and insert cameras to visually confirm damage, enabling targeted repairs while reducing repair scope and cost.
Questions to ask potential contractors and what to expect during an inspection
Who should a homeowner choose, and what should they expect from a professional inspection? A qualified contractor will be licensed, insured, and experienced with slab leaks.
Expect an initial assessment, noninvasive electronic testing, and a clear repair estimate. Ask about warranties, detection methods, and prior references.
- Licensing, insurance, and references
- Detection techniques and costs
- Timeline, disruption, and warranty details
Repair options after locating the leak
After locating a slab leak, the homeowner evaluates noninvasive options such as spot repairs, pipe lining, or rerouting against invasive methods like slab cutting, repouring, or excavation.
Cost factors and typical price ranges are weighed alongside durability, disruption, and access constraints.
The decision on the best repair method depends on leak severity, pipe material, long-term goals, and budget.
Noninvasive repairs: spot repairs, pipe lining, rerouting
Explore noninvasive repair options once the leak location is confirmed: targeted spot repairs replace or patch a short damaged section, cured-in-place pipe lining installs a resin sleeve to seal the interior of a pipe without excavation, and rerouting installs new supply lines to bypass the affected area.
Each method minimizes slab disturbance; selection depends on pipe material, access, leak severity, lifespan expectations, and budget.
Invasive repairs: slab cutting and repouring, excavation
When noninvasive methods are unsuitable or the damage is extensive, invasive repairs—cutting into the slab and repouring concrete or excavating to access pipes—provide direct, long-term solutions.
Technicians expose damaged sections, replace or reroute failing pipe, install proper bedding and vapor barriers, then restore concrete and finish surfaces.
These methods permanently resolve concealed breaches but require coordination, permits, and careful restoration planning.
Cost factors and typical price ranges
Cost is a decisive factor in choosing a slab-leak repair method, influenced by leak location, pipe material, access difficulty, and the chosen repair approach (spot repair, reroute, epoxy lining, slab cutting, or full excavation). Typical ranges: spot repair $200–$800, epoxy lining $800–$2,500, reroute $1,000–$4,000, excavation $3,000–$10,000 depending on scope.
| Repair type | Typical cost |
|---|---|
| Spot repair | $200–$800 |
| Epoxy lining | $800–$2,500 |
| Reroute | $1,000–$4,000 |
| Excavation | $3,000–$10,000 |
How to choose the best repair method for your situation
After locating the leak, the homeowner must weigh pipe material, access complexity, expected lifespan, and budget to select an appropriate repair method. Each option—spot repair, epoxy lining, reroute, or full excavation—carries distinct trade-offs in durability, disruption, and long-term cost.
A professional assessment compares leak size, location, soil conditions, and future access needs to recommend the least invasive, cost-effective solution.
Preventive measures to avoid future slab leaks
Preventive measures focus on early detection and minimizing factors that accelerate pipe failure.
Regular inspections, monitoring unusual water usage, and testing water quality help identify risks before leaks form.
Choosing corrosion-resistant materials and following best installation practices for slab plumbing further reduces the likelihood of future leaks.
Regular inspections and monitoring water usage
Regular, scheduled inspections combined with careful monitoring of water usage help homeowners detect the early signs of slab leaks before they become major problems.
Periodic checks of visible plumbing, appliances, and irrigation systems, plus comparing monthly water bills and using a smart meter or leak sensor, allow prompt identification of anomalies.
Timely professional assessments confirm issues and guide repairs to minimize damage.
Corrosion prevention and water quality checks
Monitoring and inspections identify leaks early, but addressing underlying causes like corrosion and water quality reduces recurrence.
Homeowners should test water hardness, pH, chlorine, and mineral content periodically. Treating aggressive water with neutralizers, softeners, or corrosion inhibitors protects pipe interiors.
Maintain proper drainage, avoid chemical imbalances, and schedule professional water quality assessments to detect corrosive conditions before they damage slab plumbing.
Best plumbing materials and installation practices for slabs
A few well-chosen materials and correct installation techniques greatly reduce the risk of slab leaks by minimizing corrosion, mechanical damage, and joint failure.
Use PEX or CPVC with continuous runs, avoid metal-to-metal connections, and install dielectric fittings where needed.
Verify proper bedding and concrete cover, pressure-test systems before slab pour, and follow manufacturer bend radii and codes to prevent stress and premature failure.
Signs of an urgent emergency and immediate steps to take
When sudden pooling, rapidly spreading moisture, or loss of water pressure occurs, the situation should be treated as an urgent emergency.
The homeowner should be prepared to shut off the main water supply and take basic electrical safety precautions around wet areas.
Use temporary containment like towels, buckets, and tarps to limit damage, and note key contacts.
A short contact list template—emergency plumber, insurance agent, and restoration service—can speed response and reduce loss.
How to shut off main water and electrical safety around water
Immediate action is essential once a slab leak is suspected: shut off the main water supply to prevent further flooding and assess electrical hazards before entering wet areas.
Locate the main shutoff valve—usually near the water meter or where the service line enters.
Turn power off to affected circuits at the breaker box if water reaches electrical outlets, appliances, or the panel, and call professionals.
Temporary containment steps to reduce damage
After shutting off the main water and addressing electrical hazards, the next priority is limiting water spread and protecting belongings.
Place towels and absorbent pads around visible seepage, elevate furniture onto blocks or plastic, and move rugs and electronics to dry areas.
Use a wet/dry vacuum or mop for pooled water, and run dehumidifiers and fans to reduce moisture until professionals arrive.
Contact list template: emergency plumber, insurance, restoration
If water is actively entering living spaces, or there are signs of major structural damage, a concise emergency contact list becomes critical: include a 24/7 emergency plumber experienced with slab leaks, the homeowner’s insurance claims number, and a licensed restoration company that handles water extraction and drying.
Also list the property address, shutoff valve location, policy number, preferred contractor references, and a secondary contact for decision-making.
Common mistakes to avoid when diagnosing or repairing slab leaks
Many homeowners rely on visible signs alone and miss hidden leaks beneath the slab.
Waiting to call a professional to save money can allow minor problems to become major structural and mold issues.
Attempting DIY repairs without proper tools or expertise often worsens the damage and increases long-term costs.
Over-reliance on visual inspection alone
Overconfidence in visible cues can mislead even experienced technicians when diagnosing slab leaks. Sole reliance on surface wet spots, mold, or stains ignores hidden deterioration, intermittent leaks, and subsurface pressure changes.
Accurate diagnosis demands complementary methods—pressure testing, acoustic detection, thermal imaging, and meter monitoring—rather than assumptions from sight alone. This reduces misidentification, unnecessary demolition, and prolonged water damage.
Delaying professional help to save money
A common impulse to postpone professional help in favor of DIY fixes or waiting for a cheaper moment can amplify damage and costs when dealing with slab leaks.
Homeowners who delay risk structural deterioration, mold growth, higher water bills, and more extensive repair scopes.
Prompt assessment by experienced technicians limits spread, identifies precise locations, and often reduces overall expense compared with prolonged uncertainty.
DIY repairs that can worsen damage
After noting the risks of postponing professional assessment, it is important to recognize that well-intentioned DIY attempts often make slab leaks worse.
Homeowners may cut into concrete incorrectly, use improper patching compounds, overtighten fittings, or apply sealants that mask leaks without fixing them.
These actions can increase water damage, hide leak sources, raise repair costs, and void warranties.
Seek trained plumbers.
Summary checklist: Fast action plan to find and address a slab leak
A concise 10-step checklist provides a rapid sequence of checks and actions to locate and contain a slab leak.
It guides the reader from initial detection and shutoff through pressure testing, isolation, and when to call a professional.
The list is designed for quick reference during an emergency to minimize damage and inform repair decisions.
10-step quick action checklist (concise sequence of checks and actions)
Begin by isolating the problem and confirming a leak: shut off the main water supply, note water meter activity, and listen for underground sounds while scanning for damp spots, hot floors, or unexplained utility bills.
Then follow a concise 10-step sequence: check fixtures, trace sounds, use infrared or dye, inspect slab edges, monitor meter, mark hot zones, contact pros, document evidence, contain damage, arrange repair.
- Prioritize safety
- Gather photos
- Preserve access
Conclusion
Like a faint drip in a cathedral of concrete, a slab leak whispers warning beneath the foundation. The homeowner becomes a steward of the unseen, following signs and steps as a compass through dark tiles and cool floors. Acting swiftly severs the slow erosion of time; measured tools reveal the hidden stream. With prevention as armor and timely repair as ritual, the house endures—solid, dry, and whole—guarded against future seepage.