How to Fix a Leaky Shower Head: Quick DIY Fixes and When to Replace It
To fix a leaky shower head, start by tightening the fittings, replacing worn washers or O-rings, and applying Teflon tape to the threads. For mineral buildup, soak the shower head in vinegar. If the leak persists, check and replace the valve cartridge or consider replacing the entire fixture if there is significant damage. Basic repairs typically take 10–30 minutes, but complex issues may require a plumber. Follow the steps below for detailed fixes, costs, and guidance on when a replacement is necessary.
What Causes a Shower Head to Leak
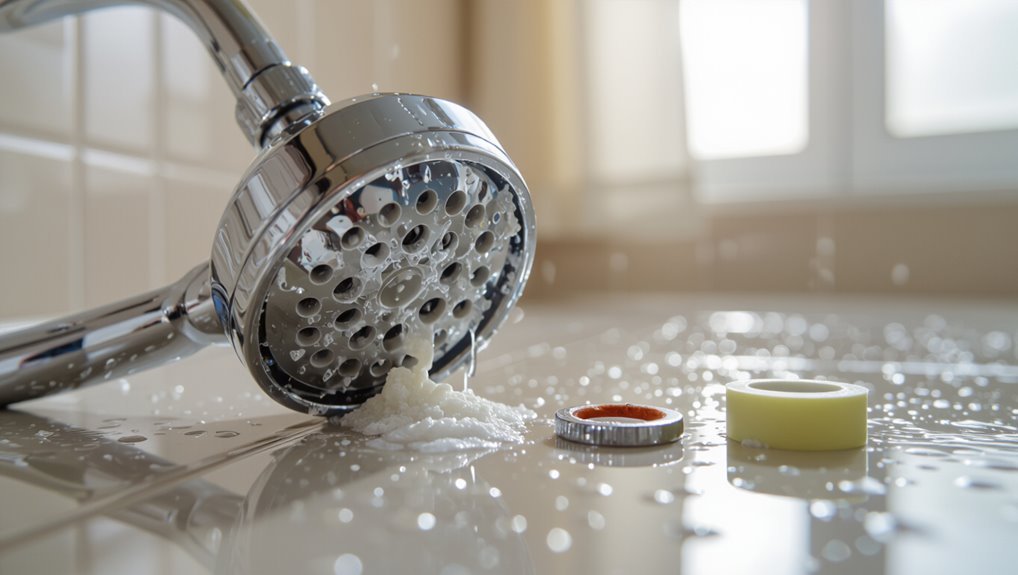
Leaks commonly stem from worn washers and damaged seals or from mineral buildup clogging nozzles.
Loose connections, stripped threads, and failing internal cartridges or valves also cause dripping.
Occasionally the water originates from the pipe or behind the wall rather than the shower head itself.
Common mechanical causes (worn washers, damaged seals)
Mechanical failure inside the shower head—most commonly worn rubber washers, deteriorated O-rings, and cracked seals—allows water to bypass designated channels and drip or spray from unintended openings.
These parts compress, harden, or tear over time; threads and housings may deform.
Inspecting and replacing faulty washers and seals is central to how to fix a leaky shower head and restore proper flow control.
Mineral buildup and clogged nozzles
Scale accumulates inside shower heads when hard water—rich in calcium and magnesium—evaporates and leaves mineral deposits, which narrow or block nozzle openings and disrupt internal flow paths.
Reduced flow creates uneven spray, dripping, and pressure shifts that mimic leaks. Regular descaling restores passages; stubborn buildup may require soaking in vinegar or replacing affected components to regain proper spray patterns and prevent persistent leakage.
Loose connections and damaged threads
Inspecting the joint between the shower arm and head often reveals that loose fittings or stripped threads are the root cause of dripping. Connections can loosen from vibration, overtightening, or corrosion.
Damaged threads prevent a proper seal, allowing steady seepage. Visual inspection and hand-tightening often identify the issue; if threads are visibly worn or cross-threaded, replacement of the arm or head is usually required.
Internal cartridge or valve issues
When loose fittings and worn threads are ruled out, leaks often originate deeper inside the fixture: the valve cartridge or internal seals.
Corrosion, mineral buildup, or worn O-rings allow water to bypass the cartridge, causing constant drips or seepage even with the handle off.
Replacement or rebuilding the cartridge typically restores proper sealing; matching the correct part and following manufacturer torque specifications prevents recurrence.
When the leak is from the pipe or wall (not the head)
Leaks that originate behind the wall or from the supply pipe present different signs and require a different approach than a dripping shower head itself.
Such leaks cause damp walls, mold, reduced water pressure, or pooling on the floor. They often stem from corroded fittings, loose connections, or damaged copper/PVC joints.
Fixes typically require shutting water, accessing the cavity, and replacing or soldering the pipe, often by a professional.
Quick Checks to Diagnose the Leak
To begin diagnosing a leaky shower head, the reader should pinpoint whether the drip originates from the head, a joint, the valve, or the supply pipe.
A visual inspection for cracks, mineral buildup, or corrosion combined with a quick water-pressure test and observation of spray patterns will help narrow the source.
Before starting, gather basic tools and supplies—adjustable wrench, pliers, Teflon tape, replacement washers—and a towel or bucket to catch water.
How to identify leak location (head, joint, valve, or pipe)
Where exactly is the water coming from — the showerhead face, the threaded connection, the handle, or behind the wall?
Observe while running water: note droplets on the face, seepage at the thread, dripping from the handle, or dampness on the ceiling/floor below.
Turn water off, dry areas, then run short bursts to pinpoint active seepage.
Record location before disassembly.
Inspecting for visible damage and corrosion
With the leak location noted, the next step is a focused visual inspection for damage and corrosion that can reveal the cause.
Examine the shower head, arm, and connections for cracks, mineral buildup, pitting, green or white deposits, and loose fittings.
Corrosion at threads or solder joints often indicates replacement; surface scale may be cleaned.
Document findings before disassembly.
Testing water pressure and splash patterns
Start by running the shower at different flow settings to observe pressure and spray behavior.
Note weak streams, pulsations, or uneven spray that indicate mineral buildup, partial clogs, or internal seal failure.
Check for excessive splash outside the designated spray cone, misaligned nozzles, or sudden pressure drops when other fixtures run.
Record findings to guide targeted cleaning, tightening, or replacement decisions.
Tools and supplies to have on hand
A small, well-organized kit speeds diagnosis: basic tools (adjustable wrench, pliers, screwdriver), sealants and parts (Teflon tape, pipe dope, spare rubber washers and O-rings), cleaning supplies (white vinegar, soft brush, cloth), and a bowl or bucket to catch water.
- Inspect parts
- Remove and clean
- Replace seals
- Test for leaks
Quick DIY Fixes You Can Do in 10 to 30 Minutes
The following quick fixes address common causes of a leaking shower head and can typically be completed in 10 to 30 minutes.
They include safely tightening the connection, replacing a worn rubber washer or O-ring, and applying plumber’s tape correctly to threaded joints.
Additional options cover removing mineral buildup with vinegar or descaler and using a temporary sealant for small external leaks, with brief notes on risks and proper application.
Tightening the shower head connection safely
Tightening the shower head connection safely prevents minor leaks from becoming water-wasting problems and avoids damaging threads or fittings.
Follow concise steps to secure the joint without force.
- Turn off water and test spray.
- Hand-tighten the head, assess leak.
- Use adjustable wrench with cloth for one-quarter turn.
- Recheck flow and inspect for persistent drips.
Replacing the rubber washer or O-ring
Replace the worn rubber washer or O-ring to stop common leaks at the shower head junction quickly and reliably.
Remove the head, inspect the seal, and match size/material.
Install the new washer or O-ring seated squarely, reassemble, and test for drips.
If leaks persist, consider deeper valve or cartridge issues.
- Remove head
- Inspect
- Replace seal
- Test
Applying plumber’s tape to threaded joints (how and when)
Often a simple wrap of plumber’s (PTFE) tape around threaded shower fittings stops leaks quickly and cleanly.
The technician should:
- Remove old tape and debris.
- Wrap tape clockwise 3–5 tight turns over threads.
- Reassemble hand-tight plus a quarter turn with a wrench.
- Test for drips; repeat if needed or replace damaged fittings.
Cleaning mineral buildup with vinegar or descaler
When mineral deposits restrict flow or cause drips, a short cleaning with household vinegar or a commercial descaler will usually restore performance in 10–30 minutes.
Remove the head if possible, soak in vinegar or follow descaler directions, scrub nozzle holes with a soft brush, rinse thoroughly, and reassemble.
Test for improved flow and leaks; repeat if residue persists.
Using a temporary sealant for small external leaks (risks and instructions)
Apply a temporary sealant to small external leaks as a short-term measure to stop dripping and buy time for a proper repair.
Clean and dry the area, apply plumber’s putty, silicone sealant, or tape per product instructions, let cure, then test.
Note risks: temporary fixes can hide bigger issues, fail under pressure, or damage finishes.
Schedule a permanent repair promptly.
Deeper Repairs for Persistent Leaks
For stubborn leaks that resist quick fixes, the next step is to take the shower head apart and inspect its internal components for worn cartridges, clogged flow restrictors, or damaged seals.
If internal parts are corroded or broken, replacing cartridges, flow restrictors, or other components — and in some cases the shower arm or flange — will restore proper function.
Before removing trim or accessing the valve, the water supply should be shut off to prevent flooding and allow safe repair.
Disassembling and inspecting the shower head internals
Begin by removing the shower head from the arm and placing it on a clean work surface so components can be examined without contamination.
Visually inspect O-rings, seals, and threads for wear, mineral buildup, or damage. Photograph part orientation.
Gently separate housings, noting retaining clips or screws. Clean deposits with vinegar and a soft brush.
Record damaged pieces for targeted replacement.
Replacing cartridges, flow restrictors, or internal parts (when and how)
When visual inspection and basic cleaning fail to stop dripping, attention shifts to replacing internal components—cartridges, flow restrictors, and worn seals—that commonly cause persistent leaks.
Identify the model, shut water, remove trim, extract the cartridge or restrictor, inspect O-rings, and replace with OEM or compatible parts.
Reassemble, test for leaks, and tighten fittings carefully.
Seek a plumber if corrosion or damage prevents repair.
Replacing the shower arm or flange
Replace the shower arm or flange if persistent leaks trace to a corroded, cracked, or misaligned connection between the piping and fixture.
Inspect visible threads, flange seal, and wall alignment. Unscrew the arm, clean pipe threads, apply plumber’s tape, and install a new arm or flange sized to match the existing pipe.
Confirm secure, drip-free connection and proper wall trim fit.
When to shut off water and remove the trim/valve
If replacing the shower arm or flange does not stop the leak, the next step is to shut off the water and remove the trim and valve to inspect internal components.
Turn off the main or local shutoff, relieve pressure by opening a faucet, then carefully remove handles, escutcheon, and cartridge.
Inspect seals, O-rings, and valve body for wear or mineral buildup; replace parts as needed.
When to Replace the Shower Head Entirely
When leaks persist despite repairs or the shower head shows corrosion, mineral buildup, or damaged spray ports, replacement is often the most practical option.
Choosing a new unit should weigh desired features—flow rate, spray patterns, finish, and water-saving certifications—against compatibility with existing plumbing.
A brief cost-and-time comparison of repairing versus replacing helps decide whether a quick fix or a full swap is more economical and durable.
Signs that replacement is the best option
Several clear signs indicate that a shower head should be replaced rather than repaired.
Persistent leakage after basic fixes, extensive corrosion or mineral buildup that resists cleaning, cracked or warped plastic, and deteriorated internal components signal end of serviceable life.
Chronic low water pressure caused by internal blockage and visible mold or rust that compromises seals also warrant full replacement.
Choosing the right replacement shower head (features to consider)
Why choose one replacement over another? Practical factors guide selection: durability, spray pattern, water efficiency, and ease of installation. Consider:
- Material and finish resistance to corrosion.
- Adjustable spray modes and pressure.
- Flow rate (gallons per minute) for conservation.
- Tool-free installation and standard fittings.
Match features to bathroom needs and plumbing compatibility before replacing.
Cost and time comparison: repair vs. replace
How much time and money will a fix actually save? A quick repair (washer, tape, cleaning) typically costs under $10 and takes 15–30 minutes. Replacement costs $20–$200 and 15–60 minutes plus shopping time. Choose repair for simple leaks; replace when corrosion, persistent clogging, or desired upgrades justify expense.
| Option | Typical Cost | Typical Time |
|---|---|---|
| Repair | $5–$15 | 15–30 min |
| Basic replace | $20–$50 | 20–45 min |
| Premium replace | $70–$200 | 30–60+ min |
Installing a New Shower Head: Step-by-Step
The section outlines the practical steps for installing a new shower head, beginning with preparing the shower arm and cleaning the threads.
It covers correct application of plumber’s tape and any necessary fittings to guarantee a secure seal.
Finally, it describes mounting the fixture and testing for leaks to confirm a watertight installation.
Preparing the shower arm and threads
Before attaching a new shower head, the shower arm and its threads must be clean, dry, and free of old tape, sealant, or corrosion to confirm a watertight connection.
Inspect threads for nicks or rounded edges; gently remove mineral buildup with a brush and vinegar.
Wipe thoroughly, allow to dry, and verify the arm sits squarely in the fitting before proceeding.
Proper use of plumber’s tape and fittings
With the shower arm cleaned and positioned, attention shifts to sealing and connecting the new head using plumber’s tape and the correct fittings.
Wrap Teflon tape clockwise around male threads two to three turns, smoothing edges.
Select matching washers and adapters; hand-tighten the shower head, then snug with a wrench using a cloth to protect finishes.
Check thread alignment before final tightening.
Mounting and testing the new shower head for leaks
Attach the prepared shower head to the arm, aligning threads carefully to prevent cross-threading, and hand-tighten until snug.
Once mounted, restore water supply and run both hot and cold, inspecting all joints for drips.
If leaks appear, tighten slightly with a wrench using a cloth to protect finishes.
Confirm steady flow and adjust spray settings before final use.
Preventive Maintenance to Avoid Future Leaks
Regular preventive maintenance reduces the chance of future shower head leaks by addressing common causes before they worsen.
This includes a routine cleaning and descaling schedule, periodic inspection of seals and connections, and managing water hardness with filters.
Seasonal checks and knowing when to call a professional complete the plan.
Routine cleaning schedule and descaling methods
A simple, consistent cleaning schedule prevents mineral buildup and extends a shower head’s lifespan. Monthly rinses remove loose debris; quarterly descaling dissolves hard-water deposits.
Recommended steps:
- Soak removable heads in vinegar solution for 30–60 minutes.
- Scrub nozzles with a soft brush.
- Flush with hot water.
- Reassemble and test for even spray.
Inspecting seals and connections periodically
Once mineral deposits are controlled through cleaning, attention shifts to seals and fittings to prevent leaks from developing.
Periodic inspections reveal worn O‑rings, cracked washers, and loose connections.
Tightening fittings, replacing damaged seals, and applying fresh plumber’s tape restore watertight joints.
Documenting dates and findings helps schedule replacements before failures occur, reducing emergency repairs and prolonging hardware life.
Managing water hardness and using filters
Addressing water hardness and installing appropriate filters can greatly reduce mineral buildup that leads to leaks and worn seals.
Homeowners should test water hardness, choose a suitable softener or point-of-use filter, and maintain cartridges per manufacturer guidelines.
Reduced scaling preserves valve seats, O-rings, and aerators, extending shower head life and lowering the frequency of repairs or replacements.
Regular flushing prevents residue accumulation.
Seasonal checks and professional inspection triggers
When should homeowners schedule seasonal checks for their shower fixtures to catch developing issues early?
Homeowners should inspect fixtures quarterly—looking for drips, mineral buildup, loose fittings, and reduced pressure.
Seasonal checks prompt early DIY fixes; indicators like persistent leaking, mold, wall damage, or unusual noises should trigger a licensed plumber.
Professional inspection prevents hidden pipe corrosion, seal failure, and costly water damage.
Cost, Tools, and When to Call a Professional
Typical DIY replacement parts like washers, cartridges, and tape generally cost under $20–$50, while professional repairs can range from $100 to several hundred dollars depending on labor and complexity.
A basic tool checklist includes an adjustable wrench, pliers, Teflon tape, screwdrivers, and an old toothbrush for cleaning.
A plumber should be called for complex valve or in-wall leaks, persistent leaks after DIY attempts, or any situation involving mold, water damage, or uncertain pipe access.
Typical costs for DIY parts vs. professional repair
Repair costs vary widely depending on whether the owner opts for a DIY fix or hires a professional:
DIY parts like replacement washers, O-rings, and Teflon tape typically cost $5–$25; a new shower head ranges $20–$150.
Professional service calls plus labor usually run $75–$250 or more, depending on diagnosis, parts, and regional rates.
Decisions hinge on skill, time, and leak complexity.
Essential tools checklist
Choosing between a DIY approach and hiring a pro often depends on having the right tools as well as parts.
A basic checklist clarifies cost and capability; if missing, professional help may be wiser.
- Adjustable wrench
- Teflon (plumber’s) tape
- Replacement washers/cartridge
- Channel-lock pliers and rag
When to hire a plumber (complex leaks, in-wall issues, persistent leaks)
When leaks involve concealed plumbing, irregular water flow, or continue after basic fixes, a licensed plumber should be engaged rather than relying on DIY attempts.
Complex leaks, in-wall damage, or mold risk require professional diagnosis, cameras, and pipe repair.
Expect higher costs for labor and parts; prioritize licensed contractors with insurance.
Call a plumber when leaks persist, worsen, or threaten structural integrity.
Troubleshooting Guide: Common Leak Scenarios and Fixes
A brief troubleshooting guide outlines typical leak locations, likely causes, and the most appropriate fixes or actions. The table below sketches common scenarios and quick remedies to help identify whether a simple repair or professional service is needed. If a leak seems to come from behind the wall or the valve, the guide recommends stopping use and contacting a plumber.
| Location | Quick image of issue |
|---|---|
| Nozzle drip | Small steady drop from shower face |
| Arm/head joint | Water spraying at the connection |
| Valve/behind wall | Water seeping from wall or floor |
| After DIY fixes | Test for continued leakage before finishing |
Small drip from nozzle likely cause and quick fix
Inspecting a persistent small drip from the shower nozzle often reveals mineral buildup or a worn washer as the culprit.
The remedy: remove the faceplate, soak in vinegar to dissolve deposits, and gently scrub nozzles.
If dripping persists, replace the internal rubber washer or cartridge.
Reassemble, test, and repeat cleaning periodically to prevent recurrence and restore a tight seal.
Leak at connection between arm and head likely cause and fix
Several common causes explain leaks where the shower arm meets the head, most often worn or missing plumber’s tape, loose fittings, or corroded threads.
To fix, remove the head, clean threads, wrap new PTFE tape clockwise, inspect and replace a damaged gasket, then hand-tighten and finish with a wrench using a cloth to protect finishes.
Replace head if threads are badly corroded.
Leak from shower valve or behind wall likely cause and recommended action
Many leaks that seem to originate from the shower valve or behind the wall are actually caused by failing cartridge seals, loose or corroded valve-body connections, or deteriorated plumbing joints.
Because these involve concealed components, they typically require shutting off water, removing the trim, and performing a targeted inspection or professional repair to prevent hidden water damage.
Technicians assess cartridge replacement, tighten or re-solder joints, and check surrounding framing for moisture.
Quick Safety Tips Before You Start Any Repair
Before beginning any repair, verify the water supply to the shower is shut off and the valve is confirmed closed to prevent unexpected flooding; if in doubt, turn off the main water supply.
The reader should follow basic precautions and use proper tools.
- Wear gloves and eye protection.
- Place towels to catch drips.
- Use nonconductive tools near electrical fixtures.
- Test for leaks before finishing.
Conclusion
A leaky shower head often signals a small fix or looming replacement; addressing it promptly saves water—US households waste about 1 trillion gallons annually from household leaks. Quick checks and simple DIY fixes solve many drips, while deeper repairs or replacement become prudent when corrosion, broken parts, or persistent leaks remain. Regular maintenance minimizes problems; when in doubt, consult a professional to guarantee efficient, long-lasting results and avoid costly water waste.