
How to Increase Shower Head Water Pressure: 12 Easy Fixes to Boost Flow Now
If you’re experiencing low water pressure from your shower head, there are several effective solutions to boost flow. Start by ensuring valves are fully open, removing any eco restrictors, and cleaning or soaking the shower head to eliminate mineral buildup. Additionally, inspect shower cartridges, seals, and O-rings for signs of wear. To assess the flow, use a container to compare water pressure between fixtures. If issues persist, check for blockages or corrosion in shutoffs, pipes, the pressure regulator, or water heater. Follow the step-by-step guide for repairs and upgrades to restore strong shower flow.
How to Tell If Your Shower Head Has Low Water Pressure
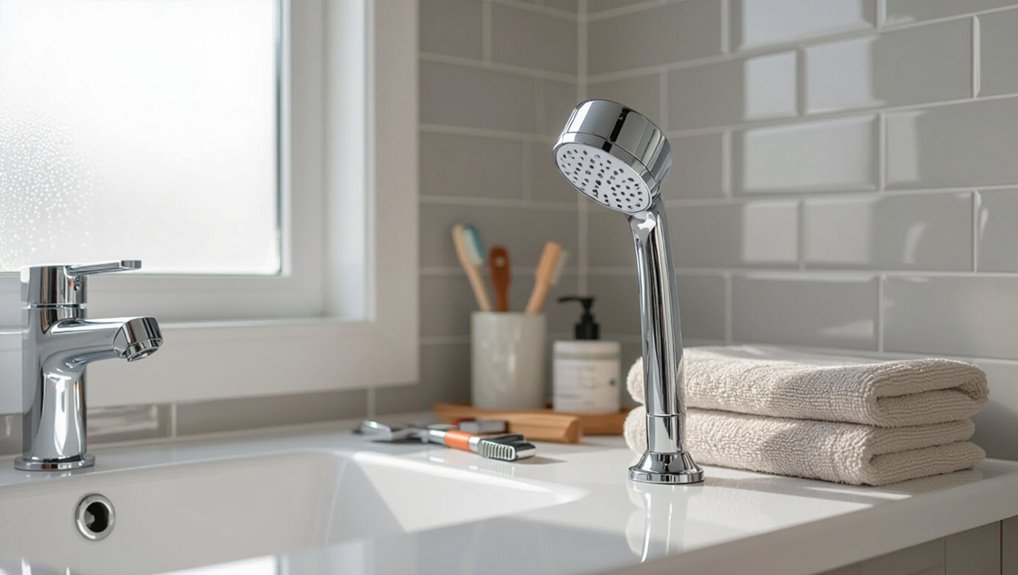
A quick inspection of shower behavior can reveal common signs of low flow, such as weak spray, sputtering, or an unusually small coverage area.
Simple at-home checks—timing a bucket fill or using a pressure gauge—allow measurement of actual shower head output.
Comparing flow in other fixtures helps determine whether the issue is isolated to the shower or indicates a whole-house pressure problem.
Signs of Low Shower Flow to Check Immediately
How can homeowners quickly tell if their shower head is underperforming?
Visible weak stream, uneven spray, sputtering or air bursts, and longer rinse times indicate reduced flow.
Mineral buildup, clogged nozzles, or valve issues often cause symptoms.
Cold spots or sudden pressure drops when other fixtures run also signal problems.
These signs guide simple troubleshooting and decisions about how to increase shower head water pressure.
How to Measure Shower Head Water Pressure at Home
Want to know whether a shower’s spray is truly weak or just feeling that way? Measure flow by timing how long to fill a one‑liter container, then calculate liters per minute.
Alternatively, use a simple bucket and stopwatch for gallons per minute (3.785 liters = 1 gallon). Compare results to typical shower flow rates (1.8–2.5 GPM).
Repeat for accuracy and note temperature settings.
When Low Pressure Is a Whole-House Problem vs. Localized
After measuring flow at the shower, the next step is determining whether low pressure affects only that fixture or the entire plumbing system.
Test other taps: kitchen, bathroom sinks, outdoor hose. If multiple outlets show weak flow, the issue is likely whole-house—check main shutoff, pressure regulator, or municipal supply.
If only the shower is weak, inspect the shower valve, supply lines, and the head for clogs or restrictions.
Quick Fixes You Can Do Now to Boost Flow
A few simple actions can often restore satisfactory shower flow without calling a plumber.
Suggestions include switching off water‑saving or eco modes, fully opening the shower valve, and inspecting the fixture for clogs.
If mineral buildup is suspected, removing the head and soaking it or replacing a clogged unit are quick, effective options.
Turn Off Water-Saving Settings or Eco Mode
Flip off eco or water-saving modes on fixtures and appliances to often restore immediate flow without parts replacements.
Many modern shower systems include flow restrictors, thermostatic controls, or eco settings that limit output.
Consult fixture controls or user manuals, toggle settings to standard or high flow, and test pressure.
Revert if concerns about water use or temperature stability arise.
Clean or Replace a Clogged Shower Head
Remove mineral buildup or worn parts from the shower head to restore spray patterns and pressure quickly. A clogged face or malfunctioning valve reduces flow; inspection determines whether cleaning or replacement is faster.
Consider these steps:
- Inspect for visible blockages and worn seals.
- Tighten fittings and test.
- Replace removable faceplates or cartridges.
- Install a new shower head if flow remains weak.
Remove and Soak Shower Head to Dissolve Mineral Buildup
If cleaning or replacing visible parts didn’t restore pressure, the next quick step is to remove the shower head and soak it in a vinegar solution to dissolve mineral deposits lodged in jets and internal passages.
Detach per manufacturer instructions, submerge in equal parts white vinegar and water for one to overnight, scrub with a soft brush, rinse thoroughly, reassemble, and test flow for improvement.
Check and Open the Shower Valve Fully
Check that the shower valve is fully open to rule out a simple supply restriction before taking more involved steps.
A partially closed valve, recently serviced fixture, or misaligned handle can limit flow. Turn the handle fully, test flow, and operate any separate volume or thermostatic controls.
If pressure improves, no further repair is needed; if not, document findings before inspecting pipes or installing pressure-boosting solutions.
Step-by-Step Repairs for Common Causes
The following steps guide readers through targeted repairs that commonly restore shower pressure.
Instructions cover inspecting and replacing a faulty shower cartridge, adjusting or clearing a clogged shutoff valve, and removing mineral buildup from shower arm and pipe aerators.
Clear tools, safety checks, and sequence-of-steps will be provided for each task.
How to Inspect and Replace a Faulty Shower Cartridge
Begin by shutting off the water supply and relieving residual pressure before removing the shower handle and trim to access the cartridge. A clean, organized workspace and basic tools (screwdriver, Allen wrench, pliers, cartridge puller) streamline the inspection.
Examine seals, O-rings, and valve body for wear or mineral buildup. Replace a damaged cartridge with the correct model, reassemble, then test for leaks and restored flow.
Fixing a Clogged or Partially Closed Shutoff Valve
After inspecting and, if necessary, replacing a faulty cartridge, attention should turn to the shutoff valve, since a clogged or partially closed valve can still limit flow.
Shut off water, remove valve handle and packing nut, then slowly open the valve to flush debris.
Replace worn washers or cartridges, reassemble, and test flow.
Tighten or fully open valve as needed.
How to Unclog Shower Arm and Pipe Aerators
Inspecting the shower arm and in-line aerators reveals mineral buildup and trapped debris that commonly restrict flow; unclogging these components restores pressure quickly.
Remove the shower head, unscrew the arm or aerator, and inspect screens.
Soak parts in vinegar to dissolve calcium deposits, scrub with a brush, and rinse thoroughly.
Reassemble, check for leaks, and test flow; repeat if necessary.
Upgrades That Improve Pressure and Experience
Upgrading fixtures and systems can deliver a noticeable boost in shower performance while improving user comfort.
Recommended options include selecting a high-pressure shower head with adjustable spray patterns, fitting a shower pump or pressure booster where mains pressure is low, and replacing aging pipes or valves that restrict flow.
The following sections outline what to look for with each upgrade and when professional installation is advisable.
Choosing a High-Pressure Shower Head: What to Look For
Several key features distinguish shower heads that deliver noticeably stronger, more satisfying streams: flow rate and throat diameter, nozzle design and spray patterns, pressure-boosting technology (air infusion or centrifugal force), and compatibility with the home’s plumbing and water pressure.
Selection should prioritize efficient flow tuning, durable materials, and adjustable sprays.
Consider:
- Measured flow rate (GPM)
- Throat diameter
- Air-boosting tech
- Installation fit
When to Install a Shower Pump or Pressure Booster
If a high-performance shower head and proper fittings still produce weak flow, a shower pump or whole-house pressure booster may be the next step.
Install when low inlet pressure, multiple simultaneous water uses, or long pipe runs cause inadequate shower force.
Evaluate pump type (single or twin impeller), power source, noise, and local regulations.
Hire a licensed plumber for sizing and safe installation.
Benefits of Replacing Old Plumbing Fixtures and Pipes
Replacing worn fixtures and aging pipes can markedly improve shower performance and user comfort by restoring flow, reducing leaks, and eliminating internal scale that restricts water passage.
Upgrading valves, showerheads, and galvanized or corroded sections increases pressure consistency, conserves water, and lowers repair frequency.
Modern components also enable better temperature control, reduce noise from cavitation, and raise overall system reliability and lifespan.
Diagnosing Plumbing Problems That Reduce Pressure
A systematic check can separate fixture problems from broader plumbing issues that reduce shower pressure.
Start by inspecting visible pipes and meters for leaks, then compare indoor flow rates with neighbors or the municipal supply to rule out external pressure drops or a failing pressure regulator.
If localized low flow persists, examine pipes for corrosion or blockages that restrict water passage.
How to Detect Leaks That Lower Shower Pressure
Detecting leaks that reduce shower pressure begins with systematic observation and simple tests to distinguish hidden breaks from fixture issues.
Inspect visible pipes, valves, and fittings for dampness or corrosion.
Listen for hissing or running water with all fixtures off.
Check the meter for unexplained usage.
Isolate sections by shutting valves to locate pressure changes.
Document findings before repairs or plumber consultation.
When Municipal Supply or Pressure Regulator Is the Issue
Consider municipal supply limitations and the home’s pressure regulator when low shower pressure persists after internal checks.
Verify supply pressure by asking neighbors or contacting the water utility; reduced mains pressure or scheduled maintenance can lower flow.
Inspect the pressure regulator for visible damage or test with a gauge.
If regulator failure or low municipal pressure is confirmed, contact the utility or a licensed plumber for adjustment or replacement.
Identifying Corroded or Blocked Pipes
Several visual and performance clues point toward corroded or blocked pipes when shower pressure drops unexpectedly.
Discolored water, metallic taste, rattling noises, uneven temperature, and slower flow in multiple fixtures indicate internal buildup or corrosion.
Inspect accessible pipe sections for rust, scale, or leaks.
A plumber can perform camera inspection or flow tests to confirm restriction and recommend cleaning, relining, or replacement.
Tools and Materials You’ll Need
A simple set of hand tools—adjustable wrench, pliers, screwdrivers, and a flashlight—covers most DIY pressure fixes.
It is also prudent to have common replacement parts on hand such as cartridge stems, rubber washers, and assorted O-rings.
These items reduce repair time and help isolate whether low pressure is caused by a worn component.
Basic Tools for DIY Pressure Fixes
Gathering the right tools before beginning guarantees most shower pressure fixes proceed quickly and safely.
Essential hand tools and supplies enable common DIY tasks without technician help.
- Adjustable wrench and channel-lock pliers
- Screwdrivers (flat and Phillips)
- Plumber’s tape and silicone grease
- Small brush and vinegar for descaling parts
Parts to Keep on Hand: Cartridges, Washers, and O-rings
After assembling the basic hand tools, it’s wise to stock a few replaceable parts that commonly wear out in shower fixtures.
Essential spares include universal ceramic cartridges for single‑handle valves, assorted rubber washers for connections and spray heads, and various O‑rings for stems and hose fittings.
Keeping these on hand speeds repairs, prevents leaks, and restores proper pressure without waiting for parts orders.
Costs, Time, and Difficulty Estimates
Estimated expenses range from a few dollars for simple DIY fixes like cleaning or replacing a showerhead to several hundred dollars for professional repairs or pipe replacement.
Time requirements vary accordingly: quick maintenance can take 15–60 minutes, while more involved repairs often require a few hours or multiple visits.
Tasks involving hidden pipes, valves, or permits generally require a licensed plumber.
Cost Range for Quick DIY Fixes vs. Professional Repairs
When evaluating options to improve shower head water pressure, homeowners should weigh quick DIY fixes against professional repairs by comparing likely costs, time commitments, and required skill levels; simple actions like cleaning or replacing a shower head typically cost $0–$50 and take 15–60 minutes, while plumber intervention for valve replacement, pipe work, or pressure-boosting installations can range from $200 to $1,500+ and require several hours to a day plus specialized tools and expertise.
| Option | Typical Cost |
|---|---|
| DIY cleaning/replacement | $0–$50 |
| Professional repair/upgrade | $200–$1,500+ |
Typical Time Required for Each Fix
Most common fixes for low shower pressure fall into clear time bands tied to their complexity and tools required: simple tasks like aerator or shower head cleaning and replacement typically take 15–60 minutes; moderate jobs such as adjusting the pressure-reducing valve, replacing cartridge valves, or clearing accessible pipe blockages usually require 1–3 hours and basic plumbing tools; and more involved professional interventions—re-piping, installing a booster pump, or extensive valve and fixture replacement—commonly take several hours to a full day or longer depending on access, permits, and system complexity.
Routine inspections, parts ordering, or unexpected complications can extend these estimates.
Which Jobs Need a Plumber
Which repairs require a licensed plumber depends on scope, access, and local codes: complex tasks—replacing shutoff valves, rerouting supply lines, fixing leaks inside walls, installing pressure-reducing valves or boosting pumps—typically need a pro.
Costs range $150–$1,200+, durations from 1–8+ hours, and difficulty is moderate to high.
Simple cartridge swaps or cleaning aerators can be DIY.
Preventive Maintenance to Keep Shower Pressure Strong
Regularly scheduled cleaning of shower heads and inlet filters removes mineral and sediment buildup that reduces flow.
Implementing water softening or other treatment options can slow scale formation and prolong peak pressure.
Seasonal checks and pressure reassessments help catch gradual declines before they require major fixes.
Regular Cleaning Schedule for Shower Heads and Filters
A simple, consistent cleaning schedule prevents mineral buildup and trapped debris from degrading shower performance over time.
A homeowner or maintenance technician should inspect and clean fixtures on a set cadence to sustain flow.
Recommended routine:
- Monthly: wipe faceplate, clear nozzles.
- Quarterly: soak removable heads in vinegar solution.
- Biannually: remove and deep-clean filters.
- Annually: replace worn components.
Water Softening and Treatment Options to Prevent Buildup
Beyond routine cleaning, addressing the water source itself reduces the rate of mineral accumulation that chokes shower nozzles and filters.
Installing a water softener or point-of-use conditioner limits calcium and magnesium deposits.
Alternative treatments—sediment filters, scale inhibitors, or reverse osmosis for extreme hardness—protect plumbing and preserve pressure.
Periodic testing guides system choice and maintenance frequency to sustain ideal flow.
Seasonal Checks and When to Reassess Pressure
When seasons shift and household routines change, homeowners should schedule simple seasonal checks to confirm shower pressure remains within expected ranges.
Inspect aerators, clean or replace shower heads, and test flow with a bucket and timer. Note pressure changes after winterization, irrigation use, or municipal work.
Record readings, compare quarterly, and address declines promptly to prevent mineral buildup or valve wear.
Mistakes to Avoid When Trying to Increase Shower Pressure
The article notes common mistakes that can worsen performance or cause damage when attempting to boost shower pressure.
Removing flow restrictors may violate local codes, increase water use, and lead to uneven spray or leaks.
Forcing old fixtures or over-tightening connections can strip threads, crack fittings, and create costly repairs.
Why Removing Flow Restrictors Can Be Problematic
Removing a flow restrictor may seem like a quick fix to boost shower pressure, but it can create legal, safety, and performance problems.
Removing it may violate local plumbing codes, increase water consumption and bills, and reduce temperature stability.
It can also overwhelm older supply lines and valves, shortening fixture life and voiding warranties.
Safer alternatives preserve regulation and efficiency.
Dangers of Forcing Old Fixtures or Over-Tightening Connections
Beware of forcing stubborn fittings or over-tightening connections, as these quick fixes often cause more harm than the pressure issues they seek to solve.
Damaged threads, cracked fixtures, burst pipes, and stripped seals can result, leading to leaks, costly repairs, or water damage.
Professionals recommend using proper tools, gentle force, or replacing worn components rather than forcing old parts beyond their limits.
Real-World Troubleshooting Scenarios
Common household problems call for targeted troubleshooting: low pressure only on hot lines often points to a failing water heater or a partially closed valve, while reduced flow after recent plumbing work suggests trapped debris or an improperly reassembled fitting.
In older homes, corroded pipes and undersized supply lines are frequent culprits and may require routing options, pipe relining, or full replacement.
The following scenarios explain likely causes and practical steps to inspect and remedy each situation.
Low Pressure Only in Hot Water: Likely Causes and Fixes
When reduced flow occurs only with hot water, the problem typically lies downstream of the cold-water inlet—within the water heater, its fittings, or the hot-side plumbing.
Common causes include sediment-clogged heater elements, partially closed hot valves, corroded or kinked hot supply lines, or a failing mixing valve/anti-scald device.
Inspect and flush the heater, check/replace valves and fittings, and clear debris to restore flow.
Low Pressure After Recent Plumbing Work: What to Inspect
After any recent plumbing work, a sudden drop in shower pressure most often indicates an issue introduced during the repair—tightened supply valves, misaligned fittings, trapped debris, or an inadvertently installed flow-restricting part.
Inspect supply shutoffs, faucet cartridges, and connections for partial closures or misalignment.
Remove and flush the shower arm and head to clear debris.
Confirm newly installed parts match original specifications and reinstall correctly.
Older Homes with Low Pressure: Practical Upgrade Paths
Because aging pipes, undersized supply lines, and outdated fixtures often coexist in older homes, diagnosing low shower pressure requires a stepwise blend of inspection and targeted upgrades.
Begin with supply line assessment and pressure testing, then clean or replace corroded valves and shower arms.
Consider upsizing pipes, installing a pressure-boosting pump, or replacing restrictive fixtures.
Prioritize cost-effective fixes before full repiping.
Quick Decision Guide: Which Fix to Try First
Which fix should be attempted first depends on ease, cost, and likelihood of addressing the actual problem. The reader is advised to start with simple, low‑cost checks (valves, aerators), then progress to cartridge replacement, pressure valve adjustment, or professional inspection if persistent. Use the table to prioritize actions by time, expense, and expected impact.
| Action | Priority |
|---|---|
| Check shutoff valve | High |
| Clean aerator | High |
| Replace cartridge | Medium |
| Adjust PRV | Medium |
| Call plumber | Low |
Conclusion
Having reviewed simple fixes, repairs, upgrades, and preventative steps, the reader sees clear options to restore shower flow. Practical tests and diagnostics separate minor obstructions from systemic plumbing issues, while avoiding common mistakes saves time and expense. When should one call a pro versus trying a DIY tweak? By matching the symptom to the recommended action—from cleaning a head to replacing valves—confidence grows that steady, strong shower pressure is achievable and maintainable.
