How to Keep RV Tanks From Freezing: 9 Proven Methods to Protect Your Plumbing
To prevent RV tanks and pipes from freezing, implement effective insulation, heating solutions, and proper winterization techniques. Start by emptying your holding tanks and bypassing the water heater. Use RV-safe antifreeze as needed. Insulate exposed pipes with closed-cell foam, heat tape, or heated hoses, and ensure access panels are sealed tightly. Consider using 12V or 120V tank heaters with thermostats when connected to shore power, and stagger electrical loads to protect your batteries. Regularly inspect your setup and choose your campsite wisely to minimize freezing risks. For detailed steps, product recommendations, and troubleshooting tips, continue reading.
How RV Tanks Freeze and Why Prevention Matters
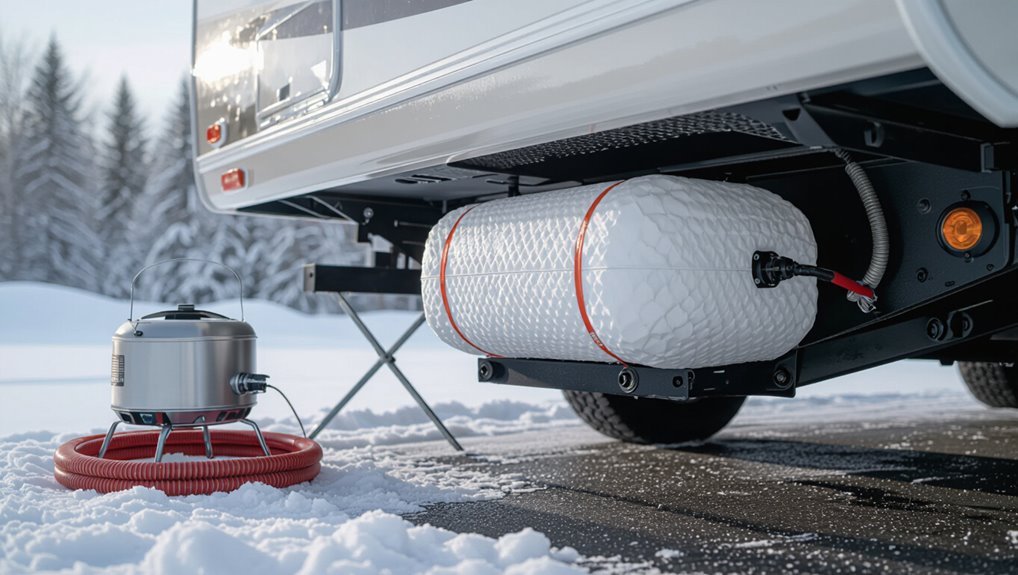
Freezing damages fresh, grey, and black water tanks differently—ice expansion can crack tank walls, clog outlets, and block sensors.
Critical temperature thresholds (around 32°F/0°C and lower) and vulnerable plumbing points such as fittings, hoses, and low-clearance valves determine where failures occur.
Left unaddressed, frozen tanks and pipes can cause costly repairs, sanitation hazards, and extended downtime for the RV.
How freezing affects fresh, grey, and black water tanks
Cold temperatures threaten all RV plumbing systems, but fresh, grey, and black water tanks respond differently when ice forms.
Fresh tanks risk cracked fittings and unusable water. Grey tanks can block drains and damage pumps. Frozen black tanks complicate waste disposal and seals.
Understanding these differences informs how to keep RV tanks from freezing and prioritize targeted prevention measures.
Temperature thresholds and common failure points in RV plumbing
At what temperatures do RV plumbing systems begin to fail, and where do those failures most often occur? Freezing risks rise near 32°F (0°C); sustained exposure below 20–25°F increases likelihood of damage.
Vulnerable points include exposed exterior lines, hose connections, water heaters, low-clearance fittings, and tight bends where ice forms first.
Insulation gaps and poor interior heat circulation compound failure risk.
Costs and risks of frozen tanks and pipes
When temperatures drop into the danger zone identified above, the financial and operational consequences of frozen tanks and pipes become immediate and measurable.
Repairs can cost hundreds to thousands for cracked tanks, burst fittings, and damaged pumps. Water loss, sanitation hazards, and downtime disrupt travel plans.
Preventive insulation, heat sources, and prompt winterization are far cheaper than emergency repairs and replacement.
Quick, Effective Measures to Prevent RV Tank Freezing
Practical steps can greatly reduce the risk of RV tank damage from freezing.
Recommended actions include emptying holding tanks before cold weather, draining and bypassing the water heater, and using RV-safe antifreeze where appropriate.
These measures are straightforward, quick to perform, and effective when timed before or during freezing conditions.
Empty tanks before cold weather sets in
Draining holding tanks and removing residual water from lines before temperatures drop reduces the chance of ice-related damage and costly repairs.
The operator should empty freshwater, gray, and black tanks, flush lines, and clear low points.
Recommended steps include:
- Empty all tanks at approved dump stations
- Flush tanks and hoses thoroughly
- Open drain valves to remove standing water
- Inspect seals and fittings for leaks
Drain and bypass the water heater
After emptying and flushing the tanks, attention should turn to the water heater, since trapped water there can freeze and cause cracks or burst fittings.
Drain the heater completely, open the pressure relief valve, and remove the drain plug.
Install or engage a factory bypass to divert antifreeze when winterizing, preventing tank filling.
Verify seals and test for leaks before closing access panels.
Use RV antifreeze safely in holding tanks
Pour non-toxic RV antifreeze into holding tanks in controlled amounts to prevent remaining water from freezing and damaging plumbing.
The operator measures volume per manufacturer guidelines, adds antifreeze through cleanouts, and guarantees waste valves remain closed during treatment.
After circulating, check seals, label the system treated, and dispose of waste per local regulations.
Replenish before next freeze risk.
Insulation Strategies for Tanks and Pipes
Effective insulation combines the right tank materials—rigid foam, insulated blankets, or removable jackets—with targeted pipe protection for exposed runs and underbelly lines.
Attention to sealing drafts and insulating access panels completes the system by preventing cold air intrusion at vulnerable points.
The following section compares options and provides practical installation tips.
Types of insulation for tanks (foam, blankets, jackets)
Select insulation based on tank size, exposure, and expected temperatures to prevent freezing while minimizing cost and installation effort.
Closed-cell foam sheets offer rigid, durable coverage for irregular tanks and tight cavities.
Quilted tank blankets provide removable, breathable warmth for seasonal use.
Insulating jackets combine foam and fabric for quick installation and maintenance access.
Choose materials rated for moisture resistance and sunlight exposure.
Pipe insulation solutions for exposed and underbelly lines
Properly insulating exposed and underbelly pipes prevents heat loss and reduces freeze risk by combining physical barriers with heat retention methods tailored to location and service type.
Common solutions include closed-cell foam sleeves, self-sealing rubber insulation, and flexible wrap for irregular fittings. Heated tape and low-voltage heat cables supplement insulation where needed.
Secure fastenings and moisture-resistant coverings guarantee durability without blocking maintenance access.
Sealing drafts and insulating access panels
After insulating exposed and underbelly lines, attention turns to eliminating drafts and insulating access panels to prevent cold air from undermining tank and pipe warmth.
Inspect panel edges and vents, seal gaps with foam tape or silicone, and add removable insulated covers or rigid foam inserts.
Confirm ventilation for safety, secure fasteners, and check seals regularly to maintain thermal integrity and prevent freeze damage.
Heating Solutions to Keep Tanks Above Freezing
The section outlines practical heating options to keep RV tanks and related plumbing above freezing.
It compares 12V and 120V tank heaters and heating pads, in-line heated water hoses and heated de-icers, and the use of furnace ducting or space heaters to warm the underbelly.
Each method is evaluated for power requirements, installation complexity, and effectiveness in different cold conditions.
12V and 120V tank heaters and heating pads
Many RV owners rely on 12V and 120V tank heaters and heating pads to prevent freshwater, gray, and black tanks from freezing in cold conditions.
These devices provide direct, controlled warmth. Selection depends on power availability, tank size, and mounting. Benefits include simplicity and targeted heat.
- 12V pads: battery-friendly, lower output
- 120V mats: stronger, require shore power
- Thermostatic control options
- Safe installation practices
In-line heated water hoses and heated de-icers
Consider using in-line heated water hoses and heated de-icers to keep fresh water lines and fittings from freezing during cold weather. These devices deliver controlled warmth directly to the supply line or external connections, reducing ice build-up without heating the entire RV.
They plug into shore power or use low-voltage controllers, require proper insulation and drip management, and prevent damage to faucets and downstream plumbing.
Furnace ducting and space heaters for underbelly warmth
Several targeted heat sources can keep an RV’s underbelly and holding tanks above freezing by directing warmth where it’s most needed: furnace ducting aimed at the belly, insulated ducts routed to tanks, and compact 120V or propane space heaters positioned in enclosed compartments.
Properly installed ducting, thermostatic controls, and safe clearances prevent overheating or fire.
Combine insulation and targeted heat for efficient freeze protection.
Electrical and Power Considerations
The section examines the electrical and power needs for running electric heaters and heated hoses, starting with their wattage and circuit requirements.
It compares battery, generator, and shore-power options for sustaining those loads and suggests ways to conserve energy.
Attention is given to thermostats, thermostatic switches, and temperature controllers to automate operation and prevent overdrawing the system.
Power requirements for electric heaters and heated hoses
Electric heaters and heated hoses require careful assessment of voltage, amperage, and continuous draw to guarantee RV electrical systems can safely support them.
Select devices rated for the RV’s available circuit (12V, 120V) and verify breaker and wiring capacities.
Note startup vs. steady current, total combined load, and manufacturer power specs.
Include inline thermostats and fusing to prevent overloads and overheating.
Using batteries, generators, and shore power efficiently
Manage power sources deliberately to keep RV tanks from freezing without overtaxing systems: batteries, generators, and shore power each have roles and limits that should be coordinated to balance heater demand, runtime, and safety.
Prioritize shore power when available, use generators for extended cold periods, and reserve batteries for brief periods.
Monitor load, avoid deep discharges, stagger heater cycles, and guarantee proper ventilation and grounding.
Thermostats, thermostatic switches, and temperature controllers
Thermostats, thermostatic switches, and temperature controllers regulate heater cycles and protect power systems by switching loads based on sensed temperature.
They maintain setpoints for holding-tank and compartment heaters, prevent short-cycling, and enable hysteresis to reduce power draw.
Proper placement, calibration, and compatible voltage/current ratings guarantee reliable activation.
Programmable units allow differential control and alarm integration for efficient, automated freeze protection.
Installation and Maintenance Steps
The section outlines practical installation steps for tank and pipe heating elements, including placement and secure connections.
It also presents a concise winterizing checklist to complete before freezing temperatures arrive.
Finally, routine maintenance actions are recommended to prevent ice buildup and clogs.
How to install tank and pipe heating elements
Begin by mapping the tank and pipe layout to identify ideal heater locations, access points, and power routes; this guarantees each element will make direct contact with the surfaces it must warm and that wiring can be routed safely.
Select appropriate wattage heaters, secure pipe heating tapes or pads, mount tank heaters with thermal adhesive or straps, run wiring to a protected breaker, and test each circuit for proper operation.
Winterizing checklist before freezing weather
After installing and testing heaters, attention shifts to a compact winterizing checklist that prepares the entire RV for prolonged freezing conditions.
The checklist verifies systems, seals gaps, and secures water lines before cold sets in.
- Drain and bypass freshwater and water heater
- Add RV-safe antifreeze to traps and drains
- Insulate exposed pipes and vents
- Close exterior vents and seal windows
Regular maintenance to prevent ice buildup and clogs
Inspecting and maintaining an RV’s plumbing and waste systems on a regular schedule prevents ice buildup and clogs by addressing vulnerable points before they fail.
Technicians or owners should flush lines, inspect seals, test heated compartments, clear vents and drains, and replace worn insulation, fittings, or valves.
Scheduled checks reduce emergency repairs, prolong components, and maintain reliable winter operation.
DIY vs. Professional Options
The section compares simple do-it-yourself fixes suited to weekend RVers—such as insulation wraps, heat tapes, and routine winterizing—with situations that merit a professional RV technician, including complex plumbing work or electrical heater installations.
It outlines typical costs for professional installations and available warranties to help weigh upfront expenses against long-term protection.
Readers are guided to match the job’s complexity and risk to their skills and budget.
Simple do-it-yourself fixes for weekend RVers
Weekend RVers can prevent tank freezing with a handful of simple DIY measures that require minimal tools and basic mechanical comfort.
Typical actions focus on insulation, heat retention, and routine checks.
Practical steps include:
- Add foam insulation or heat tape to exposed pipes and tanks.
- Install low-wattage tank heaters or heated pads.
- Use RV antifreeze in holding tanks when stored.
- Drain and ventilate lines before cold spells.
When to hire a professional RV technician
When should a weekend RVer call a professional? Serious leaks, damaged tanks, frozen pipes inaccessible without disassembly, malfunctioning heaters or thermostats, and electrical faults warrant a certified RV technician.
Professionals handle pressurized-system repairs, proper insulation retrofits, and warranty-sensitive components.
For uncertain diagnoses or safety risks—especially propane, wiring, or structural issues—engaging a qualified technician prevents further damage and guarantees code-compliant, reliable fixes.
Typical costs and warranties for professional installations
After deciding a repair or upgrade requires professional attention, cost and warranty considerations become the next practical concern. Typical installations range $150–$1,200 depending on scope; labor rates, parts, and diagnostics affect totals. Warranties often cover 90 days to 5 years; extended plans cost extra. Compare quotes, check labor guarantees, and document agreed terms before service.
| Item | Typical Cost | Warranty |
|---|---|---|
| Minor repair | $150–$350 | 90–180 days |
| Heater install | $400–$1,200 | 1–5 years |
| Parts | $20–$300 | Manufacturer warranty |
Testing and Monitoring for Reliable Protection
A routine testing protocol verifies that heaters, thermostats, and insulation perform as designed before cold weather arrives.
Remote monitoring systems and temperature alerts provide continuous oversight and early warning of drops that may outpace safeguards.
Clear signs of trouble and a brief emergency checklist guarantee rapid action if tanks begin to freeze.
How to test heaters, thermostats, and insulation effectiveness
Begin systematic testing by establishing baseline temperatures and documented performance for each heating component and insulated area.
Verify heater output with an infrared thermometer at set intervals, confirm thermostat accuracy against a calibrated probe, and perform load tests to guarantee sustained warmth.
Inspect insulation continuity and R-value assumptions via temperature differentials, sealing failures, and timed cool-down measurements to quantify effectiveness.
Remote monitoring options and temperature alerts
Once baseline performance is established for heaters, thermostats, and insulation, remote monitoring becomes the next logical step to maintain protection when occupants are absent.
Wireless temperature sensors, smart thermostats, and tank-level monitors feed real-time data to apps or cloud dashboards.
Configurable alerts via SMS, email, or push notifications notify owners of falling temperatures, heater failures, or abnormal tank readings for timely intervention.
Signs of trouble and emergency steps if tanks begin to freeze
Several clear indicators warn that RV tanks are beginning to freeze: rapidly dropping temperature readings near tanks, slowed or stopped water flow, ice-sounding pipes when tapped, unusually full tank-level readings despite no added water, and heaters cycling more frequently or failing to reach setpoints.
If detected, shut off water supply, drain exposed lines and tanks, apply heat packs or safe portable heaters, and call professional help if leaks or ruptures appear.
Seasonal Strategies and Site Selection
Site selection and seasonal planning play a central role in preventing RV tank freeze, with solar exposure, natural windbreaks, and availability of heated hookups reducing risk.
The decision to store an RV in winter versus continue camping hinges on trade-offs between maintenance demands and the convenience of onsite utilities.
Strategies must also shift between boondocking—where insulation, tank heaters, and low-water usage are critical—and RV parks, which can offer external heat sources and hookups to simplify protection.
Choosing a campsite to minimize freeze risk (sun, windbreaks, hookups)
Where should an RV be parked to reduce the risk of frozen tanks?
Choose sites with maximum daytime sun exposure, sheltered from prevailing winds by trees, buildings, or natural terrain, and close to heated hookups when available.
Orient the RV to capture sunlight on plumbing-containing sides, avoid low-lying frost pockets, and prioritize sites with reliable electrical access for tank heaters or insulated heat sources.
Seasonal storage vs. winter camping: pros and cons
Seasonal storage and winter camping present distinct trade-offs for preventing frozen RV tanks: storage removes exposure and reduces maintenance needs but may require thorough winterization and secure indoor or sheltered parking.
Meanwhile, winter camping allows continued use at the cost of active freeze-prevention measures such as heated hookups, insulation, and regular system checks.
Storage minimizes daily attention; camping preserves mobility but demands power, vigilant monitoring, and contingency plans.
Adapting strategies for boondocking vs. RV parks
Choose accommodations based on available resources and exposure: boondocking requires self-reliance with insulated tanks, heated enclosures, and battery- or generator-powered heat sources, while RV parks can offer shore power, plumbed winterized hookups, and sheltered pads that simplify freeze protection.
Campers should match system capacity to site, plan waste management, monitor temperatures, and carry contingency supplies like antifreeze, insulation wraps, and portable heaters.
Common Mistakes and How to Avoid Them
A review of common errors highlights actions that can still leave tanks vulnerable despite precautions.
Attention to proper handling and disposal of RV antifreeze, plus awareness of environmental risks, prevents harm and regulatory issues.
Clear troubleshooting steps are recommended for recognizing and resolving frozen tank situations quickly.
Mistakes that still leave tanks vulnerable
Overlooking small details can leave RV tanks exposed to freezing even when major precautions are taken. Common errors continue to create vulnerability and can be avoided with attention.
- Leaving vents or access doors unsealed
- Relying solely on intermittent heater use
- Neglecting insulation gaps around fittings
- Using damaged hoses or poorly seated valves
Awareness and routine checks prevent freeze damage.
Safe handling of RV antifreeze and environmental considerations
Handle RV antifreeze carefully and consider environmental impact before pouring or flushing any product.
Use non-toxic, propylene-glycol formulations labeled for potable systems.
Wear gloves and eye protection, follow manufacturer dilution and disposal instructions, and collect wastes for proper disposal at hazardous-waste facilities.
Avoid sink or ground drains, never mix with automotive antifreeze, and document quantities used to minimize spills and environmental harm.
Troubleshooting frozen tank scenarios
Identify frozen tanks quickly by checking sensors, fittings, valves and odors. Then follow a systematic approach to thawing and diagnosing causes.
Avoid common mistakes: applying open flame, rushing pressure tests, or neglecting insulation gaps.
Thaw gradually with heat tape, low-level heaters, or warm water sources.
Confirm pumps and seals function, replace damaged components, and document fixes to prevent recurrence.
Products and Tools Recommended for Preventing Freezing
A concise set of reliable products and tools can prevent RV tanks from freezing and reduce winter maintenance.
Recommended items include proven tank heaters, heated hoses, and insulation kits, plus essential accessories to control and protect the system:
- Top-rated tank heaters
- Heated water hoses
- Insulation/installation kits
- Thermostats, heat tape, and tank blankets
Reviewing these options helps match equipment to the RV’s layout and expected temperatures.
Top-rated tank heaters, heated hoses, and insulation kits
Several reliable products—tank heaters, heated hoses, and insulation kits—offer straightforward, proven protection against freezing in RV systems.
Popular tank heaters include Truma and RecPro models sized for gray/black tanks. Heated hoses from Camco and Valterra maintain water flow.
Foam and removable insulation kits fit awkward tanks and fittings. Selection depends on tank size, power availability, and installation complexity.
Essential accessories: thermostats, heat tape, and tank blankets
Having covered heaters, heated hoses, and insulation kits, attention turns to smaller but high-impact accessories that fine-tune freeze protection: thermostats, heat tape, and tank blankets.
Thermostats automate temperature control, conserving power. Self-regulating heat tape prevents localized freezing along pipes.
Tank blankets add passive insulation and even heat distribution. Together these components optimize system efficiency and reduce frost-related failures.
Summary Action Plan: Step-by-Step Winterization and Daily Routine
A concise action plan outlines the pre-trip winter checklist, daily monitoring routine while camping in cold weather, and emergency quick fixes if freezing begins.
It lists specific tasks to perform before departure, checks to run each day to protect tanks and lines, and immediate responses for early signs of freeze.
The goal is a clear, easily followed sequence that minimizes risk and response time.
Pre-trip winter checklist
Prepare a focused pre-trip winter checklist that guides the owner through essential winterization tasks and a compact daily routine to prevent RV tanks from freezing.
Include inspecting insulation, sealing vents and seams, draining and bypassing water lines, adding non-toxic antifreeze, checking heaters and thermostat settings, testing tank heaters, packing spare hoses and blankets, and confirming emergency tools and contact information.
Daily monitoring and routine when camping in cold weather
With the pre-trip checklist completed, attention shifts to daily monitoring and a concise routine that keeps RV tanks protected during cold-weather stays.
Each morning and evening, occupants check temperatures, inspect vents and heat sources, circulate antifreeze-treated water or run small pumps briefly, verify tank heaters and insulation remain functional, and log anomalies.
Consistent checks prevent gradual freezing and enable timely planned adjustments.
Emergency quick fixes if freezing begins
Act quickly when freezing is detected: assess which tank or line is affected, isolate valves to protect other systems, and apply immediate localized heat (portable propane heater, heat gun at a safe distance, or heated blankets) while circulating fluid by running pumps or opening faucets briefly to break ice.
Then monitor for leaks, relieve pressure, use antifreeze flush if thawed, and seek professional repair for damaged components.
Conclusion
Winterizing an RV is no longer optional; it is a practical lifeline that keeps tanks, pipes, and plumbing components functional through icy nights. Combining insulation, targeted heat, power planning, and smart site choices creates reliable protection. Like wrapping a sleeping child in a warm blanket, these measures preserve system integrity and prevent costly damage. Consistent checks and simple routines guarantee peace of mind and a ready RV whenever winter travel calls.