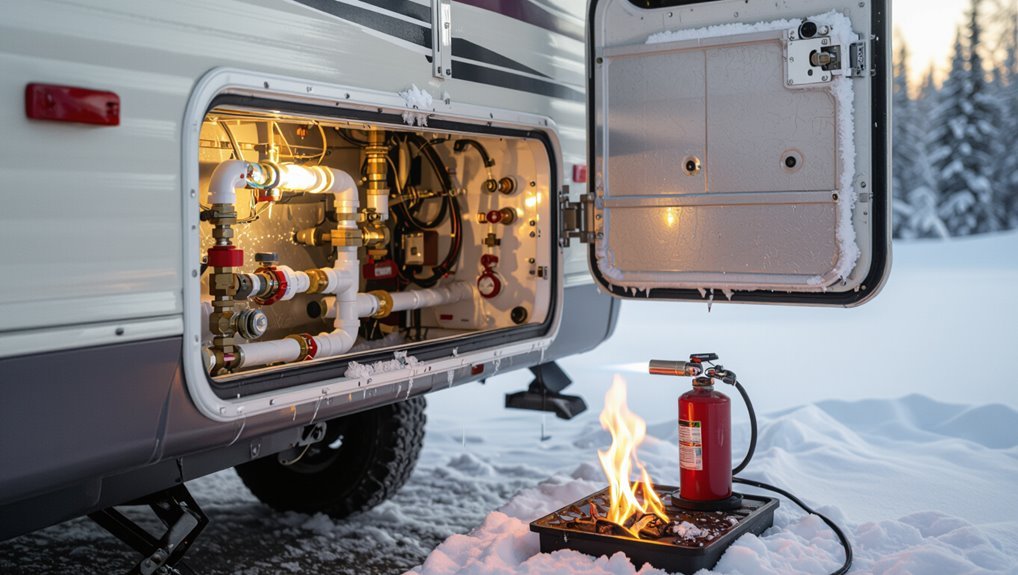
Keep Camper Pipes From Freezing: Winter RV Plumbing Tips & Hacks
To prevent frozen pipes in your camper during winter, you should shut off and drain the water system when storing your RV, use RV-safe propylene glycol in the plumbing lines, and insulate exposed pipes with closed-cell foam and taped seams. For active winter use, consider applying heat tape, heated hoses, and tank heaters with thermostats. Additionally, sealing vents and cabinet openings while monitoring power draw can help maintain warmth. In case of an emergency, shut off the water supply, open the faucets, and gently apply heat from the warm end of the pipes. For more detailed guidance, refer to step-by-step instructions on products, their placement, and safety considerations.
Quick Emergency Steps to Stop Frozen RV Pipes Now
Act quickly: locate the frozen section by feeling pipes and fittings for cold spots, then shut off the water source to prevent pressurized bursts.
A person should open nearby faucets to relieve pressure and vent trapped air.
Apply gentle, consistent heat using a hair dryer, heat gun on low, or warm towels—never open flame.
Work from the warm end toward the frozen portion.
Inspect joints and valves as ice loosens for leaks.
If thawing fails within a short interval, call professional repair to avoid cracking.
Afterward, drain residual water and monitor temperatures to prevent recurrence.
Winterize RV Plumbing for Long-Term Cold Storage
Winterizing the RV plumbing for long-term cold storage requires planning and thoroughness to prevent freeze damage and costly repairs. The owner drains all water, opens faucets, and removes the water heater element or bypasses it. Antifreeze is pumped through fixtures and traps to coat lines. Valves are labeled and shut; vents are cleared. Electrical and pumps are disabled to avoid cycling.
- Drain system fully and blow out lines with compressed air.
- Add RV-safe propylene glycol antifreeze to traps and low points.
- Seal openings, vent caps, and inspect for rodent entry points.
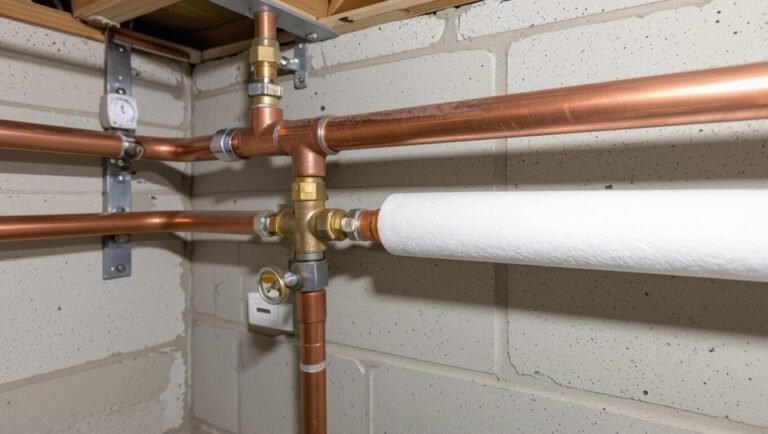
Upgrade Insulation to Prevent Frozen RV Pipes
After the plumbing has been drained and filled with antifreeze for long-term storage, attention turns to insulating the system for active cold-weather use to prevent freezes rather than relying solely on winter storage procedures. The camper’s water lines, valves, and exposed tanks benefit from closed-cell foam, pipe insulation sleeves, and insulating wraps. Installing removable access panels and insulating cabinet interiors reduces drafts. Insulation choices should balance R-value, moisture resistance, and ease of installation. Regular inspections guarantee seals remain intact. The table below summarizes common options and key attributes.
| Insulation Type | Best For |
|---|---|
| Closed-cell foam | High R-value, moisture resistance |
| Pipe sleeves | Easy DIY fit |
| Reflective wrap | Radiant heat management |
| Foam board | Tanks and panels |
Use Heat Tape, Tank Heaters, and Thermostats to Stop Freezing
Heat tape should be applied directly to pipes with manufacturer-recommended spacing and secured to avoid hot spots.
Selection of tank heaters depends on tank material and power availability, with flexible silicone-wrap or rigid skid-mounted units as common choices.
Thermostats and surface-mounted temperature sensors provide automatic control to maintain safe temperatures and reduce power use.
Proper Heat Tape Placement
Proper placement of heat tape is critical to preventing frozen lines and protecting RV plumbing components during cold snaps. The tape should run along supply lines from the source to fixtures, avoid overlap that causes hot spots, and stay dry.
Wrap joints and exposed fittings first, then secure tape with approved fasteners and thermal tape. Keep clear of insulation gaps and electrical wiring; follow manufacturer spacing and amperage limits. Monitor with a thermostat or temperature sensor where possible.
- Start at power source, run toward fixture.
- Prioritize joints and exposed areas.
- Secure, avoid overlaps, follow specs.
Choosing Tank Heaters
With heat tape positioned along supply lines and fittings, attention shifts to tank heaters as the next line of defense against freezing; selecting the right model depends on tank material, capacity, and where the unit will be mounted.
Choose a heater rated for the tank’s size and construction—plastic tanks need low-profile, evenly distributed heat while metal tanks tolerate clamp-on units.
Consider power availability and installation access; some require internal mounting, others adhere externally.
Look for marine-grade insulation, secure mounting brackets, and protected electrical connections.
Prioritize models with proven low-watt density to reduce hot spots and corrosion risk while ensuring uniform warmth.
Thermostat Control Options
Although tank heaters and heat tape provide the warmth, a thermostat is what prevents wasted energy and overheating by activating those devices only when temperatures approach freezing.
The thermostat senses ambient or surface temperature and cycles power to heat tape or tank elements, conserving battery or shore power while maintaining safe temperatures.
Choose adjustable setpoints, low-power draw models, and waterproof probes for RV use.
Proper placement avoids false readings from nearby heat sources.
Maintenance includes periodic calibration checks and secure wiring.
- Adjustable setpoint thermostats
- Surface-probe thermostats
- Low-current, waterproof models
Avoid Freeze Damage When Boondocking or Traveling
When boondocking or traveling in cold weather, insulating exposed pipes reduces the risk of bursts and preserves water flow.
Portable heated solutions, such as wrap heaters or heated hoses, provide targeted warmth where shore power is unavailable.
Combining insulation with battery- or propane-powered heating offers reliable protection on the road.
Insulate Exposed Pipes
In cold weather, insulating exposed RV pipes is essential to prevent freezing and costly damage while boondocking or traveling. Pipe insulation minimizes heat loss, reduces condensation, and extends plumbing reliability in unheated compartments. Install closed-cell foam sleeves or wrap with high-R-value insulation, ensuring tight seams and taped joints. Seal gaps at fittings and vents; protect outdoor hose connections with insulated covers. Check insulation for moisture and replace degraded sections before each trip.
- Choose weather-rated foam sleeves sized to pipe diameter.
- Secure with UV-resistant tape and cable ties.
- Inspect monthly and after heavy weather.
Use Heated Solutions
By employing active heat sources, RV owners can forestall pipe freezing and maintain reliable plumbing while boondocking or traveling in cold conditions. Heated hoses, tank heaters, and portable electric tape provide focused warmth; low-wattage thermostatic heaters conserve power by cycling on only when needed. Placement matters: apply heat to vulnerable fittings, joints, and city-water connections. Monitor power draw and use insulation over heated elements to improve efficiency. For non-electric sites, catalytic heaters or safe fuel-burning devices offer alternatives but require ventilation. Regular checks guarantee devices function and avoid fire hazards.
| Device | Power | Notes |
|---|---|---|
| Heated hose | 120V | Prevents inlet freeze |
| Heat tape | 12V/120V | Wraps pipes |
| Tank heater | 12V | Keeps tanks fluid |
| Catalytic heater | Fuel | Ventilate and monitor |
Troubleshoot Frozen RV Pipes and Repair Burst Lines Fast
Identify frozen RV pipes quickly to limit damage: reduced water flow, ice bulges on lines, or a sudden loss of hot water signal freezing inside the system.
The owner should act calmly: isolate water at the main valve, open faucets to relieve pressure, and apply gentle heat.
If a burst is found, shut off the supply immediately and drain remaining water.
- Turn off water, open taps, and assess visible pipe damage.
- Thaw with a hair dryer, heat tape, or warm towels—avoid open flames.
- For bursts, use a repair clamp or replace the section; seek professional help for major leaks.
Conclusion
Preventing frozen camper plumbing combines immediate action, proper winterization, targeted insulation upgrades, and active heating solutions. For instance, a late-fall weekend trip nearly ended when a boondocking couple found a frozen freshwater line; because they had preinstalled heat tape and rigged a small thermostat-controlled heater, they avoided a burst pipe and costly repairs. With planning and the right tools, RV owners can confidently travel or store their rigs through winter without plumbing failures.