How to Insulate Copper Pipe: Step-by-Step Guide to Prevent Freezing and Heat Loss
How to Insulate Copper Pipe: A Quick Guide
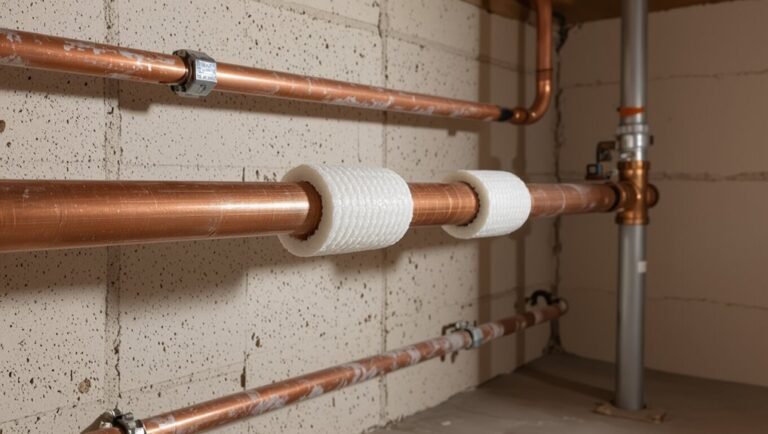
Insulating copper pipes effectively prevents freezing and reduces heat loss by creating a thermal barrier. To get started, inspect and dry your pipes, then measure their diameter. Fit pre-slit foam or elastomeric sleeves around the pipes, sealing seams and ends with tape or adhesive. Secure the insulation with zip ties and use closed-cell or vapor-barrier materials in moisture-prone areas. Regularly inspect the insulation for any damage to ensure ongoing protection. For detailed steps, material options, and cost estimates, continue reading.
How Insulating Copper Pipe Prevents Freezing and Reduces Heat Loss
Copper pipes are prone to freezing and rapid heat loss because metal conducts cold and transfers heat away from flowing water.
Insulating these pipes preserves water temperature, reduces energy costs, and lowers the risk of burst pipes for both homes and businesses.
Insulation becomes essential in cold climates, for exposed or unheated locations (basements, crawlspaces, exterior walls), and for small-diameter or long-run piping that cools quickly.
Why copper pipes are vulnerable to freezing and heat loss
Because metal conducts heat rapidly, copper pipes lose warm water temperature quickly and, in cold conditions, can freeze along exposed lengths. Their high thermal conductivity combined with thin walls and exposure to ambient air makes them especially prone to heat loss and ice formation.
Understanding how to insulate copper pipe addresses conduction, convection, and radiant losses, reducing freeze risk where pipes run through unheated spaces and near exterior walls.
Benefits of insulating copper pipes for homes and businesses
Having established how copper’s high thermal conductivity and exposure increase the risk of freezing and heat loss, insulating these pipes yields clear operational and economic benefits.
Insulation minimizes freeze incidents, reduces heat transfer, and stabilizes system performance.
Savings come from lower energy consumption, fewer repair costs, extended equipment lifespan, and improved occupant comfort.
Installation is typically low-cost with rapid payback.
When insulation is essential: climates, pipe locations, and pipe types
When exposed to cold climates, unheated spaces, or long runs through exterior walls, copper piping becomes highly susceptible to freezing and heat loss.
So insulation is essential in those conditions to preserve flow and energy efficiency.
Insulation is critical for outdoor, basement, crawlspace, attic, and garage runs, near exterior doors, and for small-diameter service lines and recirculation loops to prevent freeze and reduce heat loss.
Choose the Right Insulation Material for Copper Pipes
The selection of insulation for copper pipes depends on material type, thermal resistance, and environmental exposure.
Common options—foam rubber, polyethylene, fiberglass, and elastomeric foam—vary in R-value, moisture resistance, and UV durability, affecting suitability for indoor versus outdoor use.
Fit and installation style (slip-on, wrap, adhesive-backed, or pre-slit) and correct pipe-size matching complete the choice criteria.
Common insulation types and suitability
Although several insulation options exist, each material offers distinct thermal, moisture, and installation characteristics that determine suitability for copper piping.
Selection depends on location, exposure, and maintenance needs.
- Foam tube: easy, moisture-resistant for indoor lines.
- Rubber: flexible, durable, good for outdoor/condensation control.
- Fiberglass: high-temp areas, requires vapor barrier.
- Wraps/tapes: tight spots, joints, and repairs.
R-values and thermal properties explained
Understanding heat transfer is essential for selecting insulation for copper pipes: R-value quantifies a material’s resistance to conductive heat flow, while properties like thermal conductivity, thickness, and density determine real-world performance.
Higher R-values and lower thermal conductivity reduce heat loss; thicker, denser materials often perform better but may be bulkier.
Match material R-value to climate, pipe temperature, and space constraints.
Moisture resistance, UV exposure, and outdoor use considerations
When copper pipe insulation is exposed to the elements, moisture ingress and ultraviolet radiation become primary failure modes that dictate material choice and installation method.
Select closed-cell foam, elastomeric rubber, or PVC-coated options for outdoor use. Guarantee sealed seams, corrosion-resistant cladding, and UV-stable outer jackets.
Drain nearby water, elevate insulation from standing moisture, and inspect periodically for degradation or mold.
Size, slip-on vs. wrap, adhesive-backed, and pre-slit options
Choosing the correct size and style of insulation guarantees an effective thermal barrier and a secure fit around copper pipework.
Measure pipe outside diameter; select thickness for desired R-value.
Slip-on foam suits straight runs; wrap-around works for installed, irregular sections.
Adhesive-backed sleeves simplify sealing and reduce tape.
Pre-slit options offer quick installation but require careful seam sealing for moisture protection and longevity.
Tools and Materials You’ll Need
A concise checklist of materials and a separate list of required tools and safety equipment prepare the reader for the pipe insulation task.
Items typically include the chosen insulation, adhesive or tape, sealant, a utility knife, measuring tape, and gloves.
Clear identification of personal protective equipment and any specialty tools guarantees the job proceeds safely and efficiently.
Materials checklist
Several essential items and a few optional tools make insulating copper pipe efficient and durable.
Recommended materials include pipe insulation sleeves sized to pipe diameter, foam tape or wrap for joints, high-quality adhesive or insulation tape, and weatherproof sealant for exterior runs.
These guarantee continuous thermal protection, moisture resistance, and long-term performance without specifying tools or safety gear.
Required tools and safety equipment
With the materials assembled, attention turns to the specific tools and safety equipment required to install insulation properly.
A concise kit guarantees efficient, safe work: utility knife for cutting, measuring tape for accurate lengths, adhesive or zip ties for securing sections, and safety gear to protect installers.
- Utility knife
- Measuring tape
- Adhesive or zip ties
- Gloves and safety glasses
Preparatory Steps Before Insulating Copper Pipes
Before applying insulation, the pipes should be inspected for damage, leaks, and corrosion to guarantee repairs are made first.
Surfaces must then be cleaned and thoroughly dried, and water should be turned off with system pressure relieved when necessary to prevent accidental flow.
Finally, accurate measurements of pipe length and diameter are taken to estimate the amount and size of insulation required.
Inspecting pipes for damage, leaks, and corrosion
Inspect the copper piping system carefully for cracks, pinholes, wet spots, green or white corrosion, and loose fittings to identify areas that require repair prior to insulation.
Record locations, note active leaks, seepage patterns, and weakened joints.
Assess threaded connections, soldered seams, and valves for evidence of stress or corrosion.
Prioritize repairs that prevent further deterioration and guarantee effective insulation performance.
Cleaning and drying pipe surfaces
After documenting damage and completing necessary repairs, attention turns to preparing the pipe surfaces for insulation by cleaning and thoroughly drying them.
Remove dirt, oil, oxidation, and loose debris with a cloth, mild detergent, or acetone for greasy spots. Rinse and dry completely with clean rags or compressed air.
Confirm surfaces are moisture-free to promote adhesive or foam insulation adhesion and prevent corrosion.
Turning off water and relieving system pressure when necessary
Shut off the water supply to the section of pipe to be insulated and relieve any residual pressure to guarantee a safe, dry working area.
Then drain the isolated segment via nearby faucets or a drain valve, open taps to vent trapped air, and collect discharged water.
Verify zero flow and no pressure with a meter or gentle squeeze before proceeding to insulation.
Measuring pipe length and diameter for material estimation
Before cutting or fitting insulation, measure the run and diameter of each copper pipe segment to determine required material and fittings.
Use a tape measure for length and calipers or a pipe gauge for outside diameter. Note bends, valves, and branches to account for fittings and overlap.
Record measurements per segment, round up for waste, and list needed insulation lengths, diameters, elbows, and tees.
Step-by-Step Pipe Insulation Guide
The guide outlines practical installation steps for insulating copper pipe, beginning with cutting and fitting pre-slit foam tubes and techniques for wrapping fiberglass or rubber around irregular shapes.
It covers sealing joints, seams, and fittings with appropriate tape or sealant and specific methods for insulating elbows, tees, valves, and unions.
Best practices for outdoor and exposed pipes, including UV-resistant materials and secure fastenings, conclude the overview.
How to install pre-slit foam tube insulation
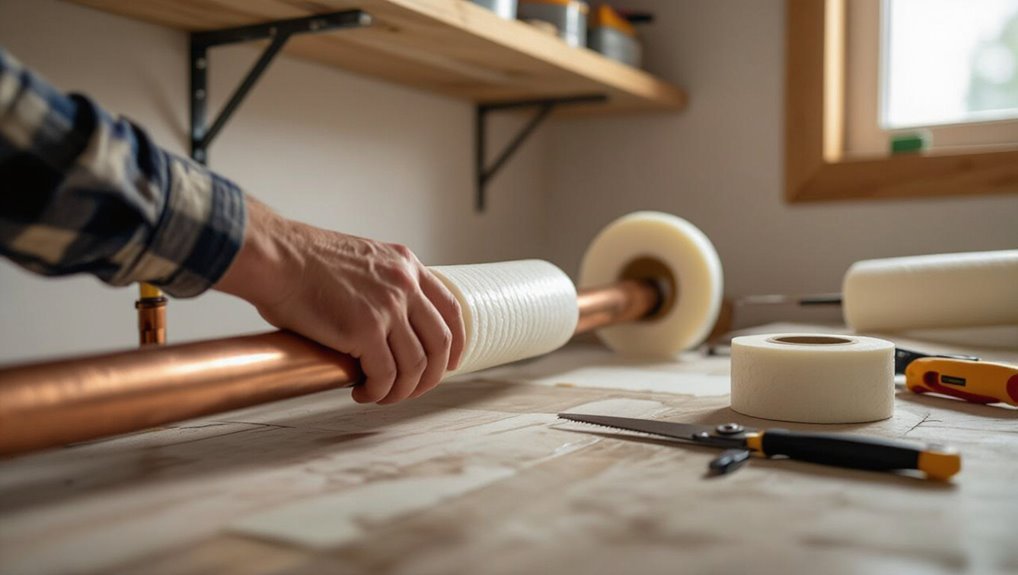
Begin by measuring the copper pipe length and selecting pre-slit foam tubes sized to match the pipe diameter; this guarantees a snug fit and minimizes gaps.
Cut tubes to length, open slit and press onto pipe, aligning seams upward. Seal ends with tape or adhesive and secure with zip ties at intervals.
- Cut squarely
- Align seams
- Seal joints
- Space fasteners evenly
How to wrap fiberglass or rubber insulation for irregular shapes
Measure and cut sections of fiberglass or rubber insulation to fit the irregular pipe profile, allowing extra length for overlapping seams and bends.
Wrap the material snugly around elbows, valves, and T-fittings, compressing where needed to maintain continuous coverage.
Trim edges for neat fits and maintain insulation thickness.
Support larger sections with straps or bands at regular intervals to prevent sagging and gaps.
Sealing joints, seams, and fittings with tape or sealant
Seal joints, seams, and fittings promptly to maintain insulation continuity and prevent heat loss, condensation, or moisture intrusion.
Apply appropriate tape (foil-backed, butyl, or insulation) over seams, overlapping edges by at least 1 inch.
For exposed gaps use compatible sealant or adhesive formulated for insulation.
Smooth tape to eliminate air pockets, and inspect seals periodically for degradation, replacing as needed.
Insulating elbows, tees, valves, and unions
Fit snug insulation pieces around elbows, tees, valves, and unions to preserve thermal continuity and prevent condensation or heat loss.
Use pre-formed fittings or wrap foam segments, cutting to match angles. Secure seams with adhesive tape or zip ties, ensuring full coverage without compressing insulation.
For valves and unions, allow removable access panels or split covers for maintenance while maintaining a tight thermal seal.
Best practices for insulating outdoor and exposed pipes
After addressing elbows, tees, valves, and unions, attention turns to outdoor and otherwise exposed copper piping, where proper insulation protects against freezing, condensation, and heat loss.
Use UV-resistant foam or closed-cell elastomeric insulation, seal seams with waterproof tape or mastic, add protective PVC or metal jacketing for mechanical damage, and slope runs to prevent water pooling.
Inspect and replace deteriorated sections annually.
Insulating Copper Pipes in Specific Locations
When insulating copper pipes, location-specific techniques address unique challenges and performance goals.
Confined spaces like interior walls and crawlspaces require compact, flexible materials and careful sealing, while basements and attics focus on condensation control and freeze prevention.
Outdoor and exposed piping needs weatherproofing and UV-resistant coverings, with different approaches for hot water versus cold water lines to manage heat retention and moisture.
Interior walls and crawlspaces: techniques for confined spaces
Accessing and insulating copper pipes inside interior walls and crawlspaces requires techniques adapted to tight, obstructed areas where full, continuous coverage is difficult.
Use split foam sleeves, sectional wraps, or flexible closed-cell foam strips cut to fit. Seal joints with foil tape or mastic.
Prioritize accessible hot spots, maintain ventilation, avoid compressing insulation, and document locations for future maintenance or upgrades.
Basements and attics: preventing condensation and freezing
Why are basements and attics particularly vulnerable to condensation and freezing on copper pipes?
Moist, cool basements and drafty, uninsulated attics create temperature differentials causing condensation and freeze risk.
Insulation with closed-cell foam or rubber sleeves, proper vapor barriers, sealing air leaks, and maintaining minimal heat or ventilation reduce moisture accumulation and prevent freezing.
Position insulation to allow access for inspections and avoid trapped dampness.
Outdoor and exposed piping: weatherproofing and UV protection
Many outdoor and otherwise exposed copper pipes face combined risks from sunlight, rain, wind, and temperature swings that accelerate corrosion, degrade insulation, and increase freeze or heat stress.
Weatherproofing requires UV-resistant foam or rubber sleeves, sealed joints with waterproof tape or mastic, and protective conduit or flashing.
Periodic inspections and quick repairs prevent deterioration; paint or wrap adds UV protection and extends service life.
Insulating hot water lines vs. cold water lines
Insulating hot and cold copper lines requires different materials and priorities because each serves opposite thermal goals: retaining heat for hot water and preventing heat gain and condensation for cold water.
Hot lines use thicker closed-cell foam or fiberglass with vapor barriers to reduce heat loss.
Cold lines need insulation with continuous vapor barriers and possibly insulation sleeves to prevent sweating and mold in humid spaces.
Common Problems and How to Fix Them
Common issues include condensation and trapped moisture, which can lead to corrosion or mold if not addressed.
Indicators of insufficient insulation—such as frost buildup, heat loss, or fluctuating pipe temperatures—signal the need for added or improved coverage.
Damaged or worn insulation should be repaired or replaced promptly by cutting out compromised sections and installing properly fitted, sealed replacements.
Dealing with condensation and trapped moisture
Condensation and trapped moisture can undermine pipe insulation by promoting corrosion, mold growth, and reduced thermal performance.
Addressing this requires selecting closed-cell or vapor-barrier insulation, ensuring tight seams and sealed joints with foil tape, and providing adequate vapor barriers where pipes pass through walls.
Inspect for existing dampness, dry affected areas, replace compromised insulation, and allow ventilation to prevent recurrence.
Signs of insufficient insulation and remedies
Signs that copper pipe insulation is inadequate are often subtle at first but become clear through specific physical and performance indicators.
Cold spots, frost buildup, visible bare metal, and fluctuating water temperatures indicate heat loss. Increased energy bills and occasional noise from thermal contraction also signal problems.
Remedies include adding proper insulation thickness, sealing gaps with tape or foam, and improving ambient airflow to reduce condensation.
Repairing damaged insulation and replacing worn sections
Inspect damaged insulation promptly to prevent further heat loss, moisture intrusion, and corrosion of the underlying copper.
Assess extent, remove compromised sections, and dry the pipe.
Measure and cut replacement foam or fiberglass to fit, securing seams with weatherproof tape or adhesive.
For joints and bends use pre-formed pieces or sealant.
Recheck periodically and replace degraded material to maintain thermal protection.
Energy Savings, Cost Estimates, and ROI
Estimating energy savings from insulating copper pipe typically shows measurable heat-loss reductions and modest annual cost savings that vary by pipe length, water temperature, and climate.
A clear cost comparison contrasts low-cost DIY materials and time with higher labor and material expenses for professional installation.
Guidance on when to hire a plumber or insulation contractor centers on complex piping runs, exposed mains, safety concerns, or when certified work is required for warranties or local codes.
Typical heat loss reduction and estimated savings
Typical heat loss from uninsulated copper hot-water pipes ranges from about 10 to 25 percent of a water heater’s delivered heat, depending on pipe length, water temperature, and ambient conditions; adding 3/8–1/2 inch foam insulation typically cuts that loss by 40–70 percent, while thicker or higher-R-value wraps can reach 70–90 percent.
Annual energy savings vary by usage and climate but often translate to modest fuel or electricity reductions and payback periods of one to several years for typical residential installations.
Cost breakdown for DIY vs. professional installation
When weighing DIY pipe insulation against hiring a professional, homeowners should compare upfront material and labor costs, expected energy savings, and the projected payback period. DIY typically has lower materials and no labor but longer install time; professionals charge higher labor yet often faster, warranty-backed work. Consider energy cost reduction, local labor rates, and expected ROI when choosing.
| Item | Typical Cost |
|---|---|
| DIY materials | $0.50–$3/ft |
| Professional | $5–$15/ft |
| Estimated payback | 1–5 years |
When to hire a professional plumber or insulation contractor
How much energy and money can be saved should guide the decision to hire a professional plumber or insulation contractor.
For complex or hard-to-reach copper runs, systems with recurring freeze risk, or situations where accurate heat-loss calculations and guaranteed workmanship affect payback, professional expertise often yields better long-term ROI.
Professionals provide precise load estimates, higher-quality materials and seals, warranty protection, and clearer cost-versus-savings timelines.
Maintenance and Long-Term Care
A regular inspection schedule is recommended, with attention to tears, compression points, moisture intrusion, and gaps at joints.
Guidance on cleaning, UV protection, proper fastening, and following manufacturer warranty requirements can extend insulation life.
A focused winter checklist—including spot-checking heat trace, ensuring vapor barriers are intact, and draining/isolating at-risk runs—helps prevent pipe freezing.
Routine inspection schedule and what to look for
Establishes a clear inspection cadence—monthly during freeze-prone months, quarterly in temperate seasons, and after any major weather event—to catch corrosion, loose fittings, insulation degradation, and signs of moisture intrusion early.
Inspect joints, valves, and supports for leaks or movement; surface discoloration or verdigris; compressions, gaps, or torn insulation; trapped water, mold, or odor; and confirm fasteners and adhesives remain secure.
How to prolong insulation life and warranty tips
Maintain the insulation proactively to extend its service life and protect any warranty coverage: perform regular cleaning, promptly repair tears or gaps, replace degraded sections before they compromise adjacent materials, and use compatible sealants and tapes specified by the manufacturer to avoid chemical damage.
Document maintenance, retain purchase and installation records, follow temperature and exposure limits, and contact the manufacturer before altering materials to preserve warranty validity.
Winter checklist to prevent pipe freezing
Before winter arrives, homeowners should follow a concise checklist to reduce the risk of copper pipe freezing and related damage:
- Inspect and repair insulation.
- Seal gaps and drafts.
- Drain and shut off exterior faucets.
- Maintain steady indoor temperatures.
- Open cabinet doors to warm enclosed pipes.
- Consider heat tape where needed.
- Test sump and heating systems.
- Schedule a professional inspection for vulnerable plumbing.
Safety, Building Codes, and Environmental Considerations
Attention to safety, compliance, and environmental impact is essential when insulating copper pipe.
The discussion covers choosing flame‑retardant materials and minimizing fire risk, meeting local code and permit requirements, and selecting eco‑friendly insulation with proper disposal or recycling practices.
Professionals and DIYers should verify regulations and product specifications before installation.
Fire safety and flame-retardant materials
When insulating copper pipe, selecting materials that resist ignition and limit flame spread is essential to reduce fire risk and comply with building codes.
Non-combustible or tested flame-retardant insulation—such as mineral wool, certain elastomeric foams with fire ratings, or specially treated fiberglass—should be specified for applications where code or proximity to heat sources demands it.
Installers should verify product fire ratings, maintain clearance from open flames, and avoid untested additives.
Local code requirements and permit considerations
Fire and material choices influence the regulatory path for insulating copper pipe, since codes often tie permitted materials and methods to demonstrated fire performance.
Contractors and homeowners should verify local plumbing and building codes, obtain required permits for significant modifications, and follow inspection procedures.
Compliance guarantees safety, avoids fines, and preserves warranty coverage.
Confirm any licensing or certification requirements for installers before work begins.
Eco-friendly insulation options and disposal guidelines
Several sustainable insulation choices exist for copper pipe work, including mineral wool made from recycled rock or slag, cellulose wraps composed of reclaimed paper, and natural-fiber products such as sheep’s wool or hemp that offer low embodied energy and biodegradability.
Selection should consider R-value, moisture resistance, and pest tolerance.
Disposal follows local waste rules: compost natural fibers, recycle mineral wool where accepted, and avoid landfill for recyclable materials.
Quick Troubleshooting Checklist Before Cold Weather
Before temperatures drop, a concise checklist helps identify vulnerable runs and shutoff locations.
If a pipe freezes, immediate steps include closing valves, opening taps to relieve pressure, and applying gentle heat along the pipe.
During severe cold alerts, recommended preventive actions are insulating exposed sections, increasing thermostat settings slightly, and allowing slow faucet drips.
Immediate actions if a pipe freezes
If a copper pipe freezes, act quickly to reduce the risk of a burst: shut off water supply to the affected section, open nearby faucets to relieve pressure, and leave taps slightly open.
Apply gentle heat with a hairdryer or warm towels, working toward the faucet. Do not use open flames.
Inspect for leaks as ice melts and call a plumber if damage or persistent blockage appears.
Preventive steps to take during severe cold alerts
Prepare a short, prioritized checklist to follow when a severe cold alert is issued:
- Open cabinet doors and drip faucets to prevent freezing.
- Insulate exposed pipes and add heat tape where applicable.
- Seal drafts around pipe runs and garage doors.
- Locate main shutoff and have emergency heat sources ready.
The checklist emphasizes quick, high-impact steps to reduce freeze risk and minimize damage.
Conclusion
Like a careful gardener wrapping young vines against an early frost, insulating copper pipe shields fragile lifelines from winter’s bite and conserves their warmth. Each layer, choice, and seal becomes a tender hand guiding flow and preserving vigor. When materials, methods, and maintenance unite, the system thrives quietly—saving energy, money, and worry—so homes remain resilient against cold, and occupants reap the steady comfort of foresight made practical.