How to Install a Kohler Toilet: Step-by-Step Guide for DIY Success
Installing a Kohler toilet is a straightforward process that a capable DIYer can complete in 1–3 hours. Start by shutting off and draining the water supply, then remove the old toilet. Inspect the flange and select the appropriate wax ring or gasket. Position the new bowl over the aligned floor bolts, tightening them evenly, and attach the tank using its gasket and bolts. Connect a new fill valve and supply line, then conduct leak and flush tests to ensure everything is functioning properly. Additional instructions cover troubleshooting, model specifics, and maintenance tips.
Quick overview of installing a Kohler toilet
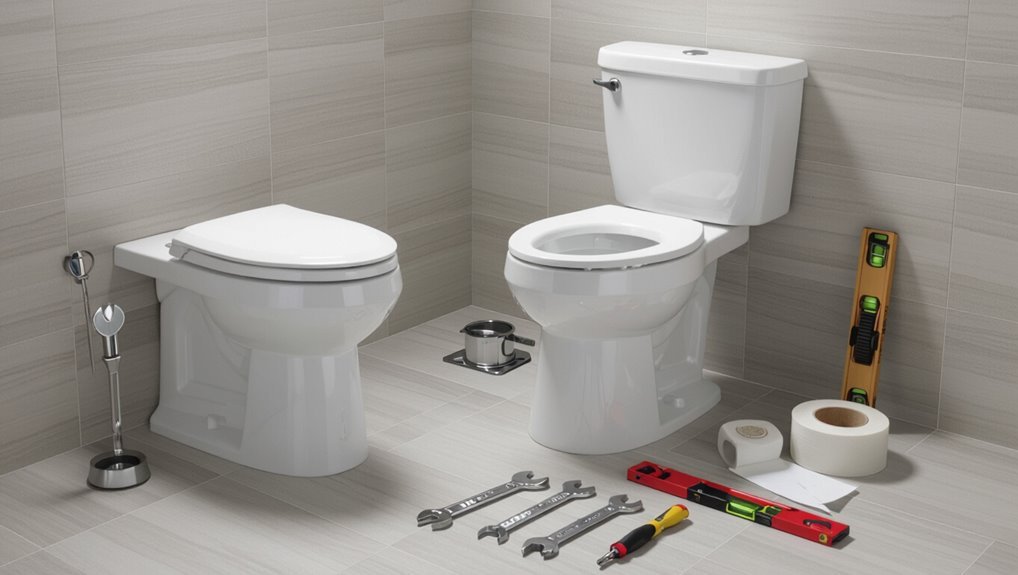
This guide is designed for a homeowner or DIYer with basic plumbing experience and standard tools, though complex jobs may require a licensed plumber.
It estimates 1–3 hours for a straightforward replacement and outlines the main steps: shut off and drain water, remove the old toilet, set the flange and wax ring, install the bowl and tank, and test for leaks.
Readers are reminded to follow safety precautions, use proper personal protective equipment, and verify local plumbing codes and permit requirements before beginning.
Who this guide is for and required skill level
Who should tackle a Kohler toilet installation and what skills are needed?
This guide suits competent DIYers comfortable with basic plumbing tasks, tool use, and following instructions.
Readers should know how to install Kohler toilet components, shut off water, remove an old fixture, and seal connections.
Professional help is recommended for complex drains, uneven floors, or unfamiliar plumbing codes.
Time estimate and summary of main steps
Most installations take between one and three hours for a single person with standard tools and an existing flange in good condition.
The process includes removing the old toilet, inspecting and preparing the flange, installing a new wax or wax-free seal, setting and securing the bowl, connecting the tank and water supply, testing for leaks, and final cleanup.
Safety precautions and local code considerations
Wear appropriate gloves and eye protection, and shut off the water supply before beginning work to reduce risk of injury and water damage.
Observe local plumbing codes, permits, and fixture clearances.
Confirm proper flange height, trapway alignment, and wax or gasket selection.
Verify venting and drain slope.
When unsure, consult a licensed plumber or local authority to avoid violations, leaks, or safety hazards.
Tools and materials needed
A concise checklist of essential tools frames the preparation for a Kohler toilet installation.
Required materials and any model-specific replacement parts should be confirmed before beginning.
Proper selection of the Kohler toilet and verification of flange compatibility guarantee a smooth fit and reliable seal.
Tools checklist
Before beginning installation, gather the required tools and materials to secure the job proceeds smoothly and without interruption.
A concise checklist prevents delays and assures safety.
Recommended basic tools include:
- Adjustable wrench, pliers, and socket set
- Screwdrivers (flat and Phillips) and utility knife
- Level, tape measure, and plumber’s putty or silicone
- Bucket, sponge, and safety gloves
Materials and replacement parts (toilet model-specific)
Specific replacement parts and model-compatible materials must be identified to guarantee proper fit and function for a Kohler toilet installation.
Consult the toilet’s model number and Kohler’s parts diagrams to confirm the correct flange bolts, wax ring or rubber gasket, fill valve, flapper or flush valve assembly, tank-to-bowl bolts, and any specialty trim or seat hardware.
- Wax ring or gasket
- Flange bolts and caps
- Fill valve and flapper
- Tank-to-bowl bolts and seat hardware
How to choose the right Kohler toilet and flange compatibility
How should one select a Kohler toilet that aligns with existing flange dimensions and installation tools?
One should measure rough-in distance (typically 10, 12, or 14 inches), confirm flange height and condition, and match bowl mounting hole spacing.
Verify toilet model specifications for rough-in compatibility, trapway type, and wax ring or gasket requirements.
Ascertain available bolts, flange extenders, and tools suit the chosen fixture.
Preparing the bathroom and removing the old toilet
Before beginning work, the water supply is turned off and residual water is drained from the tank and bowl to prevent spills.
The supply line, caps, and the old toilet are then disconnected and removed with care to avoid damaging the flange.
Finally, the flange and surrounding subfloor are inspected and prepared for any repairs or replacement before installing the new Kohler unit.
How to shut off water and drain the tank and bowl
To begin, the water supply to the toilet must be shut off and any remaining water drained from the tank and bowl to prevent spills and make removal safe; the shutoff valve at the wall or floor is turned clockwise until tight.
Flush to empty the tank, sponge or cup residual water, and use a plunger or towel to remove bowl water.
Check for leaks before proceeding.
Removing supply line, caps, and old toilet
Begin by disconnecting the water supply line at the shutoff valve or toilet tank, then cap the valve to prevent drips; a pair of adjustable pliers or a basin wrench eases stubborn fittings.
Drain remaining water, remove tank bolts, and lift the tank.
Unscrew floor bolts, rock the bowl to break the seal, and lift the toilet.
Clean flange area.
- Disconnect
- Cap
- Unscrew
- Lift
Inspecting and preparing the flange and subfloor
Carefully examine the exposed flange and surrounding subfloor for cracks, corrosion, warping, or gaps that could compromise a wax ring seal or future anchoring.
Remove debris, old wax, and corroded screws.
Measure flange height; replace or raise with a flange extender if below finished floor.
Repair rot with plywood or epoxy, secure a stable, level surface, and confirm flange alignment with drain.
Selecting and preparing the new toilet
Before installation, the new Kohler toilet should be unpacked and all components verified against the parts list to guarantee nothing is missing or damaged.
The installer must choose the appropriate wax ring or wax-free seal based on flange condition and whether a spacer or offset is needed.
Finally, toilet height and rough-in measurements should be confirmed and adjusted as necessary to match the bathroom layout and user needs.
Inspecting box contents and parts for a Kohler toilet
A thorough inspection of the box contents confirms all parts and hardware required for a Kohler toilet installation are present and undamaged.
The installer verifies tank, bowl, seat, mounting bolts, caps, gaskets, supply line, flush valve components, and any included instructions.
Check for cracks, missing or mismatched pieces, and review parts list against inventory before beginning to confirm a smooth installation.
Choosing and installing the correct wax ring or wax-free seal
When selecting the seal, the installer evaluates flange height, floor type, and toilet model to determine whether a traditional wax ring or a wax-free gasket provides the best fit and long-term reliability.
The chosen seal is positioned on the flange or bowl, bolts aligned, and the toilet lowered evenly. Excessive rocking is avoided; a compressible wax or elastomeric gasket creates a watertight connection.
Adjusting toilet height or rough-in considerations
Several measurements guide the selection and preparation of a replacement toilet: rough-in distance, floor-to-seat height, and flange condition.
The installer verifies rough-in (typically 10, 12, or 14 inches), measures seat height for comfort and ADA needs, and inspects flange level and integrity.
Extensions, offset flanges, or different bowl styles address mismatches to guarantee proper fit, seal, and clearance.
Step-by-step installation process
The installation proceeds in a logical order beginning with positioning the bowl over the flange and aligning the mounting bolts. The bowl is then secured to the flange with specified torque, followed by tank installation—installed according to one-piece or two-piece instructions—and connection of the water supply and fill valve.
Finally, the flush mechanism, flapper or flush valve are set and tested to confirm proper operation and watertight seals.
Positioning the bowl and aligning with flange
Carefully lower the Kohler bowl onto the flange, ensuring the wax ring seats evenly and the floor bolts align with the bowl’s holes; maintain a straight vertical descent to prevent shifting the seal.
Once seated, confirm the outlet aligns with the flange opening and the bowl sits flat on the floor.
Check side-to-side positioning relative to surrounding fixtures before proceeding to the next installation task.
Securing the bowl to the flange and torque guidance
Secure the bowl by fastening the floor bolts and tightening nuts in an alternating pattern to compress the wax ring evenly and prevent ceramic stress.
Tighten until snug, avoiding over-torquing; porcelain can crack. Use a calibrated torque wrench if specified by Kohler, typically low torque (check model instructions).
Trim bolt shanks and install caps.
Verify bowl stability and level before proceeding.
Installing the tank (one-piece vs two-piece specific steps)
Install the tank according to the toilet type, since one-piece models arrive factory-sealed while two-piece units require aligning and fastening separate bowl and tank components.
For two-piece toilets, position the tank gasket, lower tank onto bowl, hand-thread bolts, then evenly tighten nuts to compress the gasket without cracking porcelain.
Verify even seating and wipe away excess sealant before proceeding.
Connecting the water supply and filling valve setup
Begin by shutting off the shutoff valve and flushing the toilet to drain the tank; place a towel in the bowl to catch residual water.
Disconnect old supply line, inspect and clean the tailpiece.
Install new filling valve per manufacturer instructions, secure with locknut, adjust height.
Attach flexible supply line, tighten fittings hand-plus-quarter turn, open shutoff slowly, check for leaks and proper fill.
Setting and testing the flush mechanism and flapper/flush valve
Next, inspect and position the flush valve assembly and flapper so they align with the tank’s overflow tube and flush valve seat.
Make certain the flapper chain has a slight slack when the flapper rests and does not bind or catch on tank hardware.
Operate the trip lever to confirm smooth lift and proper reseat.
Adjust chain length for full seal, test multiple flushes, and check for leaks.
Caulking base and final bolt cover installation
Carefully prepare the toilet base and floor perimeter for a watertight seal by ensuring the flange area is dry and free of debris before applying caulk.
Apply a continuous bead of silicone caulk around the base, smoothing with a finger or tool for uniform coverage.
Replace decorative bolt caps, snapping them over the bolts.
Wipe excess caulk and allow curing time per manufacturer instructions.
Testing and troubleshooting after installation
Upon completion of installation, inspect the base, tank, and supply connection for any visible leaks and tighten or reseal as needed.
Verify and adjust the tank water level and test flush performance to confirm a full, efficient flush without siphoning or running.
If the bowl rocks, the fill is slow, or the flush seems weak, follow targeted troubleshooting steps such as tightening bolts, clearing fill/flush components, or adjusting the fill valve and flapper.
How to check for leaks at base, tank, and supply line
Begin testing by turning on the water supply and allowing the tank to fill.
Then observe the tank-to-bowl connection, the supply line, and the toilet base for any signs of moisture or dripping.
Check around tank bolts and gasket, feel under the supply coupling for wetness, and inspect the floor flange area for seepage.
Tighten fittings slightly if small leaks appear; retest.
Adjusting water level and flush performance
Adjust the fill valve and float height to set the tank water level about 1 inch below the top of the overflow tube.
Flush several times to confirm consistent refill and observe the bowl jet action.
Fine-tune the fill valve for ideal siphon initiation and adjust any dual-flush or pressure-assist settings per model.
Recheck for silent leaks and stable water level before finishing.
Diagnosing common issues (rocking bowl, slow fill, weak flush)
Diagnosing common post-installation problems requires systematic testing of the bowl, tank, and supply components to isolate the cause of rocking bowls, slow fills, or weak flushes.
Check flange alignment and shims for stability, confirm tight bolts and a proper wax ring.
Inspect fill valve, supply line, and shutoff for flow restrictions.
Test flapper seal, flush valve, and siphon jet for blockage or improper seating.
Maintenance tips for long-term performance
Routine care preserves function and prevents damage: use nonabrasive cleaners and inspect the tank-to-bowl seal and external gaskets for signs of wear.
Replace the fill valve, flapper, or wax ring when leaks, slow refill, or persistent running occur rather than waiting for catastrophic failure.
For seasonal absences or freezing conditions, follow Kohler-recommended winterizing steps and shutoff/drain procedures to protect internal components.
Recommended cleaning and seal care
Several simple habits preserve a Kohler toilet’s finish and seals while preventing common issues.
Use mild, nonabrasive cleaners and a soft cloth or brush; avoid bleach tablets and harsh acids that degrade seals and gaskets.
Wipe exterior surfaces and base regularly to spot leaks.
Periodically remove mineral buildup around bolts and flush paths with vinegar solutions to maintain proper sealing and appearance.
When to replace fill valve, flapper, or wax ring
When should components be replaced to keep a Kohler toilet functioning reliably?
The fill valve should be replaced when filling is slow, noisy, or causes continuous run;
the flapper when leaking, warped, or failing to seal;
the wax ring when persistent leaks at the base, water damage, or wobble occur.
Routine inspection every 1–3 years prevents failures and conserves water.
Seasonal and vacancy precautions (winterizing)
After inspecting and replacing worn parts like the fill valve, flapper, or wax ring, attention turns to protecting the toilet during long absences and cold months to prevent freeze damage and mold.
Shut off and drain the water, flush to empty the tank, add non-toxic RV antifreeze to trap and bowl, insulate exposed pipes, and leave cabinet doors open for heat circulation.
Cost considerations and when to hire a pro
A basic DIY Kohler toilet installation typically costs for the fixture, wax ring, bolts, and tools.
However, professional labor and potential plumbing repairs raise the total substantially.
Homeowners should weigh the lower supply costs and time investment of DIY against the certainty and warranty of a licensed plumber.
Complex issues—old or damaged flange, corroded supply lines, gas or sewer hookups, or uncertain venting—are clear signs to hire a pro.
Typical DIY cost breakdown vs professional installation
Budget is a primary factor in deciding between a DIY Kohler toilet install and hiring a professional: typical homeowner expenses include the toilet itself ($100–$700+ depending on model), basic materials like wax ring and flange bolts ($10–$30), and tools if not already owned (sealant, wrench, possibly a torque wrench or new flange kit, $20–$100), while a plumber’s service call and labor commonly add $150–$400 or more—bringing total pro-installed costs into the $300–$1,200 range depending on complexity, parts, and regional rates.
| Item | DIY Range | Pro Range |
|---|---|---|
| Toilet | $100–$700+ | $100–$700+ |
| Materials | $10–$30 | $10–$30 |
| Tools | $0–$100 | $0–$100 |
| Labor | $0 | $150–$400+ |
| Total | $110–$830+ | $300–$1,200+ |
Signs you should hire a plumber instead of DIY
When should a homeowner call a plumber instead of attempting a DIY Kohler toilet install?
A professional is advisable for persistent leaks, damaged flange or subfloor, complex flange offsets, sewer-line problems, or nonstandard rough-ins.
Also hire a plumber if local code compliance, warranty protection, or inaccessible space requires permits or specialized tools.
Compare labor costs versus time, risk, and potential repair expenses before deciding.
Model-specific notes and resources
Common Kohler models and their unique installation steps should be checked before beginning to verify proper flange height, bolt patterns, and seat attachments.
Official Kohler manuals, parts diagrams, and how-to videos are available on the Kohler website and through authorized dealers for model-specific guidance and replacement parts.
Installers should register the product and keep receipts, photos, and installation notes to support warranty claims and future maintenance.
Common Kohler models and any special installation steps
Although many Kohler toilets share basic installation steps, specific models have unique features—such as skirted bowls, concealed trapways, or integrated mounting systems—that require model-specific attention and sometimes different tools or parts.
- Cimarron: extra flange clearance for skirted base.
- Santa Rosa: universal seat alignment required.
- Wellworth: standard trapway, straightforward bolts.
- Veil: concealed mounting needs access panels and trim removal.
Where to find Kohler manuals, replacement parts, and videos
Given the model-specific features outlined above, owners should consult manufacturer resources for accurate installation and replacement guidance.
Kohler provides manuals, parts, and videos via its website and authorized dealers.
Useful sources include:
- Kohler.com product pages (manuals & parts lists)
- Kohler Parts & Service portal
- Authorized dealer parts departments
- Kohler YouTube channel (installation and repair videos)
Warranty registration and keeping installation records
Register the toilet promptly and maintain clear installation records to preserve warranty rights and expedite any future service.
The installer should record model and serial numbers, purchase date, installer contact, and photos of installation.
Store receipts, registration confirmation, and manuals digitally and in hard copy.
Timely registration and organized documentation simplify claims, repairs, and replacement part orders under Kohler’s warranty terms.
Conclusion
Installing a Kohler toilet can be straightforward with proper preparation, the right tools, and careful steps. Homeowners report that about 60% of DIYers successfully install their own toilets without professional help, reflecting achievable results for many. Following seal, flange, and connection checks minimizes leaks and future issues. Regular maintenance extends performance. When complexity, old plumbing, or confidence gaps arise, hiring a licensed plumber guarantees code compliance and long-term reliability.