How to Install a Greywater System: Step-by-Step Guide for Beginners
A greywater system effectively recycles water from showers, sinks, and laundry for landscape irrigation, helping to conserve potable water and lower utility bills. To install one, homeowners need to evaluate their water sources, local regulations, soil conditions, and suitable plants. Options include gravity diverters, laundry-to-landscape kits, or pump-fed systems. The installation process involves diverting water outlets, adding filters, laying distribution piping, and establishing mulch basins or subsurface drip systems, along with ensuring backflow control and routine maintenance. This guide also covers costs, permits, safety practices, and troubleshooting tips for a successful setup.
What a Greywater System Is and Why Install One
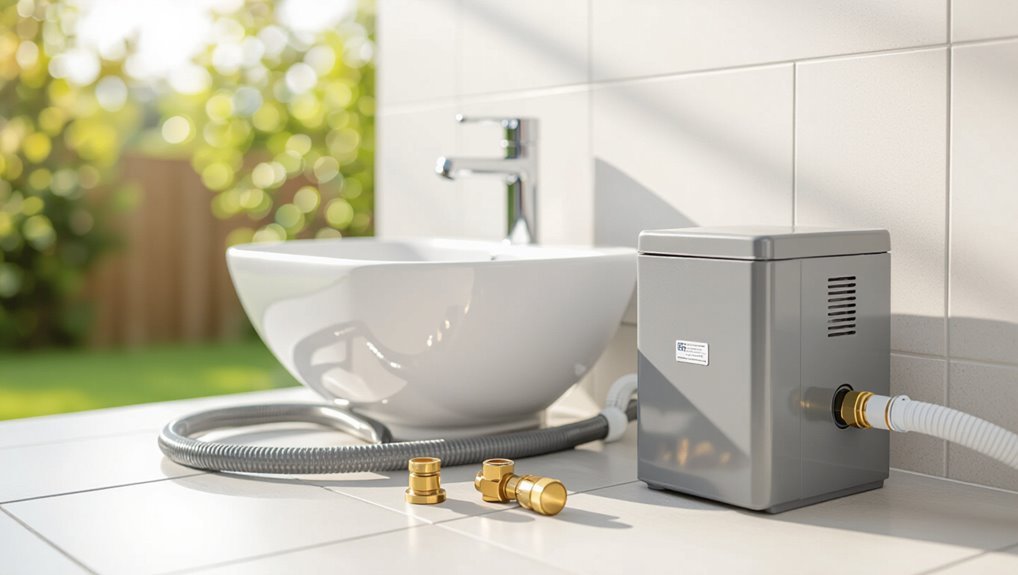
A greywater system captures household wastewater from sources like showers, sinks, and laundry for nonpotable reuse, with common types ranging from simple gravity-fed diverters to more complex filtered and pump-driven setups.
Reusing greywater can reduce potable water demand, lower utility bills, and lessen wastewater loads, but it also carries limits such as potential health risks, treatment needs, and restrictions in some jurisdictions.
Guidance on legal requirements and situations when greywater should not be used—for example with hazardous chemicals or on edible crops—should be reviewed before installation.
Definition and common types of domestic greywater systems
Greywater refers to household wastewater from baths, showers, sinks, and laundry that excludes toilet waste, and it can be collected and reused to reduce potable water use and lessen strain on septic or municipal systems.
Domestic systems include simple diversion systems, laundry-to-landscape setups, and pumped filtration units.
Guidance on how to install greywater systems varies by type, site conditions, and local regulations; professional consultation is advised.
Environmental and financial benefits of greywater reuse
Conservation of water and reduction of wastewater are primary motivations for installing household greywater systems, which redirect gently used water from showers, sinks, and laundry to landscape irrigation or subsurface reuse.
Benefits include lower potable water demand, reduced sewage loads, and decreased energy for treatment. Homeowners can realize utility bill savings, reduced landscaping costs, and enhanced garden resilience during dry periods, supporting sustainability goals.
Limitations, legal considerations, and when not to use greywater
While the benefits of greywater reuse are significant, limitations and regulatory constraints shape where and how systems can be used.
Local codes may restrict discharge, treatment, or crop irrigation; permits and inspection can be required.
Unsuitable for toilet wastewater, homes with septic sensitivities, or uses involving edible crops without treatment.
Health risks, soil buildup, and complex maintenance can make greywater inappropriate in some settings.
Assessing Your Home and Needs Before Installation
Before installing a greywater system, the homeowner should inventory potential water sources—sinks, showers, laundry, and dishwashers—and define reuse goals and daily demand.
A site survey evaluating soil type, garden layout, and drainage constraints will determine suitable distribution methods and system size.
Finally, a concise checklist of local codes, permits, and health regulations must be consulted to guarantee compliance.
Evaluating water sources: sinks, showers, laundry, and dishwashers
A practical assessment of household water flows identifies which fixtures produce suitable greywater and in what volumes. Sinks, showers, laundries, and dishwashers each present different quality, quantity, and timing characteristics that affect system design.
The evaluator catalogs contaminant types (soap, oil, food), peak flow timing, and access points, noting cold vs. hot loads, detergent types, and diversion feasibility to inform plumbing layout and prefiltration needs.
Determining household water demand and reuse goals
Having cataloged fixture outputs and contaminant profiles, the next step is to quantify household water needs and set reuse objectives that align with those supply characteristics.
Calculate daily volumes from each source, match seasonal irrigation or toilet-flush demands, prioritize uses by water quality, and determine storage and treatment requirements.
Establish achievable goals: percentage of reuse, maintenance capacity, and budget constraints.
Site survey: soil type, garden layout, and drainage constraints
Site assessment begins with mapping soil type, garden layout, and existing drainage to determine where greywater can be safely applied and stored.
The survey records soil texture, infiltration rates, slope, root zones, plant tolerance, and impermeable surfaces.
Identify low-permeability areas, potential pooling, and runoff paths.
Pinpoint suitable irrigation zones and diversion points, minimizing risks to foundations, storm drains, and sensitive vegetation.
Local codes, permits, and health regulations checklist
Before installing a greywater system, homeowners must review local codes, permit requirements, and public health regulations to guarantee compliance and avoid fines or forced removal.
Verify allowable system types, setback distances from wells and property lines, water quality and treatment standards, required signage, inspection schedules, and connection restrictions.
Confirm contractor licensing, application processes, fees, and documentation needed for approval and final inspection.
Choosing the Right Greywater System for Beginners
Beginners are advised to compare simple branch drain and laundry-to-landscape setups against more complex diverted, pump-fed, or treatment systems to match household goals and skill level.
A practical components checklist — filters, diverters, pumps, storage, and required signage — helps clarify what each option requires.
Cost and likely ROI estimates should be reviewed to weigh upfront expense against long-term water savings.
Simple branch drain and laundry-to-landscape systems overview
Simple branch drain and laundry-to-landscape systems offer straightforward, low-maintenance ways to redirect household greywater for subsurface irrigation.
These gravity-fed setups separate mild wastewater, channeling it through simple piping and distribution lines to mulch basins or drip trenches.
They require minimal modification, cost, and technical skill, suit drought-tolerant plantings, and reduce potable water use while adhering to local reuse guidelines.
Basic diverted systems vs. pump-fed and treatment systems
When choosing a greywater approach, homeowners must weigh diverted (gravity) systems against pump-fed and treatment-equipped options based on site constraints, plant needs, and maintenance willingness. Diverted systems are simpler and low-cost; pump-fed systems reach distant beds; treatment systems enable broader reuse but require more upkeep and expense.
| Type | Pros | Cons |
|---|---|---|
| Diverted | Simple, low cost | Limited reach |
| Pump-fed | Flexible distribution | More parts |
| Treatment | Safer reuse | Higher maintenance |
Components checklist: filters, diverters, pumps, storage, and signage
A clear checklist of core components — filters, diverters, pumps, storage, and signage — helps homeowners match system capabilities to site needs and maintenance capacity.
Components should be specified by capacity, materials, and service intervals; compatibility with local codes is essential.
Consider ease of access for cleaning and fail-safe backups to prevent contamination.
- Filter type and micron rating
- Diverter location and valve type
- Pump capacity and power source
- Storage sizing and overflow controls
Cost comparison and ROI estimates
Estimating costs and return on investment (ROI) for greywater systems requires comparing upfront expenses, ongoing operating costs, and anticipated savings over time.
Initial costs vary by system complexity: simple diverters are low-cost, laundry-to-landscape moderate, and engineered systems highest.
Factor installation, permits, maintenance, and potential water bill reductions.
Calculate payback period and consider incentives, local rates, and longevity to choose cost-effective options.
Tools, Materials, and Safety Precautions Needed
A clear list of essential tools and materials—pipes, fittings, valves, filters, pump (if required), basic hand tools, and appropriate sealants—frames the practical side of a DIY greywater install.
The discussion also covers personal protective equipment and procedures for safe handling and temporary storage of greywater to minimize contamination risks.
Guidance is provided on which tasks (major plumbing alterations, electrical work for pumps or timers) should be referred to a licensed plumber or electrician.
Essential tools and materials for a DIY install
Several key tools, quality materials, and strict safety precautions are required to install a DIY greywater system correctly.
The installer needs durable piping, reliable fittings, flow controls, and basic plumbing tools. Proper materials and correct sizing prevent leaks and contamination; planning reduces revisions.
- PVC or flexible irrigation pipe
- Solvent cement and appropriate fittings
- Flow diverter or valve
- Simple plumbing toolset (saw, wrench, tape)
Personal protective equipment and safe handling of greywater
Proper personal protective equipment (PPE) and strict handling procedures minimize health risks when installing or maintaining a greywater system.
Gloves, eye protection, and waterproof boots prevent contamination. Use masks when aerosolization is possible.
Disinfectant, handwashing stations, and secure containers reduce pathogen spread. Dispose of filters and waste per local regulations.
Inspect fittings for leaks; clean spills immediately to protect occupants and the environment.
When to call a professional plumber or electrician
Maintaining PPE and following strict handling procedures reduces many risks, but some greywater tasks exceed DIY scope and warrant a licensed plumber or electrician.
Engage a professional for mainline tie-ins, municipal code compliance, complex rerouting, pump or electrical timer installation, or any gas-related work.
If leaks, backflow risks, or permit questions arise, stop and consult a licensed contractor to guarantee safety and legal compliance.
Step-by-Step Installation: Laundry-to-Landscape (Beginner-Friendly)
This section outlines a practical, beginner-friendly sequence for installing a laundry-to-landscape greywater system, beginning with planning the layout and marking diverter and discharge points.
It then covers installing the laundry machine outlet or diverter valve, adding inline filters and simple distribution piping, and creating mulch basins, irrigation trenches, or drip lines to receive the flow.
Finally, it emphasizes backflow prevention and clear overflow routing to protect potable water and prevent standing water.
Planning the layout and locating diverter and discharge points
Before laying pipe or cutting into plumbing, a clear plan must define the laundry-to-landscape system’s route, the diverter’s placement, and the discharge locations relative to slopes, plantings, and property lines.
The planner maps shortest, gravity-assisted runs, locates safe access points, avoids roots and foundations, guarantees setbacks from wells and neighbors, and designates mulch basins or soakaways sized for anticipated flow.
Installing the laundry machine outlet or diverter valve
Begin by shutting off the washing machine’s water supply and unplugging the appliance to guarantee safety.
Then locate the drain hose and existing standpipe or utility sink connection where the diverter will be installed.
Measure and select a compatible laundry outlet/diverter valve.
Cut or adapt the drain connection per manufacturer instructions, secure fittings with clamps or solvent welds, and mount the valve accessible for manual switching.
Installing inline filters and simple distribution piping
Installers should fit inline filters and lay simple distribution piping so greywater is cleanly routed from the laundry diverter to landscape outlets with minimal clogging risk.
Choose a washable sediment filter sized for typical laundry flow, install it accessible for maintenance, then run 3/4–1″ PVC or flexible tubing with gentle slopes and accessible cleanouts.
Secure joints, pressure-test, and label pipes for greywater use.
Setting up mulch basins, irrigation trenches, or drip lines
Choose the distribution method—mulch basins, shallow irrigation trenches, or drip lines—based on soil type, plant water needs, and available space.
Then mark outlet locations and route the filtered laundry greywater to each point with gentle grade and accessible cleanouts.
Excavate basins or trenches, add coarse aggregate where needed, lay perforated or drip tubing, backfill with mulch or soil, and test flow, adjusting emitters for even coverage.
Backflow prevention and overflow routing
Prevent cross-connection by installing a dedicated air gap or an approved backflow prevention device between the household plumbing and the laundry-to-landscape line, and route overflow away from foundations, walkways, and storm drains.
Use visible, accessible overflow outlets directed to mulched basins or vegetated areas.
Secure piping to prevent siphonage, label valves, and follow local codes for device selection, installation height, and inspection access.
Initial system testing and troubleshooting common issues
Begin testing by running a full laundry cycle using cold rinse water while observing each component for correct operation.
Check valves, diverter, filters, and distribution lines for leaks, clogs, and proper flow.
Verify irrigation emitters receive balanced supply and no backflow occurs.
If low pressure, clear blockages; if leaks appear, tighten fittings or replace seals.
Record results and repeat until stable.
Step-by-Step Installation: Simple Branch Drain for Showers and Sinks
The installer begins by choosing which shower and sink fixtures will be routed to the greywater branch while clearly isolating any blackwater sources such as toilets or kitchen sinks.
A branching manifold with accessible filters is fitted near the collection point to simplify maintenance and prevent solids from entering irrigation lines.
Decisions about routing to subsurface or surface irrigation are made before commissioning, when flow rates are measured and system operation is confirmed.
Selecting fixtures to connect and isolating blackwater sources
Choosing which fixtures to include in a simple branch greywater system requires balancing water quality, seasonal availability, and plumbing access.
Priority is given to showers and bathroom sinks; laundry may be included if detergents are plant-safe.
Kitchen sinks, toilets, and diaper-area drains must be excluded as blackwater.
Isolation uses dedicated diverter valves and clear labeling to prevent cross-connection and maintenance errors.
Installing a branching manifold and easy-access filters
Installers fit a compact branching manifold near the collection point to route greywater from selected showers and sinks into separate distribution and maintenance lines.
They install easy-access inline filters and a removable debris trap for routine cleaning, label each branch, and include shutoff valves for isolation.
Connections are sloped, solvent-welded or threaded per code, and accessible for inspection and servicing without disturbing fixtures.
Routing to subsurface irrigation vs. surface irrigation
With the manifold and serviceable filters in place, attention turns to where the treated greywater will be delivered: subsurface irrigation lines that keep moisture below the root zone, or surface irrigation that applies water openly to beds and containers.
Subsurface reduces contact, evaporation, and odors but needs trenching and root-friendly spacing.
Surface is simpler, visible, and suited to mulched beds, but risks exposure and runoff; choose per site constraints.
Commissioning and confirming appropriate flow rates
Begin commissioning by running each source at typical use rates while measuring flow to verify the system matches design assumptions.
Record flow rates, pressures, and cycle durations for showers and sinks.
Compare results to filter, splitter, and irrigation emitter specifications.
Adjust diverter, restrictors, or storage sizing as needed.
Re-test after adjustments and document final settings for maintenance and regulatory compliance.
Maintaining Your Greywater System
Maintaining a greywater system requires a clear routine for filter cleaning and scheduled checks to keep flow and water quality consistent.
Seasonal tasks such as winterizing lines and reactivating them in spring help prevent freeze damage and biological buildup.
Regular monitoring of water quality and plant responses, along with prompt troubleshooting of odors, clogs, or system failures, preserves performance and safety.
Routine maintenance schedule and filter cleaning
Because regular upkeep preserves system performance and prevents costly repairs, a clear routine schedule is essential for any greywater installation.
Inspections should be frequent, filters cleaned, and records kept to catch buildup or odors early. Replace worn parts per manufacturer guidance and adjust frequency based on usage and water quality.
- Weekly visual check
- Monthly filter rinse
- Quarterly deep clean
- Annual component review
Seasonal tasks: winterizing and reactivation
After outlining routine checks and filter care, seasonal adjustments protect the system from freeze damage and restore full function when temperatures rise.
The owner drains external lines, insulates exposed pipes and diverts flows to sewer or storage before deep freeze.
In spring, flushed lines, inspected valves and tested pumps guarantee safe reactivation; any damaged components are repaired or replaced prior to resuming normal operation.
Monitoring water quality and plant response
Monitor water quality and plant response regularly to guarantee the greywater system remains safe and effective.
Inspect soil moisture, odorless effluent, and vegetation health weekly at first, then monthly.
Test salinity and pH seasonally or after product changes.
Note any leaf burn, stunted growth, or soil crusting.
Record observations and adjust detergent use, irrigation frequency, or distribution to protect plants and soil.
Troubleshooting foul odors, clogs, and system failures
Once regular checks of water quality and plant health are in place, attention should turn to diagnosing and resolving foul odors, clogs, and system failures that can compromise performance.
Inspect filters, drains, and pumps for blockages or damage. Flush lines, remove solids, and replace worn seals.
Correct soap or chemical inputs, adjust flow rates, and consult manuals or a professional if persistent problems or electrical faults occur.
Health, Safety, and Best Practices for Garden Use
Guidance on garden use of greywater covers choosing salt- and detergent-tolerant ornamentals and irrigation methods that keep water at or below the soil surface.
It emphasizes avoiding contact with edible crops by maintaining recommended setback distances and directing flows to non-food planting zones.
Practical steps for reducing pathogen risk—such as simple disinfection options, regular system maintenance, and minimizing standing water—are outlined.
Safe plants and irrigation methods for greywater
Several categories of plants are well suited to greywater irrigation because they tolerate occasional salt, elevated nutrients, and variable moisture: deep-rooted fruit trees, native shrubs, ornamental grasses, and many drought-tolerant perennials.
Use subsurface drip or mulched basin methods to minimize human contact and odor, avoid overhead sprays, monitor soil salinity, rotate zones, and flush systems periodically to prevent buildup and maintain plant health.
Avoiding edible crop contamination and best application distances
When applying greywater in gardens, maintaining clear separation between irrigation zones for edible crops and those for ornamentals or trees reduces the risk of pathogen or chemical contamination of food.
Apply greywater only to nonedible root zones or ornamentals; keep a buffer of at least 1–3 meters from edible beds.
Avoid overhead sprays, guarantee soil infiltration, and prevent runoff into food-growing areas.
Disinfecting options and minimizing pathogen risks
Consider disinfecting greywater to reduce pathogen risks before soil application; options include simple household treatments and more robust system-level methods.
Treatment choices—settling, filtration, chlorination, UV, and heat—reduce microbes to varying degrees. Match method to water quality, crop type, and exposure risk.
Regular maintenance, testing, and avoiding use on edible surfaces minimize health hazards; follow local regulations and expert guidance.
Cost Breakdown, Incentives, and Long-Term Savings
A clear cost overview helps homeowners weigh upfront expenses against future savings, with typical installations ranging from low-cost DIY setups to higher-priced licensed systems depending on materials and complexity.
Available rebates, permits, and incentives vary by jurisdiction and project type, and should be checked before committing to a design.
Estimating expected water savings and calculating the payback period completes the financial picture and guides the choice of budget versus premium options.
Typical installation and material costs with budget options
Cost estimates for greywater systems vary widely based on system complexity, household size, and regional labor rates, but typical residential installations range from simple DIY diverter kits costing $150–$600 to professionally designed subsurface irrigation or treatment systems priced between $2,000 and $10,000 or more.
Additional expenses include piping, pumps, filters, backflow prevention, and labor.
Budget options emphasize DIY kits, repurposed materials, and phased upgrades to reduce upfront costs.
Available rebates, permits, and incentives by project type
Many jurisdictions offer rebates, permit-fee waivers, or tax incentives for greywater projects, but eligibility and amounts depend on system type—simple laundry-to-landscape diverters, subsurface irrigation setups, and advanced treatment systems each qualify under different programs.
Homeowners should check local utility, county, and state listings for program specifics, required inspections, documentation, and application deadlines to maximize available financial support.
Estimating water savings and payback period
When evaluating a greywater system, homeowners should quantify expected water savings and compute a realistic payback period by comparing installation and maintenance costs against reduced potable water bills and any available incentives.
Calculate annual reclaimed volume from fixtures, multiply by local water rates, subtract annual operating expenses, then divide upfront net cost by net annual savings.
Include permit fees and estimated system lifespan.
Common Beginner Mistakes and How to Avoid Them
Beginners often misidentify water sources, risking hazardous cross-connections with potable lines.
They also undersize filters or piping, which leads to frequent clogs and system failure.
Failure to schedule maintenance or confirm local permits further undermines performance and legal compliance.
Misidentifying water sources and creating cross-connections
A surprising number of installation errors stem from misidentifying water sources and accidentally creating cross-connections between potable and greywater lines.
Technicians must clearly label supply lines, verify fixtures feeding greywater, and install backflow preventers.
Failure risks contamination, regulatory violations, and health hazards.
Simple mapping, pressure testing, and adherence to codes prevent improper ties between drinking-water and reuse systems.
Undersizing filters or pipes and resulting clogs
Misidentified connections and inadequate backflow protection often reveal another common error: undersized filters and piping that quickly clog under real-world loads.
Install appropriately rated filters and larger-diameter pipes to handle peak flow and particulate loads.
Design for service access, use removable cartridges or screens, and include cleanouts.
Proper sizing prevents backups, reduces failure risk, and maintains system performance without frequent interruptions.
Neglecting maintenance and legal compliance
Overlooking routine maintenance and local regulations undermines even well-designed greywater systems, leading to health risks, fines, or system failure.
Owners who skip inspections, filter changes, and documentation risk blockages, contamination, and enforcement actions.
Regular maintenance schedules, clear records, and compliance checks prevent degradation.
Consulting local codes before installation and scheduling periodic professional reviews guarantees longevity, safety, and lawful operation.
Example Layouts and Case Studies
The section presents three practical examples: a small urban yard laundry-to-landscape layout, a suburban home combining shower and laundry reuse, and a pair of before-and-after case studies.
Each example includes a schematic, site constraints, and key performance notes.
Lessons learned and measurable outcomes are summarized to inform reader decisions.
Small urban yard laundry-to-landscape example
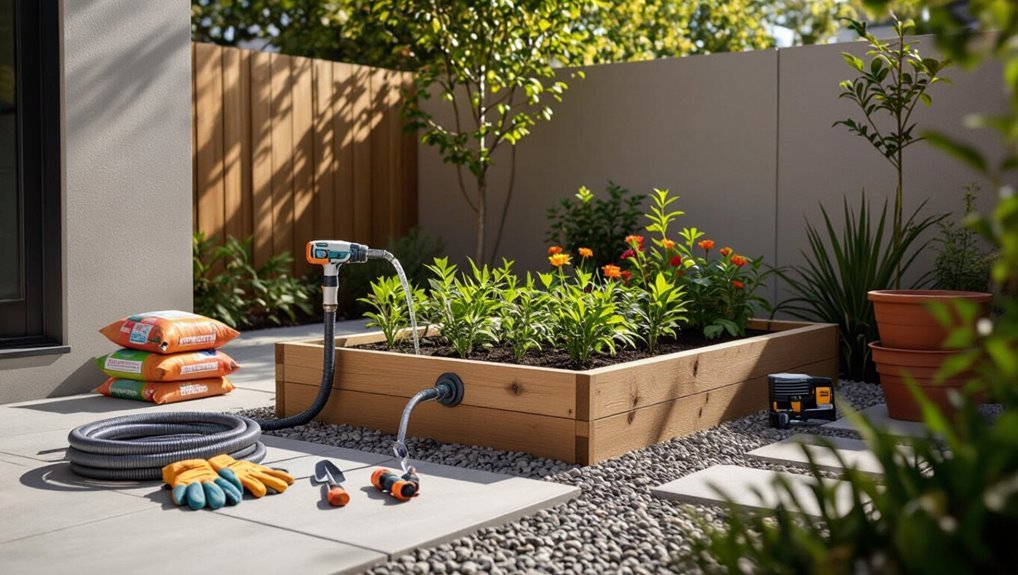
When space is limited but water savings are a priority, a laundry-to-landscape greywater system can efficiently route washing machine effluent to a compact mulched basin or a series of planter beds.
In an urban yard, short piping, a simple diverter valve, and coarse filtration protect soil and plants.
Suitable plants, seasonal scheduling, and local code compliance guarantee safe, low-maintenance reuse.
Suburban home with combined shower and laundry reuse schematic
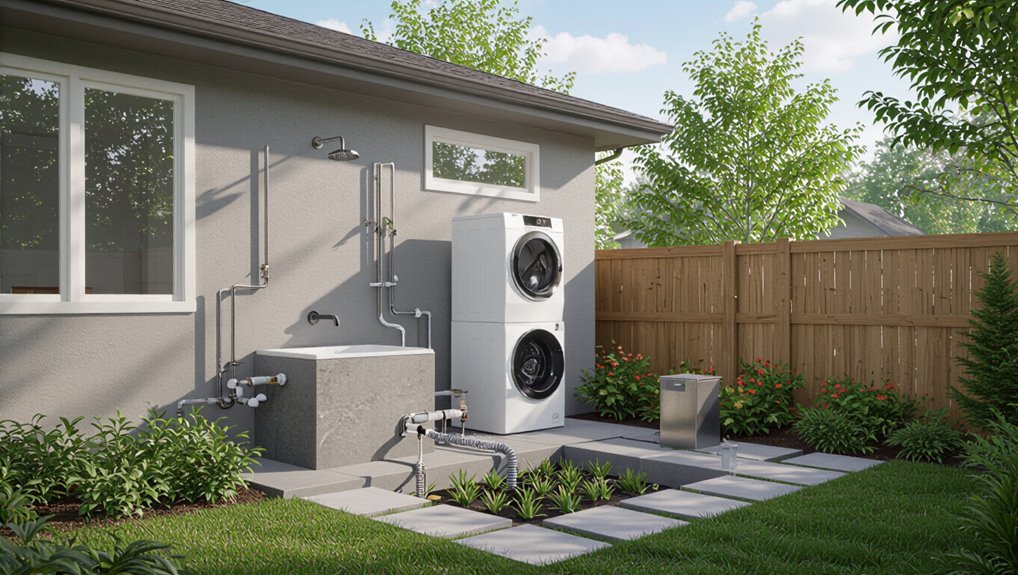
Moving from a compact laundry-to-landscape setup, a suburban home can expand reuse by combining shower and washing machine greywater into a coordinated distribution network that serves larger mulched basins, ornamental beds, or a downslope orchard.
The schematic shows dedicated diverter valves, simple filter and surge tank, gravity-fed or low-pressure drip lines, seasonal routing, and clear signage to prevent cross-connection with potable systems.
Before-and-after performance notes and lessons learned
Start with measured metrics to compare water savings, system reliability, and plant health before and after installation; typical case studies report 40–70% reductions in household wastewater routed to sewers, stable soil moisture in mulched basins, and few operational failures when simple filters and diversion protocols are followed.
Post-installation notes emphasize routine inspections, seasonal adjustments, occasional clogging in lint-prone lines, and modest maintenance improving longevity and performance.
Resources, Checklists, and Next Steps
The article now presents practical resources to guide implementation, including a step-by-step printable installation checklist for on-site use.
It points readers to where local professionals, permit offices, and regulatory details can be found.
Recommended beginner-friendly suppliers and product suggestions are also listed to simplify sourcing.
Step-by-step printable installation checklist
A concise, step-by-step printable installation checklist helps guarantee each phase of a greywater system—planning, permitting, materials procurement, plumbing, filtration, testing, and maintenance setup—is completed in the correct order and documented for compliance and future reference.
The checklist should be clear, dated, and assignable, enabling consistent execution and recordkeeping while reducing errors and oversights during installation and initial operation.
- Site assessment completed
- Materials procured
- Plumbing and filtration installed
- Tests and maintenance scheduled
Where to find local professionals, permits, and detailed regulations
Locate licensed contractors, permitting offices, and regulatory guidance through municipal websites, state environmental agencies, professional trade associations, and vetted contractor directories to guarantee compliance with local codes and access to qualified installers.
Verify licensing, insurance, and references; request permit checklists and applicable standards; consult local health departments for water-quality rules; and document permit approvals, inspection schedules, and any required maintenance or reporting obligations before beginning installation.
Recommended suppliers and products for beginners
Several reliable suppliers and starter kits suit homeowners new to greywater systems, offering clear instructions and components sized for typical laundry-to-landscape or simple diversion setups.
Trusted brands, local plumbing stores, and irrigation specialists provide modular kits, filters, and diverter valves. Compare warranty, certification, and support.
Recommended starter items include:
- Laundry-to-landscape kit
- Filter and sediment trap
- Diverter valve assembly
- Simple pump and timer kit
Conclusion
A homeowner recalled rescuing a wilting rosebush with a single bucket of greywater, a small act that grew into a flourishing drought-tolerant border. That modest rescue illustrates how simple greywater systems multiply impact: diverting one laundry load can provide roughly 20–50 liters for landscape use, turning routine chores into conservation. For beginners, this guide shows that measured, compliant steps transform everyday water into lasting garden resilience and meaningful household savings.