How to Install Elkay Sink Mounting Clips: Step-by-Step Guide for a Secure Fit
To install Elkay sink mounting clips effectively, follow this step-by-step guide to ensure a secure fit for your undermount or drop-in sink. Start by confirming that your clips are compatible with both your Elkay sink model and the countertop thickness. Clean the mating surfaces thoroughly, apply a silicone bead for a watertight seal, and position the sink carefully. Fit the clips evenly and tighten them without overtightening to avoid damage. Once sealed, allow the silicone to cure, and then check for leaks and ensure the sink is level. The guide also includes details on clip types, troubleshooting tips, maintenance advice, and cost comparisons to assist you further.
Overview of Elkay Sink Mounting Clips and Their Purpose
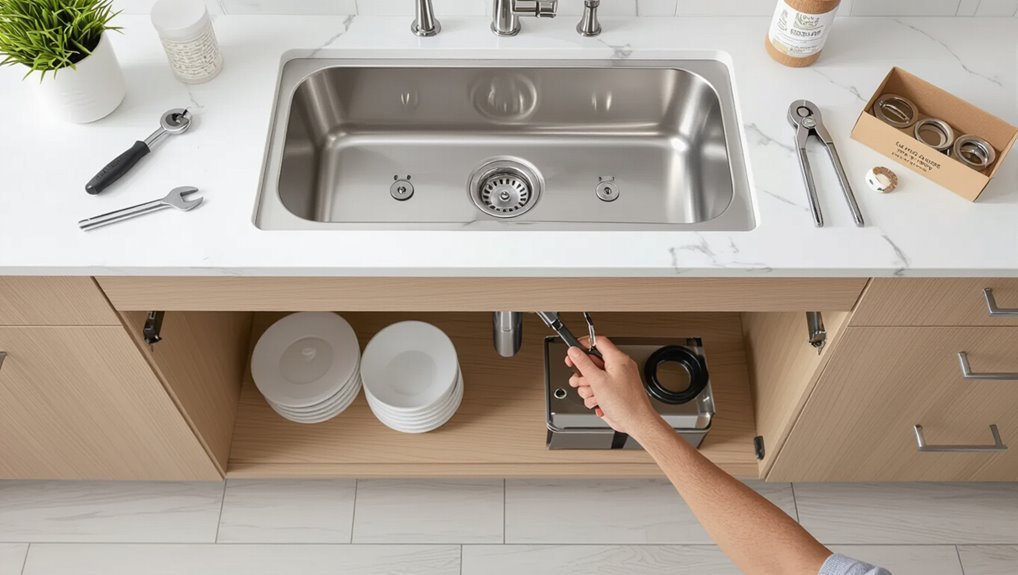
Elkay sink mounting clips are metal fasteners designed to secure undermount and drop-in sinks to countertops, providing stability and leak prevention.
Different clip styles and sizes correspond to specific Elkay sink models and countertop materials, so selecting compatible clips is essential.
Basic tools and materials—screwdriver or drill, mounting screws, sealant, and safety gear—are typically required for installation.
What Elkay mounting clips are and why they matter
Sink mounting clips are small metal or plastic fasteners designed to secure an undermount or drop-in sink to the countertop, providing stability and preventing movement or gaps over time.
Elkay mounting clips specifically match Elkay sink edges and countertop interfaces, ensuring proper load distribution, leak prevention, and longevity.
Understanding their role is essential before learning how to install elkay sink mounting clips safely and effectively.
Types of Elkay clips compatible with different sink models
Several distinct clip styles are available to match different undermount and drop-in bowl configurations and countertop materials.
Elkay offers standard spring clips for metal sinks, adjustable bracket clips for varying rim thicknesses, and epoxy-backed or adhesive clips for stone countertops.
Specialty low-profile clips suit thin-rim undermounts while heavy-duty clamps support larger, cast-iron or fireclay models.
Selection depends on sink type and countertop.
Tools and materials required at a glance
A concise kit of tools and materials guarantees a safe, secure installation of Elkay mounting clips without unnecessary trips to the hardware store.
The installer should prepare durable clips matched to the sink, fasteners, and sealant. Essential items enable accurate alignment, firm attachment, and leak prevention.
- Elkay mounting clips and screws
- Screwdriver or drill with bits
- Silicone sealant
- Measuring tape and pencil
How to Confirm Compatibility with Your Sink and Countertop
Before beginning installation, the installer should identify the exact Elkay sink model and corresponding clip type to guarantee a proper fit.
They must measure countertop thickness and any required lip dimensions to match the clip specifications.
If measurements or model differences indicate incompatibility, the installer should determine whether additional hardware or a retrofit kit is necessary.
Identifying your Elkay sink model and clip type
When confirming compatibility, the installer should first locate the sink model number—usually stamped on the underside of the basin or on the original paperwork—and compare it to Elkay’s parts charts to determine which clip style was supplied for that model.
Next, inspect existing clips or mounting holes for shape, screw type, and orientation. Then, order exact replacement clips or approved alternatives from Elkay.
Measuring countertop thickness and lip requirements
Measuring countertop thickness and verifying the lip or overhang are essential steps to guarantee Elkay sink mounting clips will engage properly and hold the sink securely.
Measure thickness at multiple points with calipers or a tape measure; record max and min.
Confirm the countertop edge provides the required lip depth and clearance per Elkay specifications.
Compare measurements to clip engagement range before installation.
When to use additional hardware or retrofit kits
If the sink model or countertop profile falls outside Elkay’s standard clip range, additional hardware or a retrofit kit becomes necessary to guarantee a secure, code-compliant installation.
Verify sink flange shape, countertop thickness, and cutout edge condition.
Choose kits designed for undermount or drop-in variations and for stone, laminate, or solid-surface counters.
Confirm load ratings and manufacturer compatibility before purchase and installation.
Preparing for Installation
Before beginning, attention should be given to safety and to arranging a well-lit, stable workspace with tools and protective gear within reach.
The sink, mounting clips, and mating sealant surfaces should be inspected for damage, cleanliness, and correct parts.
The sink area must be cleared and supported to prevent movement or stress during clip installation.
Safety precautions and workspace setup
Clear the work area and verify that tools, clips, sealant, and sink are within reach to minimize movement during installation.
Wear safety glasses and gloves to protect eyes and hands.
Make certain stable lighting and a sturdy work surface.
Turn off nearby water supply and electrical sources.
Keep a bucket and towels for spills.
Maintain clear egress and dispose of debris promptly.
Inspecting the sink, clips, and sealant surfaces
Inspect the sink, mounting clips, and designated sealant surfaces for damage, deformation, or contamination prior to installation.
Verify there are no dents, cracks, or warped edges that could compromise the seal. Confirm clips are straight, threads intact, and hardware complete.
Clean all mating areas with appropriate solvent, remove oils, debris, and old sealant residues, and let surfaces dry before proceeding.
Clearing and supporting the sink during installation
With the sink, clips, and sealant surfaces verified and cleaned, attention turns to creating an unobstructed, stable work area for installation.
Remove items beneath the countertop, clear surrounding cabinets, and secure adequate lighting.
Support the sink with a sacrificial board or adjustable jack to prevent strain on the countertop.
Make certain helpers or temporary braces hold the sink level while clips are positioned and tightened.
Step-by-Step Installation Guide for Undermount Elkay Sinks
The installer begins by positioning the undermount Elkay sink in the cutout and applying a continuous bead of sealant around the rim to prevent leaks.
Clips are then attached to the sink rim and tightened in a recommended sequence to achieve specified torque while drawing the sink flush to the countertop.
Finally, alignment and uniform gap are checked and adjusted as needed before the sealant cures.
Positioning and securing the sink in the cutout
Carefully lower the undermount sink into the countertop cutout, aligning the sink flange with the underside of the counter and centering the basin in the opening.
Inspect clearance around edges, confirm even overhangs, and hold the sink steady.
Temporarily clamp or prop the sink, then install mounting clips at specified intervals.
Recheck alignment and adjust clips to draw the flange uniformly against the counter.
Applying sealant and ensuring proper bead placement
Apply a continuous, even bead of plumber’s-grade silicone sealant to the underside of the countertop flange where it will contact the sink, keeping the caulk gun at a steady 45-degree angle to secure uniform width and thickness.
Inspect for gaps, smooth the bead with a wet finger or tool to confirm full contact, remove excess promptly, and allow manufacturer-recommended cure time before proceeding.
Attaching clips to the sink rim
Position clips evenly around the sink rim so each bracket will engage both the countertop flange and the sink lip. The installer aligns clips at recommended intervals, seats each clip over the rim, and verifies flush contact before fastening.
Follow these checks:
- Confirm clip orientation matches sink profile
- Space clips per manufacturer guidance
- Guarantee sealant remains uninterrupted
- Hold clips steady during initial engagement
Tightening sequence and torque recommendations
Begin the tightening sequence by following the manufacturer’s recommended pattern to confirm even compression of the sink flange against the countertop.
Tighten clips incrementally in small, equal turns, alternating across the sink.
Use a calibrated torque wrench or driver set to the specified value in the Elkay instructions—typically low torque—to prevent distortion.
Final torque verification confirms secure, leak-resistant mounting without over-stressing the sink or countertop.
Checking alignment and gap uniformity
A visual and tactile inspection verifies that the sink sits squarely and that the gap between the sink flange and countertop is consistent around the perimeter.
The installer measures gaps at multiple points, adjusting clip tension where necessary to correct tilt or misalignment. Uniform spacing prevents stress concentrations and guarantees even sealant compression.
Final verification confirms no binding, gaps, or visible irregularities before sealant cures.
Step-by-Step Installation Guide for Drop-in (Top-mount) Elkay Sinks
The process for installing a drop-in Elkay sink begins with preparing the sink rim and countertop surface to guarantee a clean, level fit.
Next, sealant is applied and the sink is lowered into place before any below-counter clips or fasteners are secured, where applicable.
The installation is completed by tightening clips, checking alignment, and trimming excess sealant for a neat finish.
Preparing the sink rim and countertop surface
Inspect the sink rim and countertop cutout to confirm they are clean, dry, and free of old sealant, debris, or uneven edges that could compromise a watertight fit.
Verify the rim is flat and undamaged; sand or file minor burrs. Wipe surfaces with solvent or mild cleaner, then dry.
Position protective tape on counter edges to prevent scratches during clip alignment and installation.
Applying sealant and lowering the sink
With the rim and countertop prepared and taped, apply a continuous bead of plumber’s or silicone sealant around the countertop cutout where the sink flange will contact.
Then, align the sink over the opening and lower it straight down, centering the flange onto the sealant.
Press evenly around the perimeter to seat the sink, wipe excess sealant, and allow recommended cure time before proceeding.
Installing clips and fasteners from below (if applicable)
Begin by kneeling beneath the countertop to access the sink rim and locating the factory-recommended clip positions along the flange.
Fit each clip over the flange, aligning holes with threaded studs or predrilled locations. Tighten fasteners evenly to compress sealant without overtightening.
- Position clips at marked points
- Hand-start screws or nuts
- Use a screwdriver or nut driver
- Tighten in sequence for even pressure
Finalizing the fit and trimming excess sealant
Once the clips are snug and the sink sits level in the cutout, confirm the rim is seated evenly and allow the sealant to set briefly so it firms without fully curing.
Wipe excess bead with a damp cloth, then use a sharp utility knife or trim tool to carefully remove remaining sealant flush with the countertop.
Inspect seams, tighten clips slightly if needed, and let sealant cure per manufacturer directions.
Verifying a Secure Fit and Finishing Touches
Once the mounting clips are tightened, the installer checks for any movement and runs water to confirm a watertight seal.
Any excess sealant is wiped away and allowed to cure per the manufacturer’s instructions before proceeding.
Finally, plumbing is reconnected and a thorough final inspection guarantees proper alignment, no leaks, and secure fastening.
Testing for movement and water-tightness
With the clips tightened and the sink seated, the installer inspects for any lateral or vertical movement and checks all seams for water-tightness.
The installer applies moderate pressure around the bowl, watches for shifts, runs water into the basin, and observes underside joints and clip areas for leaks.
Any detected movement prompts clip adjustment; any seepage requires immediate resealing before reconnecting plumbing.
Cleaning excess sealant and curing time
After confirming the assembly is stable and watertight, the installer removes any excess sealant around the sink perimeter using a plastic scraper or a damp cloth to avoid marring the finish.
Remaining beads are smoothed for a neat joint.
The installer follows manufacturer cure-time recommendations, avoids disturbing the seal during curing, and notes ambient temperature and humidity, which can affect full cure and final sealing performance.
Reconnecting plumbing and final inspection
Having smoothed the sealant and allowed the recommended cure time, the installer proceeds to reconnect the plumbing and perform a final inspection to verify the sink is secure and watertight.
Supply lines and drain are reattached, fittings tightened to spec, and connections tested for leaks.
Clips and countertop gaps are checked for even compression.
A final water run confirms proper drainage and no seepage.
Common Installation Problems and How to Fix Them
The article next addresses common installation issues and practical remedies.
It covers corrective steps when clips do not align with the sink flange, methods for sealing and shimming to close gaps between sink and countertop, and repair options for stripped or damaged threads.
Techniques for adjusting uneven sink height are also outlined.
Clips not aligning with sink flange corrective steps
When clips fail to align with the sink flange, installation stalls and the mounting system cannot secure the sink properly.
The installer should verify clip orientation and slot positioning, loosen fasteners slightly, and reposition clips along the channel.
If interference persists, inspect for paint, debris, or flange deformities and gently file high spots.
Replace damaged clips or use factory-recommended alternatives to restore proper alignment.
Gaps between sink and countertop sealing and shimming tips
Address gaps between the sink and countertop promptly to prevent water intrusion and countertop damage.
Use thin shims or folded plastic shims to level the sink before tightening clips, trimming excess.
Apply a continuous bead of waterproof silicone sealant around the perimeter, tooling for full contact.
Recheck after curing; add shims or reseal if settlement or gaps reappear to maintain a watertight fit.
Stripped or damaged threads repair options
After sealing and shimming are complete, attention should turn to any stripped or damaged mounting threads that can compromise clip retention.
Repair options include thread inserts (Heli-Coil) for durable restoration, oversized machine screws with matching nuts where access allows, epoxy-filled threads for low-load fixes, or replacing damaged mounting studs.
Each method selection depends on material, access, and expected load for reliable clip engagement.
Uneven sink height adjustment techniques
Leveling the sink guarantees a watertight seal and even load distribution to the mounting clips; uneven height typically results from warped countertops, misaligned cutouts, or inconsistent shimming.
Inspect the lip-to-counter gap, use precision shims under low corners, and adjust clip positions incrementally.
For significant variance, plane the countertop edge or reset the sink with a uniform bead of silicone and recheck level before tightening.
Maintenance and Long-Term Care for Mounted Elkay Sinks
Routine maintenance for mounted Elkay sinks includes scheduled inspections and retightening of clips to guarantee continued support and alignment.
Use nonabrasive cleaners, monitor sealant condition, and reapply appropriate sealant as needed to prevent leaks and corrosion.
Replace mounting clips when signs of significant wear, deformation, or persistent loosening appear.
Periodic checks and retightening schedule
Because vibration, temperature changes, and everyday use can gradually loosen mounting hardware, a regular inspection schedule is essential to maintain sink stability and prevent leaks.
Inspect clips and fasteners monthly for the first three months, then quarterly thereafter. Check for corrosion, movement, or gaps; lightly retighten clips to manufacturer torque specifications when needed.
Document dates and actions to track trends and address recurring issues promptly.
Recommended cleaners and sealant reapplication
Maintain the sink’s finish and watertight seal by using cleaners and sealants compatible with Elkay materials; mild, non-abrasive detergents and pH-neutral cleaners are recommended for daily cleaning.
Silicone-based sealants designed for kitchen sinks should be used for reapplication around the rim and joint areas.
Rinse thoroughly after cleaning, dry surfaces to prevent mildew, inspect sealant annually, and touch up small gaps promptly to retain integrity.
When to replace mounting clips
Longevity of the mounting clips is a key factor in preserving the sink’s secure attachment and preventing leaks or sagging over time.
Clips should be inspected annually and replaced if bent, corroded, stripped, cracked, or if fasteners no longer hold torque.
Replacement is also advised after significant impacts, renovations, persistent movement, or visible gaps between sink and countertop to guarantee continued safe support.
Comparison of Mounting Clip Options and Costs
A brief comparison of mounting clip options clarifies differences between OEM Elkay clips and universal aftermarket alternatives, highlighting fit, materials, and warranty effects. Cost-benefit considerations favor OEM for guaranteed compatibility and preserved warranty but may justify aftermarket choices for budget or rare sizes. The following table summarizes typical trade-offs to guide selection.
| Option | Typical Trade-offs |
|---|---|
| OEM Elkay clips | Higher cost, assured fit, warranty-friendly |
| Universal aftermarket clips | Lower cost, variable fit, possible warranty impact |
| Cost-benefit note | Pay more for certainty or save with measured risk |
| Recommendation | Use OEM when warranty or perfect fit matters; consider aftermarket when cost savings outweigh risk |
OEM Elkay clips vs. universal aftermarket clips
Choosing between OEM Elkay clips and universal aftermarket clips involves weighing fit, durability, and cost.
OEM clips match Elkay sink geometry, ensuring straightforward installation and consistent hold; they are typically higher quality but cost more.
Universal aftermarket clips offer broader compatibility and lower price, though they may require adjustment and can vary in material and finish, affecting long-term performance.
Cost-benefit considerations and warranty implications
Beyond fit and material differences, cost and warranty implications often determine which clip option makes the most sense for a project.
OEM clips cost more but preserve manufacturer warranty and guarantee compatibility.
Aftermarket options are cheaper and may function adequately but can void warranty or lack corrosion guarantees.
Buyers should weigh immediate savings against potential repair or replacement costs and warranty exclusions.
Tips to Ensure a Professional-Quality Installation
Professional installers recommend specific techniques—such as evenly spaced clips, consistent torquing, and proper sealant application—to achieve a durable, gap-free sink fit.
Common rookie mistakes include uneven clip placement, overtightening, and neglecting to check for level and drain alignment.
Homeowners should attempt DIY only if comfortable with basic plumbing; otherwise calling a professional prevents leaks, warranty issues, and costly rework.
Best practices from plumbers and installers
Installers recommend following a consistent sequence of prep, alignment, and securement to achieve a durable Elkay sink installation.
Professionals advise precise measurements, clean sealing surfaces, and even clip torque. Consistent verification prevents leaks and movement.
- Measure twice, mark once
- Clean and dry flange thoroughly
- Use manufacturer clips and recommended fasteners
- Tighten progressively and check levelness
Avoiding common rookie mistakes
With alignment and securement techniques firmly in place, attention turns to common rookie mistakes that can undermine an otherwise sound Elkay sink installation.
Installers should avoid overtightening clips, neglecting sealant continuity, misplacing foam gaskets, and ignoring shim needs.
Verify clip positions, test for gaps, confirm even torque, and clear debris.
Document measurements and recheck plumbing connections before finalizing the countertop.
When to call a professional installer
When should a homeowner escalate to hiring an expert?
A professional is recommended if structural modifications, uneven countertops, or complex plumbing are present; if the sink requires custom trimming or replacement clips; or when vibration, persistent leaks, or unclear manufacturer guidance arise.
Experienced installers guarantee correct leveling, secure fastening, and watertight seals, reducing risk of damage, warranty issues, and future costly repairs.
Quick Reference Checklist for Installing Elkay Sink Mounting Clips
Begin by confirming all required components and tools are present: the specified Elkay mounting clips, screws, a screwdriver or drill with the correct bit, a gasket or sealant if required, and safety gear.
The checklist guarantees a safe, efficient installation. Verify fit, prepare sink edge, secure clips evenly, and test stability before finalizing.
- Confirm parts and tools
- Clean and prep edge
- Evenly space clips
- Tighten and test stability
Conclusion
In conclusion, Elkay sink mounting clips provide reliable support and long-lasting performance when selected and installed correctly. The installer should always verify compatibility, prepare the countertop, and follow the manufacturer’s step-by-step procedures for either undermount or drop-in installations. Routine maintenance prevents issues and preserves the sink’s seal. With meticulous attention to alignment and torque—because these clips grip like a superhero’s handshake—professional-quality results are both achievable and durable.