How to Install a Sediment Filter: Step-by-Step Guide for Homeowners
To install a sediment filter on your home’s main supply line, follow these steps to protect your pipes and appliances. First, choose a filter type and micron rating that suit your local sediment levels and water flow requirements. Begin by shutting off the water supply and relieving pressure in the pipes.
Next, cut and deburr the main pipe before mounting the filter housing, ensuring the inlet and outlet are correctly oriented. Attach the appropriate fittings, then install the filter cartridge using new O-rings and seal tape. Once everything is in place, flush the system to remove any debris and check for leaks or pressure drops. For comprehensive installation and maintenance details, refer to the full guide.
What a Sediment Filter Is and Why It Matters for Your Home
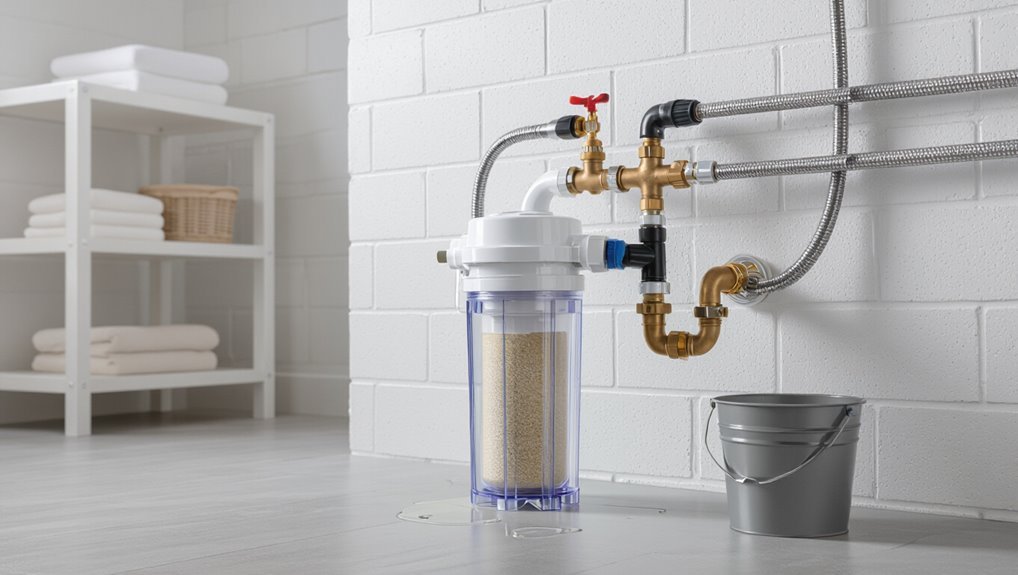
A sediment filter is a pre-treatment device that captures particulate contaminants like sand, silt, rust, and mineral scale to protect downstream plumbing and appliances.
By removing these solids, the filter reduces wear on water heaters, dishwashers, and pipes while improving overall water clarity and prolonging the life of finer filtration stages.
Common options include pleated and cartridge filters, spin-down strainers, and backwashable units that use different filter media and service methods.
Definition and main functions of a sediment filter
Sediment filters are simple mechanical devices installed in a home’s water system to trap and remove particles like sand, silt, rust, and organic debris, protecting plumbing, appliances, and downstream water treatment components.
They provide primary filtration, extend appliance lifespan, reduce maintenance, and clarify water flow.
Clear instructions on how to install a sediment filter guarantee proper placement, sizing, and maintenance for reliable performance.
Common contaminants removed (sand, silt, rust, scale)
Particles such as sand, silt, rust, and scale commonly enter household water lines from wells, aging pipes, and municipal sources. A sediment filter captures these solids before they reach fixtures and appliances.
Sediment filters trap particulate matter by size rating (microns), removing abrasive grit, iron oxide flakes, mineral deposits, and construction debris to protect downstream components and maintain clearer water flow without altering chemical composition.
Benefits for plumbing, appliances, and water quality
Installing a sediment filter protects a home’s plumbing and appliances by removing solid debris that abrades pipes, clogs valves, and reduces flow.
It prolongs pump, water heater, and appliance lifespan, reduces maintenance and emergency repairs, improves fixture performance and water pressure, and prevents staining or sediment buildup.
Cleaner water also enhances downstream treatment effectiveness and household water quality for washing and bathing.
Typical filter types and media (pleated, cartridge, spin-down, backwashable)
Recognize that sediment filters come in several common formats—pleated, cartridge, spin-down, and backwashable—each using different media and mechanisms to capture debris.
Pleated and cartridge types use layered synthetic or paper media for fine particle trapping.
Spin-down models employ a centrifugal screen to eject larger grit.
Backwashable systems reverse flow to flush accumulated sediment, extending service life and reducing replacement frequency.
How to Choose the Right Sediment Filter for Your Home
Choosing the right sediment filter begins with evaluating local water quality and sediment levels to determine required micron ratings and flow capacity.
Consideration of whole-house versus point-of-use placement, material compatibility, pressure rating, and plumbing size guarantees proper fit and performance.
Finally, budget, maintenance needs, and expected lifespan help balance upfront cost against long-term value.
Assessing water quality and sediment level
Before selecting a sediment filter, a homeowner should evaluate the water’s quality and the type and concentration of suspended particles. This assessment determines the appropriate filter media, micron rating, and flow capacity.
Testing includes visual inspection, turbidity measurement, and laboratory analysis for particle size, mineral content, and biological indicators.
Regular monitoring documents changes and informs maintenance frequency and pre-treatment needs.
Flow rate, micron rating, and system capacity explained
Having assessed particle types and concentrations, the homeowner must match those findings to a filter’s flow rate, micron rating, and overall capacity to guarantee effective removal without impairing water delivery.
Flow rate should meet peak household demand; micron rating targets particle size (lower = finer); capacity denotes lifespan before replacement.
Balancing these prevents pressure loss, frequent changes, or insufficient filtration for identified sediments.
Whole-house vs point-of-use placement comparison
When deciding where to place a sediment filter, homeowners weigh the trade-offs between whole-house protection and targeted point-of-use units: whole-house filters shield every downstream fixture and appliance from sediment but require higher flow capacity and more frequent cartridge changes, while point-of-use filters deliver finer, lower-capacity filtration at a single tap or appliance with easier maintenance and lower upfront cost.
| Option | Best for |
|---|---|
| Whole-house | Entire home protection |
| Point-of-use | Specific fixtures |
| Cost | Higher vs lower |
| Maintenance | Centralized vs individual |
| Performance | Broad protection vs fine filtration |
Material compatibility, pressure rating, and plumbing size
Choosing between whole-house and point-of-use sediment filters also requires matching the physical and performance attributes of the chosen unit to the home’s plumbing system.
Verify material compatibility with pipe metals and fittings (PVC, copper, PEX) to prevent corrosion or galvanic reactions.
Confirm filter pressure rating meets peak household water pressure and select appropriate connection sizes (½”, ¾”, 1″) or adapters to maintain flow and avoid leaks.
Budget, maintenance requirements, and expected lifespan
A clear assessment of budget, upkeep, and expected lifespan helps homeowners balance upfront costs against long-term value when selecting a sediment filter.
Initial price varies by type and capacity; cartridge units are cheaper, spin-down and backwash systems cost more but reduce replacement frequency.
Factor filter element cost, labor for periodic cleaning or replacement, and typical lifespans (1–10 years) to estimate total ownership cost.
Tools and Materials You’ll Need Before You Start
Before beginning the installation, the necessary tools and supplies should be assembled to guarantee a smooth process.
Key items include basic plumbing tools, safety gear, and common replacement parts or consumables; a short checklist follows.
- Adjustable wrench, pipe cutter, and pliers
- Teflon tape, pipe sealant, and replacement O-rings
- Safety glasses, gloves, and a bucket for spills
- Extra filter cartridges and mounting hardware
Plumbing tools and safety gear checklist
Essential tools and safety gear must be assembled before beginning a sediment filter installation to guarantee efficient work and reduce risk.
The installer should verify tool condition and personal protective equipment prior to starting.
Typical items include:
- Adjustable wrench and channel-lock pliers
- Pipe cutter and deburring tool
- Thread seal tape and silicone grease
- Safety glasses, gloves, and knee pads
Replacement parts and consumables to have on hand
Having confirmed tools and safety gear, the installer should next gather replacement parts and consumables likely to be needed during a sediment filter installation.
Essential items include replacement cartridges, O-rings, housing gaskets, Teflon tape, pipe sealant, hose clamps, and replacement shutoff valves.
Include spare fittings and short lengths of pipe or tubing to accommodate unexpected cuts or corrections.
Keep parts organized and accessible.
Preparing for Installation
Before beginning work, the installer identifies the ideal location—typically on the main supply before softeners and downstream of the water heater as appropriate—taking system layout and service access into account.
They shut off the water, relieve pressure safely, and verify no residual flow before cutting lines.
Finally, they measure and mark pipe runs and fittings, and confirm local code and permit requirements are met.
Locating the best installation point (main line, softener, water heater considerations)
When determining where to place a sediment filter, assess the plumbing layout to balance protection and accessibility; the main supply line is ideal for whole-house filtration, while installing ahead of a water softener preserves its resin and locating it before the water heater protects against sediment-related damage.
Choose a spot with room for filter removal, visible shutoff valves, and minimal pipe complexity to simplify maintenance and future upgrades.
Shutting off water and relieving pressure safely
Shut off the appropriate water supply at the nearest shutoff valve and confirm isolation by opening a downstream faucet to verify flow has stopped.
Next, relieve trapped pressure by opening a high faucet and any nearby pressure-relief valves.
Drain residual water from the line into a bucket.
Wear safety goggles and gloves.
Confirm no flow and minimal residual pressure before cutting or disconnecting pipework.
Measuring and marking pipe runs and fittings
Measure each pipe run and fitting precisely, recording lengths and orientations on the work surface and marking cut lines with a fine-tip marker at the recommended clearance points.
Verify alignment for unions, elbows, and valves; note socket depths for solvent or compression fittings.
Account for pipe expansion, insulation thickness, and accessible shutoff clearance.
Double-check measurements before cutting to prevent waste and guarantee proper filter placement.
Checking code and permit considerations
Why consult local codes and permit offices before starting? The installer must verify plumbing codes, backflow prevention, and required materials to guarantee compliance.
Permit requirements vary; inspections may be mandatory. Failure to follow regulations can cause fines or require rework.
Contact the municipal building department, obtain permits if needed, and schedule inspections prior to finalizing the sediment filter installation.
Step-by-Step Installation for a Typical Cartridge Sediment Filter
The installation begins by isolating the feed with a shutoff and fitting a bypass if continuous service is required.
The installer then cuts the pipe to length, deburrs the ends, and mounts the filter housing securely to the pipe using the appropriate fittings or brackets.
Finally, the cartridge is inserted with a properly lubricated and seated O‑ring, the system is slowly repressurized, and all connections are checked carefully for leaks.
Installing a shutoff and bypass if needed
Before connecting the cartridge housing, a shutoff and bypass should be installed to allow safe, isolated maintenance without interrupting the entire water supply.
The installer mounts two shutoff valves—one on the inlet, one on the outlet—and a bypass loop with valves to reroute flow.
Verify valve orientation, secure fittings, test for leaks, and label valves for future service access.
Cutting the pipe and deburring ends
With the shutoff and bypass secured and tested, attention turns to preparing the piping for the filter housing by cutting the line to length and cleaning the cut ends.
Measure and mark twice, then use an appropriate pipe cutter or fine-tooth saw for a square, clean cut.
Deburr inside and outside with a deburring tool or file, removing burs and sharp edges before final fitment.
Fitting and securing filter housing to the pipe
Begin by positioning the filter housing so its inlet aligns with the incoming pipe and its outlet with the outgoing line, ensuring the arrow on the housing matches the direction of water flow.
Mark pipe locations, fit appropriate fittings (threaded, compression, or push-fit), slide on nuts and ferrules as needed, and tighten connections to manufacturer torque.
Finally, mount the housing bracket securely to a stable surface.
Installing filter cartridge and O-ring lubrication/seating
Install the cartridge by first relieving water pressure and opening the housing.
Then remove the new filter from its packaging and inspect the O-ring for nicks or dust.
Lightly lubricate the O-ring with food-grade silicone grease, seat it evenly in the groove, insert the cartridge aligning tabs or fitment, guarantee it sits flat, and replace the housing cover per alignment marks.
Re-pressurizing system and checking for leaks
After the housing is securely threaded and hand-tightened to the alignment marks, the water supply can be restored slowly to re-pressurize the system while observing for leaks.
Open the upstream shutoff gradually, monitor pressure gauges if present, and inspect all joints, the housing seam, and valve connections.
Address any seepage by tightening fittings slightly or depressurizing before reseating O-rings.
Test until dry.
Initial flush procedure and verifying flow
With the system pressurized and verified leak-free, initiate an initial flush by slowly opening the downstream valve and allowing water to run through the new cartridge for several minutes; this clears manufacturing dust and primes the media while preventing air pockets.
Observe steady, debris-free flow, check inlet and outlet pressure differential if gauges exist, and close valves or adjust flow to normal operation once clarity and pressure stabilize.
Alternative Installation: Spin-Down and Backwash Filters
The section outlines installation specifics for spin-down filters, including correct orientation, inlet/outlet connections, and flushing steps to seat the screen.
It then covers backwashable sediment units, focusing on valve sequencing, drain routing, and periodic backwash procedures.
Guidance is provided on selecting these alternatives over cartridge filters based on sediment load, maintenance frequency, and system requirements.
Installing a spin-down filter (steps and orientation)
Begin by positioning the spin-down filter where it will be accessible for routine flushing and maintenance, ensuring the inlet and outlet align with the system flow and the clear bowl faces a visible, unobstructed direction for inspection.
Securely mount the housing, use proper fittings and thread sealant, confirm flow direction markings, install a bypass or isolation valves, pressure-test connections, then flush debris through the sediment drain.
Installing a backwashable sediment filter (valve setup and drain)
Install the backwashable sediment filter so its control valve is accessible and the drain line can run downhill without traps or loops.
Mount unit on a stable surface, align inlet/outlet per flow arrows, and include isolation valves upstream and downstream.
Connect a properly sized drain hose to the valve discharge, secure fittings, and orient the valve for easy manual or automatic backwash operation and maintenance access.
When to choose these alternatives over cartridge filters
After ensuring a backwashable sediment filter is mounted with accessible controls and a properly routed drain, consideration should be given to when a spin-down or backwash unit is preferable to cartridge filters.
These alternatives suit high-flow mains, coarse suspended solids, remote systems where frequent cartridge changes are impractical, or locations with reliable drain access.
Choose for lower maintenance, longer service intervals, and reduced replacement waste.
Testing and Verifying Performance After Installation
After installation, the system should be checked for leaks and monitored for any unusual pressure drop across the filter housing.
A simple clarity check—observing water for visible particles and running a sample through a clear container—can indicate basic effectiveness.
For persistent turbidity, unusual taste or odor, or routine assurance, professional water testing is recommended.
How to test for leaks and pressure drop
Begin by visually inspecting all fittings, housings, and connections while the system is pressurized to identify any immediate leaks; a steady drip, wetness, or pooling indicates a seal failure or loose connection that requires tightening or reseating.
Measure inlet and outlet pressure with gauges to calculate pressure drop. Normal drop is minimal; significant loss suggests clogging, incorrect cartridge, or valve issues requiring cleaning or replacement.
Basic water clarity and particle check
When the system is pressurized and stabilized, a basic clarity and particle check confirms whether the sediment filter is removing visible solids:
Collect water in a clear glass from multiple fixtures, compare clarity to pre-install samples, and hold against white paper to reveal fine particles.
Note any persistent cloudiness, discoloration, or grit.
Record observations and dates for ongoing monitoring.
When to perform professional water testing
How often a professional water test should be scheduled depends on initial water quality, source type, and any unusual post-installation findings. Testing is recommended immediately after installation to benchmark system performance, again after four to six weeks to confirm stability, and periodically thereafter (annually for treated municipal supplies, semiannually for private wells or variable sources) or whenever persistent cloudiness, taste, odor changes, or visible sediments recur.
A certified lab evaluates turbidity, particulates, bacterial presence, and relevant chemical parameters to verify the filter meets specifications. They also recommend maintenance, upgrades, or further treatment if results indicate contamination or declining performance.
Routine Maintenance and Replacement Schedule
A regular maintenance schedule helps preserve flow and water quality by specifying inspection and cartridge replacement intervals based on local water conditions.
Routine tasks include cleaning spin-down housings, performing backwash cycles where applicable, and recognizing signs—such as pressure drop, discoloration, or persistent sediment—that require immediate service or replacement.
Used cartridges should be handled and disposed of according to local waste regulations, with contaminated media sealed and discarded to prevent exposure.
How often to inspect and replace cartridges
Why inspect sediment filter cartridges on a regular schedule? Regular inspections identify clogging, media breakdown, and reduced flow before damage occurs.
Monthly checks suit high-sediment areas; quarterly inspections work for clearer supply.
Replace cartridges when flow drops, pressure differential exceeds manufacturer limits, or visible fouling appears.
Seasonal heavy-use periods may require more frequent replacement to maintain water quality and system longevity.
Cleaning procedures for spin-down and backwash systems
Begin routine cleaning of spin-down and backwash sediment systems by following the manufacturer’s sequence: isolate the unit, relieve pressure, and perform the prescribed drain or backwash cycle to expel captured solids.
Inspect screens and housings for buildup, flush until clear, reseal fittings with new gaskets if needed, and verify valve operation.
Record cycle frequency and any anomalies for scheduled maintenance.
Signs a filter needs immediate attention or replacement
Several clear indicators signal when a sediment filter requires immediate attention or replacement: sustained pressure drop across the unit, visible damage to the housing or screen, persistent turbidity or taste issues in the downstream water, and repeated or unusually frequent backwash/drain cycles.
Additional signs include unusual noise, leaks at connections, or rapid clogging after cleaning; address these promptly to prevent system damage and water quality decline.
Proper disposal of used filter cartridges
After identifying signs that a sediment filter needs attention or replacement, proper disposal of used cartridges becomes the next practical concern to protect health and the environment.
Used cartridges should be handled with gloves, placed in sealed bags, and checked for manufacturer recycling programs. Local hazardous-waste or municipal recycling centers may accept them.
Record replacement dates and follow local regulations to avoid contamination and improper landfill disposal.
Troubleshooting Common Problems
The troubleshooting section addresses typical issues that may arise after installing a sediment filter, including low water pressure and its remedies.
It also covers diagnosing and repairing persistent leaks, identifying causes of frequent clogging and how to prevent it, and checking sources of strange tastes or odors.
Clear, stepwise checks and fixes help isolate problems and restore proper filter function.
Low water pressure after installation and fixes
Noticeable drops in water pressure following sediment filter installation are a common complaint and usually stem from a few identifiable causes.
Clogged cartridge, incorrect filter size, or partially closed shutoff valves reduce flow.
Inspect and replace the cartridge, verify filter micron rating and housing size, fully open valves, and flush air pockets.
If pressure remains low, check upstream supply and consult a plumber.
Persistent leaks: diagnosis and repair
Low pressure can sometimes signal a leak elsewhere in the line, so attention shifts from flow issues to identifying persistent leaks and repairing their causes.
Inspect joints, fittings, and valve connections for moisture. Tighten or replace damaged fittings, use appropriate thread sealant or new compression rings, and test under pressure.
If plastic pipes crack, replace the section; consult a plumber for hidden or complex leaks.
Filter clogging too frequently: causes and solutions
Frequent clogging of a sediment filter often indicates upstream issues or incorrect filter selection rather than a failing unit; diagnosing the cause requires checking incoming water quality, particle size, and flow rate against the filter’s micron rating and capacity.
Inspect for excessive turbidity, rusty or sandy supply lines, and high flow demands.
Solutions: pre‑filtration, larger-capacity or higher-micron cartridges, pressure regulation, and scheduled replacements.
Strange tastes or odors after installation: what to check
Why does water sometimes acquire odd tastes or odors after a new sediment filter is installed?
The homeowner should check for trapped air, resin or carbon fines from new cartridges, inadequate rinsing, and microbial growth in a moist housing.
Verify proper flushing time, confirm filter media type, inspect seals and plumbing for contaminants, and disinfect the system if bacterial presence is suspected.
Cost Estimates and Long-Term Considerations
A brief cost comparison outlines typical expenses for a sediment filter installation, contrasting DIY parts and tools with professional labor and permit fees.
Projected ongoing costs include routine cartridge replacements, occasional repairs, and estimated annual maintenance totals.
Potential energy savings and reduced appliance wear from cleaner water are considered when calculating long-term return on investment.
Typical installation cost breakdown (DIY vs professional)
Installing a sediment filter can range from a low-cost DIY weekend project to a higher-priced professional job, and understanding the typical cost breakdown helps homeowners choose based on budget, skill level, and long-term needs. DIY often costs less in labor but requires tools and time; professionals add labor, permits, and warranty fees.
| Item | Typical cost |
|---|---|
| Filter unit | $30–$200 |
| DIY fittings/tools | $10–$100 |
| Professional labor | $150–$500 |
| Permits/warranty | $0–$150 |
Ongoing maintenance and replacement cost projections
Budgeting for ongoing maintenance and periodic replacement helps homeowners anticipate the true lifetime cost of a sediment filter.
Routine cartridge changes, typically every 3–12 months depending on sediment load, and occasional O-ring or housing replacements comprise main expenses.
Annual costs range from $30–$200 for cartridges plus $10–$50 for minor parts.
Factoring labor for professional service increases long-term projections accordingly.
Energy and appliance savings from improved water quality
Improved water quality from a sediment filter can reduce energy use and extend appliance life, yielding measurable cost savings over time.
Reduced sediment lowers heating element scaling in water heaters, improves dishwasher and washing machine efficiency, and decreases pump wear.
Estimated savings vary; homeowners may recoup filter costs via lower utility bills and fewer repairs over several years, increasing overall lifecycle value.
Safety, Warranty, and Professional Help
Before beginning work, the installer should follow basic safety precautions such as shutting off water and power, relieving line pressure, and wearing appropriate PPE to prevent injury and property damage.
Careful attention to manufacturer instructions and recommended maintenance schedules helps preserve warranty coverage and avoid voiding terms.
If the job involves complex piping, unclear water chemistry, or signs of leaks or system failure, a licensed plumber or water‑treatment professional should be called.
Safety precautions to follow during installation
Wear appropriate personal protective equipment and guarantee the work area is well-lit and ventilated to minimize risks during sediment filter installation.
Shut off water supply and relieve system pressure before disconnecting pipes.
Use correct tools and fittings to prevent leaks.
Avoid electrical hazards by keeping power tools dry.
Verify connections and test slowly for leaks.
Dispose of old cartridges per local regulations.
Manufacturer warranties and maintaining warranty coverage
How should one handle manufacturer warranties to preserve coverage?
Homeowners should register products promptly, retain receipts and serial numbers, and follow installation instructions precisely.
Use approved parts and documented maintenance schedules.
Avoid unauthorized modifications or unlicensed repairs that void terms.
Contact the manufacturer for clarification before deviating from guidelines.
Keep records of service and filter replacements to support future claims.
When to call a licensed plumber or water-treatment pro
Several clear signs indicate it is time to call a licensed plumber or water‑treatment professional: persistent leaks, sudden drops in water pressure, cloudy or discolored water, unusual tastes or odors, recurring clogging of the sediment filter, or any installation that conflicts with local codes or warranty requirements.
A pro evaluates system compatibility, guarantees code compliance, fixes complex plumbing, prevents warranty voiding, and diagnoses hidden contamination or equipment failure.
Quick Reference: Installation Checklist and Maintenance Planner
Before beginning work, the installer should confirm that the chosen sediment filter model, fittings, and mounting hardware match the system specifications and that shutoff valves and pressure relief points are accessible.
This quick-reference checklist and maintenance planner condenses those essentials into a single-page guide for pre-install verification, routine servicing, and parts replacement intervals.
- Confirm model, flow direction, and pressure rating
- Verify mounting location and valve access
- Schedule cartridge changes and inspection cadence
- Record parts replaced, dates, and technician notes
Conclusion
Practical protection promises peace: a properly placed sediment filter preserves pipes, prevents particulate problems, and provides predictable performance. Homeowners who plan, procure the proper parts, and proceed prudently protect plumbing and prolong appliance life. Regular rinsing or replacement reduces repairs, rescues water quality, and retains resale value. When puzzling problems persist, professional partners provide precise, prompt solutions. Consistent care cultivates clean water and confident, cost-conscious homeowners for years.