How to Install a Double Sink With Garbage Disposal: Step-By-Step DIY Guide
Installing a double sink with a garbage disposal can be accomplished by following a systematic approach. Start by preparing your workspace, shutting off the water and power, and measuring the cabinet and cutout clearance. Next, remove the old sink and disposal, then test-fit the new sink before sealing and mounting it. Attach the garbage disposal to the selected basin, ensuring the discharge aligns with the P-trap. Secure the plumbing and electrical connections according to code. Finally, conduct leak and power tests, and complete the installation with final sealing and cleanup. For detailed step-by-step instructions, continue reading.
Overview of Installing a Double Sink with Garbage Disposal
This section outlines what the guide covers and who will benefit, including homeowners and DIYers tackling a double sink install that includes a garbage disposal.
It provides estimated time, difficulty level, and the practical skills required.
A concise tools and materials checklist is also presented to prepare readers before starting.
What this guide covers and who it’s for
Several common kitchen layouts benefit from a double sink with a garbage disposal, and this guide explains the skills, tools, and sequence of steps needed to install one safely and effectively.
It covers plumbing hookup, disposal mounting, drain alignment, and basic electrical considerations, plus needed parts and safety tips.
Designed for readers: competent DIYers seeking clear, practical instruction on how to install a double sink with garbage disposal.
Estimated time, difficulty, and required skills
A realistic estimate for installing a double sink with a garbage disposal is 3–6 hours for someone with basic plumbing and electrical experience, assuming the cabinets and rough plumbing are in good condition and no surprises arise.
Difficulty is moderate; tasks include aligning sinks, sealing edges, connecting drain lines, wiring and mounting the disposal, and testing for leaks.
Basic troubleshooting skills are recommended.
Tools and materials checklist
Before starting, gather all tools and materials to guarantee the installation proceeds smoothly and without interruptions.
The installer should verify compatibility of sink, disposal, and plumbing connections, and assemble safety gear, sealants, and fasteners.
Confirm measurements and check for required adapters, mounting kits, and electrical components before beginning.
- Adjustable wrench, plumber’s putty, screwdriver set
- Garbage disposal unit, mounting flange, gasket
- P-trap, tailpieces, supply lines
Preparation and Safety
Before any cutting or connections begin, the installer inspects the existing plumbing and cabinet space to verify clearances and identify needed repairs.
Water and electrical supplies are shut off and confirmed safe, while precise measurements guide sink and disposal placement to guarantee proper fit and drainage.
Local permits and codes are checked, and a professional is consulted for complex alterations or when regulations require licensed work.
Inspecting existing plumbing and cabinet space
Many homeowners should carefully assess the existing plumbing and cabinet space to determine whether a double sink is feasible without major modifications.
Inspect drain locations, trap orientation, and venting to confirm compatibility. Measure cabinet width, base and wall framing, and available clearance for disposal units.
Note supply line placement, under-sink storage limitations, and any signs of prior leaks or damage requiring repair before installation.
Turning off water and power safely
Several critical shutoffs must be completed to guarantee safety: the house main water valve and the individual shutoff valves for the sink, plus power to any disposal or under-sink outlets.
Verify closures by running faucets and observing no flow.
Disconnect electrical power at the breaker, tag it if possible, and use a noncontact tester to confirm de-energized circuits before beginning plumbing or wiring work.
Measuring and planning sink and disposal placement
Careful measurement and logical planning determine sink and disposal placement to guarantee functionality and code compliance.
Measure cabinet interior, countertop cutout, and clearance for disposal motor and plumbing.
Locate drain lines, trap position, and dishwasher inlet for shortest, unobstructed runs.
Verify mounting flange access, under-sink workspace, and garbage disposal electrical outlet placement.
Mark layout, double-check dimensions, and adjust before cutting or installing.
Permits, codes, and when to call a professional
When is a permit required for installing a double sink and garbage disposal, and what codes govern the work?
Permits are often required for plumbing and electrical changes; local building and plumbing codes, plus NEC for wiring, apply.
Call a professional if unfamiliar with permits, gas or complex drainage, electrical wiring, structural modifications, or when inspections are required to guarantee compliance and safety.
Selecting the Right Sink and Garbage Disposal
The installer should evaluate double sink layouts—equal bowls for symmetry or unequal bowls for a larger prep basin—and how each affects workflow and plumbing.
Garbage disposal choice depends on sink configuration, required horsepower, and whether a single or dual-disposal setup is needed, plus whether mounting systems are compatible with the sink material.
Cost, installation complexity, and comparisons of popular models will guide the final selection.
Choosing double sink configurations (equal bowls vs. unequal)
Which bowl layout best fits a household’s routine depends on dishwashing habits and workspace needs.
Equal bowls offer symmetry and flexible shared tasks, simplifying accessory placement and draining.
Unequal bowls typically pair a larger basin for pots with a smaller prep sink for rinsing or disposal attachment, optimizing workflow when simultaneous, specialized tasks occur.
Consider counter space and typical load.
Types and horsepower of garbage disposals’ what fits a double sink
Several factors determine the ideal garbage disposal for a double sink setup, chiefly motor horsepower, grind chamber design, and compatibility with sink layout and accessories.
For typical households, 1/2–3/4 HP units handle everyday scraps; 1 HP or higher suits heavy use or frequent fibrous waste.
Dual-outlet or continuous-feed models simplify connection to two bowls; noise insulation and anti-jam features improve performance.
Mounting systems and compatibility with sink material
Many homeowners must match mounting systems to sink material because flange design, weight distribution, and sealing requirements vary by bowl type.
Stainless steel, cast iron, and composite sinks often require different mounting rings or splash guards.
Undermount installations need reinforced rims and specific clamps, while top-mount sinks accept standard flanges.
Verify compatibility with disposal mounts and use proper gaskets to prevent leaks and stress.
Cost considerations and popular models comparison
When budgeting for a double sink installation, homeowners should weigh initial purchase price against long-term value, including durability, maintenance needs, and compatibility with existing plumbing and garbage disposals. Cost tiers, typical lifespans, and disposal horsepower guide choices. Below is a concise comparison:
| Category | Example Sink | Example Disposal |
|---|---|---|
| Budget | Stainless laminate | 1/3 HP basic |
| Mid | Composite granite | 3/4 HP mid-range |
Removing the Old Sink and Disposal
The process begins with shutting off water, disconnecting supply lines, and removing the trap and disposal unit following manufacturer guidelines.
Attention then turns to separating the sink from the countertop—cutting through caulk and mounting hardware for undermounts or unbolting drop-in models—and safely lifting each basin free.
Finally, the cabinet interior and countertop edges are inspected for water damage or rot and repaired as needed before installing the new double sink.
Steps to disconnect plumbing and disposal
Begin by shutting off the water supply and unplugging the garbage disposal to guarantee a safe workspace; then place a bucket and towels beneath the sink to catch residual water.
Disconnect drain trap and tailpieces with pliers, loosening slip nuts. Detach dishwasher inlet hose if present.
Unmount disposal from sink flange per manufacturer instructions, supporting its weight.
Inspect seals and clean connection points before removal.
Removing sink and countertop considerations for undermount vs. drop-in
Remove the sink and countertop carefully, recognizing that undermount and drop-in installations require different techniques and precautions.
For undermounts, support the basin, cut caulk, unbolt clips, and detach from below to avoid countertop damage.
For drop-ins, loosen the rim seal, lift from above after disconnecting clips, and protect surrounding surfaces.
Label and set aside mounting hardware for reinstall.
Inspecting and repairing cabinet or countertop damage
After removing the old sink and disposal, inspect the cabinet interior and countertop edges for water damage, rot, mold, and structural compromises.
Check plywood layers, box joints, and underside of laminate or wood for soft spots.
Remove affected material, treat mold with appropriate cleaner, let dry, then reinforce or replace damaged cabinet components and countertop substrate before installing the new sink and disposal.
Installing the New Double Sink
Next, the countertop cutout is checked for fit and the sink is positioned to confirm alignment with cabinets and plumbing.
Attention then turns to sealing and mounting, using the specified adhesives, gaskets, and clips to secure the basin and prevent leaks.
Finally, drains and strainers are installed and tightened to guarantee watertight connections before final testing.
Preparing the countertop cutout and sink placement
Measure and confirm the countertop cutout against the sink template, ensuring the dimensions, corner radii, and overhang match the new double sink exactly.
Test-fit the sink dry into the opening, checking alignment with cabinets and faucet holes.
Verify clearance for drain assemblies, garbage disposal position, and underside supports.
Adjust cutout edges or cabinet bracing as needed for a flush, level placement before final attachment.
Sealing and mounting: adhesives, gaskets, and clips
Begin by laying out all sealing materials and mounting hardware—adhesive sealant, sink gasket or foam tape, mounting clips, and stainless screws—within reach.
Apply a continuous bead of sealant around the cutout or attach foam gasket per manufacturer instructions.
Lower sink, align, and engage clips evenly.
Tighten screws incrementally to compress gasket, ensuring uniform contact and a watertight seal without distorting the sink.
Installing sink drains and strainers
With the sink secured, the installer fits the drains and strainers to complete the bowl connections.
Each strainer receives plumber’s putty beneath its flange, tightened from below with a gasket and nut.
Tailpieces attach to strainers, aligning to the trap and disposal inlet.
Connections are hand-tightened, then snugged with a wrench.
The installer checks for level, secures slip nuts, and tests for leaks.
Installing the Garbage Disposal for a Double Sink
The homeowner must decide which basin will host the disposal, typically favoring the larger or more convenient bowl for dishwasher connection and workspace.
Next, the installer assembles and mounts the disposal to the chosen sink flange, ensuring a secure seal and proper alignment.
Finally, the unit is plumbed by removing the dishwasher knockout if needed and attaching the discharge to the drain trap with correct fittings and slope.
Choosing which bowl to attach the disposal to and rationale
Which bowl should receive the garbage disposal depends on plumbing layout, usage patterns, and ease of access for maintenance.
Typically the primary work bowl—where most rinsing and food prep occurs—is chosen to minimize countertop drips and simplify trap alignment.
If dishwasher connection is required, attach the disposal to the bowl with the dishwasher tailpiece.
Consider under-sink space and service access when deciding.
Assembling and mounting the disposal unit to the sink
Begin by aligning the disposal’s mounting flange beneath the chosen sink bowl and preparing the sink opening per the manufacturer’s template.
Assemble the mounting ring, gasket, and clips as instructed.
Lift the disposal, engage its housing with the sink flange, and rotate or lock to secure.
Tighten mounting screws evenly to compress the gasket.
Verify firm, plumb seating before proceeding to electrical and drain connections.
Connecting the disposal to the dishwasher (knockout plug)
Before connecting the dishwasher, inspect the disposal’s dishwasher inlet for a removable knockout plug and confirm the inlet orientation to match the dishwasher drain hose.
Using pliers or a screwdriver, carefully remove the knockout plug from inside the inlet, catching fragments.
Deburr the opening, align the dishwasher hose, and secure it with a stainless clamp.
Check for leaks after restoring power and running a short cycle.
Aligning and attaching discharge to drain trap
Positioning the disposal’s discharge elbow so it aligns with the sink’s P-trap outlet is the next critical step.
The installer measures offset, rotates the elbow, and trims tailpiece if necessary. A gasket and slip nut secure the connection; verify threads are clean and plumber’s putty or silicone applied where specified.
Tighten hand‑firm, then use wrench for a quarter turn; check for level and leaks.
Plumbing Connections and P-Trap Assembly
The guide now addresses how both sink drains tie into a common tailpiece and the proper installation of the trap adapter and P-trap to guarantee a watertight connection.
It covers venting requirements and measures to prevent siphoning, plus the common fittings used and how to size them for a double-sink layout.
Clear piping alignment, correct trap slope, and compatible fitting sizes are emphasized to avoid leaks and drainage problems.
Connecting left and right sink drains to a common tailpiece
Begin by aligning each sink’s tailpiece so both outlets feed smoothly into a central tee that leads to the common tailpiece and then to the P-trap.
Install a sanitary tee or wye with appropriate slip nuts and gaskets, positioning the disposal discharge and opposite tailpiece into each inlet.
Verify level alignment, hand-tighten fittings, then snug with a wrench without overtightening.
Test for leaks.
Installing the trap adapter and P-trap correctly
Install the trap adapter and P-trap so the assembly forms a watertight, properly sloped connection between the sink tailpiece and the house drain.
Measure and cut tubing to fit without forcing joints. Hand-tighten slip nuts, then secure with a quarter turn using pliers.
Confirm washer placement seals between adapter and trap.
Test for leaks by running water and inspecting all connections.
Ensuring venting and preventing siphoning
With the trap adapter and P-trap seated and checked for leaks, attention turns to venting and siphon prevention to maintain proper trap seal and sewer-gas protection.
The installer verifies vent connection or air admittance valve placement above the trap arm, keeps the trap arm slope correct, minimizes long horizontal runs, and avoids high discharge points that could induce siphoning during disposal operation.
Common fittings and how to size them
Several common fittings—tailpieces, slip-joint adapters, trap adapters, and tee fittings—are used to join sinks, disposals, and drain lines into a P-trap assembly.
Size choices follow fixture outlet diameters (typically 1-1/4″ or 1-1/2″) and disposal outlets (usually 1-1/2″). Proper alignment prevents leaks and guarantees trap seal depth.
- Match diameters precisely
- Use slip joints for adjustability
- Install trap adapter securely
Electrical Hookup
Next, the article addresses electrical hookup options for disposals, contrasting hardwired installations with cord-and-plug models.
It outlines safe power runs, switch placement, and proper junction box use.
Finally, the discussion covers GFCI requirements and local code considerations for sink-area circuits.
Hardwiring vs. plug-in disposal options
How should a homeowner choose between hardwiring a garbage disposal and using a plug-in unit?
Consider permanence, code requirements, and accessibility. Hardwiring offers a cleaner look and reduces outlet clutter but may complicate future replacement.
Plug-in units simplify installation and permit easy swaps or DIY removal, though they require an accessible outlet and may appear less finished.
Preferences hinge on local code and long-term plans.
Running power safely: wiring, switch installation, and junction box
Begin by planning the electrical route: determine the disposal’s power requirements, locate the nearest circuit that can handle the load, and map a safe path for cable from the circuit to the switch and junction box under the sink.
Run appropriately rated cable, secure it with clamps, mount a durable switch outside the cabinet, install a covered junction box, and make tight, code-compliant wire connections.
GFCI and code considerations
Because kitchens are wet locations, the electrical hookup for a garbage disposal must comply with GFCI requirements and local electrical code to protect against shock hazards.
Install a protected circuit, using a GFCI receptacle or breaker as required, and follow conduit, box fill, grounding, and wire gauge rules.
Verify permits and inspections; when uncertain, consult a licensed electrician to guarantee compliance and safety.
Testing and Final Adjustments
A final series of tests confirms the installation is watertight and the disposal discharges properly.
The disposer is run and inspected for unusual vibration or noise while drain and trap connections are checked for leaks.
Any remaining alignment issues or loose mounts are adjusted and tightened to specification.
Leak tests for water and disposal discharge
Turn on both hot and cold supplies and run water through each basin while observing all visible joints, tailpieces, and the disposal connection for any drips or weeps.
Inspect the trap, trap adapter, and dishwasher inlet under load and with sustained flow.
Tighten fittings as needed, retest until dry, then check under-sink for moisture after several minutes of idle to confirm seals.
Testing disposal operation and vibration checks
With leaks confirmed dry and fittings holding steady, attention shifts to the disposal’s function and any vibration that might indicate misalignment or loose mounting.
Power is restored, unit run briefly with cold water, listening for unusual noises.
Observe motor smoothness, check for wobble or rattling, and feel the sink flange for excessive movement.
Stop immediately if grinding or severe vibration occurs.
Fine-tuning alignment and tightening mounts
Recheck the sink and disposal alignment, making incremental adjustments to the mounting bolts and splash guard until fittings sit flush and the unit runs without vibration.
Verify all fasteners are torqued to manufacturer specs, then tighten retaining ring and tailpiece connections.
Confirm plumbing traps, dishwasher hookup, and electrical connections remain secure.
Run water and disposal under load to guarantee no leaks, noise, or movement.
Troubleshooting Common Problems
Common issues after installing a double sink include a garbage disposal that fails to start — often fixable by checking power and using the reset button — and leaks at the flange, discharge, or trap that require tightening, resealing, or replacing gaskets.
Slow drainage and clogs in a two-basin system usually call for trap cleaning, clearing the P-trap or shared tailpiece, and removing debris from the overflow or stopper.
Unusual noise, vibration, or persistent odors should be traced to loose mounts, misaligned pipes, or trapped food, with corrective tightening, realignment, or thorough cleaning as remedies.
Disposal won’t turn on electrical and reset steps
If a garbage disposal fails to start, the issue is often electrical—either a tripped internal breaker, a loose connection, or a switched outlet problem.
Verify power: confirm the unit is plugged, the wall switch is on, and the circuit breaker isn’t tripped.
Press the disposal’s red reset button.
If it still won’t run, turn off power and check wiring connections or consult an electrician for safe diagnosis.
Leaks at flange, discharge, or trap and how to fix them
Inspect the sink assembly for leaks at three usual trouble spots—the sink flange, the discharge elbow, and the P-trap—and address each with targeted fixes.
Tighten flange mounting nuts and replace the plumber’s putty or gasket if water seeps around the sink opening.
Re-seat or replace the rubber gasket at the disposal discharge and tighten hose clamps.
Replace worn P-trap washers and guarantee proper alignment.
Clogs and slow drainage in a double-sink setup
After addressing leaks at the flange, discharge elbow, and P-trap, attention turns to flow problems that often arise in double-sink installations.
Common causes include partial clogs in the disposal, shared tailpiece obstructions, or an improperly pitched drain line.
Recommend using a plunger, removing and cleaning the P-trap, and snaking the drain.
Confirm the dishwasher inlet and air gap do not restrict flow.
Noise, vibration, and bad smells troubleshooting
Address common sources of noise, vibration, and odors by isolating mechanical causes and sanitary issues: rattling or humming often stems from a loose garbage disposal, improperly secured mounting hardware, or an unbalanced sink basin;
persistent vibrations can indicate a worn motor mount or water hammer in supply lines;
unpleasant smells usually arise from trapped food in the disposal, a dry P-trap, or biofilm buildup in the tailpiece and drain.
Tighten mounts, secure hoses, clean blades and traps, run cold water, use enzyme cleaners, and inspect anti-vibration pads and shutoff valves for water hammer remedies.
Maintenance Tips for Longevity
Routine cleaning and awareness of which scraps are safe for the disposal help prevent buildup and odors.
Regular preventative measures—running cold water during use, occasional grinding of ice and citrus peels, and avoiding fibrous or starchy items—reduce clogs.
If persistent smells, frequent jams, or unusual noises occur, replacement or a professional inspection should be considered.
Routine cleaning and safe items to put in disposal
Keep a double sink functioning and odor-free by establishing a simple weekly cleaning habit and using the garbage disposal only for appropriate scraps.
Run cold water, grind citrus peels, and flush with baking soda plus vinegar occasionally. Avoid fibrous, starchy, and grease-heavy wastes.
- Run cold water during operation
- Grind small citrus peels for freshness
- Flush with baking soda and vinegar monthly
Preventative steps to avoid clogs and odors
Preventive maintenance extends a sink’s lifespan and minimizes clogs and odors by combining simple habits with occasional inspections.
Regularly run cold water during and after use, avoid fibrous or greasy waste, and grind citrus peels sparingly for odor control.
Flush drains with hot water weekly, use a mesh strainer for solids, and inspect seals and hoses quarterly to catch leaks or buildup early.
When to replace the disposal or hire a pro
Small, consistent care will delay many problems, but there comes a point when repairs or a full replacement are wiser than continued patching.
Signs include persistent humming without grinding, frequent jams, leaks at seals or mounting, rusty or noisy bearings, and age beyond 8–12 years.
If troubleshooting fails, hiring a licensed plumber guarantees safe replacement, proper electrical disconnects, and warranty-compliant installation.
Cost Breakdown and Time Estimates
A concise overview presents typical DIY cost ranges for parts and tools, plus when hiring a professional becomes more cost-effective.
It also outlines a practical timeline for each major step—removal, installation, plumbing, and finishing.
This information helps readers compare expenses and schedule the project realistically.
Typical DIY cost ranges for parts and tools
Typical DIY installations of a double sink generally range from $150 to $800 for parts and tools, depending on materials and whether new valves, P-traps, or a faucet set are needed.
Costs break down into:
- sink and faucet $50–$300
- garbage disposal $80–$250
- plumbing fittings $20–$100
- miscellaneous supplies $10–$50
Basic tools add $0–$100 if not owned.
When hiring a professional is cost-effective
While many homeowners can outfit a double sink economically with DIY parts, hiring a professional becomes cost-effective when labor complexity, time constraints, or potential for costly errors are considered.
Professionals bundle labor, permits, disposal hookup, and warranty; higher upfront fees can prevent repeated repairs.
Choose pros for complicated plumbing reroutes, electrical garbage disposal hookups, or limited personal time to avoid expensive mistakes.
Timeline for each major step
1. Preparation and demolition: 1–2 hours.
Sink and countertop removal: 1–2 hours.
Rough plumbing and disposal wiring: 2–3 hours.
Install new sink and mounts: 1–2 hours.
Connect disposal, trap, and dishwasher: 1–2 hours.
Seal and test for leaks: 30–60 minutes.
Cleanup and final adjustments: 30–60 minutes.
Total typical DIY time: 7–12 hours.
Useful Diagrams and Visual References
The article presents a typical double-sink plumbing schematic to clarify drain and vent routing and connection points.
It also includes a garbage disposal wiring diagram showing power, switch, and grounding details.
Close-up illustrations of mounting and flange assemblies highlight seal placement and fastener alignment.
Typical double-sink plumbing schematic
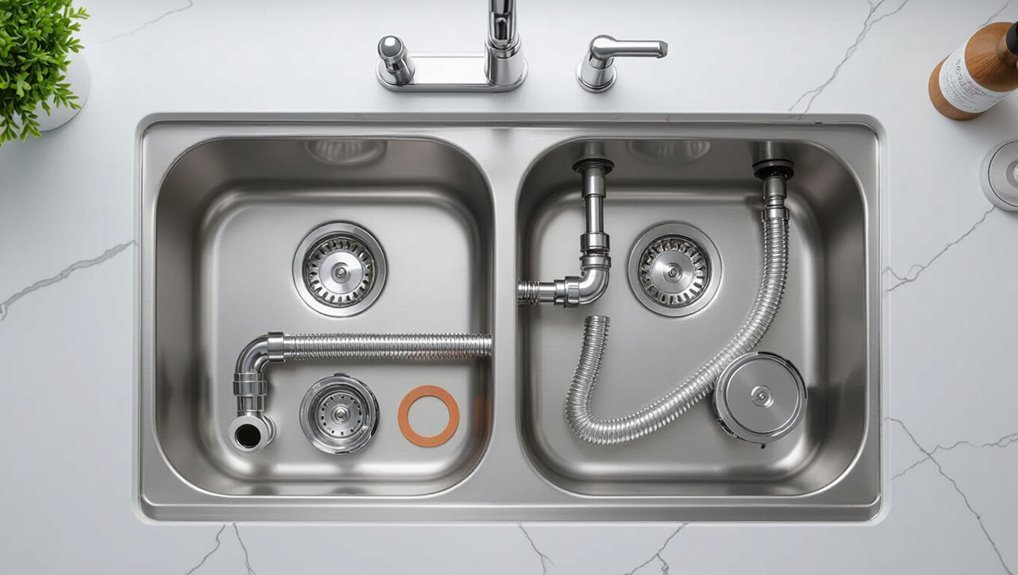
A clear schematic simplifies understanding how a double sink’s components connect: two basin drains, individual P-traps, a common tailpiece or crossover, and a shared trap arm leading to the house drain and vent.
The diagram shows dimensions, inlet/outlet orientations, slip-joint fittings, and cleanout access.
Labels indicate flow direction, slope (1/4″ per foot), and connections to venting and main waste to guarantee proper function and maintenance.
Garbage disposal wiring diagram
Begin by identifying the disposal’s power source and switch location to create a clear wiring diagram that shows connections, grounding, and any required junction boxes.
The diagram should depict hot, neutral, and ground conductors, switch loop or dedicated circuit, cable routing, wire nuts, and conduit where applicable.
Note GFCI requirement if local code mandates and label breakers and junctions for safety.
Common mounting and flange assembly close-up
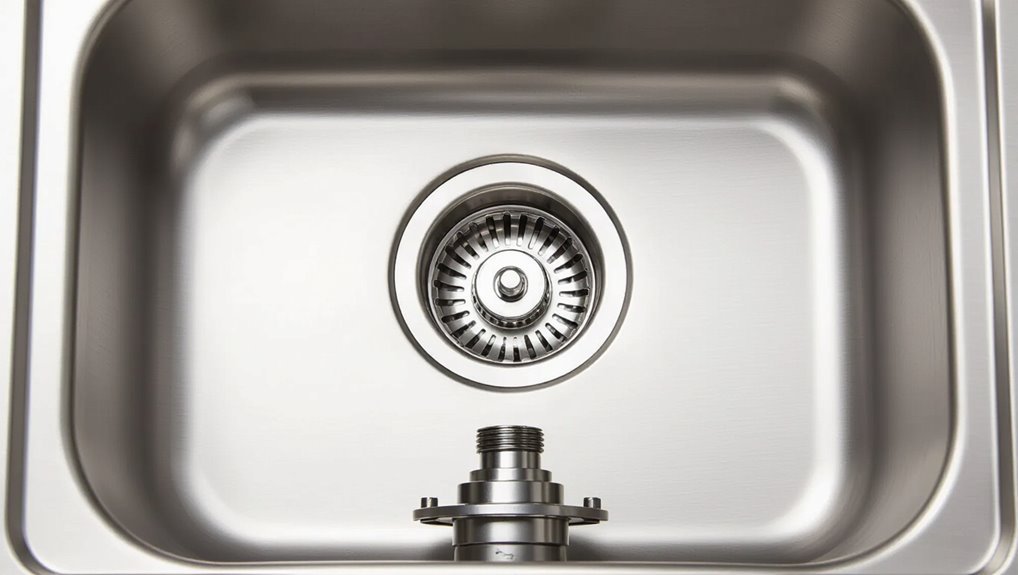
Zooming in on the sink-to-disposal interface reveals the key components of common mounting systems: sink flange, rubber gasket(s), metal mounting ring, and locking ring or snap assembly.
Diagrams should show gasket orientation, flange bead seating, and ring engagement points. Label fastener types, torque notes, and splash guard placement.
Close-ups clarify seal compression, alignment tabs, and disposal hub engagement for leak-free installation.
Conclusion
Installing a double sink with a garbage disposal can transform kitchen function and efficiency, and the step-by-step process makes it achievable for many DIYers. After careful preparation, correct component selection, and patient installation, occasional troubleshooting and routine maintenance keep the system reliable. Isn’t it satisfying when a well-executed project saves time and money while improving daily life? With basic tools, attention to seals and connections, long-term performance follows.