How to Get a Rusted Hose Off a Spigot Without Damaging the Faucet
To safely remove a rusted hose from a spigot without damaging the faucet, first stop the water supply and relieve any pressure. Apply penetrating oil to the coupling and use a strap wrench or padded pliers to turn the hose coupler, stabilizing the spigot with another wrench. Apply gentle heat and consistent torque to break the corrosion, taking care to back off periodically to protect the threads and rinse any chemicals used. If these basic measures don’t work, additional steps and preventive tips can help ensure a safer, more effective removal.
Quick solution: remove a rusted hose from a spigot without damaging the faucet
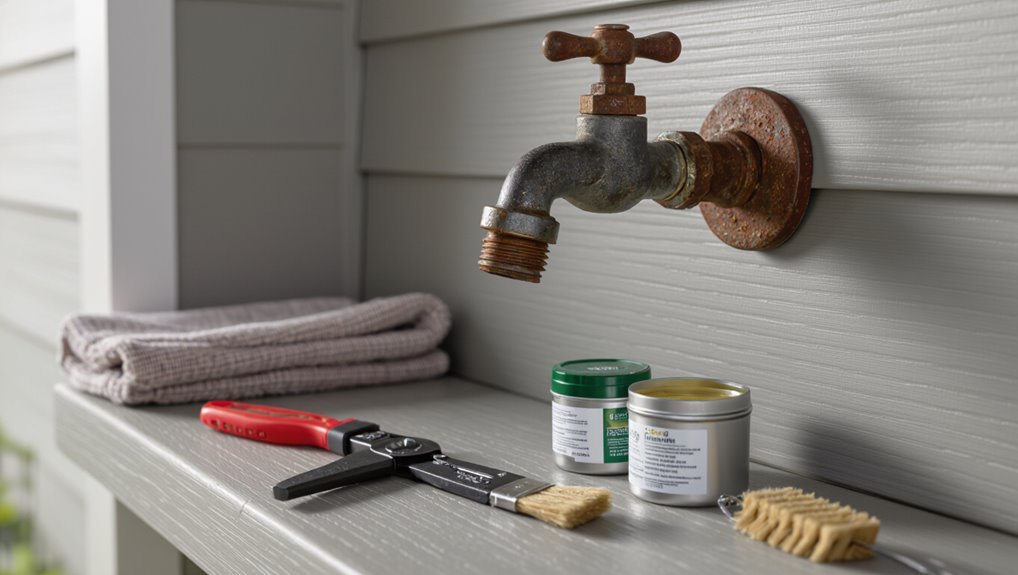
First, the person should try simple, noninvasive steps such as turning off the water, applying penetrating oil, and gently twisting the hose by hand to break surface rust.
If the hose will not budge after a few careful attempts, they should stop and reassess to avoid stressing or scratching the spigot, considering protective padding or alternate techniques.
Recognizing when to pause prevents escalation to more damaging force or unnecessary tool use.
Immediate steps to try before tools
Assess the connection and surrounding area before reaching for tools.
The writer describes simple, noninvasive checks: verify water is off, try gentle twisting and rocking motions, push the hose collar toward the spigot, and tap lightly to break rust bonds.
These steps address how to get a rusted hose off a spigot without applying force that risks damaging the faucet or fittings.
When to stop and reassess to avoid damage
After trying gentle twists, pushes, and taps, the person should pause and evaluate signs that continued force could harm the spigot: visible deformation of the faucet neck, stripped or rounded hose collar threads, persistent immobility despite lubrication, or hairline cracks in nearby fittings.
If any appear, stop. Reassess strategy, consider penetrating oil, cooling/thermal cycling, or professional help to prevent irreversible damage.
Why hoses seize to spigots: causes and risks
Corrosion, mineral deposits from hard water, and overtightening are common reasons a hose will seize to a spigot, as metal bonds and threads become clogged or welded together.
Forcing a stuck hose risks cross-threading or stripping the faucet threads and can crack the spigot body or hose fitting.
Understanding these causes and risks helps inform safer removal methods and when to stop applying force.
How corrosion, mineral buildup, and overtightening cause seizure
Metal components exposed to water and air gradually deteriorate, allowing rust, mineral deposits, and deformation from overtightening to interlock the hose fitting and spigot.
Electrochemical corrosion roughens surfaces, creating crusts that bind threads. Hard water leaves calcium and magnesium scales that cement joints.
Repeated overtightening deforms threads and compresses seals, increasing contact area and mechanical locking, making separation difficult without intervention.
Risks of forcing the hose: cross-threading, stripping, cracking
Forcing a seized hose off a spigot risks damaging both parts: cross-threading can misalign and wreck threads, stripping removes the mating profiles that hold fittings together, and cracking can fracture brittle spigot components or hardened hose fittings.
Such damage complicates future repairs, causes leaks, and may require replacing the spigot or hose. Gentle, methodical techniques reduce these risks and preserve fittings.
Tools and materials needed
The section lists the basic household tools commonly on hand, such as pliers, adjustable wrenches, and utility knives, before noting specialty items like penetrating oil, strap wrenches, and hose cutters that can make removal easier.
It also specifies recommended lubricants and rust-release products suited to metal fittings.
Finally, it outlines necessary safety equipment—gloves, eye protection, and knee pads—and simple precautions to reduce injury and damage.
Basic household tools list
A few common tools and materials will make removing a rusted hose from a spigot safer and more efficient: adjustable pliers or a wrench, penetrating oil, a wire brush, a cloth or rag, gloves, and possibly a heat source such as a hair dryer or propane torch for stubborn connections.
Essential basics include:
- Adjustable pliers or pipe wrench
- Sturdy work gloves
- Wire brush or steel wool
- Clean rags
Recommended specialty tools and lubricants
Consider adding a few specialty items to the toolkit when a standard wrench and penetrating oil are not enough: an impact wrench or strap wrench for seized fittings, a set of tapered and adjustable hose pliers to grip odd shapes, a small butane or propane torch for controlled heat application, and an extraction kit with replacement washers and hose bib adapters.
- High-strength penetrating oil
- Heat-resistant gloves (for torch use)
- Hose bib extractor set
- Nylon strap or rubber jaw protector
Safety equipment and protective measures
When specialty tools like a torch or impact wrench are brought into play, appropriate safety gear becomes necessary to protect against burns, flying debris, and chemical exposure.
The writer recommends isolating the water, working in ventilation, and keeping a fire extinguisher nearby. Personal protective equipment minimizes injury and contamination risks during stubborn-hose removal.
- Safety goggles
- Heat-resistant gloves
- Respirator or mask
- Fire extinguisher
Step-by-step method to loosen and remove a rusted hose
The procedure begins with shutting off the water and relieving pressure before any work is done.
Visible rust and deposits should be brushed away, penetrating lubricant applied and allowed to soak, and light tapping used to break corrosion bonds.
The hose should then be gripped correctly and turned with steady, controlled force to remove it.
Step 1 Shut off water and relieve pressure
Shut off the water supply at the main valve and open a nearby faucet to drain residual pressure before attempting to loosen a rusted hose.
Confirm no water flows from the spigot, then turn off any secondary shutoffs.
Wear gloves and eye protection.
Relieve remaining pressure by briefly opening the spigot, then close it.
Proceed only when the line is fully depressurized.
Step 2 Clean visible rust and deposits
Begin by brushing away loose rust and debris from the spigot and hose connection using a wire brush or abrasive pad, exposing the corroded surfaces for treatment.
Next, wipe with a clean rag and use a small brush or dental pick to remove lodged particles from threads and crevices.
Finish by rinsing with water and drying thoroughly to prevent further corrosion.
Step 3 Apply penetrating lubricant and let it soak
With loose rust removed and the connection dried, a penetrating lubricant is applied to the threads, fitting, and any visible corrosion points to loosen seized metal.
The area is saturated sparingly to avoid runoff, allowed to penetrate for the manufacturer’s recommended time, and re-treated if needed.
Protective gloves are used, and excess lubricant is wiped before attempting further mechanical action.
Step 4 Gentle tapping to break corrosion bonds
Light, targeted tapping helps fracture the rust bonds that lock the hose to the spigot without stressing the fitting.
Using a small hammer or plastic mallet, deliver controlled taps around the hose coupling, moving evenly. Focus on the joint, not the spigot body.
Pause periodically to reapply penetrating oil and check progress. Stop if movement stalls or metal deforms.
Step 5 Proper gripping and turning technique
Apply steady, controlled force while maintaining a firm, non-slip grip on the hose coupling to avoid rounding the nut or twisting the spigot.
Position a wrench squarely on the coupling, support the spigot base with the other hand or a second wrench, and turn counterclockwise in short, deliberate increments.
Pause if resistance spikes; reassess grip, alignment, and leverage before continuing.
Step 6 Use of heat (when appropriate) and precautions
Heat can loosen rusted fittings by expanding metal and breaking corrosion bonds, but it must be applied carefully and only when safe—turn off water, clear nearby combustibles, and never use flames near flammable threads, sealants, or pressurized lines.
Use a heat gun or controlled propane torch briefly, avoid overheating the faucet, monitor seals, keep a fire extinguisher nearby, and allow cooling before attempting removal.
Step 7 Last-resort mechanical options and how to avoid faucet damage
When all gentler methods have failed, resort to mechanical techniques that focus force precisely and protect the faucet from rounded edges or broken threads.
Clamp a protective jaw cover over the spigot, use a strap wrench or adjustable pliers on the hose coupler, and apply steady, controlled torque.
If threads resist, back off frequently, apply penetrating oil, and stop if metal deforms.
Alternative non-damaging approaches
The article outlines several non-damaging alternatives for freeing a rusted hose from a spigot.
Techniques include a two-wrench stabilization method to prevent twisting the spigot, and the use of strap wrenches or rubber tools to protect finishes.
It also notes gentler chemical and household options, such as electrochemical methods and treatments with vinegar or baking soda.
Using two-wrench stabilization method
Stabilize the spigot with one wrench while turning the hose-fitting with a second to prevent strain on the pipe and reduce the risk of twisting or cracking nearby plumbing.
Position the stabilizing wrench on the flat surfaces of the spigot body, apply steady counterpressure, and use a second wrench on the hex of the coupling.
Work slowly, increasing torque incrementally until the fitting loosens.
Using strap wrench or rubber tools to protect finish
Grip the coupling gently with a strap wrench or a rubber-jawed tool to loosen a rusted hose without marring the spigot’s finish.
The operator applies steady, even pressure, rotating slowly to break corrosion. Rubber pads conform to irregular shapes, distributing force and preventing scratches.
Use appropriate strap length and padding, inspect tool grip frequently, and stop if slipping occurs to reassess technique.
Electrochemical and household remedy options (vinegar, baking soda)
When chemical penetration is preferred over mechanical force, mild household acids and simple electrochemical methods can dissolve rust without harming the spigot’s finish.
White vinegar soaks loosen oxidation; baking soda paste neutralizes and lifts residue.
Electrochemical options—sacrificial aluminum with baking soda solution—reduce rust via galvanic action.
Rinse thoroughly, protect threads with lubricant, and inspect seals before reattaching the hose to prevent corrosion recurrence.
Repair and cleanup after removal
Once the hose is freed, the spigot should be inspected for thread damage and any defects at the valve seat.
The metal surfaces can then be cleaned and reconditioned to restore a proper seal and prevent future corrosion.
If fittings or washers are worn or distorted, they should be replaced before reconnecting the hose.
Inspecting spigot threads and valve seat for damage
After the hose and any corroded fittings are removed, the spigot should be examined closely for thread damage and wear at the valve seat.
Visual inspection under good light identifies stripped threads, burrs, cracks, or corrosion pitting. A feeler or fingertip can detect roughness.
Document findings, noting whether repairs, part replacement, or professional evaluation are required before reassembly or continued use.
Cleaning and reconditioning the spigot
Begin by removing loose debris and surface rust from the spigot using a stiff brush and a wire-wheel attachment on a drill or a manual wire brush, working around the threads and valve seat to expose the underlying metal.
Apply a rust remover or vinegar solution, rinse thoroughly, dry, then coat exposed metal with a corrosion inhibitor or appropriate metal-safe lubricant to protect and restore function.
Replacing hose fittings or washers if needed
Inspect the hose end and spigot fittings for worn threads, flattened or cracked washers, and accumulated corrosion that could cause leaks.
Replace damaged rubber or neoprene washers, selecting the correct size for a snug seal. Swap corroded hose couplings or use new stainless or brass fittings.
Tighten connections without overtightening, then test for drips and recheck after a short use period.
Preventing future seizure and corrosion
To minimize future seizing and corrosion, the article outlines ideal hose materials and corrosion-resistant fittings suited to outdoor use.
It also covers correct installation techniques and a simple maintenance routine to prevent moisture buildup and galvanic reactions.
Seasonal care and winterizing steps are provided to protect connections during freezing months.
Best hose materials and fittings to resist rust
When selecting hoses and fittings to minimize rust and seizure, choose materials that resist corrosion and avoid dissimilar-metal pairings that promote galvanic corrosion.
Preferred options include nonferrous metals, plastics, and protective coatings to prolong life without compromising connections.
- Brass or stainless-steel fittings
- Reinforced EPDM or PVC hoses
- Nylon or polymer quick-connects
- Brass-to-brass adapters for metal joins
Proper installation and maintenance routine
A consistent installation and maintenance routine prevents most hose-and-spigot seizures by combining correct assembly, compatible materials, and scheduled care.
Install hoses with proper washers, avoid overtightening, and use brass or stainless fittings.
Periodically inspect connections, clean threads, apply a thin food-grade silicone or plumber’s grease, and tighten gently.
Replace damaged parts promptly to minimize corrosion and maintain easy removal.
Seasonal care and winterizing tips
Following a steady installation and maintenance routine, seasonal care and winterizing further reduce the risk of seized hose-to-spigot joints by addressing temperature-related stress and moisture exposure.
Before freezing weather, disconnect and drain hoses, shut off and drain outdoor shutoffs, insulate exposed spigots, and apply a light silicone or plumber’s grease to threads.
Inspect for corrosion each season and replace damaged fittings promptly.
Common mistakes and how to avoid them
Common mistakes include using excessive force or improper tools that strip threads or crack the spigot, creating permanent damage.
Practitioners should try noninvasive remedies first—penetrating oil, heat, and proper wrenches—while monitoring for signs of worsening damage.
If the fitting won’t budge, leaks appear, or the spigot is visibly deformed, a professional plumber should be called to avoid costly repairs.
Errors that cause permanent faucet damage
Mistakes such as using excessive force, applying inappropriate tools, or neglecting corrosion can permanently damage a faucet by stripping threads, deforming spindles, or cracking housing materials.
Other errors include hammering fittings, overtightening replacement parts, using incompatible solvents that dissolve seals, and ignoring protective finishes.
To avoid irreversible harm, select correct tools, apply steady leverage, protect surfaces, and address rust with appropriate penetrating lubricants and gentle patience.
Safe escalation: when to call a plumber
Recognize when a stuck, rusted hose or seized spigot exceeds DIY skill: persistent leaks despite repeated tightening, rounded or stripped threads, visible cracking, seized internal cartridges, sudden water pressure loss, or signs of interior corrosion warrant professional help.
Hire a licensed plumber when attempts risk further damage, DIY tools fail, water shutoff issues arise, or permits and warranty concerns apply; document conditions for clear communication.
Cost, time estimates, and decision guide
Typical DIY removal takes 15–60 minutes depending on tools and corrosion, while hiring a professional can reduce effort to a short service call but adds labor cost.
Labor and parts costs are compared against the value of a new spigot or hose to determine whether replacement is more economical than repair.
The next section provides quick estimates and a simple decision checklist to guide that choice.
Typical time required for DIY removal vs professional service
Estimate the time and cost trade-offs before deciding whether to tackle a rusted hose removal as a DIY task or call a professional. DIY: 15–90 minutes, low cost for tools/penetrant; Professional: 30–60 minutes, higher labor charge but less risk. Use the table to compare typical scenarios.
| Task | Time range | Typical cost |
|---|---|---|
| Simple DIY | 15–30 min | $0–$20 |
| Stubborn DIY | 45–90 min | $10–$40 |
| Pro service | 30–60 min | $50–$120 |
When replacement is more cost-effective than repair
After weighing time and cost for DIY versus professional removal, the next consideration is whether replacing the spigot or hose bib is more economical than repairing a seized connection.
Evaluate parts, labor, and downtime: a new basic spigot typically costs $20–$70 plus one hour of labor; complex valves or corroded piping raise costs.
Replace when repair exceeds 50–70% of replacement price.
Visual aid suggestions for readers
Suggested visuals should include clear photos of the seized hose, the required tools laid out, and each key step of the removal process.
Simple diagrams are recommended to indicate correct wrench placement and the direction and location for applying heat.
These aids help readers confirm they are following the procedure safely and correctly.
Photos to include: seized hose, tools, step-by-step actions
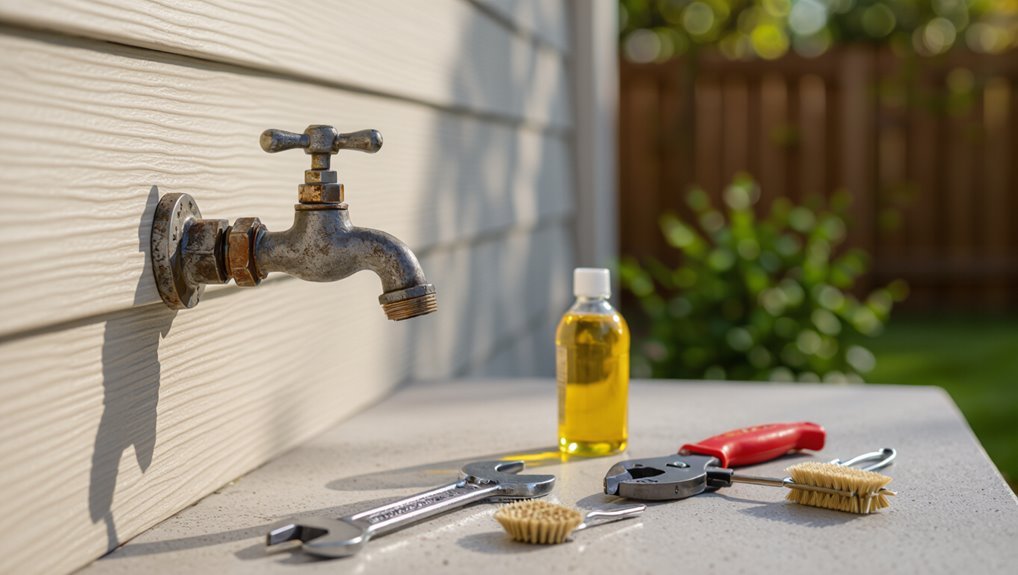
Include clear, well-composed photos that show the seized hose in relation to the spigot, the specific tools needed, and each key step of the removal process.
Capture close-ups of corrosion, wider shots for context, and labeled tool layouts. Photograph progressive actions: loosening, applying penetrant, tapping, and final removal.
Guarantee good lighting, steady framing, and varied angles to aid comprehension.
Diagrams to show correct wrench placement and heat application
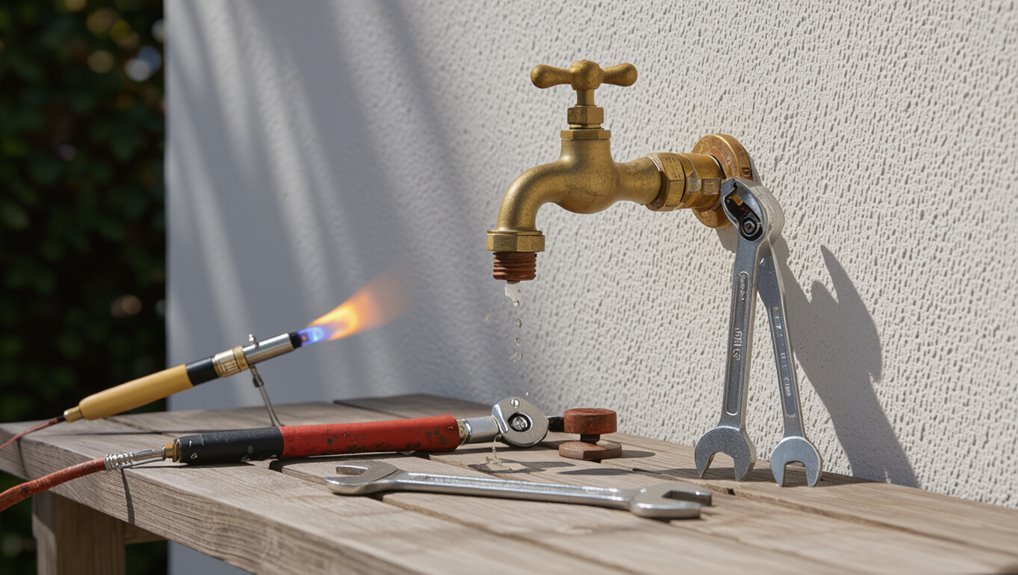
Following the photo sequence, diagrams should clearly illustrate exact wrench placement and safe heat application to complement the images.
Use labeled close-ups showing jaws on flats, torque direction arrows, and points to avoid contact with faucet body.
Include heat zones, recommended torch distance, and shielding for seals.
Add scale indicators and brief captions documenting temperature limits, timing, and required PPE for safe execution.
Conclusion
A homeowner successfully loosened a rusted hose without harming the brass spigot by applying penetrating oil, waiting 20 minutes, then using a strap wrench and gentle back‑and‑forth rotation until the coupling freed. This illustrates that patient, nonimpact methods protect faucets; forcing or cutting risks valve damage and costly replacement. With the right tools and corrosion prevention afterward, seized fittings can usually be removed intact, saving money and avoiding plumbing repairs.