How to Find a Gas Line: Step-by-Step Guide for Homeowners to Locate Pipes Safely
Before digging, homeowners must locate gas lines to avoid leaks, fires, or legal issues. Start by reviewing property plans, visually tracing lines from the meter, and contacting the national one-call service for free utility markings. Use noninvasive tools like probes and gas sniffers, and always wear safety gear. Follow marked color codes, shut off appliances if needed, and evacuate if you suspect a leak. Continue reading for detailed steps, tools required, and guidance on when to hire a professional.
How to Tell If You Need to Locate a Gas Line Before You Start Work
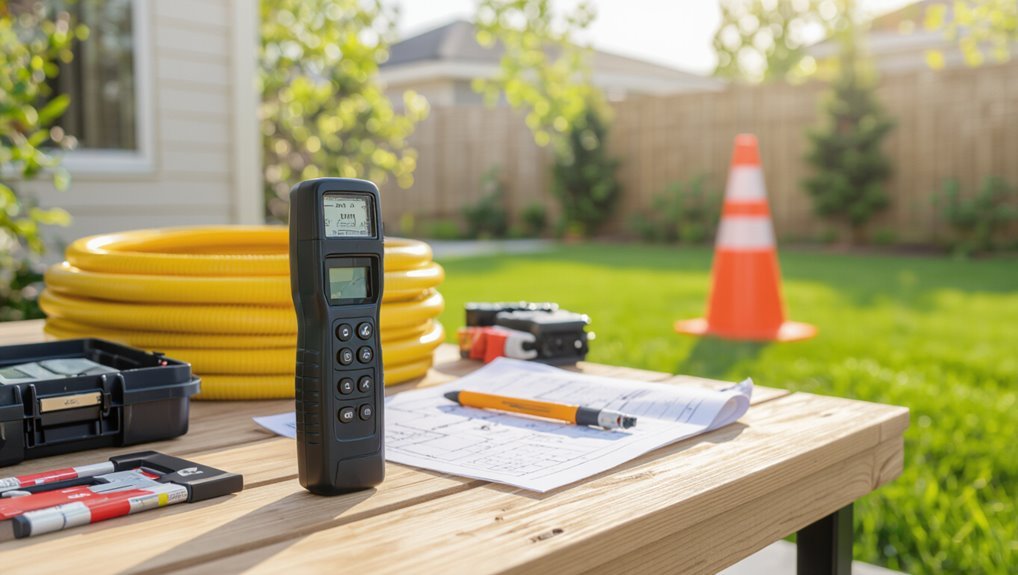
Before starting projects such as landscaping, fence or deck installation, or any work that involves digging near the house, one should determine whether a gas line may be present.
Striking or damaging a gas line can cause leaks, fire, explosion, or service disruption, so awareness of its location is critical.
Local laws and utility regulations often require homeowners to locate or have utility lines marked before excavation to guarantee safety and compliance.
Common projects that require locating gas lines
Many common home and construction projects—such as installing a new gas range, adding a water heater, replacing a furnace, building a deck, or trenching for landscaping—require knowing where underground or enclosed gas lines run to avoid damage, leaks, and safety hazards.
Other tasks include installing outdoor grills, gas lighting, pool heaters, sidewalk or driveway work, and major remodels; homeowners should learn how to find a gas line before starting.
Risks of damaging a gas line during DIY or construction
A struck or severed gas line can produce immediate dangers—explosive leaks, fires, toxic exposure, and asphyxiation—making it critical to determine whether planned digging or alterations intersect known or suspected gas routes.
Damage risks include uncontrolled gas release, ignition from tools, subsurface conduit collapse, and loss of service.
Consequences range from property destruction and environmental contamination to severe injury or death, emphasizing careful prework assessment.
Legal and safety obligations for homeowners
Determine whether locating a gas line is required whenever ground disturbance, structural work, or installation of utilities is planned, because local regulations, utility company rules, and common-sense safety standards commonly mandate pre-digging notification and marking.
Homeowners must check local code, call the national one-call service, notify utility providers, obtain permits, and follow contractor and inspection requirements to avoid legal liability and guarantee safety.
Quick checklist to determine where to look first
A quick checklist helps prioritize where to look first for a gas line and reduces the risk of accidental damage.
It should prompt gathering relevant documents, scanning the property for visible indicators, and contacting the utility when appropriate. Following these steps focuses the search and guarantees safety before any digging begins.
- Locate documents and records: property plans, permits, utility maps
- Scan for visual clues: meter, regulator, vents, and appliance positions
- Note utility-company contact points and when to call before digging
- Prioritize areas where records and visual clues align
Documents and records to gather (property plans, permits, utility maps)
Documents and records provide the fastest clues to a gas line’s location: property plans, past permits, and utility maps should be collected before any fieldwork begins.
Seek original site plans, subdivision plats, construction permits, and as‑built drawings.
Request utility locator records from the gas company and municipal maps.
Note easements, service laterals, and meter set locations; record distances and scales for accurate field referencing.
Visual clues on the property (meter, regulator, vents, appliance locations)
Visual clues on the property direct where to start searching for gas lines: exterior meters and regulators, vent pipes, appliance locations, and visible service risers form a short checklist that narrows likely routes.
Note meter orientation, buried service markers, outdoor appliance hookups, and vented flues. Follow straight-line paths from meter to appliances, observe fenced or paved ground changes, and mark probable trench corridors.
When to call your utility company before digging
Before any shovel hits the soil, the utility company should be contacted when excavation might cross, approach, or disturb underground gas infrastructure; call before digging near meters, regulators, service lines, driveways, fence posts, landscaping projects, pools, or patios.
Confirm marked locations, request professional locates, obtain permit requirements, and follow safety clearance distances.
When uncertain, always defer to the utility’s guidance and wait for markings.
Tools and resources for finding underground and indoor gas lines
The section outlines free and paid tools and services for locating gas lines both outdoors and inside homes.
It covers free resources like utility markings and 811/Call-Before-You-Dig, basic homeowner tools such as a probe, metal detector, and handheld gas sniffer, and professional options including pipe locators, electromagnetic locators, and camera inspections.
Readers are advised to use free services first and to hire qualified professionals for complex or uncertain situations.
Free resources: utility markings, 811/Call-Before-You-Dig
When digging or planning renovations, homeowners and contractors should rely on free public resources—most importantly utility markings and the 811/Call-Before-You-Dig service—which identify underground gas lines and other buried utilities, reduce the risk of strikes, and provide legal and safety guidance at no cost.
Requests trigger professional locators, color-coded surface markings, and maps; follow-up notifications and waiting periods guarantee safe excavation and compliance.
Basic tools homeowners can use safely (probe, metal detector, gas sniffer)
After using public locates like 811, homeowners can supplement that information with a few basic, low-risk tools to narrow down pipe locations and check indoor lines.
A non-invasive probe (gentle, shallow probing) can confirm shallow runs.
A consumer metal detector helps find metallic fittings.
A handheld combustible gas sniffer detects indoor leaks; always ventilate and evacuate if readings rise.
Professional tools and services (pipe locator, electro-magnetic locators, camera inspection)
Employing professional tools and services gives homeowners precise, low-risk options for locating both underground and indoor gas lines.
Technicians use pipe locators and electromagnetic locators to trace metallic and traced nonmetallic pipes; CCTV camera inspection verifies interior line condition and joints.
Licensed contractors interpret signals, mark routes, and provide safe excavation or repair recommendations, reducing damage risk and ensuring regulatory compliance.
Step-by-step process to locate an outdoor underground gas line
The procedure begins with preparing the site and donning appropriate safety gear.
After consulting utility maps and requesting markings from 811, the observer locates the gas meter and traces the visible service route.
Non-invasive detection tools are used next, with a final confirmation performed by a professional locator or utility technician.
Step 1 Prepare the site and gather safety gear
Before any digging begins, the site should be cleared of loose debris and simple hazards while the locate area is defined and marked; this sets a controlled work zone and reduces the risk of accidental contact with utility lines.
The homeowner should don safety glasses, gloves, high-visibility clothing and sturdy boots, assemble shovels, a probe and a non-sparking digging bar, and keep a charged phone and fire extinguisher nearby.
Step 2 Check utility maps and request marking from 811
Once the work area is defined, consult available utility maps and contact 811 to request a professional locate before any digging begins; this guarantees known underground lines are identified and marked by qualified technicians.
The homeowner should review municipal records, pipeline operator maps, and any utility plans, then wait the required time for markings.
Respect color codes and avoid disturbing marked areas until digging protocols are followed.
Step 3 Identify the gas meter and follow the service route visually
After confirming that utility locates are complete, a visual inspection begins at the gas meter because it marks the service connection and typically aligns with the underground route to the building.
The inspector notes meter orientation, service pipe exit point, and any visible fittings.
From there, they trace a straight line toward the structure, observing pavement cuts, landscaping changes, and other clues indicating the buried path.
Step 4 Use non-invasive detection (metal detector, gas leak detector)
Begin scanning the traced route with non-invasive detection tools to confirm the underground gas line’s location without disturbing the ground.
The operator should sweep a metal detector to detect metallic pipe and fittings, then use a combustible gas detector to sense odorants or methane.
Move slowly, mark confirmed readings with flags, and note distances from fixed landmarks for later verification.
Step 5 Confirm location with a professional locator or utility technician
With initial detections flagged, a professional locator or utility technician should be contacted to verify and precisely mark the line before any excavation.
The technician uses calibrated equipment, utility maps and tracer signals to confirm depth, route and ownership. They identify ancillary services, note safety concerns, and provide official markings or documentation.
Rely on their verification before digging or hiring contractors.
Step 6 Mark and document the located line for future reference
Mark the confirmed route clearly and record its details to guarantee safe future work.
The homeowner or technician should paint or flag the surface line, note depth measurements and GPS coordinates, and photograph the markers.
Enter this information into property records and share it with utility companies and contractors.
Keep copies in a safe, accessible place and update after any excavation or landscaping.
Step-by-step process to locate indoor gas piping and appliance connections
The text outlines a clear, step-by-step approach for locating indoor gas piping and appliance connections, beginning with turning off appliances and noting shutoff locations.
It advises tracing pipe runs from the meter into the building, inspecting basements, crawlspaces, and utility closets, and using audible sniffers or handheld detectors to check for leaks.
It also specifies safety precautions and signs for when to stop and call a licensed plumber or gas technician.
Step 1 Turn off appliances and understand gas shutoff locations
Before inspecting piping, verify all gas-burning appliances are turned off and ignition sources, such as pilot lights, are extinguished; this minimizes risk and makes subsequent checks safer.
Then locate appliance shutoff valves and the main indoor shutoff—often near the meter, furnace, or gas line entry.
Note valve positions, label them if needed, and keep a wrench nearby for emergency closure.
Step 2 Trace pipe runs from the meter into the building
Begin at the gas meter and follow the main pipe where it enters the building, noting joints, fittings, and any branch lines that lead to appliances; this visual tracing establishes a map of the system and highlights probable shutoff and appliance connection points.
Indoors, track runs along walls, ceilings, basements and crawlspaces, marking visible valves, flanges, unions and appliance risers for reference during inspection or maintenance.
Step 3 Use audible sniffers and hand-held detectors for leaks
One practical step is to sweep the interior gas runs with an audible sniffer or handheld detector to pinpoint leaks and verify connections.
The technician moves slowly along visible piping, fittings, valves and appliance inlets, listening for alarms and noting higher readings.
Confirm suspected leaks by cross-referencing with a soap solution and shutoff procedures; record locations and isolate affected sections pending professional repair.
Step 4 Inspect basements, crawlspaces, and utility closets safely
Enter basements, crawlspaces, and utility closets with a systematic plan: the inspector shines a bright work light, wears protective gear (gloves, eye protection, respirator if needed), and keeps a charged audible sniffer or handheld detector and soapy solution within reach.
They follow visible piping from meter toward appliances, check fittings, valves, and flexible connectors, listen for hissing, apply soapy solution for bubbling, and note locations.
Step 5 When to stop and call a licensed plumber or gas technician
If unexpected corrosion, active leaks, unclear piping routes, damaged fittings, or any signs of gas odor or illness are encountered, the inspector stops and contacts a licensed plumber or gas technician immediately.
The inspector documents findings, secures the area, evacuates occupants if necessary, and avoids further probing.
Only certified professionals should perform pressure tests, repairs, or modifications to guarantee safety and code compliance.
How to interpret utility markings and color codes
Utility markings and color codes provide quick, standardized clues about underground and aboveground utilities that help prevent accidental strikes. Below is a simple reference table to highlight common colors and typical marking distance/depth standards. Interpreting these marks correctly and consulting local one-call standards is essential before any excavation or service work.
| Color | Typical Meaning |
|---|---|
| Yellow | Gas, oil, steam |
| Red | Electric power lines |
| Orange | Communication, alarm or signal lines |
Common marking colors and what they mean
Because underground utilities use standardized paint and flag colors to communicate hazards, recognizing those colors is the first step in interpreting site markings.
Yellow denotes gas, oil, and steam lines; red signals electrical power; orange marks communications; blue indicates potable water; green shows sewers and drain lines; purple warns reclaimed water; white outlines proposed excavation.
Each color guides safe digging and contact protocols.
Standards for marking distances and depths
After identifying color codes, attention turns to the shapes, symbols, and numeric labels that convey distances and depths for buried lines.
Standard markings include arrows for direction, numbers indicating depth in inches or centimeters, and offsets showing lateral distance from a reference point.
Understanding abbreviations (e.g., “T” for test hole) and consistent spacing prevents misinterpretation and guides safe excavation planning.
Signs of a hidden or leaking gas line to watch for
Visible clues such as unusual sulfur or rotten-egg odors, dead or discolored vegetation, audible hissing, and air bubbles in standing water can indicate a hidden or leaking gas line outdoors.
Indoors, persistent rotten-egg smells, sudden dizziness or headaches, and pilot lights that flicker or go out are key warning signs.
If a leak is suspected, occupants should evacuate, avoid flames or electronics, and notify the gas company or emergency services immediately.
Odors, dead vegetation, hissing sounds, and bubbles in standing water
Detecting a hidden or leaking gas line often depends on noticing subtle environmental clues: unusual odors like rotten eggs from added mercaptan, patches of dead or discolored vegetation, persistent hissing or rushing sounds near underground utilities, and bubbling or foaming in standing water.
Such signs warrant immediate caution—evacuate the area, avoid ignition sources, and contact the gas utility or emergency services for professional assessment.
Indoor indicators: rotten-egg smell, dizziness, pilot light issues
When natural gas infiltrates an occupied space, the added mercaptan gives rise to a distinctive rotten-egg odor that is often the first indoor warning of a leak.
Occupants may also experience dizziness, nausea, headaches, or fatigue from low-level exposure.
Flickering or repeatedly extinguished pilot lights, unusual appliance behavior, and unexplained gas appliance malfunctions further suggest a concealed leak requiring prompt professional assessment.
Emergency actions to take if you suspect a leak
Evacuate the area immediately and move upwind if a gas odor, hissing sound, or sudden health symptoms suggest a leak; do not use electrical switches, phones, or open flames, and avoid actions that could create a spark.
After reaching safety, call emergency services and the gas utility from a safe location. Report injured persons, ventilate if instructed, and do not reenter until cleared by authorities.
Safety protocols and best practices while locating gas pipes
Before attempting any excavation or inspection, the individual should use appropriate personal protective equipment and observe safe-distance rules from marked gas lines.
They must choose hand-digging methods rather than mechanical digging within the required clearance and coordinate with neighbors, contractors, and the utility company to confirm locations and work windows.
Clear communication and adherence to protocols reduce risk and guarantee a safer locating process.
Personal protective equipment and safe-distance rules
Wear appropriate personal protective equipment (PPE) and maintain prescribed safe distances to minimize injury and ignition risk while locating gas lines.
Observers should wear flame-resistant clothing, safety glasses, gloves, hard hats and steel-toed boots. Use intrinsically safe electronic detectors.
Establish exclusion zones based on utility markings and local codes, restrict smoking and ignition sources, and keep untrained personnel well beyond the safety perimeter.
Hand-digging vs. mechanical digging near marked lines
When approaching marked utility lines, crews should favor hand-digging within the tolerance zone and reserve mechanical excavation for areas confirmed clear or where protective measures (e.g., potholing boxes, vacuum excavation) are in place; this reduces the risk of striking gas pipes, limits vibration and shrapnel hazards, and allows for controlled exposure to verify depth and orientation.
Hand tools, soft shovels, and probing rods enable precise uncovering; equipment use requires spotters and documented clearance.
Communication with neighbors, contractors, and the utility company
Effective communication among neighbors, contractors, and the utility company is essential to safely locate gas pipes and prevent accidental strikes.
Parties should share property plans, mark access points, schedule locate services, and confirm permits.
Contractors must verify markings before work; neighbors need notification of digging.
The utility company should provide records, onsite guidance, and emergency contacts.
Document agreements and maintain clear, timely updates.
Common mistakes and how to avoid them
Common mistakes when locating gas lines often stem from assuming visible indicators are definitive without verification.
Other frequent errors include excavating prior to utility marking or using inappropriate tools that can damage lines.
Failing to act on minor odor or pressure signs and delaying reports also increases risk.
Relying solely on visual cues without confirmation
Mistaking surface indicators—such as disturbed soil, visible pipe markings, or nearby utility flags—for proof of an active gas line can lead to dangerous assumptions.
Visual cues alone are unreliable because lines may be buried, inactive, relocated, or unmarked.
Professionals recommend verifying with utility locators, calling 811, checking as-built plans, and using certified detection equipment before proceeding.
Never assume visual signs equal confirmed pipe location.
Digging before utility marking or using improper tools
Beginning excavation before utilities are marked or using inappropriate tools can sever a gas line, creating leaks, explosions, or service outages.
Homeowners should always request professional utility marking, use noninvasive locating methods first, and employ proper hand tools when excavation is necessary.
Follow safe digging practices, maintain clear marks, and contact utility operators for guidance to prevent damage and guarantee swift, compliant repairs.
Ignoring minor signs of leakage or delayed reporting
Overlooking faint smells, hissing sounds, or dead vegetation can turn a small gas leak into a major hazard if not reported promptly.
Homeowners who dismiss subtle signs or delay notifying gas providers increase risks of explosion, poisoning, and property damage.
Prompt detection, immediate evacuation if needed, and swift reporting to utility companies or emergency services prevent escalation and enable timely professional repair.
When to hire professionals and what to expect from paid services
When uncertain about a gas line’s location or when excavation or pressure work is planned, a professional should be engaged.
Options include utility locators, licensed plumbers, and certified gas-fitters, each offering different tools, typical turnaround times, and fee structures.
Before hiring, ask about credentials, detection methods, estimated cost and timeframe, insurance, and whether a written mark-up or report will be provided.
Types of professionals: utility locators, plumbers, gas-fitters
Identifying the right professional for gas-line work depends on the task: utility locators map underground public and private lines before digging.
Plumbers handle indoor gas piping and appliance connections.
Licensed gas-fitters or HVAC technicians perform complex installations, repairs, and safety inspections.
Homeowners should verify licensing, insurance, and references; expect diagnostic testing, marked lines, formal reports, and compliance with local codes and permits.
Typical costs and timeframes for professional locating
Costs for professional locating typically range from a basic call-out or flat fee for markouts to higher hourly or project rates for detailed surveys and documentation.
Turnaround times vary from same-day visits to several days depending on demand and complexity.
Homeowners should expect clear pricing, visible markings, written reports for complex jobs, and higher costs for depth scans, mapping, or emergency after-hours service.
Questions to ask before hiring a locator
Who should be called and what should they provide are key considerations before hiring a gas-line locator.
Homeowners should ask about licensing, insurance, and utility notification procedures.
Inquire on detection methods, accuracy guarantees, written reports, and mark permanence.
Request references, timeframes, itemized pricing, and liability for damage.
Clarify follow-up support and regulatory compliance before signing any contract.
How to document and maintain records of located gas lines
Once located, gas lines should be clearly marked on the property using durable markers and a scaled paper map kept with other site documents.
Digital records—photos, GPS coordinates, and scanned plans—provide precise, easily shareable references. Those records must be updated promptly after any landscaping or construction to reflect changes and maintain safety.
Best ways to mark lines on your property (permanent markers, maps)
Marking and recording the location of gas lines on a property creates a reliable reference for future work and safety checks.
Homeowners should use durable, weatherproof markers—metal stakes or labeled PVC posts—placed at regular intervals and key bends.
Complement physical markers with a clear hand-drawn map on paper stored with property documents.
Note marker dates, material, and any maintenance or changes for accurate long-term records.
Digital record options: photos, GPS coordinates, scanned plans
Physical markers and paper maps provide a reliable on-site reference, but digital records make the information easier to share, back up, and update over time.
Homeowners should photograph exposed lines with date-stamped images, record GPS coordinates (decimal degrees) for key points, and scan utility plans or receipts.
Store files in cloud backup, label consistently, and keep a simple index for quick retrieval.
Updating records after landscaping or construction
When landscaping or construction disturbs a yard, homeowners should immediately update their records to reflect any changes to gas line exposure, routing, or added protective measures.
They should timestamp photos, annotate GPS waypoints, note contractor names and permits, and mark altered depth or shielding.
Store copies digitally and in hard copy with property records, and notify utility providers of significant modifications.
Additional resources and legal references
Readers are reminded to contact 811 before any excavation and to expect a ticket that schedules locates within a specified timeframe and notes marked utilities.
They should consult local building and safety codes and keep utility company contact information handy for service-specific questions.
Manufacturer manuals and industry guidance for gas appliances are recommended for safe installation and operation.
How to contact 811 and what to expect from a ticket
Contact 811 by calling the national three-digit number or using the local utility’s online ticket portal to request a locate before digging; the call initiates an official ticket that alerts utilities to mark underground lines at the work site and typically includes a ticket number, scheduled mark date, and contact information for follow-up.
Expect color-coded marks, a validity period, possible field visits, and verification steps.
Relevant local codes and utility company contacts
After receiving an 811 ticket and the utility markings at the site, local building codes, excavation ordinances, and utility company rules determine the legal responsibilities for safe digging, notification periods, and mark maintenance.
Homeowners should consult municipal code sections, state excavation laws, and the gas utility’s contact list for emergency and engineering liaisons.
Retain written permits, inspection requirements, and dispute procedures for compliance and liability protection.
Recommended reading and manufacturer guidance for gas appliances
A concise bibliography of manufacturer manuals, industry standards, and authoritative guides helps homeowners and contractors verify correct installation, operation, and maintenance of gas appliances.
Include appliance-specific installation instructions, ANSI/ASME/CGA standards, local code summaries, and utility safety pamphlets.
Recommend OEM service bulletins and warranty terms, plus links to NFPA 54 and government consumer safety sites.
Consult certified technicians for interpretation and compliance.
Conclusion
Locating gas lines requires caution, yet ordinary preparation. The homeowner’s practical checklist contrasts with the hidden risk beneath a lawn; routine tools sit beside specialized meters. Simple steps can reveal pipes, while a single mistake can spark danger. When uncertainty persists, professional help replaces DIY confidence. Clear documentation transforms vague memory into reliable maps. The juxtaposition of ease and peril underscores one truth: respect the unseen—prepare thoroughly, act carefully, and never assume.