How to Tighten a Hand Auger: Step-by-Step Guide for Secure, Smooth Drilling
To tighten a hand auger effectively, start by inspecting it for any damage, loose fasteners, or worn threads. Secure the auger on a stable surface and clear any debris from the joints. Use the correct wrenches to replace or realign bits, and then tighten the set screws or collars in a crisscross pattern, taking care not to over-torque. Applying a light lubricant or thread locker can enhance performance. Finally, test-rotate the auger to ensure there’s no wobble, and log any maintenance performed. For further guidance, refer to detailed techniques, torque specifications, and troubleshooting tips.
Quick summary: When and why tightening a hand auger matters
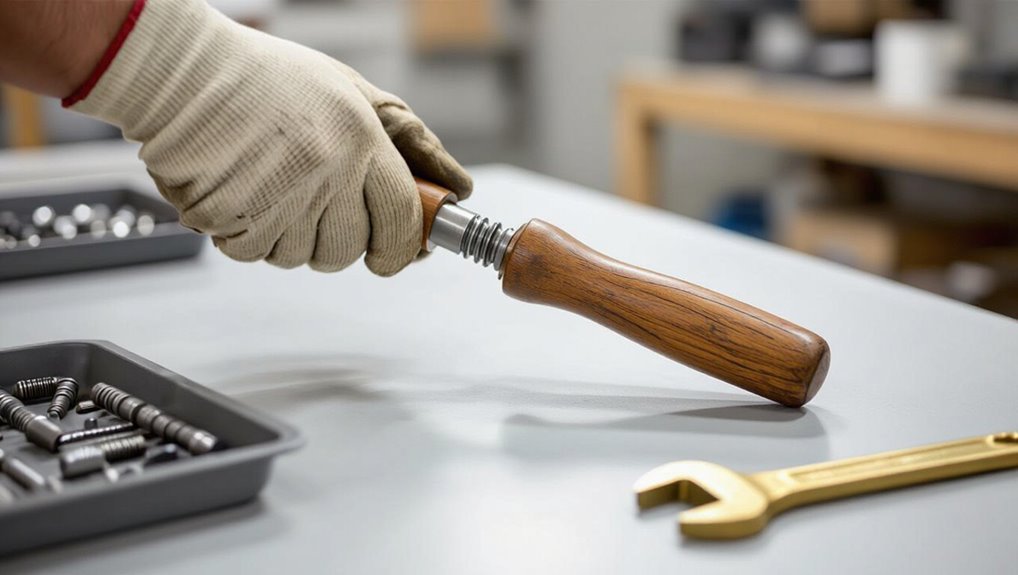
Regularly checking and tightening a hand auger prevents slippage, improves cutting efficiency, and reduces wear on both the tool and operator.
This concise overview explains when and why adjustments matter: before each use, after striking roots or hard material, and when vibration increases.
Understanding how to tighten hand auger fasteners guarantees secure bit seating, stable torque transfer, and safer, more consistent drilling performance.
Tools and materials needed for tightening a hand auger
The section lists the essential tools and any replacement parts needed to tighten a hand auger, such as wrenches, replacement screws, and locking collars.
It also notes optional lubricants and maintenance supplies that simplify the job and extend tool life.
Practical recommendations focus on matching parts to the auger model and choosing appropriate lubricants.
Required tools and replacement parts
Gathering the right tools and replacement parts before tightening a hand auger assures the job is efficient and avoids mid-repair delays.
A concise kit prevents damage and guarantees safe operation. Essentials include compatible replacement blades or bits, appropriate wrench or pliers for fasteners, and a set of replacement screws or pins matched to the auger model.
- Replacement blades/bits
- Wrench or pliers
- Screws or pins
Optional lubricants and maintenance supplies
After assembling replacement blades, fasteners, and gripping tools, attention can turn to optional lubricants and maintenance supplies that keep the auger operating smoothly and extend component life.
Recommended items include light machine oil for threads, silicone spray for wooden handles, anti-seize compound for metal joints, a rust inhibitor, clean rags, a small brush for debris, and a compact tool roll to store essentials.
Understanding hand auger components relevant to tightening
The auger head, shaft, and interchangeable bits should be inspected for proper seating and alignment before any tightening is attempted.
Fasteners, collars, set screws, and other locking mechanisms must be checked for security and correct torque.
Attention should be paid to common wear points—worn splines, stripped threads, and rounded fastener heads—that often cause looseness.
Auger head, shaft, and bits’ what to check
Inspect the auger head, shaft, and bits for wear, damage, and secure connections before attempting any tightening.
Examine cutting edges for dullness or chips, check the shaft for bends, cracks, or corrosion, and verify bit fitment and alignment.
Remove debris lodged in joints, confirm threads are intact, and note any deformation that could impair performance or require replacement rather than tightening.
Fasteners, collars, set screws, and locking mechanisms
Fasteners, collars, set screws, and locking mechanisms form the interface that secures a hand auger’s components and controls rotational and axial movement.
Inspect threaded fasteners for proper torque, check collars for alignment and wear, verify set screws seat on flats or keys, and confirm locking mechanisms engage fully.
Use appropriate tools and threadlocker where specified to maintain reliable, backlash-free connections.
Common wear points that cause looseness
Wear concentrates at interfaces where load, friction, and vibration intersect, producing the loosest, most failure-prone joints on a hand auger.
Bearings, bushings, and spindle journals erode; threads strip; keyways and spline fits loosen; pressed collars and tapered shafts wear; retaining rings deform; set screw seats ovalize.
Identifying these points enables targeted inspection, timely replacement, and corrective tightening to restore secure, accurate operation.
Safety precautions before tightening or working on an auger
Before any tightening is attempted, the operator should be equipped with appropriate personal protective equipment and a cleared, well-lit workspace to prevent slips and debris hazards.
The auger must be isolated from power, pinned or braked as needed, and any stored energy discharged or secured. These precautions reduce the risk of accidental startup and injury during maintenance.
Personal protective equipment and workspace setup
A clear checklist of personal protective equipment and a well-organized workspace are essential to safe auger maintenance.
Protective gloves, eye protection, sturdy footwear, and close-fitting clothing reduce risk.
Clear area of tripping hazards and guarantee good lighting.
Tools arranged within reach reduce fumbling.
- Gloves: confidence against cuts
- Goggles: calm against debris
- Clear floor: relief from slips
Lockout steps and handling stored energy
Shutdown and isolate the auger system, then lock and tag energy sources to prevent unexpected startup.
Verify mechanical brakes, clamps, or chocks are engaged.
Release stored energy from springs, pneumatic lines, or tensioned cables following manufacturer procedures.
Drain hydraulic pressure and bleed lines where applicable.
Test that controls remain inactive.
Document lockout status and retain keys until maintenance completion.
Step-by-step tightening procedure for a typical hand auger
The procedure begins with a visual and hands-on inspection to identify damaged components and any loose parts.
The auger should then be firmly supported or clamped before set screws and collars are tightened in the recommended sequence and to specified torque values.
Finally, the bit is reseated or replaced, alignment verified, and the assembly test-rotated to confirm there is no wobble or play.
Inspect the auger for damage and identify loose parts
Begin by placing the hand auger on a clean, well-lit surface and visually surveying all components for obvious wear, cracks, or bent sections.
Check the bit, spiral, ferrule, handle, and shaft for deformation or corrosion.
Gently wiggle joints, set screws, collars, and fasteners to locate looseness.
Note stripped threads, missing parts, or worn bearings for repair or replacement.
Secure the auger for stable work (clamping and support)
After identifying loose joints and damaged parts, the auger should be secured on a stable work surface before any tightening is attempted.
Position padding to protect wood handles, align the shaft horizontally, and clamp near the bit and handle without crushing.
Add secondary supports under long shafts to prevent sag.
Verify stability by gently rocking the tool; it must not shift during work.
Tighten set screws and collars: proper sequence and torque guidance
Start by identifying and cleaning the set screws, collars, and mating surfaces so torque readings are accurate and threads run freely.
Then finger-tighten collars, align components, and sequentially snug set screws in a crisscross pattern.
Use a calibrated torque wrench and apply manufacturer-specified torque values, increasing in two stages to final torque.
Recheck all fasteners after short test rotation and adjust if necessary.
Re-seat or replace the auger bit and verify alignment
Seat the auger bit firmly in the headstock or chuck, ensuring the shank fully engages the mating surface before any tightening is attempted.
If worn or damaged, replace the bit with a correctly sized, undamaged substitute.
Align the bit visually with the auger frame and flighting, confirm axial seating depth, then secure fasteners to specification.
Re-inspect for correct engagement and orientation before finishing.
Test-rotate and check for wobble or play
With the auger bit secured and fasteners torqued to specification, the operator should slowly rotate the headstock or chuck by hand while observing the bit and flighting.
Any lateral wobble, axial play, or binding indicates improper seating, worn bearings, or loose fasteners.
Stop, re-torque, reseat, or replace components until rotation is smooth, concentric, and free of perceptible play before use.
Tightening variations by auger type and connection method
Different auger designs require specific tightening approaches: single-piece fixed-head augers rely on body torque, while replaceable-bit and threaded-shank models need attention to pin or thread engagement.
Connection types such as clamp-style or quick-release fittings demand inspection of locking surfaces and proper torque or latch seating.
Handle designs—wooden-handled versus T-handle mechanisms—affect leverage and the amount of force applied during final tightening.
Single-piece fixed-head augers
Single-piece fixed-head augers require specific tightening approaches depending on the auger’s design and how the handle or drive connects to the shaft.
For welded or forged heads, inspect for cracks and verify the ferrule or collar is snug against the shaft.
For press-fit or pinned connections, confirm pin torque and absence of play; apply threadlocker where applicable and retest under light load.
Replaceable-bit and threaded-shank augers
Account for the variety of replaceable-bit and threaded-shank augers by matching tightening method to the connection type: insert-style cutters, threaded tips, and collet or set-screw assemblies each demand specific torque, locking compounds, or retaining clips to prevent loosening during use.
Inspect threads and mating surfaces, apply appropriate threadlocker sparingly, torque to manufacturer specs, and secure set screws or clips.
Test rotation under load.
Clamp-style and quick-release connections
While threaded shanks and replaceable bits rely on threads, set screws, and adhesives to resist loosening, clamp-style and quick-release connections use mechanical pressure and indexed locks that require distinct tightening practices.
Operators should center shafts, close clamps evenly, and engage detents fully. Torque to manufacturer specs, check alignment, and test under light load.
Inspect for wear and replace damaged clamping parts promptly.
Wooden-handled vs. T-handle mechanisms
Many hand augers employ either a wooden handle or a T-handle, and each design demands specific tightening and maintenance approaches.
Wooden handles require secure ferrules, periodic varnish, and tensioning of threaded tangs to prevent loosening.
T-handles rely on set screws or through-bolts; inspect fasteners, apply thread locker if metal-to-metal, and torque to manufacturer spec for stable, slip-free operation.
When to replace parts instead of tightening
Signs such as stripped threads, rounded fasteners, or a bent shaft commonly indicate that tightening is no longer sufficient and parts should be considered for replacement.
Persistent shaft wobble that cannot be corrected by securing connections typically signals internal damage requiring new components.
The decision to repair or replace should weigh replacement cost against safety and the likelihood of recurring failures.
Signs of stripped threads, rounded fasteners, and bent shafts
A worn hand auger will often betray deeper damage through specific telltale failures: stripped threads that no longer hold tension, fastener heads rounded from repeated slipping, and shafts bent out of true.
Stripped threads spin without engagement, preventing secure clamping. Rounded fasteners resist wrenching and risk slippage.
Visible shaft deformation, scoring, or persistent looseness despite proper tightening signals component replacement rather than repair.
When shaft wobble indicates replacement
Shaft wobble that persists after tightening, realignment, and bearing replacement generally indicates underlying deformation or wear beyond salvage.
The operator should inspect for bent or out-of-round shafts, fractured journals, and irreversible thread damage.
If straightening risks metallurgical weakening or alignment cannot be restored within tolerances, replacement of the shaft or assembly is recommended to prevent accelerated wear, loss of control, or sudden failure.
Cost vs. safety considerations for repair vs. replace
Weigh repair costs against safety and long-term performance when deciding whether to tighten, refurbish, or replace components.
The decision balances immediate expense, potential failure risk, and remaining service life. If parts are corroded, cracked, or repeatedly failing, replacement is prudent.
Consider labor, downtime, and resale value when choosing.
- Financial relief vs. risk
- Safety first, always
- Peace of mind
Preventive maintenance to keep a hand auger tight and reliable
A concise preventive maintenance routine keeps a hand auger tight and dependable by addressing wear before it causes loosening.
Regular inspections, targeted cleaning and lubrication to prevent corrosion, and correct storage and handling habits form the core of that routine.
Outlining a simple checklist for these tasks helps users perform them consistently.
Routine inspection checklist
When performed consistently, a brief routine inspection identifies loose fittings, worn threads, and early signs of corrosion before they compromise a hand auger’s tightness and reliability.
The inspector methodically checks handles, couplings, and bit seating, records torque irregularities, and flags parts for adjustment or replacement to maintain safe operation.
- Check for movement and secure fastenings.
- Inspect threads for wear.
- Note discoloration or pitting.
Cleaning, lubrication, and corrosion prevention
Regular cleaning, targeted lubrication, and proactive corrosion prevention extend a hand auger’s service life and help maintain tight, reliable connections.
After each use, remove debris and dry components. Apply light machine oil to threads, pivots, and fasteners; wipe excess.
Treat exposed metal with a rust inhibitor or wax. Inspect coated surfaces regularly and reapply protection where finish wears to prevent corrosion and seizing.
Proper storage and usage habits to avoid loosening
Building on routine cleaning and lubrication, proper storage and consistent usage habits further reduce the risk of fasteners loosening and components wearing unevenly.
Store the auger dry, hung or in a padded case to prevent impacts. Avoid over-torquing and side-loading during use.
Periodically inspect and retighten fasteners, rotate usage to distribute wear, and keep a simple maintenance log for reliable performance.
Common mistakes and how to avoid them
Common mistakes when tightening a hand auger include over-tightening, which can strip threads or damage bits.
Using incorrect tools or fasteners often leads to poor fit and compromised holding power.
Repeated looseness is frequently a sign of underlying wear that should be inspected and repaired rather than repeatedly tightened.
Over-tightening and damaging threads or bits
Over-tightening a hand auger often strips threads, deforms bits, or cracks the chuck, leaving the tool unsafe or unusable; recognizing safe torque limits and using the right technique prevents most damage.
Inspect threads and bit shanks for wear, apply controlled hand pressure, avoid cheater bars, and stop when components seat firmly.
Lubricate threads and replace damaged parts promptly to maintain safe operation.
Using wrong tools or fasteners
Choose the correct tool and fastener for the job: mismatched bits, incorrect screws, and improvised adapters cause stripped holes, broken auger teeth, and unsafe assemblies.
Select manufacturer-recommended bits, matched thread-form screws, and proper-size wrenches.
Inspect fasteners for wear, avoid excessive force with wrong drivers, and replace damaged parts.
Proper fit reduces slippage, preserves components, and guarantees safe, consistent drilling performance.
Ignoring underlying wear that causes recurrent looseness
Ignore visible looseness at your own risk: recurrent wobble usually signals worn components rather than inadequate tightening.
The mechanic should inspect shafts, bearings, threads, and fastener seats for wear, corrosion, or deformation. Replace or repair compromised parts instead of repeatedly over-tightening.
Regular inspection intervals, proper lubrication, and using OEM replacements prevent recurring looseness and preserve auger alignment and safe operation.
Troubleshooting guide for persistent looseness
The guide outlines how to diagnose root causes of persistent looseness by matching specific symptoms to worn parts, misalignment, or improper assembly.
It also explains temporary fixes, their expected lifespan, and the limitations of quick remedies.
Finally, it specifies indicators that warrant professional repair or replacement to prevent recurring failure.
Diagnosing root causes by symptom
Several common symptoms of a persistently loose hand auger—wobbling shaft, slipping handle, uneven drilling, or recurring fastener loosening—can each indicate different underlying failures. The technician inspects bearings, shaft straightness, handle fit, and fastener wear, matching symptom to cause. Diagnosis guides targeted repair: replace bearings, straighten or replace shaft, refit handle, or use proper fasteners.
| Symptom | Likely cause |
|---|---|
| Wobble | Bent shaft/bearing wear |
| Slip | Handle or fastener wear |
Temporary fixes and their limitations
After matching symptoms to likely causes, a technician can apply temporary fixes to keep a hand auger usable while arranging permanent repair or replacement.
Common measures include tightening fasteners with threadlocker, adding shims, wrapping worn shafts with tape, or using clamp plates.
Each is short-term: reduced strength, altered alignment, or accelerated wear may occur.
Monitor performance and plan definitive repairs promptly.
When to seek professional repair or replacement
Recognize when do-it-yourself measures have been exhausted and professional help is needed: persistent wobble, recurrent loosening after temporary fixes, visible structural damage (cracked hub, bent shaft, or stripped threads), or compromised safety features all warrant technician evaluation or replacement.
A qualified repairer can assess alignment, replace worn components, rethread or rebalance shafts, and advise replacement when cost, safety, or integrity make repair impractical.
Final checklist before drilling with a tightened hand auger
Before the first cut is made, a concise pre-drilling checklist confirms the hand auger is secure, the workspace is safe, and the operator is prepared.
The operator inspects bit tightness, confirms protective gear, clears debris, and verifies workpiece stability. Final calm focus reduces mistakes and injury.
- Confirm tightness and alignment.
- Confirm PPE and clear area.
- Breathe, steady grip, proceed.
Conclusion
After following the tightening steps, the hand auger will feel as steadfast as a mountain—unyielding, reliable, and ready to bore with the calm fury of a tiny, dependable titan. This exaggerated assurance underscores practical reality: attentive maintenance, correct parts, and careful tightening transform a finicky tool into predictable performance. The reader, armed with procedure and prudence, gains confidence that each twist and clamp yields smooth, secure drilling rather than fumbling frustration.