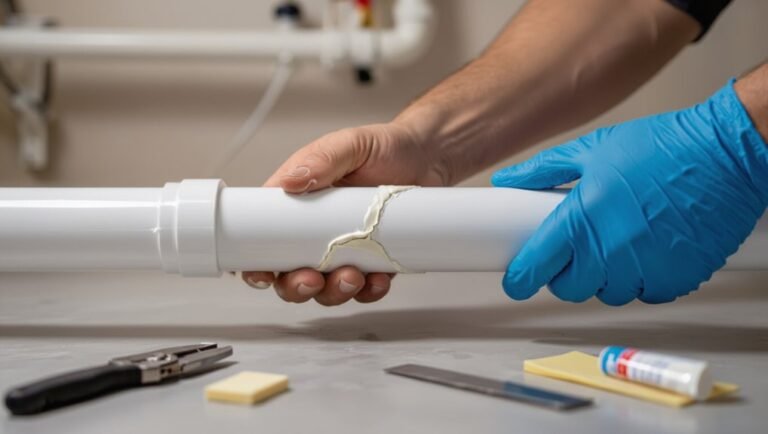
How to Fix a Broken PVC Pipe in Concrete: Step-by-Step Repair Guide
If you have a broken PVC pipe in concrete, follow this step-by-step guide for a systematic repair. Start by obtaining the necessary permits and utility locates, and ensure you wear safety gear. Carefully break the concrete to access the pipe and inspect it to determine whether to patch, use a sleeve, apply a coupling, epoxy, or replace a full section. Clean the joints, then either prime and solvent-weld or mechanically couple the pipe together. Conduct a pressure test to ensure a proper seal before backfilling and restoring the concrete. Finally, monitor the repair and implement preventive measures to avoid future issues. This guide details each step to effectively fix your PVC pipe.
Overview of Repairing a Broken PVC Pipe in Concrete
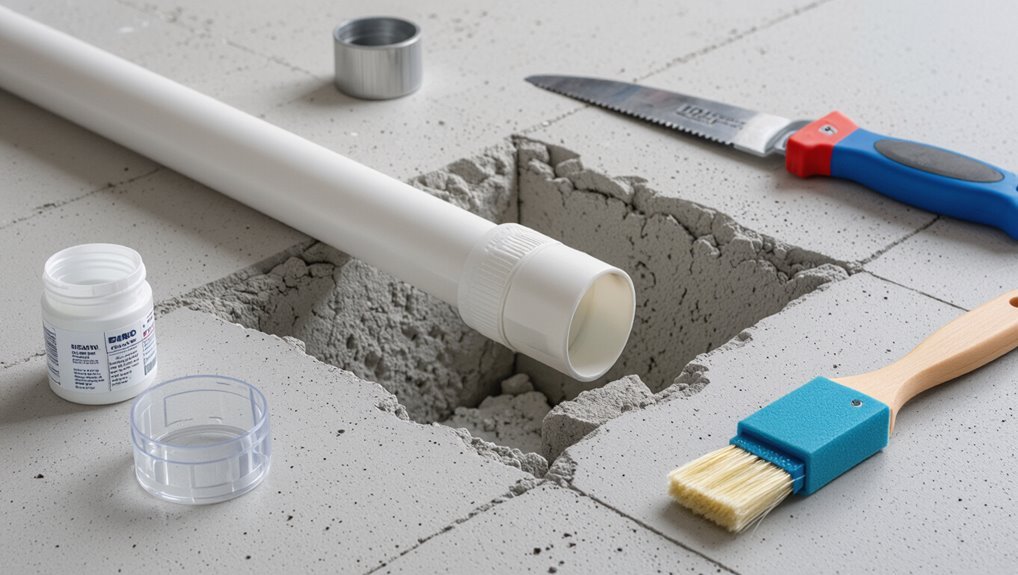
Concrete-encased PVC can fail from ground movement, frozen water, improper installation, or heavy loads above the slab.
Typical signs include unexplained wet spots, sinking concrete, reduced water flow, and sudden increases in water bills.
Small, accessible breaks may be handled as DIY repairs, but widespread damage, difficult access, or sewer-line involvement usually warrants a professional.
Common causes of PVC breaks in concrete
Several factors commonly lead to PVC pipe failures when buried in concrete, including physical stress from shifting soil, improper installation practices, freeze-thaw cycles, chemical degradation from nearby substances, and corrosion of adjoining metal fittings.
Understanding these causes helps determine how to fix broken PVC pipe in concrete. Other contributors include heavy loads, vibration, thermal expansion, and abrasion from aggregate or debris during pouring.
Signs that a PVC pipe is damaged under concrete
How can one tell when a PVC pipe is failing beneath a slab?
Persistent damp spots, unexplained pooling, or soggy soil above concrete indicate leaks.
Cracks or heaving in the slab, reduced water pressure, sewer odors, and recurring mold growth also signal damage.
Sudden, localized cold areas on the floor and unusual gurgling in drains further suggest buried pipe compromise needing inspection.
When to call a professional vs. DIY repair
Deciding whether to call a professional or attempt a DIY repair hinges on the damage’s scope, the pipe’s function, and the homeowner’s skill set and tools.
Minor leaks, accessible sections, and basic plumbing experience justify DIY patching or coupling.
Extensive breaks, sewer lines, structural compromise, or lack of excavation tools require licensed plumbers to guarantee code compliance, reliable sealing, and prevention of further concrete or property damage.
Safety, Permits, and Tools Required
Before beginning any repair, the author notes that appropriate safety precautions—gloves, eye protection, and respiratory protection when cutting concrete—are essential.
They also recommend confirming local permit requirements, verifying code compliance, and arranging utility locates to avoid hidden services.
Finally, a concise list of required tools and materials—pipe cutter or saw, couplings, primer and cement, replacement PVC, and concrete repair supplies—is provided for a successful repair.
Safety precautions and personal protective equipment
When working on a broken PVC pipe, proper safety precautions and personal protective equipment are essential to prevent injury from sharp edges, chemical exposure, and pressurized water.
Workers should wear safety goggles, chemical-resistant gloves, long sleeves, and sturdy boots. Use hearing protection when cutting, and respiratory protection when sanding or solvent-welding in confined spaces.
Always depressurize and isolate the line before beginning repairs.
Permits, code considerations, and utility locates
Although a broken PVC repair may seem straightforward, permits, local codes, and utility locates often dictate how the work must be performed and who may perform it.
Confirm permit requirements with the municipality, follow plumbing and excavation codes, and verify depth/spacing standards.
Contact utility-locate services before cutting concrete to avoid gas, electrical, or communication line strikes.
Retain records of permits and locates.
Essential tools and materials
A concise kit of safety gear, permit documentation, and the right tools is essential for a reliable PVC repair.
Protective equipment, approved permits, and quality materials minimize delays and hazards.
Recommended items include:
- Safety: gloves, goggles, respirator, knee pads
- Tools: jackhammer or chisel, saw, sanding tool, deburring tool
- Materials: PVC pipe, couplings, primer, solvent cement
- Misc: tape measure, marker, tarp, bucket
Assessing the Damage and Planning the Repair
The technician first pinpoints the exact break, using visual inspection, probing through exposed concrete, or listening for leaks to locate the damaged section.
Next, the pipe material, diameter, and how easily it can be accessed are confirmed to match fittings and replacement parts.
Finally, a decision is made between patching, replacing a section, or rerouting based on damage extent, location, and long-term reliability.
How to locate the exact break point in concrete
How can the exact break in a PVC pipe beneath concrete be pinpointed without unnecessary demolition?
Inspect surface signs: damp spots, sinkage, or efflorescence.
Use acoustic listening or electronic leak detectors to trace sound or moisture.
Employ infrared imaging to spot temperature anomalies.
Probe minimally with hollow-core drills at flagged locations.
Confirm with a small exploratory core before full excavation.
Determining pipe type, size, and accessibility
One clear step after locating a break is identifying the pipe’s material, diameter, and routing to determine viable repair methods and required tools.
Inspect fittings, markings, and wall thickness to confirm PVC versus CPVC or ABS. Measure diameter with calipers or a tape.
Assess accessibility: depth, concrete thickness, nearby utilities, and space for cutting or temporary support before planning excavation and staging.
Deciding repair method: patch, section replacement, or reroute
Decide on a repair strategy by matching damage type, location, and long‑term needs: small hairline cracks or surface abrasions often suit a patch, mid‑run failures typically require cutting out and replacing a section, and repeated breaks, extensive corrosion on adjacent fittings, or impractical excavation favor rerouting.
Evaluate access, pipe material and pressure rating, anticipated lifespan, and cost; choose the least invasive solution meeting reliability and code requirements.
Step-by-Step: Exposing the Broken PVC Pipe
The technician begins by marking the work area and shielding nearby surfaces to prevent collateral damage.
Concrete is broken and removed with appropriate tools and safety gear, using different excavation methods for shallow versus deep pipes.
Once the pipe is exposed, a careful inspection of the pipe and surrounding structure determines the exact repair approach.
Marking the work area and protecting surroundings
Before any cutting begins, the work area should be clearly marked and surrounding surfaces protected to prevent accidental damage and contain debris.
Tape and chalk outline cutting boundaries; barriers or warning signs restrict access.
Cover nearby fixtures, flooring, and landscaping with drop cloths or plastic sheeting. Secure coverings with weights or tape.
Make certain tools and lighting are staged outside the protected zone for safe access.
Breaking and removing concrete safely
Begin by evaluating the slab to locate the broken pipe and determine the smallest safe excavation area.
Then plan an orderly sequence for breaking and removing concrete to expose the PVC without causing further damage.
Use appropriate tools—hammer, chisel, rotary hammer with narrow bit—work from outside toward the pipe, remove debris progressively, support adjacent concrete, and wear PPE to prevent injury.
Excavation techniques for shallow vs. deep pipes
Shallow and deep pipe excavations require different approaches: shallow lines often allow hand tools and careful hand-digging to minimize surface disruption, while deep pipes demand mechanized digging, benching, or shoring to guarantee worker safety and maintain trench stability.
For shallow repairs, expose only necessary length and protect adjacent utilities; for deep work, establish access, slope sides or use trench boxes, and monitor conditions continuously.
Inspecting exposed pipe and surrounding structure
With the pipe exposed, attention shifts from excavation method to a careful inspection of the damaged PVC and the surrounding materials.
The inspector checks for cracks, abrasions, hairline fractures, and deformation, noting joint integrity and nearby fittings.
Surrounding concrete, soil, and reinforcement are examined for corrosion, voids, and destabilization.
Documented findings guide repair scope, part replacement, and requisite shoring or concrete restoration.
Step-by-Step: Repair Methods
The guide now outlines practical repair methods matched to common PVC failures.
It summarizes options from solvent-welding small cracks and using slip or mechanical couplings, to inserting sleeves or epoxy for hairline cracks, full section replacement and re-joining, and rerouting or installing an above-ground bypass when replacement is impractical.
Each option is presented with the basic steps, required tools, and typical use cases to aid decision-making.
Repair option 1 Clean-out and solvent welding a small crack
The damaged section of PVC is first removed by cutting squarely through sound pipe and deburring the ends to guarantee a proper fit.
Primer is applied to both pipe ends and the interior of the coupling, followed immediately by solvent cement to create a chemical weld.
Proper alignment and a brief hold time complete the joint, restoring pressure integrity.
Preparing pipe ends and cutting out damaged section
Begin by isolating the damaged section and shutting off water to prevent leaks during work.
Expose the pipe, clear concrete around the break, and mark cut lines beyond cracked areas.
Use a saw to make square, clean cuts; remove burrs and rough edges with a deburring tool or sandpaper.
Dry and inspect ends for proper alignment before fitting replacement coupling.
Priming and solvent welding PVC couplings and fittings
Prepare to join the prepared pipe ends by selecting a PVC primer and solvent cement rated for the pipe schedule and local plumbing codes.
Apply primer to pipe ends and coupling interiors, allowing brief dwell time.
Brush solvent cement evenly onto primed surfaces, insert pipe into coupling with a quarter-turn twist, hold alignment until set.
Wipe excess and allow cure per manufacturer instructions.
Repair option 2 Slip coupling or mechanical coupling replacement
The next option covers replacing the damaged section with a slip or mechanical coupling, beginning with selecting the correct coupling type and precise measurements to guarantee a snug fit.
Instructions then outline the step‑by‑step installation procedure, including pipe preparation, alignment, and securement.
The section concludes with recommended leak testing methods and inspection points to verify a watertight joint.
Selecting the right coupling and measuring for fit
Choosing the correct coupling and measuring accurately are essential to a secure, leak-free repair when replacing a section of PVC with a slip or mechanical coupling.
Determine pipe material and diameter, account for wall thickness and schedule, and select a coupling rated for pressure and environment.
Measure cut lengths including insertion depths and gasket/compression allowances.
Verify clearance inside the concrete access hole before purchasing.
Installation procedure and leak testing
Begin by positioning the pipe ends and coupling components so all measurements and clearances are visible and accessible; this assures each step—cleaning, cutting, deburring, dry-fitting, solvent or gasket installation, and tightening—can be completed without obstruction.
Apply primer and solvent or fit gasketed coupling per instructions, verify alignment and correct insertion depth, tighten clamps evenly, restore pressure gradually, observe for leaks, and recheck torque after initial run.
Repair option 3 Inserting repair sleeve or epoxy for hairline cracks
For hairline cracks, the person should start by thoroughly cleaning and drying the pipe surface to guarantee proper adhesion of epoxy or a repair sleeve.
Epoxy must be mixed and applied according to manufacturer instructions, and sleeves should be positioned and secured to cover the damaged area fully.
After application, the repair requires the prescribed curing time and a pressure or visual check to verify a watertight seal.
Surface preparation and epoxy application
Prepare the pipe surface to guarantee a durable bond before inserting a repair sleeve or applying epoxy.
Clean surrounding concrete, remove loose debris, and abrade PVC with coarse sandpaper to create a keyed surface.
Degrease with solvent recommended by the epoxy manufacturer.
Mask adjacent areas.
Mix epoxy components per instructions, apply evenly into the crack, seat the sleeve if used, and smooth excess for full contact.
Curing times and verification
How long will the repair hold before pressure can be restored?
Curing time depends on epoxy type, ambient temperature, and sleeve material. Fast-setting epoxies may allow low pressure in 1–2 hours, full pressure after 24 hours; standard formulations often require 8–24 hours for handling and 48–72 hours for full strength.
Verify by visual inspection, hardness test, and gradual pressure increase while monitoring for leaks.
Repair option 4 Full section replacement and re-joining to existing system
For a full section replacement, the technician begins by cutting the damaged pipe squarely, deburring the edges, and performing dry-fittings to confirm alignment and part sizes.
Attention then turns to proper solvent welding: surfaces must be clean, primed where required, and glued following manufacturer flash and set times.
Clear, methodical preparation and adherence to primer-and-glue best practices guarantee a reliable rejoin to the existing system.
Cutting, deburring, and dry-fittings
Begin by cutting the damaged PVC section cleanly and squarely at points that preserve sufficient pipe length for solvent or mechanical couplings. Accurate cuts guarantee proper alignment and seal when joining the new section to the existing system.
Deburr and chamfer cut ends to remove burrs and sharp edges.
Test-fit replacement pipe and couplings dry to confirm alignment, fit, and proper insertion depth before final joining.
Solvent welding or primer and glue best practices
With the replacement piece dry-fitted and alignment confirmed, the repair proceeds to solvent welding using primer and PVC cement to create a permanent, pressure-tight joint.
Apply primer to both mating surfaces, allow brief flash time, then apply an even coat of cement.
Assemble immediately with a quarter-turn twist, hold for recommended set time, wipe excess, and allow full cure per manufacturer pressure/cure specifications.
Repair option 5 Rerouting or installing an above-ground bypass (when replacement impractical)
When a damaged underground PVC run cannot be excavated or replaced economically, rerouting the line or installing an above-ground bypass provides a practical alternative.
Assess flow requirements, pressure ratings, and freezing risk. Use appropriate fittings, supports, and UV-resistant pipe or insulation.
Test for leaks and secure permits if required. Document new routing and label exposed runs for maintenance and safety.
Testing and Verifying the Repair
After completing the repair, the article outlines pressure testing and leak detection methods to confirm system integrity.
It also covers visual inspection steps and required cure times for adhesives and fittings.
Finally, common post-repair issues and straightforward troubleshooting actions are summarized.
Pressure testing and leak detection methods
Begin pressure testing and leak detection by isolating the repaired section, re-pressurizing the line to its normal operating pressure or a slightly higher test pressure specified for PVC, and observing for pressure drop or visible leaks.
Use a calibrated gauge, listen for hissing, apply soapy water for bubble detection, and employ handheld electronic leak detectors if available.
Record readings and hold pressure for the recommended duration.
Visual inspection and allowed cure times
How long should visual inspection and cure monitoring take before declaring a PVC repair complete?
The technician inspects joints, adhesive beads, and surrounding concrete immediately, then at intervals during the adhesive’s specified cure window.
Typical curing spans 24–72 hours depending on product, temperature, and humidity.
Final verification includes no visible seepage, firm bond, and restored structural alignment before returning the system to full service.
Troubleshooting common post-repair issues
A systematic testing protocol helps identify and resolve residual issues following a PVC repair by combining pressure checks, leak detection, and functional observation.
After curing, the repaired section is pressurized to recommended PSI while monitoring for drops. Use dye, electronic sniffers, or tissue to spot leaks.
Verify flow and drainage under typical load. Document findings, and repeat repairs or pressure-test until stable.
Backfilling and Restoring the Concrete Surface
Once the repair passes pressure testing, attention turns to backfilling and restoring the concrete surface.
Proper selection and staged compaction of backfill material prevent future settlement and protect the repaired pipe, while preparing the excavation edges and substrate guarantees a sound bond for the patch.
The final steps cover pouring, finishing, and curing the concrete to match the surrounding surface texture and elevation.
Backfill materials and compaction best practices
Select backfill materials that match the original soil conditions and provide proper drainage and compaction characteristics to protect the repaired PVC pipe and surrounding concrete surface.
Use clean, granular fill (sand or crushed stone) around the pipe, avoiding large stones.
Place compactible lifts no greater than 6 inches, compact each lift with a plate compactor or hand tamper, and maintain moisture for effective density.
Preparing for concrete repair or patching
Prepare the trench and surrounding area for concrete repair by ensuring the backfill is properly compacted, the pipe is correctly positioned and protected, and any loose debris is removed from the concrete edges.
Verify bedding firmness, install moisture or vapor barriers if required, and seal gaps with appropriate backfill to prevent future settlement.
Clean edges and set forms to support precise patch dimensions.
Pouring and finishing concrete patch
Begin by confirming that the trench is dry, forms are secure, and reinforcement—if specified—is correctly positioned above the repaired pipe.
Mix concrete to specified slump, pour evenly around the pipe, and consolidate to remove voids.
Screed flush with surrounding slab, then float to close surface.
Edge and joint as required.
Remove forms when initial set allows without disturbing the patch.
Curing concrete and matching existing surfaces
Allow adequate curing time and protect the repair to guarantee the concrete achieves its desired strength and appearance.
Keep the patch moist with curing compound, damp burlap, or plastic sheeting for the recommended 48–72 hours, longer in cold or windy conditions.
Match texture and color by brushing, stamping, or using a colorant before full cure.
Blend edges and remove forms carefully.
Preventing Future Breaks and Long-Term Maintenance
To reduce the risk of future failures, attention to proper design and installation—correct slope, adequate bedding, secure joints, and allowance for thermal expansion—is essential.
Pipes should be protected from freezing, excessive ground movement, and heavy surface loads through insulation, proper burial depth, and load-distributing backfill.
A regular inspection and maintenance schedule, including visual checks, leak testing, and prompt repairs, helps detect problems before they become breaks.
Design and installation tips to avoid pipe stress and shifting
Plan pipe layouts and installation details with an emphasis on minimizing mechanical stress and preventing movement over time.
Specify continuous support spacing, gentle bends, and expansion joints where thermal or structural displacement is expected.
Use properly sized sleeves through concrete, secure clamps on stable substrates, and avoid unsupported spans.
Select compatible materials and route to reduce load points, facilitating inspection and future access.
Protecting pipes from freezing, ground movement, and heavy loads
Although often out of sight, pipes require deliberate protections against freezing, ground movement, and heavy loads to prevent future breaks and reduce maintenance needs.
Insulate exposed runs, bury below frost line, and add heat tracing where necessary.
Use flexible joints, proper bedding, and restraint anchors to accommodate movement.
Shield lines beneath slabs with protective sleeves or concrete islands and avoid routing under concentrated load zones.
Routine inspection and maintenance schedule
Establish a regular inspection and maintenance schedule that aligns with pipe material, service conditions, and local climate to detect deterioration early and prevent failures.
Inspections should be documented, timed, and linked to corrective actions.
Recommended routine:
- Quarterly visual checks for cracks, displacement, and moisture.
- Annual pressure or flow testing.
- Post-event inspections after freezes or ground shifts.
- Recordkeeping and prompt repairs.
Cost Estimates, Timeframe, and When to Hire a Pro
Typical repair costs vary by method and complexity, ranging from inexpensive patch kits for minor leaks to several hundred dollars for section replacement or fittings.
DIY fixes often take an hour or two for simple jobs, while more complex or behind-wall repairs can consume a day or require multiple visits. Professionals generally complete standard repairs faster but at higher labor cost.
A licensed plumber or contractor should be hired for pressurized mains, structural or concealed piping, unclear leak sources, or when local codes and permits apply.
Typical cost range by repair type and complexity
Repairing a broken PVC pipe can range from a quick, low-cost patch to a full replacement that requires substantial labor and parts; costs vary with repair type, pipe accessibility, and the extent of damage. Typical ranges: minor patching $20–$100; small splice $50–$250; section replacement $150–$600; full reroute $500–$3,000.
| Repair type | Typical cost |
|---|---|
| Minor patch | $20–$100 |
| Splice | $50–$250 |
| Section replace | $150–$600 |
| Reroute/full replace | $500–$3,000 |
Expected time for DIY vs professional repairs
After outlining how costs vary by repair type and complexity, attention turns to how long those repairs actually take and who should do them.
Simple DIY fixes—exposing pipe, cutting, gluing or patching—typically require 2–6 hours for a competent homeowner.
Complex breaks under concrete or involving fittings often take professionals 4–12+ hours, depending on excavation, replacement, and testing.
Hire pros if time, tools, or confidence are lacking.
Criteria for hiring licensed plumbers or contractors
Many homeowners weigh three key factors when deciding whether to hire a licensed plumber or contractor: accurate cost estimates, realistic timeframes, and clear thresholds for professional intervention.
Licensed professionals provide written estimates, permit handling, and warranty details.
Expect timelines tied to scope, access, and excavation.
Hire a pro for sewage lines, major concrete removal, unknown leaks, or when local codes and permits are required.
Common Mistakes to Avoid During Repair
Common mistakes during PVC repair include improper cutting, inadequate priming or solvent cementing, and poor joint alignment that compromise seals.
Insufficient excavation or sloppy concrete restoration can lead to future settling and pipe stress.
Skipping required permits, inspections, or pressure testing risks code violations and undetected leaks.
Errors in cutting, priming, and joining PVC
Cutting, priming, and joining PVC require precise technique; mistakes at any step can compromise a repair and lead to leaks or joint failure.
Common errors include uneven or burr-filled cuts, insufficient primer or solvent, misaligned fittings, and inadequate cure time.
Excessive primer or solvent weakening the pipe and rushed assembly before solvent sets are frequent causes of joint failure and future leaks.
Inadequate excavation or poor concrete restoration
When excavation stops short of the pipe or trenches are backfilled hastily, the repair is compromised by restricted access and disturbed bedding that can cause misalignment, stress points, or future settlement.
Similarly, poorly restored concrete slabs that are uneven, inadequately reinforced, or insufficiently cured can crack or settle, exposing joints and leading to leaks or structural damage.
Proper excavation, bedding, compaction, reinforcement, and curing prevent recurrence.
Skipping permits, inspections, or pressure tests
Failing to obtain required permits, skip inspections, or omit pressure testing undermines both the safety and legality of a PVC pipe repair.
Ignoring regulatory steps risks fines, failed occupancy approvals, and undetected leaks.
Proper permits guarantee qualified oversight; inspections verify connections and backfill; pressure tests confirm integrity before closing concrete.
Adhering to procedures protects occupants, property value, and liability exposure.
Quick Troubleshooting Guide
If leaks persist after an attempted repair, the guide recommends checking seals, fittings, and water pressure before considering more extensive fixes.
Reappearing cracks in the concrete above the pipe may indicate ongoing movement or an improperly supported section that requires stabilization.
Clear signs that a full section replacement is preferable include widespread cracking, repeated failures at different points, or extensive corrosion or degradation of the pipe material.
Persistent leaks after repair and next steps
Investigate persistent leaks immediately to prevent water damage and identify the root cause; common reasons include inadequate joint preparation, incompatible adhesives, cracked or warped pipe sections, or pressure-related failures.
Document leak location, isolate the section, and test at low pressure. If reseating joints and replacing seals fail, cut out and install a new fitting or pipe segment.
Consult a licensed plumber for high-pressure or hidden-system issues.
Cracks reappearing in concrete above repaired pipe
When cracks reappear in the concrete above a repaired PVC pipe, it signals that the underlying issue—settlement, ongoing moisture, thermal movement, or insufficient structural repair—has not been fully addressed.
The first step is to confirm whether the cracking is superficial (surface shrinkage) or structural by inspecting crack width, pattern, and progression over time.
If superficial, sealant and surface patching suffice; if structural, investigate support, drainage, and pipe movement.
Signs the whole section should be replaced rather than patched
How can one tell whether a damaged run of PVC should be replaced rather than patched?
Extensive corrosion, multiple fractures, long-segment sagging, or repeated leaks indicate systemic failure.
Frequent repairs, compromised fittings, or sections exposed to heavy stress or root intrusion justify replacement.
If flow capacity is reduced or inspection shows internal collapse, replacing the entire run is safer and more cost-effective than recurring patches.
Conclusion
To sum up, the guide equips a homeowner with practical steps to locate, expose, and repair a broken PVC pipe in concrete, balancing safety, permits, and tools. By following careful cutting, coupling, and testing procedures, future damage is minimized and maintenance simplified. If unsure, professionals should be consulted. This pragmatic approach, oddly reminiscent of a cobbler fixing boots by gaslight, guarantees durable results and greater confidence in one’s plumbing repairs.