How to Use a Tubing Pipe Cutter: A Step-by-Step Guide for Clean, Precise Cuts
A tubing pipe cutter allows for quick and precise cuts in materials like copper, brass, aluminum, and various plastics. To achieve clean cuts, first measure and mark your tube accurately. Secure the tube in place, then position the cutting wheel on your mark. Tighten the cutter slightly to create an initial score, then rotate the cutter around the tube while gradually tightening until the tube separates. After cutting, deburr the inside and check for squareness. Use the appropriate cutter types for specific materials like PEX or thick metal, and always wear safety gear. Regularly maintain the cutting wheel for optimal performance. For advanced techniques and troubleshooting tips, refer to the comprehensive guide.
How to Use a Tubing Pipe Cutter for Clean, Precise Cuts
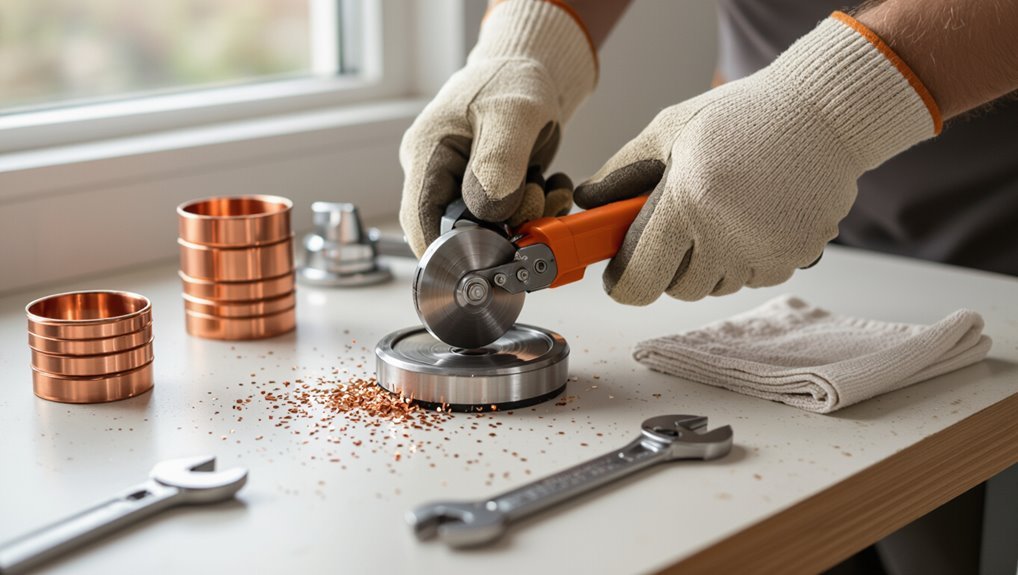
A tubing pipe cutter scores and rotates around tubing to create clean, square cuts, and is preferred when a neat end and minimal burrs are required.
Different cutters—mini-wheel cutters for soft copper and plastic, ratcheting models for thicker metal, and rotary saw-style cutters for larger diameters—should be chosen based on tube diameter and material.
Most cutters handle copper, brass, aluminum, and many plastics; steel and stainless require heavy-duty or specialized cutters sized for the tubing wall and outside diameter.
Quick overview of what a tubing pipe cutter does and when to use one
Tubing cutters are handheld tools designed to score and rotate around pipes, producing straight, burr-minimized cuts ideal for copper, brass, aluminum, and some plastics.
They simplify pipe preparation for fittings, reduce need for sawing, and speed repetitive work.
Guidance on how to use a tubing pipe cutter focuses on proper alignment, steady pressure, and incremental tightening to preserve roundness and guarantee clean joints.
Types of tubing pipe cutters and which to choose for common jobs
When selecting a cutter for a particular job, matching the tool to the material, diameter, and working conditions guarantees the cleanest, most precise cuts.
Rotary tube cutters suit thin-walled copper and brass; ratcheting cutters provide leverage for thicker metals; plastic pipe cutters score and snap PVC/PEX; mini cutters access tight spots; deburring tools finish edges.
Choose by accessibility, force required, and finish quality.
Materials and tubing sizes compatible with pipe cutters
Many common cutters accommodate copper, brass, aluminum, PVC, CPVC, PEX, and thin-walled stainless, with each cutter type and blade material matched to tube composition and wall thickness for ideal results. Selection depends on diameter range, wall gauge, and whether plastic or metal requires scoring. Proper cutter avoids crushing or jagged edges, ensuring consistent, square cuts.
| Material | Typical Sizes |
|---|---|
| Copper | 1/8″–2″ |
| PVC/CPVC | 1/4″–4″ |
| PEX | 1/4″–1″ |
| Aluminum/Stainless | 1/8″–1″ |
Essential tools and safety gear to prepare before cutting
Before beginning, the operator assembles required tools and optional accessories such as a tubing cutter, deburring tool, measuring tape, and clamps.
Personal protective equipment—safety glasses, gloves, and hearing protection as needed—is put on and the workspace cleared and well-lit.
The cutter and tubing are then inspected for damage, burrs, or contamination to guarantee a safe, accurate cut.
Required tools and optional accessories
A small set of essential tools and a few optional accessories guarantee accurate, safe tubing cuts: a properly sized tubing pipe cutter, a deburring tool or reamer, a measuring device (tape or caliper), and safety gear—gloves and eye protection.
Optional items include a vise or tubing holder, marker, and lubricant for stubborn or thicker materials.
- Tubing pipe cutter
- Deburring tool or reamer
- Measuring device
- Vise or tubing holder
- Marker and lubricant
Personal protective equipment and workspace setup
Put on appropriate personal protective equipment and arrange the workspace to minimize hazards before cutting begins.
The operator should guarantee clear lighting, stable support, and unobstructed access. Safe practices reduce injury and damage.
- Safety glasses or face shield
- Cut-resistant gloves
- Long sleeves and closed-toe shoes
- Secure vise or clamp
- Clean, well-lit work surface
Inspecting the cutter and tubing for damage or contamination
With PPE in place and the work area secured, the operator should inspect both the tubing cutter and the pipe before any cutting proceeds.
Check the cutter’s wheel for nicks, burrs, or excessive wear; verify smooth rotation and secure adjustment mechanisms.
Examine tubing for dents, corrosion, oil, grease, or debris; clean or replace damaged components to guarantee accurate, safe cuts.
Step-by-step procedure for cutting tubing with a handheld rotary cutter
The procedure begins with accurate measurement and a clear mark, then securing the tubing to prevent any movement during cutting.
The cutter is positioned on the mark, lightly scored to seat the blade, and then progressively tightened and rotated to produce a smooth, square cut.
Finally, the cut face is deburred and finished with appropriate tools to remove burs and guarantee a clean joint.
Measuring and marking the cut accurately
Accurate measurement and clear marking are essential before cutting tubing with a handheld rotary cutter to guarantee a snug fit and prevent material waste.
Measure twice: account for insertion depth, fittings, and any beveling. Use a fine-tip marker or scribe to draw a single, thin line perpendicular to the tubing axis.
Verify alignment visually before proceeding to cut.
Securing the tubing to prevent movement
Clamp the tubing firmly to eliminate rotation or axial slip before cutting. Secure it in a suitable vise or pipe clamp with protective jaws to avoid deformation.
Support long runs with additional clamps to prevent sagging. Verify the marked line remains exposed and unobstructed.
Recheck stability by applying light manual torque; any movement indicates repositioning or tighter clamping is required.
Positioning the cutter and initial scoring technique
Position the cutter so its wheel aligns precisely with the marked line, perpendicular to the tube’s axis and centered on the circumference.
With light, controlled pressure, turn the cutter once around to create a shallow score. Confirm the tool remains stable and the score continuous; avoid slipping.
This initial scoring establishes a guide for subsequent tightening and rotation without deforming the tubing.
Progressive tightening and rotating: achieving a smooth, square cut
After the shallow score is established, the operator incrementally tightens the cutter’s adjustment knob and rotates the tube steadily around its axis.
With each full rotation the blade bites slightly deeper; the operator avoids sudden pressure increases to prevent distortion.
Consistent, even turns maintain blade alignment and guarantee the cut progresses uniformly until separation, yielding a square, controlled break without twisting or crushing.
Removing burrs and finishing the cut (deburring tools and techniques)
Remove any sharp edges and metal shavings immediately to guarantee a safe, reliable joint and proper fit with fittings.
Use a chamfering tool or deburring knife to remove internal and external burs, rotating gently to avoid gouging.
Finish with fine emery cloth or a nylon brush to smooth edges and remove residue.
Inspect visually and by touch for clean, uniform burr-free surfaces before assembly.
Verifying cut dimensions and end-face quality
Measure the tubing immediately after cutting to confirm both length and squareness of the end face before any deburring or assembly.
Use a caliper for length and a machinist square or square block against the face to check perpendicularity.
Inspect for ragged edges, uneven compression, or distortion.
Record measurements and reject or rework any tube outside specified tolerances before proceeding.
Using other types of cutters: ratcheting, PEX, and power-assisted models
Different cutter styles require adjusted technique and are suited to specific tasks: ratcheting cutters use a progressive squeeze for thicker or harder tubing, while PEX-specific cutters focus on fast, clean shears and often include quick-release mechanisms.
Power-assisted and battery models speed repetitive cuts but introduce electrical and mechanical safety considerations.
Proper maintenance—blade inspection, lubrication, and battery care—ensures safe, reliable performance across all types.
Ratcheting cutters: differences in technique and best uses
Ratcheting tubing cutters use a stepped jaw that advances incrementally with each squeeze, letting the user apply steady pressure without repositioning the tool after every bite. This mechanism reduces hand fatigue and improves control on harder or thicker pipes.
Technique emphasizes small, repeated squeezes while rotating the cutter, maintaining alignment and blade sharpness. Best for copper, brass, and thicker wall tubing where consistent force is required.
PEX-specific cutters and quick-release features
When working with flexible plastic tubing like PEX, cutters designed specifically for that material offer cleaner, square cuts and reduce deformation by using a single sharp blade rather than the compress-and-roll action of metal pipe cutters.
These tools often include quick-release mechanisms for immediate blade retraction, improving cycle speed and safety.
Users appreciate compact handles, replaceable blades, and reliable alignment for fittings.
Power-assisted and battery cutters: safety and maintenance tips
Although power-assisted and battery-operated tubing cutters dramatically speed repetitive cuts and reduce user fatigue, they require distinct safety precautions and routine maintenance to remain reliable.
Operators should use appropriate PPE, secure workpieces, and follow lockout procedures.
Keep batteries charged, contacts clean, and blades sharp; inspect housings, cords, and guards for damage.
Store dry, avoid overloading, and follow manufacturer service intervals.
Common cutting situations and adjustments
Common cutting situations require adjustments to technique and tool choice, from cramped spaces and pipes close to fittings to thick-walled or reinforced tubing.
The approach also changes for angled or miter cuts and varies by material—plastic, copper, brass, and stainless each need specific blade types, pressure, and finishing steps.
Practical tips and setup examples will clarify how to adapt cutters and work safely for each case.
Cutting in tight spaces or pipes near fittings
Many situations require cutting tubing close to walls, inside cabinets, or near valves and fittings, where limited clearance demands different techniques and tool choices.
One-sided or compact cutters, mini rotary tools, and tubing shears suit confined spots. Support the pipe to prevent deformation, mark clearly, rotate tool with small adjustments, and trim incremental passes.
Protect adjacent fittings and inspect the edge for burrs.
Cutting thick-walled or reinforced tubing
Cut reinforced or thick-walled tubing with deliberate, steady strokes and the appropriate tool to avoid crushing, fraying, or delamination.
Use a cutter rated for thicker walls or a fine-tooth saw when necessary, supporting the tube firmly. Rotate slowly, increasing pressure gradually.
Deburr both edges with a file or deburring tool. Inspect for internal reinforcement damage before installation.
Dealing with angled or mitre cuts
Several angled or mitre cuts require a steady setup and an accurate marking method to confirm proper fit and sealing.
The user should scribe the angle, secure the tube in a miter block or angled vise, and rotate a cutter or use a hacksaw guided by the block.
Deburring the bevel and test-fitting components confirms mating faces align for reliable joints.
Cutting plastic, copper, brass, and stainless steel tubing material-specific tips
Different tubing materials demand specific cutting techniques and tool adjustments to preserve edge quality and guarantee proper joints. Plastic requires slow, steady turns and deburring; copper needs light pressure and frequent rotation; brass tolerates moderate force; stainless steel needs hardened blades and incremental tightening. Match blade type, feed rate, and clamp firmness to material for best results.
| Material | Blade | Tip |
|---|---|---|
| Plastic | Fine | Slow turns |
| Copper | Standard | Light pressure |
| Stainless | Hardened | Incremental tightening |
Troubleshooting frequent problems and how to avoid them
Troubleshooting common cutter issues begins with preventing crushed or deformed tubing by using the correct jaw pressure and support.
Attention to cutting technique and a deburring tool eliminates burrs and jagged edges and reduces the need for re-cuts.
If cuts are off-square or the cutter binds, inspect wheel alignment, clean and lubricate the mechanism, and follow re-cutting strategies to salvage the workpiece.
Preventing crushed or deformed tubing
Preventing crushed or deformed tubing begins with proper tool selection and setup: using a cutter sized for the tube, ensuring the cutting wheel is sharp and aligned, and supporting the tube close to the cut to distribute pressure evenly.
Rotate the cutter gradually, avoid over-tightening, and back off the clamp between passes.
For thin-walled or soft materials, use sacrificial mandrels or rollers to maintain roundness.
Eliminating burrs and jagged edges
Deburr tubing immediately after cutting to remove sharp edges and ridges that can impair fittings or injure installers.
Use a deburring tool or reamer, working both inside and outside the bore. Rotate gently, remove minimal material, and inspect with fingers (carefully) and visually.
For brass or copper, a fine file or emery cloth refines the edge.
Clean swarf before assembly.
Fixing off-square cuts and re-cutting strategies
When a cut is noticeably off-square, assess the error before proceeding: measure deviation, mark a true square line, and determine whether re-cutting or trimming will suffice.
For minor angles, rotate the tube and take a light skim with the cutter, maintaining steady pressure.
For larger errors, shorten the tube to a fresh section and recut squarely.
Deburr and verify with a square.
When the cutter won’t rotate or binds: maintenance fixes
Inspect the cutter immediately if the wheel stops turning or the frame binds, since seized parts or accumulated debris are the usual culprits.
Clean chips and grime, remove and lubricate the wheel axle and adjustment screw, and check for bent or worn components.
Replace dull wheels and damaged rollers.
Reassemble, test rotation, and store dry.
Regular inspection prevents recurrence.
Maintenance and storage to keep your cutter performing reliably
Routine maintenance preserves cutter performance: regular cleaning, lubrication, and a blade replacement schedule prevent wear and poor cuts.
Periodic calibration and inspection of moving parts guarantee smooth operation and accurate alignment.
When not in use, storing the tool in a dry, protected case keeps blades and cutting wheels from damage and corrosion.
Cleaning, lubrication, and blade replacement schedule
Maintain the cutter through regular cleaning, periodic lubrication, and timely blade replacement to guarantee consistent cuts and prevent corrosion or binding.
Wipe debris after each use, apply light oil to threads and rollers, replace blades at first dullness, store dry with blade retracted, and log maintenance dates for predictable performance and safety.
- Clean immediately after use
- Oil moving joints weekly
- Swap blades when burrs appear
- Dry before storage
- Record service dates
Calibrating and inspecting moving parts
Periodically verify that the cutter’s moving components align and operate smoothly by checking clearances, travel, and locking mechanisms against the manufacturer’s tolerances.
Inspect rollers, feed screw, and guide tracks for wear, burrs, or deformation. Measure play and adjust tension or shim as specified.
Replace worn parts promptly. Test full-range motion and locking repeatability before use to guarantee consistent, safe cutting performance.
Proper storage to protect blades and cutting wheels
Store blades and cutting wheels in a clean, dry location to prevent corrosion and accidental damage.
Individual protective sleeves or labeled compartments avoid edge contact and contamination.
Keep cutters disassembled when long-term storage is planned, with light oil applied to metal surfaces.
Store away from humidity, chemicals, and heavy tools.
Regularly inspect stored wheels for nicks and replace any compromised components before use.
Time-saving tips and professional techniques for consistent results
Experienced users employ marking templates, simple jigs, and repeatable setups to batch cuts with consistent length and alignment.
They balance speed and quality by slowing feed or using finer adjustments when a clean finish matters.
For complex jobs, cutters are often paired with deburring tools, vises, or tubing benders to save time and guarantee professional results.
Marking templates, jigs, and repeatable setups
Using simple templates and jigs transforms repetitive tubing cuts into a fast, predictable process by eliminating guesswork and reducing setup time.
Standardized marking, clamping, and use of stop blocks guarantee identical lengths and angles. Templates save measurement steps; jigs hold tubing squarely; labeled guides speed selection; repeatable setups reduce waste and training time.
- Mark templates for common lengths
- Use stop-block jigs
- Label fixtures clearly
- Clamp before cutting
- Store setups by job
Speed vs. quality: when to slow down for better finishes
Balance speed and quality by recognizing which cuts demand extra attention and which can be rushed without consequence.
Professionals slow for final passes, thin walls, tight fits, or visible joints to prevent burrs and distortion. Faster cuts suit rough lengths or hidden sections.
Use steady pressure, incremental scoring, and brief deburring when slowing to guarantee consistent finishes without sacrificing overall productivity.
Combining cutters with other tools for complex jobs
When a job moves beyond simple straight cuts, combining a tubing cutter with complementary tools saves time and improves consistency.
Professionals pair cutters with deburring tools, rotary files, and pipe vises for secure, clean workflows.
For angled or offset cuts, use a mitre box or tubing bender to preset geometry.
Torque-limited wrenches and supports prevent distortion, ensuring repeatable, high-quality joints.
Safety reminders and regulatory considerations for plumbing work
The author notes that many jurisdictions set specific standards for cut quality and joint preparation that must be met to pass inspection.
Proper cleanup and containment of metal shavings is emphasized to prevent injury and contamination, with disposal following local hazardous-waste or construction-waste rules.
Readers are reminded to consult applicable plumbing codes and site-specific waste protocols before beginning work.
Local code considerations for cut quality and joint prep
Although cutting a tube cleanly is a basic skill, local plumbing codes often define minimum requirements for bevel, burr removal, and dimensional tolerances that affect whether a joint is deemed acceptable.
Inspectors may require documented compliance with manufacturer specs, approved fittings, and verified joint gaps. Adherence to code prevents leaks, failed inspections, and rework; professionals should consult jurisdictional codebooks before final assembly.
Safe handling of metal shavings and disposal
Cutting requirements and inspected joint tolerances also influence how metal shavings are produced and must be managed on-site.
Workers should collect swarf with brushes and shop vacuums, avoid hand contact, and store shavings in labeled, sealed containers.
Follow local hazardous-waste rules for disposal, recycle where permitted, and document disposal.
Use PPE, inspect work areas, and prevent shavings from entering drains or sensitive equipment.
Quick reference checklist before and after every cut
Before and after each cut, inspect the workspace, tool, and tubing to confirm safe, accurate operation. The operator verifies blade condition, secures tubing, checks alignment marks, removes debris, and confirms PPE.
Follow this concise checklist to prevent errors and injury:
- Inspect cutter wheel for nicks or wear
- Secure tubing in stable position
- Align cut mark precisely
- Clear chips and oil
- Wear gloves and eye protection
Conclusion
With practiced hands and the right cutter, tubing can be trimmed cleanly and reliably, like a seamstress snipping thread. Following preparatory checks, correct blade alignment, steady rotation, and deburring produces leak-free joints. Choosing the appropriate cutter style and making minor adjustments for material and access keeps work efficient. Regular maintenance preserves tool accuracy. Adhering to safety practices and local codes guarantees cuts are both precise and professionally acceptable.