How to Fit a Shower Arm: Step-by-Step Guide for a Leak-Free Installation
To fit a shower arm and ensure a leak-free installation, follow these steps: First, shut off the water supply. Then, remove the old shower arm, clean the threads, and inspect the stub-out for any damage. Next, apply plumber’s tape or pipe dope to the threads of the new arm, hand-start it into the stub, and tighten it with a wrench. Seal the escutcheon with silicone. Finally, test for leaks and adjust the angle of the showerhead as needed. For further assistance, refer to troubleshooting tips, tool recommendations, and guidance on selecting the right shower arm.
Overview of Shower Arm Installation and Expected Outcome
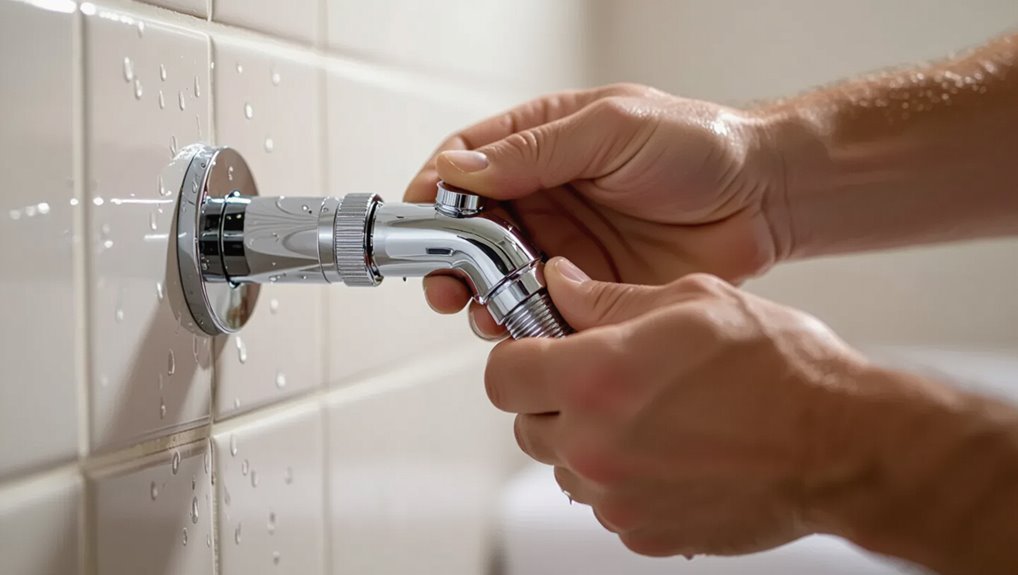
A properly fitted shower arm sits flush at the wall flange, aligns with the showerhead without leaks, and provides a secure, stable connection.
Typical reasons to replace or install an arm include leaks, corrosion, improper angle, or an upgrade in style and reach.
Required tools and materials are basic: an adjustable wrench or pipe wrench, plumber’s tape, replacement arm and flange, and possibly thread sealant or pipe dope.
What a correctly fitted shower arm looks like
Several clear indicators distinguish a correctly fitted shower arm from an improperly installed one: the arm sits flush at the wall escutcheon, aligns level with desired spray direction, and shows no visible gaps or thread sealant residue.
Water flows smoothly without leaks, fittings remain tight after use, and the finished appearance complements surrounding fixtures—clear outcomes of following how to fit a shower arm properly.
Common reasons to replace or install a shower arm
Consider replacing or installing a shower arm when performance, style, or safety concerns arise: persistent leaks, corrosion, low or misdirected spray, outdated finish, or compatibility issues with new fixtures all justify intervention.
Additional reasons include uneven water pressure from old piping, damaged threads causing leaks, upgrading to a rain or handheld head, or correcting incorrect length or angle for improved user comfort and bathroom aesthetics.
Tools and materials needed
With reasons for replacing a shower arm identified—leaks, alignment, style, or compatibility—the next step is assembling the right tools and materials to complete the job efficiently and safely.
Necessary items guarantee a secure, watertight installation and smooth workflow.
- Adjustable wrench and pipe wrench
- Teflon tape (PTFE) and pipe sealant
- Replacement shower arm and flange
- Rag and plumber’s grease
- Ladder or step stool
Choosing the Right Shower Arm for Your Bathroom
Choosing the right shower arm begins with selecting the suitable type—wall-mounted, ceiling-mounted, adjustable, or decorative—based on bathroom layout and desired spray direction.
Material and finish options such as brass, stainless steel, chrome, or matte affect durability and aesthetics.
Accurate measurement of thread type and size and verification of compatibility with the existing shower head and plumbing guarantee a proper fit.
Types of shower arms (wall-mounted, ceiling-mounted, adjustable, decorative)
Types of shower arms fall into four main categories—wall-mounted, ceiling-mounted, adjustable, and decorative—each designed to suit different plumbing layouts, aesthetic goals, and user needs.
Selection depends on spray direction, mounting location, and user mobility. Consider functionality, maintenance access, and visual impact.
- Wall-mounted: traditional, space-efficient
- Ceiling-mounted: rain-style immersion
- Adjustable: angle/height flexibility
- Decorative: style-focused
- Accessibility-oriented: ease of use
Materials and finishes: brass, stainless steel, chrome, matte
After selecting the appropriate arm style and placement, material and finish determine durability, corrosion resistance, and the bathroom’s overall look.
Choices balance performance and aesthetics:
- Brass: corrosion-resistant, classic warmth
- Stainless steel: modern, durable, low maintenance
- Chrome: bright, affordable, easy to match
- Matte: contemporary, hides fingerprints
Finish quality affects longevity and maintenance requirements.
Measuring and matching thread types and sizes
When selecting a shower arm, accurate measurement and correct thread matching guarantee a watertight, secure connection between the arm and the showerhead or wall fitting.
Measure thread diameter with calipers, confirm pitch (threads per inch) or metric pitch, and identify male versus female ends.
Common sizes include 1/2″ NPT and BSP variants; use adapters if types differ, ensuring proper sealant and alignment.
Compatibility with existing shower heads and plumbing
Choosing a shower arm requires matching its length, angle, and connection style to the existing showerhead and in-wall plumbing to guarantee proper reach, spray coverage, and a leak-free joint.
Verify thread type, size, and taper; confirm wall outlet depth and mounting flange compatibility.
Consider material, finish, and weight for support.
Test fit before sealing with PTFE tape or pipe dope.
Preparing the Workspace and Plumbing Safety
Before any work begins, the water supply should be shut off and the shower line drained to prevent leaks and water damage.
Fixtures and surrounding surfaces must be protected with cloths or tape to avoid scratches and debris.
The existing plumbing should be inspected for damage or corrosion to guarantee a secure, watertight installation.
Turning off water supply and draining the line
To prevent accidental flooding and guarantee a safe working environment, the water supply to the shower must be shut off and any residual pressure relieved.
Locate the shutoff valve or the home’s main, close it, then open the shower valve to drain remaining water.
Inspect for continued flow; if present, recheck valve position or shut off the main before proceeding.
Protecting fixtures and surrounding surfaces
A clean, well-prepared work area minimizes damage and simplifies installation; protective measures should be applied to fixtures and surrounding surfaces before any tools are used.
Cover faucets, valves, and the tub or shower base with painter’s tape and soft cloths. Lay down drop cloths or cardboard.
Remove loose items and secure nearby cabinetry. Keep a small container for fasteners to prevent scratches and loss.
Inspecting the existing plumbing for damage or corrosion
Several visible and hidden signs indicate whether the existing plumbing needs attention.
The installer checks for green or white corrosion, pitting, hairline cracks, mineral buildup, and soft or brittle pipe sections.
Threads and fittings are examined for wear, leaks, and previous repairs.
Any compromised copper, brass, or galvanized components are documented and replaced to guarantee a durable, leak-free shower arm installation.
Step-by-Step Installation: Remove the Old Shower Arm
The technician begins by loosening a stuck shower arm with penetrating oil and proper tools, taking care not to damage the fitting or surrounding tile.
Once removed, remaining sealant and debris are scraped away and the pipe threads are cleaned for a secure new connection.
Finally, the wall fitting and plumbing stub-out are inspected for thread damage, corrosion, or leaks before proceeding.
How to loosen and remove a stuck shower arm safely
Begin by shutting off water to the shower and protecting nearby fittings and tile with towels or painter’s tape; this prevents accidental damage and limits mess before tackling a stuck shower arm.
Apply penetrating oil at the wall joint, allow dwell time, then use a strap wrench or adjustable wrench with a cloth to avoid marring.
Gently tap the arm base, alternate heat if needed, and remove carefully.
Removing old sealant and cleaning the pipe threads
Once the arm is removed, scrape away old sealant and tape from the exposed pipe threads using a utility knife or small chisel held at a low angle to avoid nicking the threads.
Follow with a nylon brush or brass wire brush to clear remaining debris. Wipe with a lint-free cloth and solvent if needed.
Confirm threads are dry and free of particles before applying new tape or sealant.
Inspecting the wall fitting and plumbing stub-out
Inspect the wall fitting and plumbing stub-out for damage, corrosion, or misalignment before proceeding.
The installer checks for cracked escutcheons, loose mounting screws, and mineral buildup that could prevent a watertight seal.
Measure stub-out depth and thread condition; repair or replace damaged fittings.
Confirm the supply line remains secure and dry; document any required corrective steps before installing the new shower arm.
Step-by-Step Installation: Fit the New Shower Arm
The installer chooses between plumber’s tape and pipe dope based on thread type and manufacturer recommendations, applying whichever guarantees a watertight seal.
The new arm is started by hand-threading and snugging to avoid cross-threading, with a final gentle turn using a strap wrench or cloth-covered pliers to finish without overtightening.
Before fully securing, the arm’s angle is set and the flange aligned flush with the wall to guarantee proper orientation and a clean fit.
Applying plumber’s tape vs. pipe dope when to use each
A choice must be made between plumber’s tape and pipe dope based on thread type and the desired level of sealant; plumber’s tape (PTFE) is preferred for tapered metal threads where it lubricates and fills gaps.
On the other hand, pipe dope provides a thicker, longer-lasting seal for straight threads, damaged fittings, or joints requiring extra protection against leaks.
Use tape for corrosion-prone metals; use dope for aged or uneven threads.
Correctly threading and hand-tightening the shower arm
Orient the shower arm so its threads align with the wall outlet, then start threading by hand to guarantee smooth engagement and prevent cross-threading.
The installer continues turning until snug, feeling for uniform resistance and uninterrupted progress. If resistance spikes, reverse slightly and re-engage.
Hand-tightening secures correct seating and alignment before any final torquing, ensuring the fixture sits square and threads remain intact.
Final tightening technique to avoid cross-threading or damage
After hand-tightening until threads feel uniformly engaged, attention shifts to final tightening to lock the shower arm without cross-threading or deforming fittings.
Using an adjustable wrench with a soft-jaw protector, apply steady, even torque in small increments. Pause to check alignment and feel; stop once resistance increases firmly.
Over-tightening risks thread damage and leaks, so prefer cautious, measured force.
Positioning the arm angle and aligning the flange or escutcheon
Position the shower arm so its outlet points at the desired spray angle before seating the flange or escutcheon against the wall.
The installer guarantees the arm threads engage smoothly, adjusts rotation to align the flange evenly with surrounding tile, and verifies the escutcheon sits flush.
Minor gaps are corrected with backing or caulk; final orientation is confirmed before completing the last tightening.
Sealing, Testing, and Finishing
After the arm is secured, gaps around the flange should be sealed with caulk or silicone to prevent water ingress.
The water supply is then turned back on and the line pressure-tested for leaks, with attention paid to the joint between arm and pipe for common failure points.
Finally, the shower head is reattached and the spray pattern checked, addressing any leak or alignment issues as they appear.
Sealing gaps around the flange with caulk or silicone
A thin, continuous bead of caulk or silicone around the flange prevents water from seeping behind the wall and protects the shower arm installation.
The installer applies an even bead, smooths it with a wet finger or tool, and removes excess. Cure time is observed per manufacturer instructions.
Use mildew-resistant, bathroom-grade sealant and guarantee a uniform seal around the entire flange perimeter.
Turning water back on and pressure-testing for leaks
Once the sealant around the flange has cured, the installer cautiously restores the main water supply and slowly opens the shutoff valve to pressurize the line.
They inspect the joint, flange, and exposed piping for visible drips, then run the shower briefly to confirm hot and cold flow.
Any seepage triggers immediate shutoff; observations continue for several minutes to guarantee stability under pressure.
Troubleshooting common leaks at the joint
Begin troubleshooting by isolating the source of the leak: inspect the joint, thread engagement, and flange seating for visible gaps, corrosion, or damaged tape/sealant.
If dripping occurs at threads, drain, disassemble, clean threads, and rewrap with fresh PTFE tape or apply pipe joint compound.
For flange leaks, reseat or replace the escutcheon gasket and verify arm is tightened without cross-threading.
Reattaching the shower head and testing spray pattern
Reconnect the shower head by threading it onto the arm, ensuring the mating surfaces are clean and the tape or compound remains intact; hand-tighten until snug, then finish with a wrench only enough to compress the seal without deforming fittings.
Restore water, check for leaks at the joint, cycle through spray settings, verify even coverage and pressure, and adjust angle or replace aerator if flow is irregular.
Common Problems and How to Fix Them
Common problems include seized or corroded fittings that require penetrating oil, heat, or extraction tools to remove.
Post-installation leaks, misaligned arms causing awkward spray, and internal wall damage each have specific diagnostic steps and remedies ranging from re-seating and re-taping threads to adjusting arm orientation or replacing concealed plumbing.
Serious deterioration or broken pipes inside the wall warrants stopping work and calling a licensed plumber.
Stubborn or corroded fittings removal strategies
When a shower arm or its fittings seize from mineral buildup or corrosion, removing them requires a careful mix of penetrating lubricants, heat, and mechanical advantage to avoid damaging the wall or plumbing.
Apply penetrating oil, allow soaking time, use calibrated heat (hairdryer or heat gun) cautiously, and employ strap or adjustable wrenches with pipe protectors.
Tap joints gently and work incrementally until freed.
Leaks after installation diagnosis and remedies
If leaks appear after installing a shower arm, diagnosing the cause promptly prevents water damage and frustration. Most post-installation leaks stem from improper thread sealing, loose fittings, cracked escutcheons, or damaged supply lines.
Inspect joints for visible drips, tighten fittings, remove and rewrap threads with plumber’s tape or sealant, replace damaged escutcheons or O-rings, and pressure-test the connection before finishing.
Misaligned arm or awkward spray direction adjustment tips
After addressing leaks, attention should turn to alignment and spray angle, since a misaligned shower arm or head can make the fixture uncomfortable or ineffective.
Check arm thread engagement and tighten or loosen to orient the head. Use plumber’s tape to adjust depth, replace an incompatible flange or shower head swivel adapter, and test spray patterns, making small incremental adjustments until desired direction is achieved.
Damaged plumbing inside wall when to call a plumber
How severe is the damage to plumbing hidden inside a wall determines whether a homeowner can attempt a DIY repair or must call a licensed plumber.
Visible water stains, persistent leaks, mold, low water pressure, or compromised structural elements warrant immediate professional assessment.
Minor fixture connections or accessible pipe sections may be repaired DIY with proper skills; complex corrosion, burst pipes, or inaccessible failures require licensed intervention.
Time, Cost, and Skill-Level Expectations
A typical DIY shower arm installation takes between 30 minutes and 2 hours depending on access and sealing needs.
Material and replacement costs usually range from a few dollars for a basic arm and plumber’s tape to $50–$150 for higher-end fixtures and fittings.
Professional help is recommended if hidden plumbing must be altered, threads are corroded, or a watertight fit cannot be achieved.
Typical time required for DIY installation
When considering a DIY shower arm installation, most homeowners can expect the job to take roughly 30 minutes to 2 hours, depending on experience and complications.
Simple replacements with accessible fittings and proper tools lean toward the shorter end. Tasks such as clearing old sealant, aligning threads, or addressing minor corrosion add time.
Unexpected issues—hidden damage or difficult access—can extend the project.
Estimated material and replacement costs
Budgeting for a shower arm replacement depends on part choice, tool needs, and whether professional labor is required.
Typical parts range from $10 for basic arms to $75+ for designer finishes. Essential consumables (plumber’s tape, sealant) add $5–15.
Basic tools may already be owned; purchasing adds $10–40. Total DIY cost commonly falls between $15 and $100, excluding labor.
When professional help is recommended
Several situations warrant hiring a professional to replace a shower arm: limited time, complex plumbing configurations, visible corrosion or hidden leaks, and lack of confidence with threaded pipe work.
Professionals guarantee correct fittings, proper sealing, and code compliance. Expect higher hourly labor costs but faster, reliable results.
Hire a licensed plumber for integrated valves, remodels, inaccessible supply lines, or persistent leak diagnosis to avoid costly mistakes.
Maintenance Tips to Keep the Shower Arm Leak-Free
Routine inspection and cleaning help prevent corrosion and buildup that can lead to leaks.
Seals should be replaced and thread sealant reapplied at the first sign of wear or persistent seepage.
Consider upgrading the arm or fittings for better water efficiency or improved aesthetics when maintenance becomes frequent.
Regular inspection and cleaning to prevent corrosion
Inspecting and cleaning the shower arm at regular intervals prevents corrosion before it compromises the connection or water flow.
A routine includes wiping away mineral deposits, gently removing scale with a nonabrasive cleaner, and checking external fittings for pitting or discoloration.
Any surface corrosion should be brushed off and rinsed. Documenting observations helps track deterioration and schedule further maintenance.
When to replace seals or reapply thread sealant
When should seals be replaced or thread sealant reapplied to keep a shower arm leak-free?
Seals and tape require replacement when visible wear, cracking, compression, persistent dripping, or loosened joints appear.
Reapply thread sealant during reinstallation, after any repair, or if threads are exposed.
Routine checks every six months catch deterioration early; replace immediately when leaks recur despite tightening.
Upgrading for water efficiency or improved aesthetics
Although primarily functional, a shower arm can be upgraded to improve water efficiency or aesthetics without compromising its seal integrity; choices should preserve proper sealing and flow.
Recommended considerations:
- Low‑flow showerheads compatible with existing thread
- Replaceable aerators to reduce water use
- Corrosion‑resistant finishes for longevity
- Matching trim to prevent stress on seals
- Professional installation for complex swaps
Quick Reference Checklist for a Successful Installation
A compact checklist helps guarantee a smooth shower arm installation by highlighting required tools, part compatibility, and sequence of steps.
It summarizes essentials, safety checks, and verification points to avoid leaks and misalignment.
- Verify thread type and shower arm length
- Gather wrench, tape, sealant, and cloth
- Shut off water and remove old arm
- Apply tape, install, and tighten securely
- Test for leaks and adjust as needed
Conclusion
The final twist arrives as the new shower arm tightens into place, threads sealed and water pressure tested. For a moment, silence—no drip, no wobble—only the promise of a trouble-free shower. Yet beneath the tile, unseen connections hold the verdict; a hairline fault or misaligned thread could still betray the calm. Vigilant checks and simple maintenance separate lasting success from a return to the toolbox, so routine inspections remain essential.