How to Empty the Drain Pan on an Air Conditioner: Step-by-Step DIY Guide
To empty the drain pan on your air conditioner, follow these steps: First, turn off the power to the unit. Next, remove the access panels and filters to access the drain pan. Scoop or siphon out the standing water, and use a wet/dry vacuum or pump to remove any remaining moisture. Clear the drain line using a snake or by flushing it, then sanitize the pan before reassembling everything securely. Lastly, inspect float switches and pumps for any faults. This guide will provide you with detailed step-by-step instructions, troubleshooting tips, and preventive care measures to keep your air conditioner running smoothly.
What It Means to Empty an Air Conditioner Drain Pan
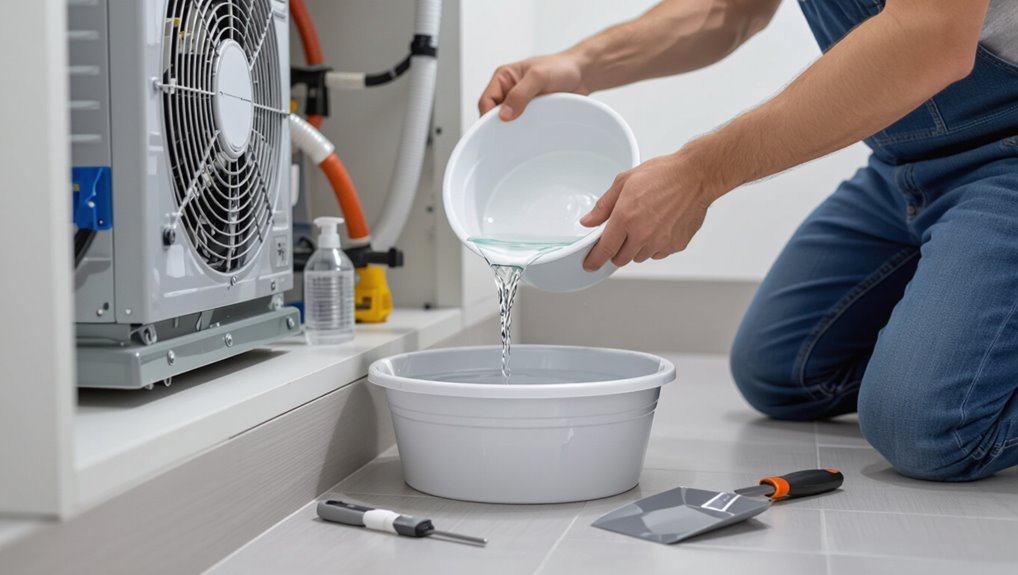
An air conditioner’s drain pan collects condensate from the evaporator coil and must be emptied when buildup, leaks, or blocked drain lines prevent proper flow.
If the pan becomes full or clogged, standing water can cause indoor water damage, promote mold growth, and trigger safety switches that shut down the system.
Understanding these causes and risks clarifies why routine inspection and timely emptying are important.
Purpose of the drain pan and common reasons it needs emptying
The drain pan collects condensate produced when the air conditioner cools indoor air, directing that water safely away from the unit to prevent damage and mold growth.
It also stabilizes overflow and supports proper drainage. Common reasons it needs emptying include blocked drain lines, evaporator coil drip, or interrupted condensate removal.
Routine checks answer how to empty drain pan on air conditioner and prevent buildup.
Risks of a full or clogged drain pan (water damage, mold, system shutdown)
Neglect of a clogged drain pan can quickly escalate into tangible problems: standing water promotes mold and mildew growth, leaks compromise ceilings and floors, and modern systems may trigger safety cutoffs that halt cooling.
Beyond visible damage, moisture fosters structural rot, warped insulation, and deteriorated finishes; indoor air quality worsens, increasing health risks.
Repair costs and downtime rise if the pan remains unattended.
Tools and Safety Precautions Before You Start
Before beginning, the technician identifies required tools and materials such as a wet/dry vacuum, flexible tubing, plumber’s snake, and a replacement drip pan if needed.
They don personal protective equipment—gloves and eye protection—and follow electrical safety steps like shutting off power at the breaker and verifying the unit is de-energized.
If corrosion, recurring clogs, or complex plumbing/electrical issues are present, a qualified HVAC professional is called instead of attempting DIY repairs.
Required tools and materials
Several basic tools and safety items are needed to empty an air conditioner’s drain pan safely and effectively: a wet/dry vacuum or condensate pump, a set of screwdrivers, a small brush or pipe snake, a garden hose or tubing, rubber gloves, safety glasses, and a flashlight.
Essential materials and tips follow:
- Clean water source for flushing
- Replacement tubing or sealant
- Bucket or container for waste
- Mild detergent and cloth
Personal protective equipment and electrical safety steps
Wear appropriate personal protective equipment and follow electrical safety steps to reduce risk of injury when servicing an air conditioner.
The technician should wear safety glasses, nitrile gloves, and nonconductive footwear.
Before work, disconnect power at the breaker and verify with a multimeter. Lockout/tagout the circuit if possible.
Avoid wet conditions and use insulated tools.
Confirm adequate ventilation when working in confined spaces.
When to call a professional instead of DIY
After confirming PPE use and isolating electrical power, the technician should assess whether the drain-pan task fits within their skill set or requires a professional.
Consider calling a professional for persistent clogs, recurring leaks, visible mold, damaged pans, corroded fittings, refrigerant concerns, complex condensate pump issues, or inaccessible components.
If unsure, err on the side of safety and consult a licensed HVAC technician.
How to Locate and Access the Drain Pan
The location of the drain pan varies by unit: window units usually house it beneath the evaporator coil, wall units behind a front panel, and central systems in the air handler or condensate drain pan under the coil.
Panels or filters can typically be removed by unscrewing fasteners or releasing clips; doing so exposes the pan while minimizing disturbance to electrical components.
Once accessible, the drain outlet and any overflow switch should be identified and inspected before any cleaning.
Where drain pans are located in window, wall, and central A/C units
Different types of air conditioners place their drain pans in distinct, predictable spots: window units typically tuck the pan beneath the evaporator coils inside the cabinet.
Wall-mounted through-the-wall units hide it behind a front access panel, and central systems locate a larger condensate pan under the indoor coil or near the furnace/air handler.
Pans may be shallow or deep, plastic or metal, often with a drain outlet or overflow sensor nearby.
How to remove panels or filters to reach the pan safely
Begin by cutting power to the unit at the thermostat and breaker to prevent fan or compressor startup while working.
Remove exterior grille or access panel screws with appropriate screwdriver.
Slide out or unclip air filter, noting orientation for reinstall.
Support panels to avoid bending.
Set fasteners aside in a labeled container.
Use flashlight to confirm clear access to the drain pan before proceeding.
Identifying the drain outlet and overflow switch
Locating the drain outlet and overflow switch requires inspection of the evaporator housing and nearby condensate lines to identify where water exits and what device monitors levels.
The drain outlet is typically a PVC or copper stub near the pan’s lowest point.
The overflow switch is a small float or electronic sensor mounted above the pan or on the drain line; note wiring and orientation.
Step-by-Step Guide to Emptying the Drain Pan
Before beginning, the technician guarantees the air conditioner is powered off and safe to work on.
Panels and the filter are removed to expose the drain pan, after which standing water is scooped or siphoned out.
Residual water is cleared with a wet/dry vacuum or pump, and the drain line and outlet are inspected and cleared.
Step 1 Turn off power and ensure unit is safe to work on
Shut off the air conditioner’s power at the breaker and confirm the unit is not receiving electricity by testing the controls or ensuring the display is dark.
Verify power is locked out or tagged if available.
Wear insulated gloves and eye protection.
Wait several minutes for capacitors to discharge.
Keep children and pets away.
Proceed only when confident the unit is electrically safe.
Step 2 Remove access panels and filter to expose the pan
Carefully remove the unit’s outer access panels and the air filter to expose the drain pan and surrounding components.
Wear gloves and safety glasses. Use a screwdriver or hex key as required, keeping fasteners organized.
Gently slide out the filter and set it aside for cleaning.
Inspect the pan, drain outlet, nearby condensate lines, and visible wiring for corrosion, debris, or damage before proceeding.
Step 3 Scoop or siphon out standing water
With the access panels and filter removed and the drain area inspected, the technician can remove standing water from the pan using either a scoop or a siphon.
Choose method by volume and access. Use clean containers and tubing; avoid spills.
- Scoop with a small cup for shallow pools
- Siphon with clear tubing for deeper water
- Work slowly to prevent overflow
- Dispose water safely
Step 4 Use a wet/dry vacuum or pump to remove residual water
Use a wet/dry vacuum or a small pump to extract the remaining water from the drain pan, ensuring a more complete and faster removal than scooping or siphoning alone.
Position the hose at the lowest point, seal around the opening to maintain suction, and run briefly until the pan is nearly dry.
Empty the vacuum/pump reservoir and repeat if necessary.
Step 5 Inspect and clear the drain line and outlet
After removing as much water as possible from the pan, the technician moves on to the drain line and outlet to guarantee proper flow and prevent future backups.
They inspect for clogs, algae, and debris, use a flexible brush or plumber’s snake to clear obstructions, flush the line with water, check the outlet for blockages, and verify unobstructed discharge before proceeding.
Step 6 Clean and sanitize the pan to prevent mold buildup
Begin by removing any remaining standing water and loose debris from the pan.
Then scrub surfaces with a soft brush and mild detergent, reaching corners and seams.
Rinse thoroughly and apply a diluted bleach solution or EPA-approved sanitizer to kill mold spores; let sit per product instructions.
Dry completely with cloth or air flow, and inspect for persistent stains or damage before proceeding.
Step 7 Reassemble the unit and restore power
Carefully realign the drain pan and any removed panels, ensuring gaskets and screw holes match up to prevent leaks and vibration.
Secure fasteners evenly to avoid warping.
Reinstall filters and access covers, confirm drain line routing is unobstructed, then restore power at the breaker.
Observe one full cooling cycle, check for proper drainage and unusual noises, and tighten or adjust as needed.
Additional Cleaning and Maintenance Steps
After emptying the drain pan, attention should turn to other maintenance tasks that prevent future clogs and leaks.
The article will explain how to flush the condensate drain line with a vinegar or diluted bleach solution, when and how to clean or replace filters and coils to reduce drainage problems, and how to inspect and test the condensate pump and float switch.
Following these steps helps maintain efficient operation and avoids recurring water damage.
How to flush the condensate drain line with vinegar or bleach solution
To flush the condensate drain line, pour a measured solution of white vinegar or a diluted bleach mix down the access point to dissolve algae and mold buildup; allow it to sit 15–30 minutes, then rinse with water until clear.
- Use 1 cup vinegar or 1 part bleach:10 parts water
- Protect surrounding surfaces
- Wear gloves and eye protection
- Repeat quarterly or as needed
Replacing or cleaning filters and coils to reduce future drainage issues
Replace or clean filters and coils on a regular schedule to prevent dust and biological growth from restricting airflow and increasing condensate formation.
Technicians recommend inspecting filters monthly and coils at least annually; more often in dirty environments. Wash or replace filters per manufacturer guidance.
Clean evaporator and condenser coils using coil cleaner and soft brushes, ensuring power is off and fins remain undamaged.
Inspecting and testing the condensate pump and float switch
Once filters and coils are clean, attention should turn to the condensate removal system—specifically the condensate pump and float switch—since a malfunctioning pump or stuck float can cause overflow and water damage.
Inspect for debris, corrosion, or leaks. Manually lift the float to guarantee movement and activation.
Test the pump by pouring water into the pan; listen for operation and verify proper discharge.
Common Problems, Causes, and Fixes
The guide now turns to common problems that can affect the drain pan and how to distinguish them.
It outlines how to tell a clogged drain line from a damaged pan, addresses recurring water in the pan with root causes and long-term fixes, and highlights signs of mold or bacterial contamination with remediation steps.
Clear diagnostic clues and practical remedies are provided to help resolve each issue.
Clogged drain line vs. damaged pan how to tell
How can a homeowner tell whether water in an air conditioner’s drain pan comes from a clogged condensate line or from a cracked or corroded pan? Visual inspection, localized leaks, and timing help distinguish. Clogged lines overflow; pan damage leaks continuously.
| Sign | Likely cause |
|---|---|
| Water only during heavy cooling | Clogged line |
| Constant seepage | Damaged pan |
| Visible crack or rust | Damaged pan |
Dealing with recurring water in the pan (root causes and long-term fixes)
Although occasional water in the condensate pan is normal, recurring accumulation signals an underlying problem that requires diagnosis and durable repair.
Common causes include persistent drain clogs, improper pan slope, frozen coils producing excess condensate, or a failing condensate pump.
Long-term fixes: clear and flush the drain, reposition or replace the pan for correct pitch, repair coil issues, and service or replace the pump.
Signs of mold or bacterial contamination and remediation steps
When dark streaks, slimy residues, or a musty odor are present around the condensate pan, they indicate mold or bacterial growth that can impair air quality and clog drain lines.
Inspect visually and smell; wear gloves and a mask.
Clean with a diluted bleach or vinegar solution, scrub surfaces, flush the drain line, and dry thoroughly.
Replace porous insulation and schedule professional remediation if growth persists.
Preventive Measures and Maintenance Schedule
The article recommends a regular maintenance rhythm, such as monthly inspections during peak cooling months and at least once per season otherwise, to check and empty the drain pan.
It notes specific seasonal tasks—cleaning the condensate drain line in spring, verifying pan condition before summer, and clearing debris after fall—that reduce the risk of overflow.
Simple upgrades like installing a drain line trap and upgrading to higher-efficiency filters are suggested to lower maintenance frequency and prevent clogs.
Recommended frequency for checking and emptying the drain pan
Regularly inspecting the air conditioner’s drain pan helps prevent clogs, overflows, and mold growth.
Monthly checks suffice during moderate use, increasing to biweekly in heavy cooling seasons or humid climates.
Emptying should follow inspections whenever standing water or debris appear.
After any system work or unexpected leaks, perform an immediate check.
Keep a simple log to track frequency and findings.
Seasonal checks and tasks to prevent pan overflow
After establishing a routine for monthly or biweekly inspections, homeowners should also schedule seasonal checks tied to HVAC use and local climate patterns.
Inspect pan condition, condensate drain, and nearby insulation at spring startup and fall shutdown. Clear debris, verify secondary drain and float switches, test condensate pump if present, and document findings.
Adjust inspection frequency after heavy pollen or storm seasons.
Simple upgrades to reduce maintenance (drain line traps, filter upgrades)
Several simple upgrades can significantly cut down on drain pan and condensate-line maintenance: adding a trap or P-trap to guarantee proper drainage, installing a secondary inline trap or cleanout, and upgrading air filters to higher-efficiency, longer-lasting models.
Other useful steps include installing a drip tray float switch, using antimicrobial drain inserts, and switching to pleated or HEPA-compatible filters to reduce debris and biological growth.
Cost and When to Hire a Professional
Professional cleaning or minor repairs for a drain pan typically range from a modest service call fee to a few hundred dollars depending on labor and parts.
More extensive issues—such as persistent clogs, corrosion, refrigerant leaks, or electrical faults—usually require an HVAC technician.
Homeowners should call a pro when basic cleaning does not resolve the problem or when safety and system integrity are in question.
Typical costs for professional cleaning or repairs
Costs for cleaning or repairing an air conditioner’s drain pan typically range from modest hourly service fees for routine maintenance to higher charges for parts replacement or complex water-damage remediation.
Typical price indicators include:
- Basic cleaning/service call: low hourly fee.
- Clogged drain line snaking: moderate charge.
- Pump replacement or pan repair: higher parts/labor cost.
- Water-damage remediation: substantial expense.
Situations that require HVAC technician intervention
Recognize when a drain pan issue requires an HVAC technician: if standing water persists after basic cleaning, there is visible corrosion or a crack in the pan, recurring clogs despite drain-line clearing, malfunctioning condensate pumps, or signs of water damage (mold, stained ceilings, or warped floors).
A professional assesses damage, replaces pans or pumps, repairs leaks, addresses microbial contamination, and provides cost estimates and warranty-covered solutions.
Quick Troubleshooting Checklist
A brief checklist helps identify why the drain pan refills shortly after being emptied, starting with inspecting the condensate line for clogs and the float switch for proper operation.
If active leaks or electrical issues are discovered, immediate steps include shutting off power to the unit and containing water to prevent damage.
The checklist prioritizes safety and rapid fixes while noting when professional service is required.
Fast checks to perform if the pan fills again soon after emptying
Begin by inspecting obvious causes and ruling out simple faults that make the pan refill quickly. These quick checks can identify clogs, drainage issues, or condensate production problems before more invasive work is needed.
Verify drain line clear, test condensate pump operation, inspect float switch, check air filter and coil for excess dirt, guarantee proper unit level, and confirm no nearby humidity sources increasing load.
Emergency steps to take if you find active leaks or electrical issues
If visible leaks or electrical sparks are discovered after performing the quick checks, stop the air conditioner immediately and isolate power at the breaker to prevent shock or fire.
Evacuate the area if odor or smoke is present.
Do not touch wet components.
Call a licensed HVAC or electrical professional for inspection and repair.
Document symptoms and any actions taken for the technician.
Conclusion
The steps outlined demystify how to empty an air conditioner drain pan, but one vital detail lingers: neglect. A small clog today can quietly become tomorrow’s leak, staining ceilings and breeding mold. Follow the maintenance guidance, and inspect the pan regularly—yet remain alert for faint, unusual sounds or smells. Ignoring them invites trouble; prompt attention transforms a minor chore into prevention. The next drip could be the last warning—don’t wait to act.