
How to Seal Corrugated Pipe Fittings: Step-by-Step Guide for Leak-Proof Joints
To effectively seal corrugated pipe fittings and ensure leak-proof joints, start with clean, undamaged ends and use the appropriate gasket or coupler along with a compatible sealant or clamp. Follow these steps:
- Prepare Surfaces: Ensure all surfaces are brushed and solvent-cleaned.
- Insert Gaskets: Place gaskets or butyl tape securely in the corrugations.
- Align Fittings: Carefully align the fittings to ensure a proper connection.
- Tighten Clamps: Use a crisscross pattern to tighten clamps evenly to the specified torque.
- Cure Time: Allow adequate time for the sealant to cure before conducting a low-pressure test.
- Inspect for Leaks: Check for any seepage and follow maintenance intervals for prolonged durability.
For more detailed techniques and guidance on special cases, continue reading.
Why sealing corrugated pipe fittings matters for leak-proof systems
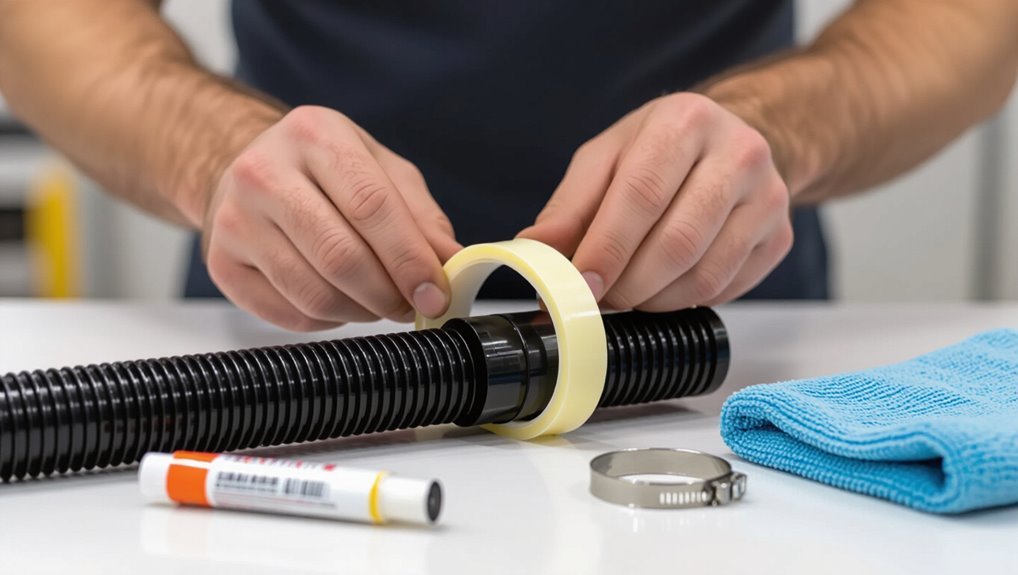
In municipal drainage, foundation waterproofing, agricultural irrigation, and HVAC condensate lines, corrugated pipe fittings are common and any joint failure can affect structures, crops, or equipment.
Poorly sealed joints allow soil erosion, water intrusion, mold growth, and system inefficiency that multiply repair costs and downtime.
Understanding these consequences frames why precise sealing practices are essential for long-term, leak-proof performance.
Common applications and where leaks cause the most damage
Sealing corrugated pipe fittings matters across a range of common applications—stormwater drainage, septic and sewer systems, agricultural irrigation, and underground utility conduits—because leaks in these contexts can lead to soil erosion, contamination, structural undermining, and costly service interruptions.
Professionals prioritize how to seal corrugated pipe fittings in road crossings, foundation drains, field laterals, and municipal connections where failures produce the most damage.
Consequences of poorly sealed corrugated pipe joints
Poorly sealed corrugated pipe joints allow water and solids to escape or enter the system, triggering a cascade of problems that range from gradual soil erosion to sudden structural failure.
Consequences include sinkholes, undermined foundations, clogged downstream infrastructure, contamination of potable sources, increased maintenance costs, and shortened pipe lifespan.
Detecting leaks early prevents environmental damage, safety hazards, regulatory violations, and costly emergency repairs.
Quick overview: Best sealing methods for corrugated pipe fittings
For most DIY and professional jobs, a mechanical seal—such as threaded compression fittings, stainless clamps, or purpose-made couplers—offers the best balance of reliability and ease of installation.
Chemical sealing with compatible sealants or gasket compounds is recommended when joints are irregular, vibration is low, or access prevents mechanical methods.
The choice between mechanical and chemical approaches should be based on pipe material, joint geometry, expected loads, and service conditions.
Direct recommendation for most DIY and professional jobs
Choose a sealing approach that balances reliability, ease of installation, and cost for most DIY and professional corrugated pipe projects.
Prefabricated rubber gaskets with stainless clamps are recommended for general use: they seal corrugations, resist weathering, and install quickly.
For buried or high-pressure runs, combine gasketed joints with a compatible silicone or polyurethane bead for added protection against infiltration and minor movement.
When to choose mechanical vs. chemical sealing
When should a mechanical clamp be preferred over a chemical sealant? A mechanical clamp suits high-pressure, load-bearing, or frequently inspected joints and where immediate service is required.
Chemical sealants work best for irregular corrugations, submerged conditions, or long-term vibration damping.
Choose based on pipe material compatibility, accessibility, cure time, maintenance needs, and environmental exposure.
Consider combined use for added redundancy.
Types of corrugated pipe fittings and how they affect sealing
Corrugated fittings vary by application, and each type presents distinct sealing challenges and material compatibilities.
Flexible corrugated drainage, corrugated conduit for electrical runs, HVAC/ducting corrugated fittings, and sewer/stormwater corrugated fittings each require tailored gaskets, sealants, or mechanical clamps to achieve reliable joints.
Understanding the specific fitting type guides selection of sealing method, material, and installation practice.
Flexible corrugated drainage pipe fittings
Flexible corrugated drainage pipe fittings come in a range of shapes—couplers, adapters, elbows, and gaskets—each influencing how a joint is sealed and what sealing method is appropriate.
Material, rib profile, and flexibility determine clamp type, gasket selection, or solvent/adhesive use. Properly matched components simplify sealing; mismatches require custom gaskets, wider clamps, or reinforcement to prevent leaks and maintain alignment under load.
Corrugated conduit and electrical fittings
Many types of corrugated conduit and electrical fittings—conduit bodies, couplers, connection adapters, glands, and junction boxes—affect sealing requirements by their geometry, material, and designated electrical rating.
Sealing considerations include dielectric compatibility, thermal expansion, ingress protection (IP) level, and mechanical strain relief.
Proper sealant choice, gasket profiles, and installation torque guarantee continuous conductive insulation and moisture exclusion while maintaining code compliance and serviceability.
HVAC and ducting corrugated fittings
Addressing HVAC and ducting corrugated fittings requires consideration of airflow, condensation control, and pressure class, because each fitting type—elbows, reducers, takeoffs, end caps, dampers, and connection pieces—changes how seals must perform under vibration, thermal cycling, and positive or negative pressure.
Choice of gasket material, adhesive compatibility, compression method, and access for inspection determines longevity and leak resistance in HVAC applications.
Sewer and stormwater corrugated fittings
While HVAC fittings prioritize airflow and pressure stability, sewer and stormwater corrugated fittings demand attention to solids conveyance, external load resistance, and long-term watertightness.
The variety of fitting types—bell-and-spigot joints, gaskets, couplers, tees, wyes, end sections, and outlet stacks—affects sealing strategy because geometry, joint movement allowance, and surrounding backfill conditions change compressive forces, exposure to infiltration/exfiltration, and susceptibility to abrasion or biological clogging.
Sealing choices hinge on material compatibility, gasket profile, installation clearances, and maintenance access to guarantee durability under cyclic loading and sediment transport.
Tools and materials needed for leak-proof corrugated pipe joints
A concise inventory of tools and materials clarifies what is required to create leak-proof corrugated pipe joints.
Essential sealing products, mechanical fasteners, and elastomeric components each play distinct roles in forming durable connections.
Proper preparation, safety, and testing tools guarantee installations perform as designed.
- Sealing tapes, mastics, adhesives; mechanical clamps, stainless steel bands, couplers
- Gaskets, O-rings, rubber sleeves; cutters, deburring tools, cleaners
- Safety gear and testing tools (pressure gauges, leak detectors)
Sealing tapes, mastics, and adhesives
Select appropriate sealing tapes, mastics, and adhesives based on pipe material, joint type, and exposure conditions to confirm durable, leak-proof corrugated pipe connections.
Recommended options include butyl or polyethylene sealing tapes for compression joints, polyurethane or silicone mastics for irregular surfaces, and solvent- or polymer-based adhesives compatible with pipe substrate.
Verify chemical resistance, UV stability, curing time, and manufacturer compatibility before application for reliable long-term seals.
Mechanical clamps, stainless steel bands, and couplers
Several common mechanical fastening options—hose clamps, stainless steel band clamps, and purpose‑built couplers—provide reliable, repeatable sealing for corrugated pipe joints when chosen and installed correctly.
Proper sizing, corrosion‑resistant materials, and even torque application guarantee consistent compression across corrugations. Couplers designed for corrugated profiles align pipes, while bands distribute clamp force.
Installation tools include torque drivers, banding tools, and cutters for clean pipe ends.
Gaskets, O-rings, and rubber sleeves
Many corrugated pipe joints rely on gaskets, O-rings, or rubber sleeves to form a resilient seal that accommodates profile irregularities and movement.
These elastomeric components are selected by material compatibility (EPDM, NBR, silicone), durometer, and shape to match corrugation geometry.
Properly sized seals compress uniformly, resist compression set and chemicals, and permit thermal or mechanical movement while maintaining leak-tight performance.
Preparation tools: cutters, deburring tools, cleaners
Prepare the pipe ends and fittings with the right set of preparation tools to guarantee a clean, square cut and contaminant-free sealing surfaces.
Use a ratcheting cutter or fine-toothed saw for straight cuts, a deburring tool or file to remove burrs and sharp edges, and lint-free wipes with approved solvent or cleaner to remove oils, dirt, and residue before assembly.
Safety equipment and testing tools
A compact set of safety gear and testing tools is essential to verify and maintain leak-proof corrugated pipe joints while minimizing risk to personnel and the system.
Required items include gloves, eye protection, respirator when solvents are used, and knee pads.
Testing tools: pressure gauge, air or hydrostatic test pump, soapy solution for leak detection, and a flashlight for visual inspection in confined spaces.
Step-by-step sealing process for flexible corrugated drainage pipes
The procedure begins with a careful inspection of pipe ends and fittings for cracks, burrs, or deformation.
Surfaces are then cleaned and prepared, the appropriate coupler or clamp selected, and any gasket or sealant applied before seating the fitting.
Finally, clamps are tightened, alignment verified, and the joint tested for secure sealing.
Inspecting pipe ends and fittings for damage
Inspect pipe ends and fittings visually and by touch to detect cracks, jagged edges, deformations, or embedded debris that could compromise a watertight joint.
Note hairline fractures, split corrugations, crushed sections, or misshapen bead profiles.
Verify coupling alignment, guarantee mating surfaces are uniform, and reject components with irreversible damage.
Document defects and replace or repair parts before proceeding to sealing.
Cleaning and preparing surfaces for adhesion
Begin by removing loose dirt, gravel, and old sealant from pipe ends and fitting faces using a stiff-bristled brush and compressed air or a clean, dry rag to secure a contaminant-free surface.
Wipe with isopropyl alcohol or a mild detergent solution, then rinse and dry thoroughly.
Confirm grooves and corrugations are free of debris and oil before applying primer or adhesive.
Selecting the correct coupler or clamp
After surfaces are clean and dry, attention shifts to choosing a coupler or clamp that matches pipe diameter, wall profile, and expected load.
The selected fitting must align with corrugation pitch, material compatibility (HDPE, PVC), and required stiffness.
Opt for stainless or coated clamps in corrosive environments.
Guarantee saddle or overlap couplers provide adequate engagement length and rated pressure without deforming the pipe.
Applying gasket or sealant and installing the fitting
Prepare a clean, level workspace and gather the chosen gasket or sealant, lubricant (if specified by the manufacturer), the coupling or clamp, and appropriate hand tools.
Inspect pipe ends, apply gasket or a continuous bead of sealant to flange or socket, seat gasket evenly, slide coupling onto pipe ensuring full contact, remove excess sealant, and allow manufacturer-recommended curing time before any stress or flow is introduced.
Securing clamps and checking alignment
Secure the clamps evenly around the fitting, then verify the pipe alignment to confirm a leak-free joint and proper flow.
Tighten clamps incrementally in a crisscross pattern to distribute pressure; avoid over-tightening which can deform corrugations.
Confirm coupling sits flush with pipe ends, check axial and radial alignment, and verify clamp bands rest on solid gasket material for consistent compression and long-term stability.
Curing time and initial leak test
Once clamps and alignments are verified, allow the sealant or gasketed coupling to cure for the manufacturer-specified interval—typically between 30 minutes and 24 hours depending on product and temperature—before performing any pressure or water tests.
After curing, conduct a controlled low-pressure or static water test. Observe joints for at least 15 minutes, document any seepage, then repair and retest until fully watertight.
Step-by-step sealing process for corrugated electrical conduit
The procedure for sealing corrugated electrical conduit begins with verifying that conductors are properly protected and positioned to prevent abrasion before any sealing is performed.
Install conduit-specific fittings and compression seals per manufacturer instructions, then apply approved conduit sealants and tape using recognized standards for electrical installations.
Finally, confirm grounding continuity and provide appropriate strain relief to maintain electrical safety and mechanical integrity.
Ensuring proper conductor protection before sealing
Before sealing a corrugated conduit fitting, one must verify that all conductors are correctly insulated, routed, and secured within the coupling to prevent abrasion, strain, or exposure.
The installer inspects insulation integrity, guarantees slack for movement, arranges conductors to avoid sharp edges, and secures them with appropriate ties or clamps.
Documentation of conductor layout and continuity testing is performed before final sealing.
Using conduit-specific fittings and compression seals
Begin by selecting conduit-specific fittings and compression seals rated for the conduit material and application, ensuring size compatibility and environmental ratings (e.g., IP, NEMA) match the installation.
Inspect mating surfaces, insert conduit fully into the fitting, compress seals uniformly per manufacturer torque or hand-tightening guidance, and verify mechanical retention.
Test for proper alignment and strain relief before proceeding to final sealing steps.
Applying conduit sealants and tape standards
Prepare a clear, methodical sequence for applying sealants and tapes to corrugated electrical conduit that guarantees environmental protection, mechanical stability, and compliance with relevant standards.
Inspect surfaces, remove debris, and apply primer if specified.
Use manufacturer-approved silicone or polyurethane sealant in uniform bead over joints.
Wrap approved dielectric or self-fusing tape overlapping 50% for required layers.
Cure times and inspection per code.
Grounding and strain-relief considerations
After sealing joints and wrap layers, attention shifts to grounding continuity and mechanical strain relief at terminations and fittings.
The installer verifies bonding straps or continuity connectors are intact, exposes minimal conductor length, and secures firmly to metallic conduit or grounding lugs.
Strain-relief clamps and bushings prevent cable pullout and abrasion.
All components must meet code torque and corrosion-resistant material requirements.
Step-by-step sealing for large-diameter sewer and stormwater corrugated pipes
For large-diameter sewer and stormwater corrugated pipes, sealing begins with proper preparation of bell-and-spigot and coupler joints, ensuring clean contact surfaces and correct fit.
Profile gaskets or compression seals are then installed and checked for uniform compression to prevent movement under load.
Finally, careful backfilling to control settlement is followed by pressure and infiltration/exfiltration testing to verify long-term seal integrity.
Preparing bell-and-spigot and coupler joints
Begin by inspecting the bell-and-spigot and coupler joints to confirm clean, undamaged surfaces and correct socket alignment. Proper sealing for large-diameter sewer and stormwater corrugated pipes depends on a tight, uniform interface and the absence of debris, moisture, or deformities.
Remove dirt, rust, and old sealant; dry surfaces. Verify fit tolerances, chamfers, and axial alignment.
Protect prepared faces from contamination until assembly.
Installing profile gaskets and compression seals
With the joint faces prepared and aligned, the installer proceeds to place profile gaskets or set up compression seals, following manufacturer specifications for material orientation and seating depth.
Gaskets are fitted into grooves, checked for continuous contact, and lubricated if required.
Compression seals are centered, wedges or clamps are tightened uniformly to specified torque, and final gap and compression are verified before proceeding.
Backfill and settlement considerations for long-term seal integrity
Because backfill practices and anticipated settlement directly affect joint performance, installers must plan and execute bedding and compaction to preserve gasket compression and prevent differential movement.
Use uniform, well-graded granular bedding, compact in lifts to specified densities, and avoid heavy point loads near joints.
Anticipate consolidation, provide connecting backfill zones, and monitor settlement over time to maintain continuous seal engagement and alignment.
Pressure testing and infiltration/exfiltration checks
Perform pressure testing and infiltration/exfiltration checks to verify seal integrity and detect leaks before final backfilling and commissioning.
The crew applies hydrostatic or air tests per standards, monitors for pressure decay, observes joints for water ingress or egress, and records leak locations.
Identified defects are repaired, retested, and documented.
Final approval requires meeting allowable leakage rates and regulatory criteria prior to acceptance.
Comparison of common sealant products and mechanical options
A concise comparison of common sealants and mechanical connectors helps specify which option best matches project priorities such as durability, flexibility, UV and chemical resistance, ease of installation and reworkability, and typical cost. The table below highlights how representative products stack up on those key attributes to guide selection and procurement. Recommendations should be based on site conditions, expected service life, and maintenance access.
| Option | Strength | Typical Use Case |
|---|---|---|
| Butyl/EPDM gasket | Flexible, UV-resistant, moderate cost | Short- to medium-term joints, easy rework |
| Silicone/Polyurethane sealant | High flexibility, good chemical resistance | Irregular gaps, where movement is expected |
| Mechanical clamps/compression rings | Very durable, high initial cost | Long-term structural connections with low maintenance |
| Mastic/trowel-applied compound | Good adhesion, variable UV resistance | Irregular surfaces, field repairs |
Durability, flexibility, UV and chemical resistance
Evaluate sealant and mechanical options by how they balance durability, flexibility, UV resistance, and chemical tolerance for the designated environment.
Silicone and polyurethane offer high UV and chemical resistance with moderate adhesion.
EPDM-based gaskets provide flexibility and weathering resilience.
Butyl and polysulfide sealants excel chemically yet age differently.
Stainless clamps and crimp fittings provide mechanical longevity but may need compatible sealants to prevent corrosion or solvent attack.
Ease of installation and reworkability
Having balanced performance requirements like UV and chemical resistance, attention turns to ease of installation and future reworkability—practical factors that often dictate final product choice.
Quick-curing silicone and polyurethane offer straightforward application but can complicate removal; removable compression fittings and mechanical clamps enable faster serviceability and part replacement.
Selection hinges on required permanence, available tools, cure time, and likelihood of future access or maintenance.
Typical cost and recommended use cases
Cost considerations drive many sealing choices: silicone and polyurethane caulks typically range from $8–$25 per tube, solvent- or water-based adhesives about $5–$20, and specialty industrial sealants (fuel‑resistant, high‑temperature) can exceed $40.
Affordable options suit general drainage and HVAC; midrange adhesives balance flexibility and adhesion for potable water and mild chemicals; premium sealants or mechanical clamps are recommended for fuel, high pressure, or extreme temperatures.
Visual cues and simple tests to confirm a leak-proof joint
A brief set of visual checks and simple tests can quickly verify whether a corrugated pipe joint is watertight.
The following methods are practical, low-cost, and suitable for field or home use. Each test highlights different failure modes and helps determine if further sealing is required.
- Low-pressure water test procedure
- Air-pressure and soap-bubble test method
- Long-term observation and moisture monitoring
Low-pressure water test procedure
Begin the low-pressure water test by slowly filling the assembled corrugated pipe and fittings with water until the joint area is fully submerged and any trapped air is expelled.
Observe for visible drips, seepage, or moisture tracking at seals and clamps.
Maintain a slight head for five to ten minutes, then dry and recheck for residual dampness; document any imperfections for immediate repair.
Air-pressure and soap-bubble test method
Pressurize the sealed fitting gently with air and apply a soapy solution around the joint to reveal leaks by bubble formation.
Visual inspection of bubble size, location, and persistence gives immediate indication of seal integrity and guides targeted repairs. Observe for steady growth, intermittent bubbles, or foam streaks.
Mark defects, depressurize, reseal with appropriate compound or clamp, then retest until no bubbles appear.
Long-term observation and moisture monitoring
Following the soap-bubble check, installers should monitor fittings over time to confirm that seals remain dry and stable under normal environmental conditions.
Regular inspections—visual checks for dampness, staining, corrosion, or softening—should occur weekly initially, then monthly.
Simple tests include touch checks, tissue-paper blot tests, and repeating low-pressure air tests after temperature shifts or heavy rainfall to verify ongoing integrity.
Common mistakes that cause corrugated pipe fitting leaks
Common leaks often result from preventable errors such as inadequate surface preparation or contamination at the joint.
Incorrectly sized fittings or clamps, and clamps tightened either too much or too little, compromise the seal.
Use of incompatible sealants or materials that don’t suit the environment further increases failure risk.
Poor surface preparation and contamination
Many leaks trace back to inadequate surface preparation and contamination: dirt, oil, rust, or leftover manufacturing residues prevent sealants and gaskets from forming an uninterrupted bond with corrugated pipe fittings.
Technicians who skip cleaning, degreasing, or rust removal risk uneven compression, gaps, and chemical incompatibility.
Proper inspection and surface treatment are essential to guarantee reliable adhesion and long-term leak resistance.
Using wrong-sized fittings or clamps
After inadequate cleaning creates uneven contact areas, another frequent cause of leaks is the use of incorrectly sized fittings or clamps.
Mismatched diameters prevent full seating, create gaps, and concentrate stresses on corrugation peaks. Using proper-size components guarantees uniform compression and seal engagement.
Inspect dimensions, match nominal pipe size, and replace ill-fitting parts to avoid persistent seepage and mechanical failure.
Over-tightening or under-tightening clamps
Over- or under-tightening clamps is a frequent installer error that directly undermines a corrugated pipe joint’s integrity.
Excessive torque deforms corrugations, crushes gaskets, and creates localized stress points that leak. Insufficient torque allows movement, vibration, and pressure cycles to open gaps.
Proper tightening to manufacturer-specified torque, using calibrated tools and retorquing after initial settling, prevents both failure modes.
Incompatible sealants and environmental mismatches
A frequent source of leaks arises when sealants or gasketing materials are selected without regard to the installation environment, chemical exposure, or temperature range.
Incompatible choices degrade, harden, swell, or dissolve, compromising seals. Selecting materials rated for specific chemicals, UV exposure, pressure, and temperature cycles prevents failure.
Testing compatibility and following manufacturer specifications guarantees durable, leak-proof corrugated pipe joints.
Maintenance, inspection schedule, and when to re-seal
Recommended inspection intervals vary by application—residential drains benefit from annual checks, stormwater and agricultural systems warrant biannual or post-storm inspections, and high-traffic or chemical-exposed installations may need quarterly monitoring.
Observable signs such as persistent seepage at joints, visible gasket deformation, odor infiltration, or corrosion indicate that resealing or replacement should be considered.
When resealing is appropriate, best practices include cleaning mating surfaces, using compatible sealants or gaskets, and testing the joint under expected load before returning to service.
Recommended inspection intervals by application
How often should corrugated pipe fittings be inspected depends on their installation environment and function; high-traffic roads, agricultural fields with heavy machinery, and chemically aggressive sites require more frequent checks than low-risk residential or landscape applications.
Recommended intervals:
- monthly for critical infrastructure,
- quarterly for agricultural and commercial sites,
- biannually for typical residential drainage,
- and annually for low-use landscape installations,
adjusting after severe weather or construction.
Signs that indicate resealing or replacement is needed
Visible damage, seepage, and changes in joint integrity signal that a corrugated pipe fitting may need resealing or replacement. Inspectors should prioritize cracked or split corrugations, persistent leaks at seams or couplings, noticeable joint separation, corrosion on metal bands, and soil erosion or undermining around connections.
Additional indicators include reduced flow capacity, sediment buildup near joints, recurring repairs, and visible deformation from load or frost heave.
Best practices for resealing without full replacement
Having identified signs that warrant action, inspectors should establish a focused maintenance plan for resealing corrugated pipe fittings that prioritizes regular inspection intervals, clear criteria for intervention, and documented repair procedures.
Schedules vary by environment; quarterly checks suit high-risk sites, annual for stable locations. Reseal when minor corrosion, gasket wear, or hairline leaks appear.
Record materials used, methods, and follow-up dates.
Special scenarios and solutions
In certain situations, standard sealing methods require adjustment, such as working in cold climates with frozen ground where materials and techniques must accommodate low temperatures.
Repairs for pinned or crushed corrugated pipes often combine structural patching with specialized sealants to restore integrity.
Distinguishing temporary emergency seals from permanent fixes guarantees appropriate materials and follow-up actions are selected.
Sealing in cold climates and frozen ground
When temperatures drop and ground freezes, sealing corrugated pipe fittings requires materials and methods that remain pliable and maintain adhesion despite thermal contraction and ice pressures.
Use cold-weather-rated sealants and butyl tapes, apply when surfaces are clean and dry or use primer for frost.
Protect joints with heat trace, insulated wrap, or temporary enclosures until backfill settles and seasonal movement stabilizes.
Repairing pinned or crushed corrugated pipes
Assess damaged corrugated pipes promptly to determine whether a pinched or crushed section can be repaired in place or requires replacement. Minor deformations often respond to reshaping and reinforcement, while severe collapses compromise flow and structural integrity.
Use targeted excavation, straighten ribs carefully, install internal sleeves or external clamps, and reinforce with banding and grout as needed. Test flow and inspect joints after repair.
Temporary emergency seals vs. permanent fixes
Distinguish quickly between temporary emergency seals and permanent repairs to prevent further damage or runoff contamination:
Temporary measures—wraps, rubber patches, hose clamps, and silicone—stop leaks until proper assessment. They are quick, not code-compliant, and require monitoring.
Permanent fixes involve replacing damaged sections, properly seated couplings, bedding correction, and approved sealants.
Prioritize permanent repairs when access, safety, and long-term integrity allow.
Tools and techniques for professional-grade, long-lasting seals
The section reviews the tools and techniques that produce professional-grade, long-lasting seals, including specialty clamps and welded couplers for mechanical integrity.
It also covers advanced adhesives and primer systems used to bond corrugated materials reliably.
Finally, it outlines quality control measures and documentation practices essential for consistency on large projects.
Use of specialty clamps and welded couplers
Installers rely on specialty clamps and welded couplers to produce professional-grade, long-lasting seals on corrugated pipe fittings.
High-tension stainless clamps compress gasketed joints uniformly, resisting vibration and thermal cycling.
Welded couplers create continuous metal-to-metal seals for thermoplastic and metal corrugated pipes, eliminating mechanical failure points.
Proper sizing, surface preparation, and certified welding techniques guarantee leak-free performance and longevity in demanding installations.
Advanced adhesives and primer systems
Select primers and adhesives engineered for the specific pipe material and application to confirm durable, chemically resistant bonds; epoxy-based systems, solvent cements, and polyurethane adhesives each require matching primers and surface preparations to achieve full cure and long-term performance.
Technicians should follow manufacturer mix ratios, pot life, and ambient temperature limits, perform test bonds, and use applicators that guarantee consistent bead size and adhesion coverage.
Quality control and documentation for large projects
Because large projects multiply the consequences of small errors, a rigorous quality control and documentation program is essential to guarantee professional-grade, long-lasting seals for corrugated pipe fittings.
Inspectors should use standardized checklists, torque and cure-time logs, and photographic records. Randomized sampling, pull tests, and non-destructive leak surveys verify integrity.
Centralized digital records enable traceability, corrective action tracking, and client reporting.
Cost considerations and selecting the right approach for your project
Cost decisions hinge on the balance between upfront expense and expected seal lifespan, with higher-quality materials and labor often extending service intervals.
For simple repairs or tight budgets, do-it-yourself methods can be cost-effective, while complex fittings, deep excavations, or critical applications usually justify professional installation.
Project-specific risks and long-term maintenance costs should guide the final choice.
Budget vs. lifespan trade-offs
Weighing upfront expense against expected service life helps determine the most suitable sealing method for corrugated pipe fittings.
Cheaper materials and simple clamps lower initial cost but may require earlier replacement or maintenance. Premium gaskets, sealants, or mechanical couplers raise upfront investment yet extend longevity and reduce leaks.
Project scope, access difficulty, and lifecycle costs should guide the selection.
When to hire a professional installer
Assess whether a professional installer is necessary by examining project scale, complexity, and access constraints alongside budget limits.
For small, straightforward repairs, DIY may suffice; for large systems, buried lines, confined spaces, or warranty requirements, hire a licensed installer.
Compare estimates, verify insurance and references, and weigh long-term costs of proper sealing versus short-term savings to choose the most cost-effective approach.
Quick checklist: Achieving a reliable, leak-proof corrugated pipe joint
Prepare a concise checklist that guides each step needed to create a durable, leak-proof corrugated pipe joint.
The checklist summarizes prep, assembly, sealing, and inspection to guarantee consistent results and prevent common failures.
- Clean and deburr pipe ends; verify fit and alignment.
- Apply correct gasket/sealant; torque clamps to spec.
- Pressure-test and inspect for seepage; re-tighten or reseal if needed.
Conclusion
Precise sealing transforms simple corrugated fittings from potential failure points into dependable system anchors. While flexible corrugated pipes seem forgiving yet leak-prone, careful selection of clamps, gaskets, and sealants creates resilient, watertight joints. DIY simplicity contrasts with professional rigor: quick tape fixes oppose methodical banding and adhesive cures. Ultimately, attention to material compatibility and installation technique separates temporary stops from enduring solutions, ensuring leak-proof performance under varied conditions.
