How to Cut Corrugated Drain Pipe Cleanly: Tools, Steps, and Pro Tips
To cut corrugated drain pipe cleanly, ensure square, burr-free edges for optimal seating and leak prevention. Start by marking the desired cut, then securely clamp the pipe to avoid crushing. Choose the appropriate cutting tool: use a utility knife or PVC shears for smaller pipes, and a fine-tooth saw or powered cutter for larger diameters. After cutting, deburr the edges, trim any ribs, and test-fit couplers with compatible seals and clamps. Following these steps will enhance the durability of joints and streamline your work. For further assistance, explore recommended tools, jigs, and advanced techniques.
What a clean cut on corrugated drain pipe looks like and why it matters
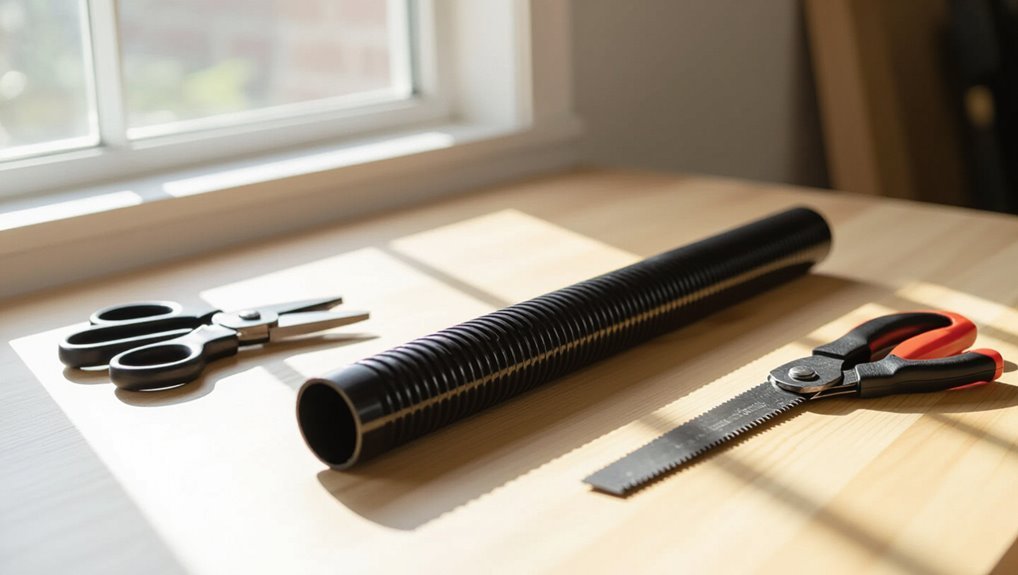
A clean cut on corrugated drain pipe is even, free of burrs and crushed ribs, and square to the pipe axis, regardless of whether the material is thin plastic, HDPE, or flexible corrugated types.
Such precision guarantees proper seating in fittings and maintains unobstructed flow, while ragged or tapered cuts can cause leaks, clogs, or misalignment.
Recognizing these visual cues helps users choose the right cutting method and verify compatibility with couplers and adapters.
Visual characteristics of a proper cut
Cut edges should appear straight and uniform, with ribs aligned and no jagged teeth or loose strands protruding.
A proper cut shows consistent wall thickness, clean rib tops, and a circular profile free of distortion.
Smooth beveling may aid joining.
Visual inspection confirms precise fit and reduces sealing effort.
Photographs or templates help evaluate outcomes when learning how to cut corrugated drain pipe.
Effects of a poor cut on drainage performance and fittings
Poorly executed cuts compromise flow and fittings by creating irregular edges that trap debris, promote leaks at joints, and prevent snug connections with couplers or gaskets.
Such defects increase clogging risk, accelerate wear at seals, and force misalignment that stresses clamps and fittings.
Poor seals allow infiltration or exfiltration, reducing system efficiency and requiring more frequent maintenance or premature replacement of pipe sections.
Materials and common pipe types (plastic, HDPE, flexible corrugated)
Materials for corrugated drain pipe range from thin PVC-based plastics to heavy-duty HDPE and highly flexible corrugated polymers, each with distinct wall thickness, corrugation depth, and cutting behavior.
A clean cut presents smooth, uniform edges that preserve the pipe’s profile and allow couplers or gaskets to seat evenly, minimizing gaps and preventing misalignment.
HDPE needs sharp blades; flexible types require steady support to avoid crushing.
Tools and supplies you need for a clean cut
A few basic tools and a tidy workspace are all that stand between a ragged edge and a professional-looking cut on corrugated drain pipe.
The next section lists primary cutting tools, helpful accessories for accurate results, and the safety gear and setup that prevent accidents. Proper selection and placement of these items makes clean cuts faster and more consistent.
- Essential cutting tools: utility knife, PVC saw, pipe cutter, tin snips
- Recommended secondary tools: measuring tape, marker, clamp, deburring tool
- Safety gear and workspace setup: gloves, eye protection, stable surface
Essential cutting tools (utility knife, PVC saw, pipe cutter, tin snips)
Select the right cutting tool to match pipe material, diameter, and the precision required for the job.
A sharp utility knife trims thin corrugated tubing and scores for snap cuts.
A fine-tooth PVC saw makes straight cuts on rigid conduit.
Ratcheting pipe cutters deliver clean, round cuts on smaller diameters.
Tin snips handle thicker metal-clad corrugated pipe where shearing is needed.
Recommended secondary tools (measuring tape, marker, clamp, deburring tool)
Measuring tape, a fine-tip marker, a clamp, and a deburring tool form the basic secondary kit that guarantees cuts are accurate, stable, and finished cleanly.
The tape measures length and alignment; the marker marks cut lines precisely.
The clamp secures the pipe to prevent slipping during cutting.
The deburring tool removes jagged edges and inner burrs for a smooth fit and better seal.
Safety gear and workspace setup (gloves, eye protection, stable surface)
Although often overlooked, proper safety gear and a stable workspace are essential before cutting corrugated drain pipe. Protective gloves prevent cuts from sharp ridges; eye protection shields against plastic fragments.
Confirm a flat, sturdy surface and secure the pipe with a clamp to stop movement. Adequate lighting and a clean work area reduce mistakes.
Inspect gear and replace damaged items before starting.
How to measure and mark corrugated drain pipe accurately
Accurate measurement and clear marking are essential for clean, functional cuts on corrugated drain pipe. Recommended techniques include using a straightedge and tape measure for perpendicular cuts, a bevel gauge or template for angled or offset cuts, and high-contrast markers, paint pens, or masking tape for dark or heavily textured surfaces.
Consistent reference points and double-checking measurements reduce waste and guarantee proper fit.
Best measuring techniques for straight cuts
How does one guarantee a straight, clean cut on corrugated drain pipe?
Measure twice: position a rigid straightedge along the pipe’s axis, mark at desired length with a fine-tip permanent marker at multiple points around the circumference.
Use a tape measure for distance accuracy, transfer marks evenly, then join marks with the straightedge to create a continuous cutting line.
Verify alignment before cutting.
Marking methods for angled or offset cuts
Begin by establishing reference points: for angled or offset cuts on corrugated drain pipe, place a straightedge or level along the pipe to define its axis. Then mark the pipe at the cut-start and cut-end positions using a fine-tip permanent marker or scribe.
Measure radial offsets with a caliper or tape, transfer angles with a protractor or bevel gauge, and connect marks with a flexible ruler before cutting.
Tips for marking on dark or textured pipe surfaces
When working on dark or heavily textured corrugated drain pipe, use high-contrast and tactile marking methods to guarantee lines remain visible and durable.
For example, chalk, light-colored wax pencils, or a paint marker provide strong visual contrast, while a scribe or awl can create a shallow groove that survives handling and cutting.
Measure with a flexible tape, transfer marks around ridges, and verify alignment before cutting.
Step-by-step guide to cutting corrugated drain pipe cleanly
The following steps outline how to prepare and secure corrugated drain pipe for a straight, controlled cut and which cutting tools suit different wall thicknesses.
Techniques cover using a utility knife with measured strokes, selecting saw blades for thicker corrugations, and choosing rotary or oscillating tool attachments and speeds.
The sequence concludes with concise finishing methods for deburring, trimming high ribs, and smoothing cut lips.
Preparing the pipe and securing it for a straight cut
Secure the corrugated drain pipe on a stable surface and mark the cut line clearly before any tool touches the material.
Use clamps or a vise with protective pads to prevent crushing. Align the troughs perpendicular to the blade, support both sides to avoid sagging, and remove debris inside the pipe.
Verify measurement twice and guarantee adequate lighting for a straight, controlled cut.
Cutting with a utility knife or sharp blade (technique and stroke count)
Begin by positioning the marked pipe under steady pressure and orienting the blade perpendicular to the corrugation peaks.
Using a utility knife or fresh straight blade, make a shallow scoring pass along the mark to establish a clean groove.
Then follow with 3–5 progressively deeper strokes, keeping the knife angled consistently and the non-cutting hand clear of the path to avoid jagged edges.
Finish with a final clean-through pass.
Using a PVC or hack saw for thicker corrugations (blade selection and motion)
For thicker corrugated drain pipe, choose a fine-tooth PVC saw or a medium-tooth hacksaw blade designed for plastics to minimize chipping.
Then clamp the pipe and mark the cut line clearly. Use steady, even strokes following the groove profile; let the blade do the work without excessive pressure.
Rotate the pipe as needed for an even cut and deburr lightly with sandpaper.
Cutting with a rotary tool or oscillating multi-tool (attachments and speed)
A rotary tool or oscillating multi-tool can produce fast, precise cuts on corrugated drain pipe when fitted with the right attachment and run at the correct speed; choose a carbide-grit or fine-tooth cutting wheel for rotary tools, or a bi-metal/plastic blade for oscillating tools.
Clamp the pipe to prevent movement, and mark the cut line clearly before starting. Operate at moderate speed, steady pressure, and short passes to avoid melting.
Finishing the edge: deburring, trimming high ribs, and smoothing lips
After cutting, the edge of corrugated drain pipe requires careful finishing to guarantee a clean fit and prevent leaks or debris catch. This process involves deburring the cut face, trimming any raised ribs that interfere with couplers, and smoothing sharp lips for safe handling.
Use a utility knife, file, or rotary deburring bit; remove burrs, trim protruding ribs flush, and lightly sand for a snug, damage-free joint.
Choosing the right method by pipe diameter and corrugation depth
Different diameters and corrugation depths call for distinct cutting approaches to guarantee clean, safe cuts and proper fitment. The table below summarizes quick tool recommendations by pipe size and structure, followed by brief notes on when to contemplate professional help. Readers should match tool choice to pipe flexibility and layer complexity before proceeding.
| Pipe size/category | Recommended tools/settings |
|---|---|
| Small (1–4 in) | Utility knife, PVC shears; steady hands, shallow slicing |
| Medium–Large (5–12 in) | Reciprocating saw with fine blade, circular saw with guide; slow, controlled cuts |
| Very large / multi-layered | Pipe saws, band saws, professional-grade cutters; think about hiring a professional |
Small-diameter flexible pipe (1 to 4 in) recommended tools and settings
For 1–4 inch flexible corrugated drain pipe, tool choice and technique should be matched to the pipe diameter and corrugation depth to guarantee a clean, square cut without crushing the tube.
Use sharp single‑bevel utility knives for thin‑walled 1–2 in tubing, scoring and snapping.
For 2–4 in, prefer PVC tubing cutters or compact ratchet pipe cutters, supporting beneath corrugation and rotating for even pressure.
Medium to large-diameter corrugated pipe (5 to 12 in) recommended tools and settings
Moving up from small flexible tubing, cutting 5–12 inch corrugated drain pipe requires heavier tools and firmer support matched to both diameter and corrugation depth to avoid ovaling or splintering the plastic.
For shallow corrugations, a fine-toothed reciprocating saw or circular saw with a guide works.
Deep corrugations favor a band saw, abrasive cutoff with clamped cradle, or powered pipe shear; always secure with padded clamps.
Very large or multi-layered drain pipe professional options
Evaluate pipe characteristics first: very large diameters (over 12 in) and multi-layered constructions demand professional cutting methods selected by both outer diameter and corrugation depth because those factors determine cutter type, support requirements, and feed rates.
Contractors typically use band saws with custom guides, abrasive cold saws, or CNC router setups; thicker walls may require pre-scoring, progressive passes, and hydraulic pipe clamps for safety and accuracy.
Common problems when cutting corrugated pipe and how to fix them
Common problems include jagged or uneven cuts, splitting or crushing during cutting, and mismatches with couplers that prevent a watertight fit.
Practical fixes range from filing or trimming jagged edges and using a proper cutting tool or jig to prevent deformation, to repairing crushed sections with short replacement segments.
When fittings don’t seat properly, trimming to square ends and selecting the correct adapter or using a flexible coupler usually resolves the issue.
Jagged edges and uneven cuts correction steps
Trim jagged edges and correct uneven cuts promptly to guarantee a tight seal and prevent injury or flow disruptions.
Inspect the cut, deburr ridges with a sharp utility knife or rotary file, and sand lightly with fine-grit sandpaper.
Re-measure and square the end using a straightedge.
If gaps remain, apply a snug coupling and silicone sealant to restore alignment and prevent leaks.
Splitting or crushing the pipe during cutting prevention and repair
Prevent splitting or crushing by supporting the corrugated pipe firmly and choosing the right cutting method; unsupported sections easily deform under blade pressure or clamping.
Use a cradle or jig, clamp over flat areas, and cut with a sharp fine-tooth saw or tubing cutter suited for corrugations.
If damage occurs, trim past the deformed zone, reinforce with a short repair sleeve or wrap with waterproof tape before joining.
Inaccurate fit with couplers trimming and adapter solutions
Measure twice and cut once: mismatched ends or uneven ribs often cause couplers to sit crooked or leak.
When this occurs, trim ragged ribs flush with a utility knife and deburr with sandpaper. If gaps persist, use flexible neoprene adapters or stepped reducers to bridge size differences.
Secure with stainless clamps and waterproof sealant, then test for alignment and leaks before final burial.
Tips for making durable joints and fittings after cutting
Properly prepared pipe ends guarantee couplers, connectors, and gaskets seat squarely and remain secure.
Watertight connections rely on the right sealant and clamps for the material and application, with attention to bead placement and clamp tension.
Adapters or conversion fittings are recommended when joining different diameters or materials to maintain flow and prevent leaks.
Preparing pipe ends for couplers, connectors, and gaskets
When preparing corrugated drain pipe ends for couplers, connectors, and gaskets, verify each cut is square, clean, and free of burrs so fittings seat evenly and seals hold.
Deburr with a file or utility knife, trim uneven ridges, and inspect for cracks.
Align corrugations, check inner lip depth, and test-fit components before final assembly to verify durable, long-lasting joints.
Sealing techniques for watertight connections (sealant types, clamps)
After preparing square, burr-free ends and test-fitting components, attention turns to sealing methods that guarantee a watertight connection under soil and load.
Use compatible rubber gaskets or silicone-based sealants rated for underground use; apply evenly and avoid gaps.
Stainless-steel or UV-resistant plastic clamps provide compression and corrosion resistance.
Inspect joints, retighten clamps after settling, and protect fittings with short sleeve couplers or protective tape.
When to use adapters or transition fittings
One common indicator for using adapters or connector fittings is a mismatch in diameter, material, or pipe profile between cut corrugated sections and existing lines; adapters bridge differences between corrugated and smooth-wall pipes, connect dissimilar materials (PVC to HDPE), or step down/up between sizes while preserving flow characteristics and structural support.
Choose fittings rated for load, match seal type, and guarantee secure clamps or solvent joints for longevity.
Time-saving and professional tricks from plumbers
Plumbers often rely on simple jigs, guides, and cutting templates to guarantee repeatable, square cuts on corrugated drain pipe.
They save time by batch cutting multiple sections at once and organizing lengths for immediate assembly.
Regular tool maintenance—sharpening blades and cleaning guides—keeps cuts consistent and reduces rework.
Using jigs, guides, and cutting templates
Clamp the pipe into a simple jig and the difference is immediate: cuts become faster, straighter, and repeatable.
Templates, adjustable guides, and fence-mounted saw stops guarantee consistent length and square ends.
Use sacrificial spacers to protect corrugations and quick-release clamps for throughput.
Mark templates clearly for diameter and orientation.
Keep templates rigid and portable for on-site adaptability without sacrificing precision.
Batch cutting strategies for multiple pipe sections
Set up a repeatable workflow before making the first cut: lay out all required lengths, group pipes by diameter, and prepare a cutting station with jigs and stops tailored to each size.
Measure once, mark clearly, then batch-clamp identical pieces. Use a single clean-cut method per group, feed consistently, and inspect ends collectively.
Label stacks for installation to prevent mix-ups.
Tool maintenance to keep cuts clean over time
Keep tools sharp and aligned to maintain consistently clean cuts and reduce rework. Regularly inspect blades, replace dull or nicked edges, and tighten clamps and pivots.
Clean debris from saws and shears after use, lubricate moving parts sparingly, and store tools dry.
Calibrate guides periodically and use blade guards.
Consistent maintenance preserves cut quality, speeds work, and extends tool life.
When to call a professional or choose specialized equipment
For complex installations or large-diameter systems, a professional assessment can prevent leaks and misalignments that DIY methods may miss.
Projects that involve trenching, heat fusion, or heavy machinery typically require specialized equipment and trained operators for safety and code compliance.
Homeowners should weigh the rental cost of tools against professional labor to determine the most efficient and economical option.
Complex installations or large-diameter systems
Although many household corrugated drain projects are manageable with basic tools, complex installations or large-diameter systems often exceed DIY scope and call for professional assessment or specialized equipment.
Experienced contractors evaluate load, flow requirements, fittings compatibility, and local codes. They deploy large-capacity cutters, pipe saws, and precision measuring tools to guarantee proper sealing, alignment, and long-term performance, reducing leak and failure risks.
Situations requiring trenching, heat fusion, or heavy machinery
Several scenarios signal that trenching, heat fusion, or heavy machinery are required rather than simple hand tools: deep burial below frost lines, long continuous runs of large-diameter corrugated pipe, installation beneath driveways or structures, or projects involving significant soil compaction or unstable ground.
In such cases, professionals evaluate subsurface conditions, permit needs, excavation safety, and fusion welding or mechanical joining to guarantee structural integrity and code compliance.
Cost vs. benefit of rental tools and professional services
Deciding whether to rent specialized tools or hire a professional hinges on project scale, complexity, and the homeowner’s skill level: small repairs and short runs of lightweight corrugated pipe often justify renting a saw or auger for a day, while deep trenches, large-diameter installations, or work requiring fusion welding typically warrant professional crews with heavy equipment and permits.
Cost comparisons should include rental fees, transport, time, permit and inspection costs, and potential warranty or liability coverage.
Quick checklist before and after cutting
Before cutting, review a concise checklist to guarantee a safe, accurate job and to verify the pipe and site are prepared. After cutting, follow a short post-cut checklist to confirm clean edges, proper fit, and secure connections.
The technician inspects measurements, fasteners, and tool condition, then rechecks deburring, seal integrity, and joint alignment before finalizing the installation.
- Verify measurements and clearance
- Confirm blade sharpness and PPE
- Inspect edges, seals, and fitment
Conclusion
A clean cut on corrugated drain pipe finishes a job like a sharp note ending a song: precise, tidy, and reliable. Following proper tools, accurate measuring, and careful cutting methods produces snug fittings and leak-resistant joints. Small investments in technique—deburred edges, correct saw or snips, and chamfering—save time and repairs later. For complex runs or large diameters, professionals or specialized tools prevent costly mistakes, ensuring long-lasting drainage performance.