How to Cover Exposed PEX Pipe: 7 Safe, Professional Fixes to Prevent Damage and Freezing
To protect exposed PEX pipes from damage, UV degradation, and freezing, it’s essential to cover them promptly. Effective solutions include foam split sleeves, closed-cell wrap, insulated jackets with foil vapor barriers, rigid foam or drywall boxing, protective metal conduit, heat cables with insulation, and PVC or trim covers for a polished finish. Always seal seams, maintain access to valves, and adhere to local codes. The following sections will detail selection, installation steps, maintenance, costs, and when to consult a professional.
Why You Should Cover Exposed PEX Pipe Immediately
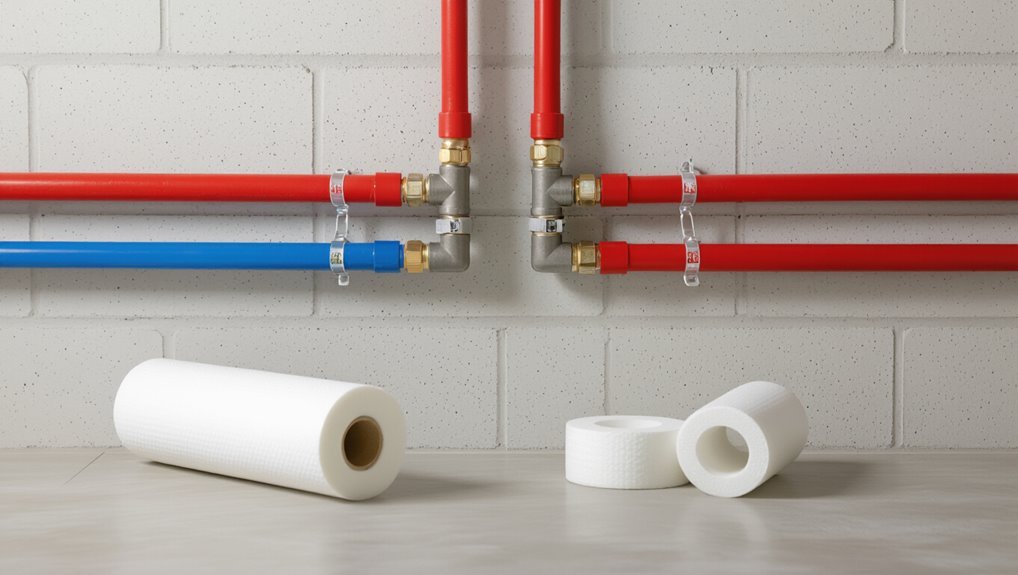
Exposed PEX pipe faces risks such as physical damage, UV degradation, and freezing that can lead to leaks or ruptures.
In certain locations and below specific temperature thresholds, exposed runs can escalate into immediate emergencies requiring rapid response.
Building codes and insurance policies may also mandate protection or penalize unprotected plumbing, making prompt coverage both a safety and compliance issue.
Risks of leaving PEX pipe exposed (damage, UV degradation, freezing, physical impact)
Leaving PEX pipe unprotected invites several predictable hazards that can compromise system performance and safety.
Exposed PEX faces physical impacts, abrasion, rodent chewing, and UV degradation that weakens tubing over time. It is also vulnerable to freezing in cold conditions, risking bursts.
Homeowners seeking how to cover exposed PEX pipe should act promptly to prevent leaks, costly repairs, and safety hazards.
When exposed PEX becomes an emergency (temperature thresholds and location factors)
When PEX runs through uninsulated spaces or sits where temperatures dip near freezing, the situation can quickly escalate from a maintenance issue to an emergency.
Rapid freezing risk occurs below about 32°F (0°C), with significant damage likelihood as temperatures fall further.
Vulnerable locations—exposed crawlspaces, exterior walls, attics, garages—demand immediate covering or heat tracing to prevent bursts and service interruptions.
Codes and insurance considerations for exposed plumbing
Covering PEX piping promptly reduces code violations and insurance exposure by ensuring the installation meets local building and fire-safety requirements.
Compliance prevents claim denials and fines tied to improper insulation, inappropriate routing, or lack of protection in conditioned and unconditioned spaces.
Property owners should document repairs, use approved materials, and consult local inspectors or insurers to verify standards and maintain coverage.
Quick Recommendation Best Overall Fix for Most Situations
A simple solution is to cover exposed PEX with foam pipe insulation secured with zip ties, suitable for most indoor runs and short exterior sections when paired with weatherproof tape.
Required tools and materials are pre-slit foam sleeves sized to the pipe, zip ties or HVAC tape, scissors or a utility knife, and, for outdoor use, weatherproof tape or a protective conduit.
The recommendation emphasizes speed, ease of installation, and readily available supplies for quick protection.
One-sentence solution and when to use it
Choose insulated foam pipe sleeves secured with aluminum foil tape as the best overall fix for most exposed PEX runs, since they combine thermal protection, simple installation, and a clean appearance suitable for both interior and moderately cold exterior locations.
Use this when pipes are accessible, require basic freeze protection, or need neat concealment; avoid for permanently buried or high-impact outdoor exposures where rigid protection is required.
Tools and materials required for the recommended fix
For the recommended fix—insulated foam pipe sleeves secured with aluminum foil tape—the basic toolkit includes the sleeves sized to the PEX diameter, a sharp utility knife for clean cuts, a tape measure, and a roll of self-sealing aluminum foil tape.
Additionally, nitrile gloves, a marker, and a cloth for cleaning the pipe surface improve speed and finish.
Also needed: silicone sealant, zip ties, and safety glasses.
Seven Safe, Professional Ways to Cover Exposed PEX Pipe
Several reliable methods exist for covering exposed PEX pipe while protecting against heat loss, condensation, and physical damage.
Each option balances ease of installation, space constraints, and environmental protection differently. The following list highlights practical, professional-grade choices to evaluate.
- Foam pipe insulation sleeves or split slip-on covers
- Closed-cell foam wrap (tape or roll) for tight or irregular spaces
- Insulated pipe jackets with foil vapor barrier
- Rigid foam board boxing or drywall enclosure (and heat tape/cable combined with insulation)
1. Foam pipe insulation sleeves (split or slip-on)
Foam pipe insulation sleeves (split or slip-on) are commonly recommended for insulating and protecting exposed PEX where moderate temperature control and abrasion resistance are needed.
A brief step overview covers measuring, cutting to length, and securing with tape or clamps, with tips to guarantee snug seams and protection at fittings.
Homeowners can expect low material cost, straightforward DIY installation, and multi-year durability that may degrade if exposed to UV or chemical contact.
Best uses and pros
When temperature control and simple protection are the goals, split or slip-on foam pipe insulation sleeves provide an efficient, low-cost solution for exposed PEX lines.
They are best used for indoor runs, basements, and crawl spaces to reduce heat loss, prevent mild condensation, and guard against minor physical damage.
Lightweight, easy to replace, and compatible with most PEX sizes, they offer cost-effective, immediate protection.
Step overview and installation tips
Having outlined where split or slip-on foam sleeves work best, the next section presents a concise step-by-step overview and practical tips for installing them on exposed PEX.
Measure pipe length, select correct sleeve diameter, cut to fit, slide or snap over pipe, seal seams with tape or adhesive, insulate fittings with shorter pieces, secure with zip ties or tape, and check for snug, gap-free coverage.
Cost and durability expectations
Although relatively inexpensive per linear foot, split or slip-on foam sleeves vary in price and expected lifespan depending on material density and exposure.
Basic polyethylene options cost a few cents to a couple of dollars per foot, while higher-density neoprene or insulated-jacket variants run higher.
Typical polyethylene lasts 5–10 years outdoors with UV and compression risk; neoprene and thicker jackets can exceed 15 years if protected.
2. Closed-cell foam wrap (tape or roll) for tight spaces
Closed-cell foam wrap in tape or roll form is ideal for tight runs and irregularly shaped PEX where split sleeves won’t fit, offering good thermal performance and resistance to air and moisture.
Installation typically involves wrapping the pipe with overlapping turns, sealing seams with compatible tape or adhesive, and ensuring continuous coverage at fittings and connections.
Attention to condensation control is important: closed-cell foam minimizes moisture absorption, but seams and exposed ends should be sealed and, where needed, a vapor barrier added to prevent trapping moisture against the pipe.
Best uses and pros
Foam wrap in tape or roll form offers a compact, effective solution for insulating and protecting exposed PEX in tight or irregular spaces.
It excels around bends, behind fixtures, and within crawl spaces where bulky insulation won’t fit.
Benefits include moisture resistance, thermal efficiency for freeze protection, easy conforming to odd shapes, and reduced abrasion risk, making it ideal for localized, professional-grade repairs.
Step overview and installation tips
Begin by measuring the exposed PEX run and selecting appropriately sized closed-cell foam wrap in tape or roll form to match pipe diameter and the space constraints.
Clean and dry the pipe, cut wrap to length, and slit or spiral-wrap where required.
Overlap seams per manufacturer, secure ends with compatible adhesive or tape, and trim excess.
Test fit before final fastening for neat, tight coverage.
Moisture and condensation considerations
After fitting and securing the closed-cell wrap, attention turns to moisture and condensation control to prevent mold, corrosion, and loss of insulation performance.
Closed-cell foam resists water absorption, but seams and fittings require sealed joints with compatible tape or mastic.
Guarantee vapor barriers where needed, maintain ventilation in confined spaces, and inspect periodically for trapped moisture or damage to preserve thermal efficiency and pipe integrity.
3. Insulated pipe jackets with foil vapor barrier
Insulated pipe jackets with an outer foil vapor barrier are recommended for runs exposed to humidity or exterior walls, offering protection and improved thermal performance.
Installation typically follows sliding the jacket over the pipe, compressing around fittings, and sealing longitudinal and end seams with foil tape to maintain the vapor barrier.
These jackets can raise effective R-value compared with bare pipe insulation, reducing heat loss and lowering energy use when properly sealed.
Best uses and pros
Foil-faced insulated pipe jackets combine closed-cell foam insulation with a reflective vapor barrier, making them well suited for runs of PEX that pass through unheated spaces, exterior walls, or near cold air sources where condensation or heat loss is a concern.
They excel at preventing condensation, reducing heat loss, and resisting moisture.
Lightweight, easy to route, and durable, they suit residential and light commercial applications.
Installation sequence and sealing edges
Begin by laying out the jacket sections along the PEX run to confirm fit and orientation before applying adhesive or tape.
Work from one end toward the next, overlapping foil edges per manufacturer guidance.
Secure seams with approved foil tape, seal end caps and penetration points with compatible mastic or tape, and inspect for gaps.
Maintain continuous vapor barrier and fasten intervals per code.
Energy savings and R-value notes
When properly installed, pipe jackets with an integrated foil vapor barrier reduce conductive heat loss and can meaningfully improve system efficiency for both hot and chilled PEX runs.
Measured R-values depend on jacket thickness, material, and installation quality; foil increases radiant resistance.
Typical savings vary by climate and usage patterns, often reducing standby losses and lowering heating/cooling loads when seams are sealed and coverage is continuous.
4. Rigid foam board boxing and drywall enclosure
Rigid foam board boxing combined with a drywall enclosure offers a neat, insulated solution for exposed PEX. However, it is best used where pipes are not frequently accessed for maintenance.
Material choices, simple framing techniques, and a removable access panel should be specified to balance insulation, serviceability, and a clean finish.
Installers must also address fire safety and local code requirements, such as using fire-rated drywall or providing required clearances and labeling.
When to box PEX vs. leaving accessible
Although protecting PEX runs improves appearance and prevents accidental damage, deciding between boxing in the pipes or keeping them accessible depends on code, function, and future service needs.
Box when pipes are exposed to impact, drafts, or visual clutter and when aesthetics or insulation benefit.
Leave accessible where frequent maintenance, shutoffs, or inspections are expected; provide clear labeling and unobstructed workspace for technicians.
Materials, framing, and access panel recommendations
A simple, durable enclosure for exposed PEX combines insulation, structural framing, and an access panel sized for service; using rigid foam board for thermal and moisture protection with a drywall finish yields a tidy, code-compliant result that remains serviceable.
Use 2×2 or 2×3 furring for minimal depth, secure foam with adhesive and mechanical fasteners, and install a removable access panel large enough for fittings and repairs.
Fire safety and code compliance
Having established a foam-board boxing with furring strips and an access panel, attention must turn to meeting fire-safety requirements and local plumbing/electrical codes.
Make certain foam is rated or separated by 1/2″ gypsum where required, install fire-blocking at penetrations, maintain required clearances from heat sources, label shutoffs, and confirm access panel size.
Verify compliance with jurisdictional codes and obtain inspections if required.
5. Heat tape / heat cable combined with insulation
Heat tape and heat cable come in self-regulating and constant-watt varieties, and compatibility with PEX and local codes should be confirmed before selection.
Installation requires wrapping or laying the cable per manufacturer instructions, adding appropriate insulation over the cable, and ensuring a protected electrical connection with a ground-fault circuit breaker.
This method is primarily recommended for pipes at risk of freezing in extreme cold or poorly heated spaces where passive insulation alone is insufficient.
Types of heat cable and compatibility with PEX
When choosing a heat cable for exposed PEX, professionals evaluate cable type, wattage, and manufacturer compatibility to guarantee safe, effective freeze protection.
Self-regulating cables adjust output with temperature and are preferred for PEX. Constant-watt cables need careful spacing and thermostat control.
Only cables listed for use on plastic pipe and matched to pipe diameter and environment should be selected to avoid overheating or warranty voids.
Installation steps and electrical safety
After selecting a cable type and confirming manufacturer approval for use on PEX, the installer proceeds to the physical installation and electrical safety checks.
The cable is routed straight, secured per instructions, and insulated with compatible sleeve or foam. Connections use listed junction boxes and GFCI protection.
Circuits are tagged, tested for continuity and grounding, and installation follows local code and manufacturer guidelines.
When heat tape is necessary (extreme cold scenarios)
If outdoor temperatures regularly approach or drop below freezing for extended periods, heat tape combined with proper insulation becomes a practical necessity to prevent PEX from freezing and bursting.
Heat tape should be used where pipes run exposed, in unheated crawlspaces, or along exterior walls.
Choose thermostatic, UL-listed cable, follow manufacturer spacing, secure with non-conductive tape, and add closed-cell insulation for reliable protection.
6. Protective conduit or metal shielding for exposed exterior runs
Protective conduit or metal shielding offers a durable barrier for exterior PEX runs, shielding lines from physical damage, UV exposure, and weathering.
Installers should choose corrosion-resistant materials or apply protective coatings and guarantee joints and terminations remain watertight to prevent degradation.
Secure conduit with appropriate fasteners, maintain a slight slope or drain points where condensation or water can collect, and avoid trapping moisture against the pipe.
Best practices for outdoor PEX protection
When PEX runs are exposed to the elements, using dedicated outdoor protection prevents UV degradation, physical damage, and temperature extremes that can shorten service life.
Install rigid conduit or metal shielding sized for thermal movement, secure with corrosion-resistant fittings and supports, seal penetrations, maintain drainage and inspection access, and use insulation rated for outdoor use.
Follow local codes and manufacturer guidance for longevity.
Corrosion and UV protection considerations
Moving from outdoor installation practices to material-specific threats, attention must turn to corrosion and UV damage that can degrade both PEX and its metal enclosures.
Specify UV-resistant PEX or apply UV-blocking wrap for exposed runs.
For metal conduit, use corrosion-resistant alloys, galvanized or stainless finishes and protective coatings.
Ascertain compatible sealants and avoid dissimilar metals that promote galvanic corrosion.
Fastening and slope/drainage requirements
Secure and slope exposed PEX runs to prevent movement, standing water, and stress at fittings.
Fasten PEX every 32 inches indoors and every 4–6 feet outdoors, using appropriate clips or straps that do not pinch.
Maintain a minimum 1/8–1/4 inch per foot slope toward drains or low points.
Confirm fittings sit at lowest points and protect runs with conduit or metal shielding for exterior exposure.
7. Foam-in-place spray and seal for irregular runs
Foam-in-place spray can conform to odd shapes and seal gaps around irregular PEX runs, offering good insulation but potentially limiting future access and removability.
Proper application requires surface prep, controlled bead placement, and awareness of curing times that vary by product and temperature.
A professional should be considered for large jobs, tight spaces near fittings, or where over-spray and chemical handling pose risks.
Advantages and risks (accessibility, removability)
Foam spray-and-seal offers a practical solution for irregular PEX runs by filling gaps and creating a continuous insulating layer.
However, it also raises accessibility and removability concerns: once cured, closed-cell spray foam bonds to piping and surrounding structures, making future repairs, inspections, or replacements more difficult and potentially requiring cutting or chiseling to access the line.
Benefits include seamless insulation and moisture resistance; risks include concealed leaks and permanent encapsulation.
Application tips and curing times
Plan the application carefully to guarantee consistent coverage and predictable cure times when using spray-and-seal for irregular PEX runs.
Apply thin, even passes to avoid overspill and uneven expansion. Maintain manufacturer-recommended temperature and humidity ranges.
Allow initial tack-free set before light trimming; full cure can take from several hours to 24+ hours depending on foam type and ambient conditions.
Inspect for voids after curing.
When to hire a pro for spray foam application
Several situations warrant hiring a professional for spray-foam application over irregular PEX runs: complex or confined spaces, proximity to heat sources or vents, runs crossing multiple materials, inconsistent pipe spacing, or where code compliance and warranty preservation are concerns.
A pro guarantees proper foam selection, controlled expansion, fire-blocking compliance, clean changes, and thorough curing. They document work for inspections and warranties, reducing risk.
How to Choose the Right Method for Your Situation
Selection depends on practical factors: whether the pipe is inside or outside, located in a crawlspace, attic, or slab, and local freeze risk.
Consider future access needs, budget, desired appearance, and whether a permanent solution is required.
Balancing these constraints points to the most appropriate covering method.
Assessing location: interior vs exterior, crawlspace, attic, slab
Location determines both risk and approach when covering exposed PEX pipe.
Interior runs allow simple insulation and concealment; attics need vapor-permeable wraps and secure fastening.
Crawlspaces require elevated, rodent-resistant coverings and moisture management.
Exterior or slab-adjacent lines demand protective conduit or foam board and proper sealing at penetrations.
Assessment guides material choice, attachment method, and accessibility for maintenance.
Climate and freeze risk factors
Because freeze risk varies with local climate, elevation, and exposure, choosing a covering method for exposed PEX should begin with an assessment of the site’s specific thermal and weather conditions.
Consider mean winter lows, wind chill, duration of freezing, and microclimates near foundations or vents.
Match insulating thickness, heating cable use, and moisture-resistant enclosures to documented freeze probability and severity for reliable protection.
Accessibility needs for future repairs
Consider future access needs when choosing a covering method for exposed PEX: the chosen solution should allow straightforward inspection, maintenance, and segment replacement without damaging surrounding finishes.
Opt for removable covers, access panels, or cable channels that permit quick exposure. Mark routes clearly and avoid permanent encapsulation over fittings.
Guarantee fasteners and insulation are installed to enable tool access and nondestructive removal during repairs.
Budget, aesthetics, and permanence trade-offs
A clear appraisal of cost, appearance, and permanence helps determine the best way to cover exposed PEX.
Homeowners balance low-cost insulation sleeves for temporary protection, paintable foam or PVC for midrange aesthetics, and drywall or custom boxing for long-term durability.
Choices hinge on budget, visible location, required longevity, and maintenance access, guiding a practical, site-specific solution.
Step-by-Step General Installation Checklist for Covering PEX Pipe
A concise checklist guides the installer through safety preparation and assembling the required tools before work begins.
It then moves through surface cleaning, measuring and cutting insulation or covers to fit, and sealing seams, joints, and penetrations.
The process concludes with testing and a final inspection to confirm proper coverage and leak-free performance.
Safety preparation and required tools
Before any work begins, the area around the exposed PEX pipe must be assessed for hazards and access requirements so that tasks proceed safely and efficiently.
Required PPE includes gloves, safety glasses, and knee protection.
Tools: measuring tape, utility knife, insulation sleeves, pipe clamps, zip ties, foam sealant, and a heat gun if using adhesive-backed materials.
Confirm ventilation and shutoff access.
Surface prep and cleaning PEX before applying insulation
Once hazards are addressed and tools staged, attention moves to preparing the PEX surface for insulation.
The technician inspects for damage, leaks, oil, or corrosion. Dirt and residues are wiped with a lint-free cloth and mild detergent, rinsed, and dried.
Grease is removed with isopropyl alcohol. Surfaces must be fully dry and free of sharp burrs before proceeding.
Measuring, cutting, and fitting insulation or covers
Measure the run carefully, accounting for bends, joints, and any fittings. Then mark insulation lengths and cut points with a fine permanent marker.
Select appropriately sized foam or wrap, cut straight with a utility knife or shears, and test-fit pieces. Trim around elbows and tees for snug contact.
Secure with recommended clips or tape, ensuring insulation sits flush without compressing the PEX.
Sealing seams, joints, and penetration points
Seal seams, joints, and penetration points methodically to maintain insulation integrity and prevent drafts, moisture, and pest entry.
Use compatible tape or sealant rated for plumbing and insulation, applying continuous beads or wrapped tape with firm compression.
Reinforce corners and connections with foam gaskets or backer rod where gaps exceed sealant depth.
Verify seals are flush, smooth, and unobstructed before finishing.
Testing and final inspection after installation
Begin a systematic testing and inspection sequence to confirm that the covered PEX runs are secure, watertight, and compliant with project requirements.
Inspect coverings, supports, and seals visually.
Perform pressure testing per code, monitor for leaks and hold time.
Verify insulation continuity and fastening integrity.
Record results, note corrective actions, and retest affected areas.
Complete documentation and client handover.
Common Mistakes and Problems to Avoid
Common mistakes when covering exposed PEX include over-insulating near heat sources and fixtures, which can trap heat and damage fittings.
Blocking access to valves and unions or using incompatible materials can prevent maintenance and chemically degrade the pipe.
Failure to accommodate expansion and contraction or improper fastening often leads to leaks and stress on joints.
Over-insulating near heat sources and fixtures
Why would adding extra insulation near boilers, water heaters, or lighting fixtures ever be a problem?
Excess insulation can trap heat, degrade fittings, and create fire hazards or overheating of pipes and nearby components.
It may void manufacturer warranties or violate codes requiring clearance.
Properly sized, rated insulation and maintained ventilation prevent damage while ensuring safe operation and inspection access.
Blocking access to valves and unions
While over-insulating near heat sources can create overheating and access issues, another frequent mistake is covering valves and unions so they become difficult or impossible to reach.
Obstructed fittings hinder maintenance, emergency shutoff, and leak repairs. Proper covers and insulation should allow clear, tool-accessible space and removable panels.
Plan layouts to preserve visible, unobstructed access to all critical valves and unions.
Using incompatible materials that degrade PEX
Avoid mixing materials that chemically or mechanically harm PEX, as certain metals, adhesives, and oil-based products can accelerate degradation or compromise fittings.
Installers should avoid direct contact with incompatible metals (like some copper alloys without dielectric fittings), solvent-based glues, and petroleum-based sealants.
Use manufacturer-approved clamps, tapes, and mounting hardware.
Verify compatibility via product datasheets to prevent leaks, embrittlement, and premature failure.
Ignoring expansion/contraction and fastening errors
Protecting PEX from incompatible materials is only part of ensuring long-term performance; attention must also be paid to how the tubing moves and how it is fastened.
Ignoring expansion/contraction leads to buckling or stress at fittings. Overly tight clamps or rigid supports prevent thermal movement, causing fatigue leaks.
Use sliding clips, proper spacing, and allowance for axial movement to avoid failure.
Maintenance, Inspection, and When to Call a Professional
A concise inspection routine helps catch wear, loose fittings, discoloration, or moisture before they become failures.
Seasonal tasks such as winterizing exposed runs and re-sealing penetrations reduce freeze and corrosion risk.
Persistent leaks, damaged insulation, or uncertain diagnostics warrant hiring a licensed plumber or HVAC technician.
Periodic inspection checklist and signs of failure
Regular inspections of exposed PEX pipe help catch wear, damage, and installation issues before they escalate into leaks or failures.
Inspect for discoloration, kinks, abrasions, loose fittings, corrosion at metal connections, and unsupported spans.
Check insulation integrity and signs of moisture or staining.
Note reduced water pressure, intermittent flow, or persistent dampness.
Document findings and schedule repairs; contact a licensed plumber if deterioration, persistent leaks, or joint failures appear.
Seasonal tasks (winterizing, re-sealing)
Prepare for seasonal changes by addressing winterizing and resealing needs for exposed PEX pipe to prevent cold-weather damage and maintain long-term performance.
Inspect insulation, replace compressed or wet materials, and add foam sleeves or heat tape where required.
Clean fittings, remove old sealant, and apply compatible plumbers’ grease or approved sealant.
Schedule brief seasonal checks to catch deterioration before leaks or freezing occur.
When to hire a licensed plumber or HVAC technician
After completing seasonal checks and addressing insulation or sealant issues, homeowners should understand when conditions exceed DIY scope and require a licensed plumber or HVAC technician.
Call a pro for persistent leaks, frozen or burst PEX, complex rerouting, inadequate water pressure, gas line proximity, questionable fittings, or when local codes and permit needs arise.
Professional inspection guarantees safety, compliance, and durable repairs.
Cost Comparison and Durability Summary
A concise cost and durability comparison helps the reader weigh typical upfront cost, expected lifespan, and the main pros and cons of each covering method. The table below summarizes representative figures and trade-offs to guide selection. Following the table, each method’s long-term value and maintenance needs will be briefly assessed.
| Method | Typical Upfront Cost | Lifespan / Key Pros & Cons |
|---|---|---|
| Foam Insulation | Low | 5–10 years; cheap and easy but less durable and vulnerable to damage |
| PVC/Trim Covers | Moderate | 10–25 years; neat appearance and durable but higher material/labor cost |
| Metal or Custom Boxing | High | 25+ years; most durable and protective but costliest and may require pros |
Typical upfront cost, lifespan, pros, and cons per method
Cost and durability vary widely between methods for covering exposed PEX pipe, so selecting the right approach depends on budget, expected lifespan, and trade-offs.
Foam insulation: low cost, 5–20 years, easy install, limited protection.
Rigid boxing: moderate cost, 20+ years, durable, needs carpentry.
Metal conduit: higher cost, 30+ years, excellent protection, complex install.
Heat tape: moderate, variable, requires power and monitoring.
Visual Guide and Reference Photos
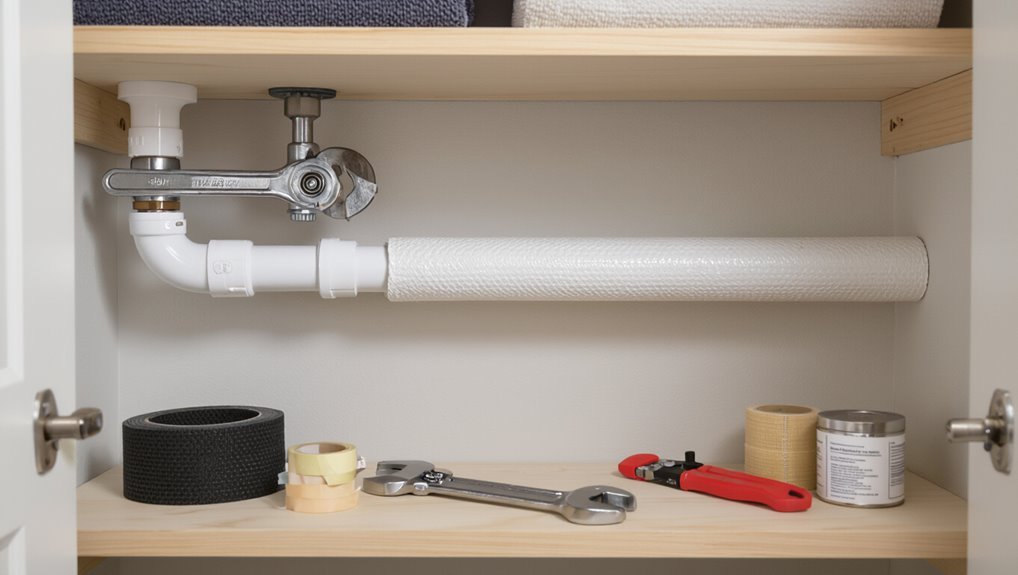
The article presents a visual guide contrasting correct and incorrect insulation methods for exposed PEX pipe.
Photographs highlight examples of properly fitted foam and protective coverings alongside common mistakes such as gaps, crushed insulation, and improper fastenings.
Readers are encouraged to use the reference photos to identify and replicate effective installations while avoiding the illustrated errors.
Examples of proper insulation installations
When inspected closely, effective PEX insulation installations reveal consistent patterns: snug-fitting foam sleeves, sealed seams with appropriate tape or adhesive, and protected fittings where heat loss or freezing risk is greatest.
Photos show continuous coverage along runs, insulation properly sized to pipe diameter, foam elbows and tees fitted or padded, and weatherproof outer layers for exposed outdoor sections, demonstrating durable, code-conscious workmanship.
Examples of poor installations to avoid
Highlighting common mistakes helps prevent long-term damage and inefficiency.
Photos show crushed, improperly sized foam, gaps at fittings, and unsecured wraps slipping from pipes.
Exposed PEX near heat sources, sharp edges, or UV light is documented.
Examples include taped seams left open, overlapping without sealant, and insulation compressed under panels.
Each image identifies the fault and recommends correct remediation.
Conclusion
Of course the pipe’s modest unwrapping becomes a drama: the plumber watches, bemused, as insulation and shields soldier against winter’s attitude. The homeowner, who once admired exposed gleaming tubing, now tucks it into foam, box, or conduit with the solemnity of a librarian re-shelving a scandalous volume. The covered PEX, relieved and anonymous, quietly vows to keep flowing—unseen, unbothered, and utterly unheroic when frost arrives.