How to Install a Tankless Water Heater in an RV: Step-by-Step Guide for DIYers
To install a tankless water heater in your RV, start by confirming that you have adequate space, electrical and propane capacity, and proper venting clearances. Next, shut off all utilities, drain the lines, and remove the old heater. Mount the new tankless unit securely, then make the necessary gas, water, and electrical connections according to manufacturer specifications and RVIA codes. Finally, test for leaks and ensure combustion safety, and implement freeze protection and maintenance plans. Detailed step-by-step instructions and troubleshooting tips are provided for those ready to take on this DIY project.
Overview of Tankless Water Heaters for RVs
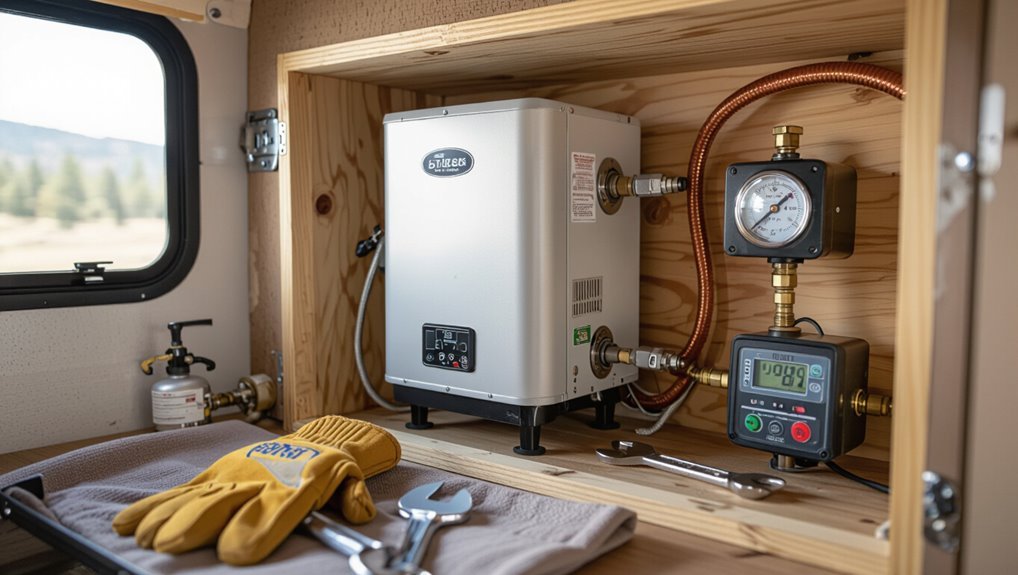
A tankless RV water heater heats water on demand using a compact heat exchanger, unlike traditional tank models that store and reheat a fixed volume.
Benefits include continuous hot water, space and weight savings, and often greater energy efficiency.
However, they can have higher upfront cost, require sufficient fuel/electric capacity, and may not suit rigs with very high simultaneous hot-water demand.
What a tankless RV water heater is and how it differs from tank models
Tankless RV water heaters deliver hot water on demand by heating cold water as it passes through a compact heat exchanger, rather than storing a preset volume in an insulated tank.
They are compact, mountable near supply lines, and use gas or electric elements to produce continuous flow.
Compared to tank models, they avoid standby storage and require different installation considerations — relevant when learning how to install a tankless water heater in an rv.
Benefits of installing a tankless unit in an RV
Moving from how these units operate and differ from tank systems, the benefits of installing a tankless water heater in an RV are practical and tangible: reduced space requirements, lower weight, on-demand hot water without standby heat loss, and often improved fuel or electrical efficiency.
Installation can free storage, simplify plumbing runs, and extend hot-water availability for showers and chores while conserving energy and resources.
Limitations and when a tankless unit may not be suitable
Limitations matter: despite their advantages, tankless water heaters can be ill-suited for certain RV owners and usage patterns.
Limited flow rates, high electrical or propane demand, and performance drop in cold climates restrict suitability.
Complexity, higher upfront cost, and need for adequate ventilation or hookups deter minimalists or infrequent campers.
For heavy simultaneous hot-water use, old RV electrical systems, or budget constraints, tank-style units may be preferable.
Quick Compatibility Check: Is Your RV Ready?
A quick compatibility check reviews available space and mounting options, verifies sufficient electrical capacity (shore power, inverter, battery) and confirms propane supply and gas line sizing.
It also assesses water pressure/flow against the unit’s requirements and inspects venting clearances and exhaust routing.
These factors determine whether the RV needs modifications before installation.
Assessing space and mounting locations
Before cutting or drilling, the installer should verify available space, weight limits, and clearances to guarantee the tankless unit will fit and operate safely.
Measure wall cavities, access panels, and exterior compartments. Confirm mounting surface strength, ventilation paths, and service access for valves and filters.
Avoid obstructing plumbing, vents, or existing systems. Mark fastener locations and use appropriate brackets and vibration isolation.
Electrical system requirements (shore power, inverter, battery)
After confirming mounting locations and ventilation, attention turns to the RV’s electrical capacity to support a tankless water heater.
The unit’s voltage and amperage must match shore power or inverter output; many require 120V/15–30A or 240V variants.
Confirm inverter continuous rating, battery bank capacity for sustained draws, and shore power breaker limits.
Proper wiring, breakers, and shore connection compatibility are essential.
Propane supply and gas line capacity
Propane capacity and gas-line sizing determine whether an RV can safely fuel a tankless water heater. Owners should verify tank volume, regulator output, and the diameter and length of the existing supply line.
Confirm appliance BTU demand versus regulator flow (PSI) and available tank capacity for sustained use. Inspect fittings, valves, and venting clearances; upgrade to larger-diameter tubing or a higher-capacity regulator if calculations show insufficiency.
Water pressure and flow requirements
Having confirmed that the gas supply can meet a tankless unit’s BTU demand, the next check is whether the RV’s water system can deliver the required pressure and flow for reliable operation.
Measure static and dynamic pressure and confirm minimum flow rate per manufacturer (often 0.5–1.5 GPM).
Inspect pump capacity, pressure regulator, and restrictors; correct deficiencies to prevent cold-water sandwich, overheating, or unit shutdowns.
Venting and clearance considerations
Several key measurements determine whether an RV can safely accommodate a tankless water heater: available exterior wall space for vent termination, clearances from combustible materials, and unobstructed airflow paths for both intake and exhaust.
The installer must verify manufacturer vent lengths, termination clearances from windows and vents, separation from propane components, and internal cabinet spacing.
Noncompliance can cause carbon monoxide, overheating, or voided warranties.
Tools, Materials, and Safety Equipment Needed
Before beginning the installation, the installer should assemble the necessary tools, materials, and safety equipment to guarantee a smooth, code-compliant job. This includes hand and power tools, replacement parts commonly needed during installation, and personal protective gear plus emergency shutoff items.
Proper preparation reduces delays and minimizes safety risks.
- Adjustable wrench, pipe wrenches, and tubing cutters
- Flexible water lines, fittings, and compatible venting components
- Replacement parts: pressure relief valve, filters, and gaskets
- Safety gear: gloves, eye protection, and a respirator if soldering
- Emergency shutoffs: accessible gas/electric disconnect and a water shutoff valve
Essential tools
A concise set of tools, materials, and safety equipment is required to install a tankless water heater in an RV; gathering them in advance reduces downtime and helps guarantee a safe, code-compliant installation.
Essential tools include adjustable wrenches, pipe cutters, torque wrench, multimeter, drill with bits, caulking gun, soldering or crimp kit, tubing benders, and a level.
Safety: gloves, eye protection, respirator.
Required materials and replacement parts
Materials and replacement parts must be organized to match the chosen tankless model and the RV’s existing water, gas, and electrical systems.
Required items include proper inlet/outlet fittings, flexible water lines, isolation valves, pressure relief valve, dielectric unions, gas connectors and shutoff, appropriate electrical wiring and breakers, mounting brackets, venting kit, gaskets, sealants, and spare thermostats or sensors compatible with the unit.
Safety gear and emergency shutoff items
Several essential safety items and emergency shutoff components are required to protect both the installer and the RV during a tankless water heater installation.
Required gear includes safety glasses, gloves, hearing protection, and a respirator for confined spaces.
Emergency shutoff items: accessible gas valve wrench, labeled water and gas shutoff valves, inline shutoff switches, a fire extinguisher rated for gas/electrical fires, and a carbon monoxide detector.
Choosing the Right Tankless Unit for an RV
Selection of a tankless unit for an RV hinges on accurate sizing (required GPM and temperature rise) and choosing the fuel type—propane, electric, or hybrid—that matches the vehicle’s infrastructure.
Consider power consumption and whether battery capacity or shore power must be upgraded.
Prioritize RV-friendly features like freeze protection, compact size, and remote control.
A brief comparison of popular RV models will help weigh trade-offs in performance, installation complexity, and cost.
Sizing: flow rate (GPM) and temperature rise calculations
Properly sizing a tankless water heater for an RV hinges on two key measurements: the required flow rate in gallons per minute (GPM) and the temperature rise needed to reach desired hot-water output.
Determine peak simultaneous fixtures to set GPM.
Calculate temperature rise: desired outlet minus incoming cold water.
Match unit specifications—GPM at that rise—to guarantee consistent performance without oversizing.
Fuel types: propane vs. electric vs. hybrid
After determining required GPM and temperature rise, the next decision is fuel type—propane, electric, or hybrid—since each affects installation complexity, energy availability, and ongoing operating costs.
Propane offers strong, fast heating with gas plumbing and venting requirements. Electric units simplify venting but demand high electrical capacity.
Hybrid models combine gas ignition with electric assistance for flexibility, weight, and fuel-source tradeoffs.
Power consumption and battery/shore power planning
Evaluate the RV’s electrical profile before choosing a tankless unit: assess shore power availability, inverter and converter ratings, service amperage, and battery capacity to determine whether the hot water demand can be met without overloading systems.
Calculate continuous and peak wattage, account for simultaneous loads, and verify inverter surge capability.
Plan battery bank size, charging sources, and shore power prioritization to guarantee reliable operation and safe installation.
Top features to prioritize for RV use (freeze protection, compactness, remote control)
Select features that address RV-specific constraints and operating environments: reliable freeze protection to prevent coil and line damage in cold camps, compact and lightweight construction for limited space and weight budgets, modest electrical or propane demands compatible with onboard systems, and convenient controls or remote monitoring for ease of use in tight living quarters.
Prioritize thermostatic stability, low standby loss, simple service access, and certified marine/RV safety ratings.
Quick comparison table of popular RV tankless models
A concise comparison table helps RV owners quickly weigh trade-offs between size, power source, flow rate, freeze protection, and safety certifications when choosing a tankless unit. The table below summarizes common options to guide selection by space, output, and reliability.
| Model | Power | Notes |
|---|---|---|
| Brand A | Propane, 1.5 GPM | Good freeze protection |
| Brand B | Electric, 2.0 GPM | Compact, lower output |
| Brand C | Propane, 2.5 GPM | Higher flow, certified |
Preparing the RV for Installation
Before beginning work, all utilities must be shut off and the existing water system drained to prevent leaks and hazards.
The installer should remove any old heater or clear and reinforce the chosen mounting area, then inspect water and gas lines for condition and compatibility, upgrading them if necessary.
Finally, a venting route and electrical access must be planned to meet clearances and code requirements.
Turning off utilities and draining existing water system
Shut off the RV’s electrical power, propane supply, and city water connection, then close the main water valve to isolate the onboard plumbing.
Open all faucets and drain valves, including hot and cold at sinks, shower, and any low-point drains.
Flush and vent remaining pressure from lines.
Collect discharged water, inspect for leaks, and verify zero pressure before proceeding with heater removal.
Removing old water heater or preparing mounting area
With the system fully depressurized and drained, the technician can move on to removing the old heater or preparing the mounting area.
Disconnect remaining electrical, gas, and water fittings, label and cap lines, and unbolt or cut mounting brackets.
Clean and inspect the wall or compartment for rot, corrosion, or loose insulation.
Confirm a flat, reinforced surface and adequate ventilation clearance before proceeding.
Inspecting and upgrading water and gas lines if needed
Once the mounting area is confirmed sound, the technician inspects the RV’s water and gas lines for wear, improper fittings, and compliance with the tankless unit’s requirements.
Corroded sections, undersized supply lines, flexible hose age, and non-rated connectors are identified. Necessary upgrades include replacing corroded pipe, upsizing water feed to maintain flow, installing approved gas fittings, and adding accessible shutoffs and pressure relief components.
Planning venting route and electrical access
After addressing water and gas integrity, attention turns to planning the venting route and electrical access for the tankless unit.
The installer evaluates exterior wall placement, clearances, and exhaust run length to prevent heat buildup and exhaust reingestion.
Electrical supply is confirmed: circuit capacity, breaker size, wiring gauge, and conduit path.
Accessibility for maintenance and compliance with RV and manufacturer codes is guaranteed.
Step-by-Step Installation Guide
The installation proceeds through a clear sequence of tasks that guarantee safe operation and code compliance.
First the unit is positioned and mounted, then gas and electrical connections are completed and tested.
Finally plumbing fittings, pressure relief components, and the venting/combustion air system are installed and inspected.
Step 1 Positioning and mounting the unit
Begin by selecting a secure, well-ventilated location for the tankless water heater that allows clearances specified by the manufacturer and provides direct access to gas, water, and electrical connections.
Guarantee a flat mounting surface, structural support for unit weight and vibration, and proximity to existing plumbing runs.
Mark bracket locations, pre-drill holes, and fasten the mounting hardware level and firmly to prevent movement during travel.
Step 2 Installing gas line connections and leak testing
Proceed to connect the gas supply using properly sized, RV-rated fittings and a certified shutoff valve positioned within easy reach; guarantee all pipe threads are sealed with gas-rated tape or approved joint compound and that flexible connectors are rated for propane or natural gas as applicable.
After connections, pressurize the line with the manufacturer-recommended test pressure. Apply a leak-detection solution to joints, and repair any bubbles before finalizing installation.
Step 3 Making electrical connections and grounding
With the gas line confirmed leak-free and shutoff accessible, attention shifts to the electrical connections and grounding required for safe, reliable operation.
The unit must be wired to the RV’s 12V or shore power per manufacturer specs, using correct gauge wire, fuses, and a dedicated circuit.
Connect ground to chassis ground point, secure terminals, and verify polarity and continuity before powering.
Step 4 Plumbing connections: cold inlet, hot outlet, pressure relief
Attach the cold-water supply, hot-water outlet, and pressure-relief valve to the tankless unit following the manufacturer’s labeled ports and flow-direction arrows.
Use appropriate fittings, thread sealant or tape, and clamp or solder joints per RV plumbing materials.
Mount the pressure-relief discharge tubing to a safe drain location.
Pressure-test the system at manufacturer-specified pressure, inspect for leaks, and tighten or adjust as needed.
Step 5 Installing venting and combustion air intake
Begin by identifying the manufacturer-specified venting and combustion air locations on the unit and the RV wall or roof, ensuring clearances and material ratings meet the installation manual and local codes.
Cut and seal openings, mount approved vent components, maintain proper slope and support, and install combustion air intake with required screened protection.
Verify seals, clearances, and draft per manufacturer before finalizing.
Step 6 Installing condensate/drain lines and insulation
After completing vent and combustion-air installation and verifying seals and clearances, attention turns to routing condensate and drain lines and insulating exposed plumbing.
Install a dedicated condensate trap and grade drain piping toward an approved RV drain or external drain point.
Use flexible, corrosion‑resistant tubing, secure with clamps, and wrap exposed hot and cold lines with closed‑cell insulation to prevent freezing and heat loss.
Step 7 Connecting controls and testing sensors
Move on to the control connections and sensor checks with a clear plan: verify wiring diagrams, confirm power is isolated, and gather the manufacturer’s control harnesses and any required adapters.
Attach thermostat, remote control, and flow sensor leads per schematic. Secure connections, route wiring away from heat and moisture, then perform continuity and voltage checks.
Inspect temperature and pressure sensor readings for expected baseline values.
Step 8 Initial startup procedure and flame/burner adjustment
Power is applied only after a final visual inspection confirms all fuel, water, venting, and electrical connections are secure and leak-free.
The initial startup procedure then follows a prescribed sequence to purge air, introduce gas at the correct pressure, activate the ignition system, and observe burner behavior while monitoring combustion and safety sensors.
Technicians adjust flame height and stability via regulator or pilot screw, ensuring proper combustion and no soot.
Step 9 Verifying temperature, flow, and safety features
With the burner tuned and combustion verified, the technician proceeds to confirm that hot-water temperature, delivery flow, and all safety interlocks operate within specified limits.
Temperatures are checked at multiple outlets with a calibrated thermometer; flow rates measured against manufacturer minimums; pressure relief, overheat cutoff, and gas-shutoff responses tested.
Any deviations prompt adjustment, documentation, and re-test before concluding commissioning.
Common Problems During Installation and How to Fix Them
The installation process can present predictable issues that affect safety and performance, so the installer should inspect each system point carefully.
Quick identification and straightforward fixes usually resolve most problems without major rework. The following list highlights common faults to watch for and basic troubleshooting steps.
- Gas leaks and low gas pressure
- Electrical faults and tripped breakers
- Poor water flow or fluctuating temperature
- Venting issues and backdrafting
- Error codes: interpreting and troubleshooting
Gas leaks and low gas pressure
Because propane systems are pressurized and combustible, even small leaks or inadequate supply can quickly create hazardous conditions during an RV tankless heater installation.
Inspect fittings, hoses, and valves with a soapy water test; tighten or replace faulty components.
Verify regulator function and cylinder pressure; guarantee correct hose size and unobstructed lines.
If pressure remains low or leaks persist, stop and consult a certified RV technician.
Electrical faults and tripped breakers
Frequently, electrical faults and tripped breakers occur during RV tankless water heater installations when circuits are overloaded, connections are loose, or grounding is improper.
Technicians should verify circuit capacity, tighten and inspect terminals, replace damaged wiring, and confirm proper grounding and GFCI/AFCI protection.
Test with a multimeter before energizing.
If breakers trip persistently, consult a licensed electrician to prevent fire or equipment damage.
Poor water flow or fluctuating temperature
Addressing poor water flow or fluctuating temperature requires pinpointing whether the issue stems from plumbing restrictions, improper heater settings, or inlet/outlet pressure imbalances.
Inspect for clogged aerators, kinked hoses, or undersized supply lines; verify correct temperature and flow settings on the unit; guarantee consistent water pressure with a pressure regulator or booster pump if needed.
Flush inlet filter and check for cross-connections.
Venting issues and backdrafting
After checking flow and temperature causes, attention must turn to combustion venting and backdrafting, which can create safety hazards and poor heater performance.
Inspect vent routing for obstructions, correct clearances, and proper upward slope. Confirm seals at joints and roof penetrations are tight.
Test for positive exhaust flow and room negative pressure. Adjust vent termination location or add vent cap or passive air intake as needed.
Error codes: interpreting and troubleshooting
When an RV tankless water heater displays an error code, the numeric or alphanumeric readout provides the most direct clue to the underlying fault—identifying whether the issue is electrical, fuel-related, combustion, temperature sensing, or flow-related.
Consult the manufacturer chart, note conditions when code appears, reset power, check wiring, gas supply, venting, sensors, and flow switches.
Replace parts only after diagnosis confirms failure.
Post-Installation Checklist and Safety Tests
After installation, a concise post-installation checklist guarantees the heater and RV remain safe and functional.
Technicians should perform leak testing for both gas and water, confirm combustion and carbon monoxide safety, and verify the temperature-pressure relief operates correctly.
Finally, all work should be documented, components labeled, and the warranty registered.
Leak testing (gas and water)
Begin by verifying there are no leaks in either the gas or water systems before regular use; a thorough, methodical leak test is essential to occupant safety and appliance integrity.
Inspect all fittings, valves, and hose connections.
Pressurize water lines and apply soapy solution to gas joints.
Observe for bubbles and pressure drops.
Repair or tighten any faults, then retest until stable and leak-free.
Carbon monoxide and combustion safety checks
Perform a focused set of carbon monoxide and combustion safety checks to confirm the heater vents, combustion air supply, and exhaust pathways are unobstructed and operating correctly.
Proper combustion prevents CO buildup and guarantees safe appliance function. Inspect vent terminations, seals, and clearances.
Verify fan operation and flame appearance. Use a calibrated CO detector and analyzer at appliance and living-space locations.
Document readings and corrective actions.
Verifying temperature-pressure relief operation
A single, focused check of the temperature-pressure relief (T&P) valve confirms the tankless system will safely relieve excess pressure or temperature and prevents catastrophic failure if upstream controls malfunction.
The technician inspects valve condition, confirms proper orientation and drainage routing, slowly lifts the test lever to verify discharge, guarantees reseating without leaks, and records operating setpoint and observed behavior for corrective action if performance deviates.
Documentation, labeling, and warranty registration
Finalize the installation record by compiling all test results, component specifications, and corrective actions into a single post-installation dossier.
Label valves, shutoffs, electrical disconnects, and service points clearly with durable tags. Photograph serial numbers and installation locations.
Store manuals, receipts, and inspection reports together. Complete manufacturer warranty registration promptly and note coverage dates and service contacts in the dossier for future reference.
Maintenance Schedule and Seasonal Care
A regular maintenance schedule keeps the RV tankless heater reliable and efficient, including routine descaling and flushing to prevent mineral buildup.
Seasonal care requires winterizing in cold climates—draining, or using RV-safe antifreeze—and inspecting vents, burners, and filters before and after heavy use.
Clear troubleshooting steps and defined criteria for when to contact a professional help avoid damage and guarantee safe operation.
Regular descaling and flushing procedures
Establishing a consistent descaling and flushing routine is essential to maintain an RV tankless water heater’s efficiency and prevent mineral buildup from impairing heat exchangers and flow sensors.
Monthly or quarterly intervals depend on water hardness; use a manufacturer-recommended descaler and a pump kit to circulate solution, then flush with clean water until clear.
Inspect filters and fittings; repeat sooner if performance drops.
Winterizing the unit and anti-freeze tips for cold climates
Many RV owners in cold regions must winterize their tankless water heaters to prevent freeze damage to heat exchangers, pipes, and sensors.
The unit should be drained, bypass valves set, and potable water lines flushed. Pumping nontoxic RV antifreeze through the system protects internal components; follow manufacturer concentration and temperature guidelines.
Store external components and insulate exposed plumbing for added protection.
Periodic vent, burner, and filter inspections
Inspect vents, burners, and filters on a regular schedule to guarantee safe, efficient operation of an RV tankless water heater.
Perform visual vent checks monthly for obstructions. Clean burner assemblies seasonally to remove soot and debris, and inspect inlet and inline filters every 1–3 months.
Replace or clean filters per manufacturer guidance and record inspections to track wear and timing.
Troubleshooting reminders and when to call a professional
When recurring issues arise despite routine checks, refer to a concise troubleshooting list to identify simple fixes and recognize faults that require professional attention.
Log error codes, verify power, gas, and water supplies, and reset per manufacturer instructions.
Attempt only noninvasive tasks—filter changes, vent clearing, or sensor cleaning.
Contact a certified RV technician for persistent leaks, combustion problems, or electrical faults.
Cost Breakdown and Time Estimate
A concise cost and time overview helps owners plan full installation expenses and schedule.
Typical parts and materials, plus whether the work is DIY or done by a professional, determine upfront costs and labor hours.
A brief comparison of expected operating costs versus a traditional tank heater rounds out the financial picture.
Typical parts and material costs
Because installation costs vary with unit type, fuel source, and RV layout, owners should budget for several distinct line items: the heater itself, fuel/venting components, water fittings, mounting hardware, and optional electrical or propane upgrades.
Typical prices range:
- compact RV heaters $300–$900;
- venting/fuel parts $50–$300;
- water fittings and valves $20–$100;
- mounts and brackets $10–$50;
- electrical upgrades $50–$300.
Labor/time estimate for DIY installation vs. professional
Although experience and RV layout particularly affect the outcome, installing a tankless water heater can be approached either as a weekend DIY project or a paid professional job, each with distinct time and labor-cost implications.
DIYers typically need 6–12 hours (planning, removal, plumbing, venting, testing).
Professionals usually complete work in 2–4 hours but charge labor rates ($75–$150+/hour), plus travel and warranty.
Long-term operating cost comparison with tank heaters
Several key factors determine long-term operating costs when comparing tankless and tank water heaters in an RV: fuel type and efficiency, average daily hot-water demand, standby losses, maintenance frequency, and expected lifespan.
Tankless units typically use less fuel per use and avoid standby losses, reducing annual energy costs.
Higher upfront cost and periodic maintenance can be offset by longer lifespan and lower per-use expenses.
Safety Regulations, Codes, and When to Hire a Pro
The installation must comply with RV and campground safety standards, including propane, electrical, and venting requirements specific to mobile dwellings.
Owners should verify whether local permits, mandatory inspections, or insurance notifications are required before beginning work.
Complex gas, electrical, or structural modifications, or any situation where compliance is uncertain, warrant hiring a licensed professional.
Relevant RV and camping safety standards to follow
When installing a tankless water heater in an RV, compliance with applicable safety regulations and codes is essential to prevent fire, carbon monoxide, and electrical hazards.
Follow RVIA standards, NFPA 1192 guidance, local propane and electrical codes, and campground rules.
Guarantee proper ventilation, certified gas fittings, GFCI protection, and labeled shutoffs.
Hire a licensed technician for unfamiliar systems or when code compliance is uncertain.
Permits, inspections, and insurance considerations
Installing a tankless water heater in an RV often triggers permit, inspection, and insurance requirements that vary by jurisdiction and by whether the work involves gas, electrical, or structural changes.
Owners should check local building and campground rules, obtain required permits, schedule inspections, and notify their insurer to maintain coverage.
Documentation of compliant installation and certified components reduces liability and claim denial risk.
Scenarios that require professional installation
Local regulations and insurer requirements often dictate whether a tankless water heater installation in an RV must be performed or inspected by a licensed professional.
Situations warranting a pro include gas line modifications, RV electrical system changes, propane appliance integration, structural alterations, and installations in commercial or rental units.
Complex venting, code compliance, or required permits also justify hiring certified technicians.
Practical Tips and Tricks from Experienced RVers
Experienced RVers share compact, practical approaches that make tankless heater installations work in tight, mobile spaces. Their tips focus on smart mounting, maximizing on-demand heat while conserving power, and preventing freeze and condensation issues on the road.
The following concise suggestions reflect real-world solutions tested in varied RV setups:
- Mount under cabinets or use low-profile brackets to save floor and storage space.
- Route plumbing and venting to minimize heat loss and shorten hot-water wait times.
- Insulate exposed lines and add a small loop for recirculation to improve efficiency.
- Use heat tape, insulated covers, and strategic placement to prevent freezing in cold climates.
- Vent and space components to avoid condensation buildup in humid or alternating-temperature conditions.
Space-saving mounting hacks
Because every inch counts in an RV, mount locations and orientations must prioritize access, ventilation, and balance without sacrificing usable space.
Experienced RVers recommend vertical mounting in narrow closets, recessed panels to tuck the unit flush, quick-release brackets for service, and routing lines through cabinetry voids.
Counterweight placement and vibration-damping pads preserve stability while keeping living areas uncluttered and functional.
Optimizing hot water efficiency on the road
Many RVers find that small adjustments yield noticeable gains in hot water efficiency on the road: insulating lines and tanks, installing low-flow fixtures, and setting the heater to an ideal temperate setpoint all reduce demand and heat loss.
Additionally, grouping hot-water tasks, checking for leaks, using smart shower timers, and maintaining clean burners/filters keeps output steady while conserving fuel or electricity during boondocking and long trips.
Preventing freeze damage and condensation problems
Take proactive measures to prevent freeze damage and condensation, since both can quickly degrade plumbing, insulation, and appliances in an RV.
Insulate exposed lines, add heat tape with thermostat control, and seal vents. Drain and winterize systems before cold storage.
Use low-flow ventilation, moisture-absorbing desiccants, and monitor humidity.
Regular inspections catch leaks and ice buildup early, minimizing repairs and downtime.
Useful Resources and Checklist Downloads
The article points readers to downloadable resources that support a safe, code-compliant installation.
These include a printable installation checklist with wiring and venting diagrams, links to manufacturer manuals and parts suppliers, and a contact list of RV service centers and certified technicians.
Users are encouraged to consult these resources before beginning work.
Printable installation checklist and wiring/venting diagrams
When preparing to install a tankless water heater in an RV, a concise printable checklist and clear wiring and venting diagrams streamline the process by enumerating required parts, safety steps, and sequencing for electrical and exhaust connections.
Templates should include parts, tools, torque/spec notes, fuse/breaker sizing, wire gauge, grounding, vent routing with clear bends, mounting points, and inspection/commissioning steps for verification.
Links to manufacturer manuals and parts suppliers
Having a printable checklist and clear wiring/venting diagrams in hand, a compiled list of manufacturer manuals and vetted parts suppliers completes the documentation set needed for a safe, code-compliant RV tankless water heater installation.
Provide direct links to OEM installation and service manuals, replacement parts lists, approved venting kits, and compatible fittings.
Include supplier contact pages, part numbers, and notes on warranty-eligible components.
Contact list for RV service centers and certified technicians
One concise contact list groups RV service centers, certified propane and gas technicians, and tankless-water-heater specialists by region and service type to streamline repairs, inspections, and warranty work.
It provides vetted contacts, service ratings, emergency availability, and notes on RV-specific certifications. Owners can quickly find qualified help for installation, maintenance, or leak diagnostics.
- Regional RV service centers
- Certified propane technicians
- Gas appliance specialists
- Manufacturer-authorized shops
- Emergency roadside contacts
Conclusion
Ultimately, the careful camper considers compatibility, components, and conscientious connections when choosing and crafting a clean, compact tankless system for an RV. Methodical measurements, mindful material selection, and measured maneuvering minimize mishaps and maximize efficiency. Respectful routing, reliable regulators, and routine reviews reinforce safety. Confident, capable campers capture comfort and conserve space, savoring steaming showers without storage stress—steady, satisfying solutions simplifying life on the lively, rolling road.