
How to Clean the Floor After a Toilet Overflows: Step-by-Step Cleanup and Disinfection Guide
How to Clean the Floor After a Toilet Overflows: A Step-by-Step Guide
To effectively clean a floor after a toilet overflow, follow these essential steps: First, stop the water flow and secure the area. Wear gloves, eye protection, and waterproof boots for safety. Next, remove any standing water using a wet vacuum or towels. Scoop out any solid waste and double-bag it for disposal. Rinse the affected area to extract moisture, and then disinfect surfaces using an EPA-registered cleaner or an appropriate bleach solution, ensuring you follow the recommended contact times. Thoroughly dry the area with fans and a dehumidifier, monitor for lingering dampness, and discard any porous items that cannot be cleaned. For more detailed cleanup and prevention tips, continue reading.
What to Do Immediately After a Toilet Overflow
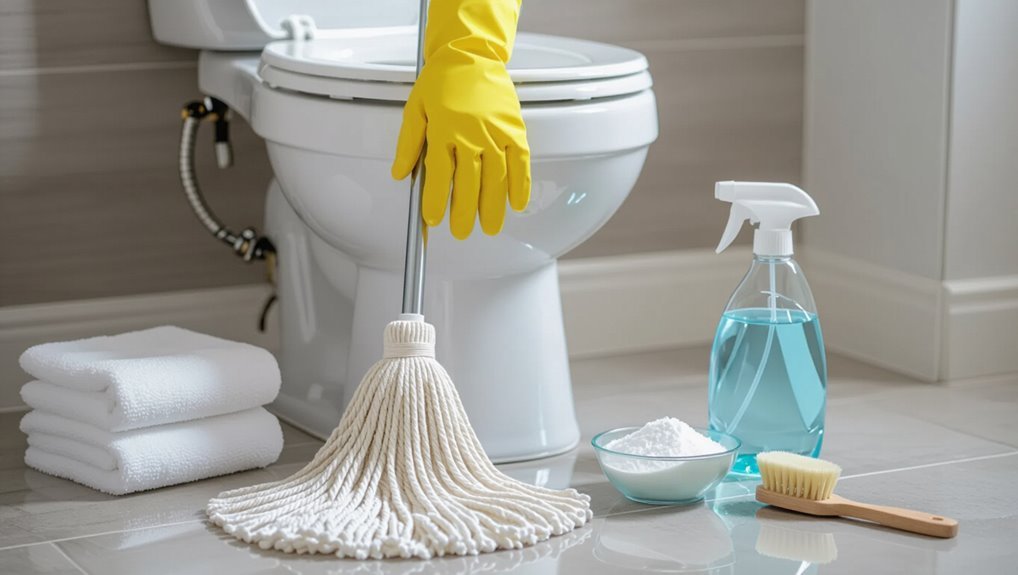
The first actions focus on stopping the flow of water and preventing further damage. This includes closing the toilet’s shutoff valve and, if water threatens electrical outlets or appliances, cutting power at the breaker.
If flooding is extensive or sewage is present, evacuate the area and call a professional immediately.
Stop the water source quickly
Shut off the water immediately to prevent further flooding and contamination.
The responder confirms the flush mechanism is halted, removing any standing flow.
While focusing on how to clean floor after toilet overflows, they quickly remove excess water with buckets or towels, block doorways to protect other rooms, and avoid electrical hazards.
Prompt action limits spread and simplifies later disinfection steps.
Turn off the water supply valve
Locate and turn the toilet’s shutoff valve clockwise to stop incoming water immediately, preventing further overflow and reducing contamination spread.
Confirm the tank stops filling. If the valve resists, use a wrench gently to avoid damage.
Note the valve type and condition for repair.
Once closed, inform others and proceed with cleanup steps, minimizing foot traffic to limit contamination.
Cut power to nearby electrical outlets if needed
After the shutoff valve is secured, attention should turn to electrical hazards: any outlets, switches, or appliances within the splash zone must be cut from power to prevent shock or short circuits.
Use the breaker panel to switch off affected circuits or unplug devices with dry hands and nonconductive footwear.
Label isolated breakers and avoid touching wet electronics until fully dried and inspected.
When to evacuate and call a professional
If water continues to rise, carries sewage, emits a strong odor, or soaks large areas or multiple rooms, evacuate immediately and call a professional—these signs indicate a health and structural risk beyond routine cleanup.
Professionals assess contamination levels, shut off utilities, and perform extraction and drying. Engage a licensed plumber or remediation service for sewage backups, significant structural damage, persistent odors, or compromised HVAC to guarantee safety and proper restoration.
Safety Precautions and Personal Protective Equipment
Before beginning cleanup, the person should put on appropriate PPE—washable or disposable gloves, waterproof boots, eye protection, and a mask—to reduce exposure to contaminants.
A respirator or face shield is recommended when aerosols, heavy soiling, or prolonged cleaning with strong chemicals are present.
Children, pets, and porous or sensitive items should be removed from the area until surfaces are fully cleaned and dried.
Recommended PPE (gloves, boots, eye protection, mask)
Donning appropriate personal protective equipment (PPE) is essential when addressing a toilet overflow to minimize exposure to pathogens and chemical cleaners.
Recommended items include impermeable gloves, waterproof boots or shoe covers, sealed eye protection, and a disposable fluid-resistant mask.
All PPE should fit properly, be inspected for damage before use, and be removed and disposed of or decontaminated following cleanup to prevent cross-contamination.
When to use a respirator or face shield
Assessment of airborne risk guides whether a respirator or face shield is needed during toilet-overflow cleanup.
A fitted N95 or higher respirator is recommended when splashing, aerosolizing, or using strong disinfectants; a face shield protects against droplets and chemical splatter.
Use both for heavy contamination or prolonged work.
Replace or decontaminate PPE between tasks and follow manufacturer fit and cleaning instructions.
Protecting children, pets, and sensitive household items
After considering respirator and face shield use for aerosol or chemical risks, attention should turn to minimizing exposure for children, pets, and sensitive items in the home.
Keep children and pets out of affected areas until cleanup and drying complete.
Remove or seal toys, linens, electronics, and porous items; launder or discard as advised.
Use barriers, signage, and supervision to prevent reentry.
Assessing the Spill and Damage
The responder first determines whether the overflow is clean water or contaminated sewage, since contamination changes cleanup methods and required protective measures.
Next, the responder notes the flooring type—tile, vinyl, laminate, wood, or carpet—to decide what can be dried, cleaned, or must be removed.
Finally, the responder inspects the subfloor and nearby walls for seepage or staining that indicate deeper damage needing repair.
Identifying clean vs. contaminated water (sewage vs. clean)
How can one tell whether the overflow is clean water, gray water, or sewage?
Visual cues, odor, and source indicate contamination: clear water from supply lines is likely clean; cloudy, soapy, or food‑waste tinged water suggests gray water; dark, foul‑smelling, or fecal‑tainted water indicates sewage.
If in doubt, assume sewage and use protective gear, contain spread, and disinfect thoroughly.
Checking affected flooring types (tile, vinyl, laminate, wood, carpet)
When evaluating flooring after a toilet overflow, begin by identifying the material and the extent of moisture penetration, since response and salvageability vary greatly between tile, vinyl, laminate, wood, and carpet.
Tile and grout may resist water but grout can harbor contaminants. Vinyl can often be cleaned if adhesive intact. Laminate and hardwood risk swelling and warping.
Carpets often require removal and deep sanitation.
Inspecting subfloor and nearby walls for seepage
Begin by lifting baseboards and checking seams where flooring meets walls to spot stains, soft spots, or dampness that indicate seepage into the subfloor or wall cavities.
Document locations and extent, probe suspect areas with a screwdriver, and smell for mildew.
If moisture or rot is suspected, identify affected joists and drywall sections, isolate the area, and consult a contractor for drying, repair, or mold remediation.
Step-by-Step Cleanup Process
The cleanup begins with removing standing water using buckets, towels, or a wet vacuum and then clearing and disposing of any solids and debris following sanitary precautions.
Next, rinsing and extracting moisture from floors and seams reduces contamination and prepares the area for disinfecting.
Specific procedures differ for carpeted areas—where blotting, shampooing, and professional extraction may be needed—and for hard floors like tile, vinyl, or laminate, which require careful scrubbing, rinsing, and drying.
Initial water removal methods
The cleanup begins with removing standing water using absorbent towels and a mop, taking care to wring and dispose of contaminated materials safely.
When available, a wet/dry vacuum can speed removal, but it should be used only with appropriate filters and after verifying the unit is rated for contaminated water.
Personal protective equipment and proper disposal of wastewater and soiled cleaning tools are emphasized throughout.
Using towels and mops safely
Grab absorbent towels and a sturdy mop to start removing standing water, taking care to keep movement slow to avoid splashing contaminated water into surrounding areas.
Wear gloves and waterproof footwear. Wring towels into a bucket; change them when saturated.
Rinse the mop frequently in disinfectant solution and replace mop heads if heavily soiled.
Dispose of contaminated materials per local guidelines.
Wet/dry vacuum best practices
Begin by confirming power sources and wearing appropriate PPE—gloves, eye protection, and waterproof boots—before operating a wet/dry vacuum.
Use a vacuum rated for sewage-contaminated water, remove large debris first, and fit a disposable filter or collection bag.
Work from perimeter toward drain, avoid electrical outlets, empty and disinfect the tank outdoors, then sanitize the machine and all touched surfaces.
Clearing and disposing of solids and debris
Assess visible solids and debris first, noting what is organic, absorbent, or potentially hazardous so disposal can follow local regulations.
Use disposable scoops, heavy-duty gloves, and puncture-resistant bags for sharp or contaminated items.
Segregate materials: compostable separately, sanitary or biohazardous waste sealed and labeled.
Decontaminate reusable tools, double-bag waste, and contact local waste services for proper removal.
Rinsing and extracting moisture from floors and seams
After solids and hazardous items have been removed and bagged, attention turns to removing residual moisture from floors and seams to prevent staining and microbial growth. Surfaces are rinsed with clean water, seams scrubbed with a brush, and moisture extracted using a wet vac or microfiber mops. Finish by airing the area and monitoring for damp spots until fully dry.
| Tool | Purpose |
|---|---|
| Wet vac | Extract water |
| Brush | Agitate seams |
| Mop | Final wipe |
Detailed steps for carpeted floors
For carpeted floors, the cleanup process follows a strict, step-by-step routine to remove contaminants, extract moisture, and prevent staining or mold growth.
Wear protective gear, blot and remove solids, pre-treat with enzyme cleaner, rinse sparingly, extract with a wet vacuum, apply disinfectant per label, deodorize, and monitor drying with fans and dehumidifier.
Inspect padding; replace if saturated.
Detailed steps for hard floors (tile, vinyl, laminate)
Begin by containing the spill and blocking off the area to prevent foot traffic; hard floors require prompt attention to limit contamination and avoid slipping hazards.
Wear gloves and boots.
Remove solids with disposable towels, then mop up liquid with absorbent cloths.
Clean with detergent and hot water, rinse, then disinfect with appropriate solution.
Allow to air dry and ventilate thoroughly.
Dispose of waste safely.
Handling hardwood floors and preventing warping
One clear priority is to limit moisture exposure immediately to prevent cupping or warping of hardwood boards.
Remove standing water with towels and a wet vacuum, blotting rather than rubbing. Open windows and use fans plus a dehumidifier to speed drying.
Lift baseboards if soaked to inspect subfloor. After drying, sanitize with a hardwood-safe cleaner and monitor for discoloration or warping.
Disinfection and Odor Control
Selection of disinfectants should prioritize products proven to kill common pathogens and include safe bleach alternatives when appropriate.
Attention to proper dilution and required contact time guarantees effectiveness, while enzyme cleaners target organic residues that can sustain odors.
Natural odor neutralizers may be suitable for low-risk areas but should not replace disinfection after contamination.
Choosing effective disinfectants and bleach alternatives
Assess disinfectant options by matching their effectiveness against common pathogens in sewage—bacteria (E. coli, Salmonella), viruses (norovirus, adenovirus), and enteric parasites—to the surface type and contact time available.
Choose EPA-registered products when possible: chlorine bleach for nonporous, hydrogen peroxide or peracetic acid for sensitive finishes, and quaternary ammonium compounds for general use.
Consider material compatibility, residue, odor, and safety for occupants.
Proper dilution and contact time for disinfectants
Proper dilution and adequate contact time are critical to guarantee disinfectants inactivate sewage pathogens effectively without damaging surfaces or harming occupants.
Follow manufacturer labels: mix concentrations for hard, nonporous surfaces (often 1:10 to 1:100 bleach solutions or approved EPA products).
Apply thoroughly, keep surfaces visibly wet for the specified contact time (commonly 1–10 minutes), then rinse if required.
Use PPE.
Natural odor neutralizers and when they are appropriate
Many homeowners turn to natural odor neutralizers—such as baking soda, white vinegar, activated charcoal, and essential oil blends—after a toilet overflow because they absorb or mask smells without harsh chemicals.
These options suit minor, well-cleaned areas where no visible biofilm remains. They do not disinfect; use them only after proper cleaning and disinfection.
Test essential oils for sensitivity and avoid porous surfaces that trap odors.
Using enzyme cleaners for organic contamination
Employ enzyme cleaners to break down organic matter—proteins, fats, and waste residues—that traditional disinfectants can’t remove.
They digest stains and odors at the source, reducing biofilm and masking.
Apply per label, allow dwell time for enzymatic action, then blot and rinse if required.
Use in well-ventilated areas and on surfaces compatible with biological cleaners; store away from extreme temperatures.
Drying and Dehumidification Techniques
Next, the article addresses drying and dehumidification techniques to complete cleanup after a toilet overflow.
It outlines strategic placement of fans and air movers, criteria for when a rented or owned dehumidifier is warranted, and typical drying durations to observe before making repairs or reinstalling fixtures.
Clear timelines and equipment choices help prevent lingering moisture and secondary damage.
Using fans and air movers strategically
A few well-placed air movers and axial fans can cut drying time and prevent mold after a toilet overflow when positioned to create directed airflow across wet surfaces.
Operators should angle units low and parallel to the floor, targeting seams, baseboards, and under fixtures.
Rotate placement periodically, combine with open doors and windows for cross-ventilation, and monitor moisture until surfaces reach safe dryness levels.
When to rent or use a dehumidifier
Deciding whether to rent or use a dehumidifier hinges on the extent of water intrusion and the space’s ventilation capacity.
Smaller spills in well-ventilated rooms may be handled with a portable unit, while larger exposures, damp subfloors, or limited airflow often require commercial-capacity or rented dehumidifiers.
Select a unit rated for room size, monitor humidity, and position to promote airflow without obstructing drying equipment.
How long to dry before repairs or reinstallation
After removal of standing water and initial cleanup, drying should continue until moisture levels in affected materials reach safe, repair-ready readings.
This typically takes 24–72 hours for porous finishes like drywall and flooring under ideal conditions, but can extend to a week or more for saturated subfloors or insulation.
Use moisture meters to confirm readings, maintain airflow and dehumidification, and delay repairs until consistent low readings are recorded.
Cleaning and Sanitizing Tools, Linens, and Personal Items
Decisions about disposal versus salvage hinge on item porosity and contamination level, with single-use and heavily porous materials often discarded.
Reusable cleaning tools and equipment require specific decontamination steps—including hot water, detergent, and appropriate disinfectants—to prevent cross-contamination.
Contaminated clothing and linens should be handled with gloves and washed separately on the hottest safe cycle with detergent and a disinfectant or bleach when fabric-safe.
What to throw away vs. what can be salvaged
When evaluating items exposed to toilet overflow, categorize them quickly into three groups—discard, salvage with thorough cleaning, or untouched—based on material porosity, contamination level, and ease of sanitization.
Porous items (mattresses, pillows, stuffed toys, some rugs) should be discarded.
Nonporous or washable textiles and plastic items can be salvaged after laundering and disinfecting.
Personal items contacting stool often require disposal.
How to decontaminate mops, buckets, and vacuums
Once porous items have been discarded and washable surfaces identified, attention turns to cleaning the tools and supplies used during cleanup—mops, buckets, and wet/dry vacuums can harbor pathogens and must be handled methodically.
Rinse debris outdoors, disinfect with EPA‑registered or bleach solution, soak mop heads, empty and sanitize buckets, clean vacuum filters and tanks per manufacturer guidance, then air‑dry completely before storage.
Washing contaminated clothing and linens safely
Separate contaminated clothing and linens from uncontaminated items and contain them in plastic bags or sealed hampers to limit spread.
Handle with gloves and avoid shaking.
Pre-treat heavily soiled areas, then wash on the hottest safe setting using detergent and bleach if fabric allows.
Dry completely on high heat.
Clean and disinfect the laundry area and wash hands thoroughly after handling.
Repairing and Restoring Damaged Flooring
Assessment of flooring damage determines whether carpet and padding must be removed, individual hardwood or laminate planks can be repaired or need replacement, or tile grout must be reworked and sealed after contamination.
Moisture, staining, odor, and the duration of exposure guide those decisions and the urgency of action.
For extensive damage or structural concerns, a flooring specialist or contractor should be contacted to evaluate and execute repairs.
When to replace carpet and padding
When is carpet salvageable after a toilet overflow depends on contamination level, drying time, and material type; contaminated sewage (Category 3) or prolonged saturation that allowed mold growth typically necessitates replacement of both carpet and padding.
Non-contaminated, quickly dried carpet may be cleaned and deodorized; staining, persistent odors, delamination, or visible mold indicate full removal.
Professional assessment recommended for health-risk cases.
Repairing or replacing hardwood and laminate planks
Begin by identifying the type and extent of water damage to hardwood or laminate planks—cupping, warping, staining, delamination, and soft spots each indicate different remedies.
Dry thoroughly, then assess salvageability: sand and refinish minor hardwood damage; replace affected hardwood boards if structurally compromised.
For laminate, replace swollen or delaminated planks.
Confirm subfloor dryness and install new planks with matching material and moisture barrier.
Regrouting and sealing tile floors after contamination
Restore tile floors contaminated by sewage or standing water by focusing on grout removal, deep cleaning, and proper resealing to prevent lingering bacteria and future moisture intrusion.
Remove compromised grout, scrub joints with antimicrobial cleaner, rinse thoroughly, and allow full drying.
Replace grout using a nonporous, mold-resistant mix.
After curing, apply a high-quality grout sealer and inspect edges to guarantee watertight joints and sanitation.
When to call flooring specialists or contractors
Once grout has been removed, replaced, and sealed, homeowners should assess whether damage extends beyond surface repairs and warrants professional help.
Signs requiring contractors include warped or buckled flooring, persistent stains or odors, mold growth within subflooring, soft spots, or extensive tile/crack patterns.
A specialist can evaluate structural integrity, perform subfloor remediation, and recommend durable replacements or waterproofing to prevent recurrence.
Preventing Future Toilet Overflows
To reduce the risk of repeat incidents, the article reviews common causes of toilet overflows—such as blockages, faulty flappers, and improper flushing—and practical steps to avoid them.
It then outlines a concise maintenance checklist for toilets and drains, including regular inspections, proper use of drain cleaners, and scheduled professional servicing.
Finally, it explains options for installing overflow prevention devices and backflow valves to provide mechanical protection against future backups.
Common causes of toilet overflows and how to avoid them
When a toilet overflows, it is usually the result of one or a combination of preventable issues such as clogs, faulty fill or flush mechanisms, blocked vents, or sewer backups. Common causes include foreign objects, buildup, mechanical failure, or external sewer problems. Prevention focuses on proper use, timely repairs, and vent clearance.
| Cause | Symptom | Prevention |
|---|---|---|
| Clog | Slow drain | Avoid flushing solids |
| Valve failure | Continuous fill | Replace faulty parts |
| Sewer backup | Multiple fixtures | Call utility/service |
Maintenance checklist for toilets and drains
Having identified common causes of overflows—clogs, faulty parts, and sewer issues—attention shifts to a concise maintenance checklist that reduces recurrence.
Inspect and tighten tank components monthly, test flapper and fill valve function, clear visible drain obstructions, run enzymatic drain cleaner quarterly, check sewer cleanout accessibility, replace worn seals, monitor water level and bowl flush pressure, and schedule professional plumbing inspection annually.
Installing overflow prevention devices and backflow valves
Install overflow prevention devices and backflow valves to reduce the risk of recurring toilet floods and protect the home’s water supply.
Homeowners should evaluate options—float cup stops, anti-siphon fill valves, and check valves—based on fixture type.
Professional installation guarantees correct sizing and compliance with local codes.
Regular testing and maintenance prevent failures; document installations and schedule inspections after major plumbing work or storms.
When to Contact Professionals and Insurance Considerations
If standing water exceeds a few inches, odors persist, or sewage has contaminated porous materials, a water damage or biohazard remediation professional should be contacted.
Homeowners should photograph affected areas, note time stamps, save damaged items and keep receipts to support an insurance claim.
Before hiring, they should ask about licensing, scope of work, estimated timeline, containment and disposal procedures, and whether the company works directly with insurers.
Signs you need a water damage or biohazard remediation pro
Because sewage and standing water pose health and structural risks, recognizing when an overflow exceeds routine cleanup is essential; call professionals if contamination covers large areas, water has soaked walls or subflooring, foul odors persist, mold appears, electrical systems were exposed, or occupants experience illness.
Professionals handle hazardous waste, structural drying, mold remediation, and coordinate with insurers for proper mitigation.
What to document for insurance claims
After contacting professionals when contamination, structural soak-through, or health risks are present, documenting the incident for an insurance claim becomes the next priority.
The homeowner should record clear evidence, timelines, and expenses to support coverage decisions.
- Photos and video of affected areas and belongings
- Date/time logs, service invoices, and repair estimates
- Receipts for temporary repairs, rentals, and cleanup supplies
Questions to ask remediation companies before hiring
When should a homeowner ask pointed questions to a remediation company?
After overflow containment and initial photos, the homeowner should ask about license, insurance, scope, methods, remediation timeline, moisture detection, mold prevention, waste disposal, and guarantees.
Also verify written estimates, subcontractor use, liability limits, and insurer communication.
Clear answers inform hiring decisions and claims coordination.
Quick Reference: Cleanup Supplies Checklist
A concise checklist of supplies guarantees an efficient, safe cleanup after a toilet overflow. Responders should gather personal protective equipment (gloves, goggles, and waterproof boots), disinfectant and bleach-based cleaners, absorbent materials (paper towels, disposable cloths, or absorbent pads), heavy-duty trash bags, a mop or wet/dry vacuum, and access to hot water and soap.
- PPE and hand hygiene
- Cleaning and disinfecting agents
- Absorbents and disposal supplies
Timeline for Recovery and Follow-Up Actions
The timeline for recovery after a toilet overflow breaks the process into Immediate (0–24 hours), Short-term (1–7 days), and Long-term (2–6 weeks) phases to prioritize actions and track progress.
In the Immediate phase, focus is on stopping the source, removing standing water, and sanitizing exposed surfaces.
The Short-term and Long-term phases cover inspections, repairs, ongoing drying and disinfection, and final checks to confirm no hidden damage or mold.
Immediate (0 to 24 hours)
Begin by securing the area and preventing further spread of contaminated water: shut off water to the toilet if possible, ventilate the room by opening windows and running exhaust fans, and keep people and pets out until cleanup begins.
Don protective gloves and boots, remove standing water with towels or a wet vacuum, discard soaked porous materials, and disinfect hard surfaces with appropriate cleaners.
Monitor for lingering odors.
Short-term (1 to 7 days)
Once initial cleanup is complete, occupants should inspect affected areas daily for moisture, odors, or signs of mold growth and document any changes to guide remediations and insurance claims. Monitor drying, re-clean high-touch spots, continue disinfection, and restrict traffic until surfaces are dry. Report damages to insurers and schedule repairs promptly.
| Day | Action |
|---|---|
| 1 | Monitor moisture |
| 2 | Re-clean surfaces |
| 3 | Air and dehumidify |
| 4 | Check for odors |
| 5 | Document findings |
Long-term (2 to 6 weeks)
Over the next two to six weeks, occupants should focus on sustained drying, periodic inspections, and completing repairs or remediation tasks identified during short-term monitoring.
Continue dehumidification, verify moisture levels weekly, and monitor for odors or mold growth.
Replace damaged materials, finalize plumbing repairs, and document work for insurance.
If issues persist, consult professionals for mold remediation or structural assessment.
Conclusion
In the quiet aftermath of a chaotic spill, the homekeeper stands between ruin and restoration. Wet floors gleam with the memory of the flood while disinfectant scents promise renewal. Simple tools and careful steps transform hazard into habit; caution pairs with competence. Small, deliberate acts—mopping, airing, inspecting—turn alarm into assurance. The mess fades, but the lesson lingers: preparedness and calmness, side by side, prevent repetition and preserve peace.
