How to Clean Copper Sinks: Step-by-Step Guide for Shiny, Scratch-Free Results
To keep your copper sink shiny and scratch-free, follow these essential care steps. Rinse daily and wash with a mild pH-neutral soap using a soft cloth. Always dry the sink to prevent water spots and corrosion. Once a week, apply a nonabrasive cleaner or a baking soda paste for any stains, then buff with a microfiber cloth. For unlacquered surfaces, finish with a clear wax or polish. Avoid using steel wool, harsh acids, and bleach to protect the finish. For more detailed instructions and stain removal tips, continue reading.
What Makes Copper Sinks Unique and How to Care for Them
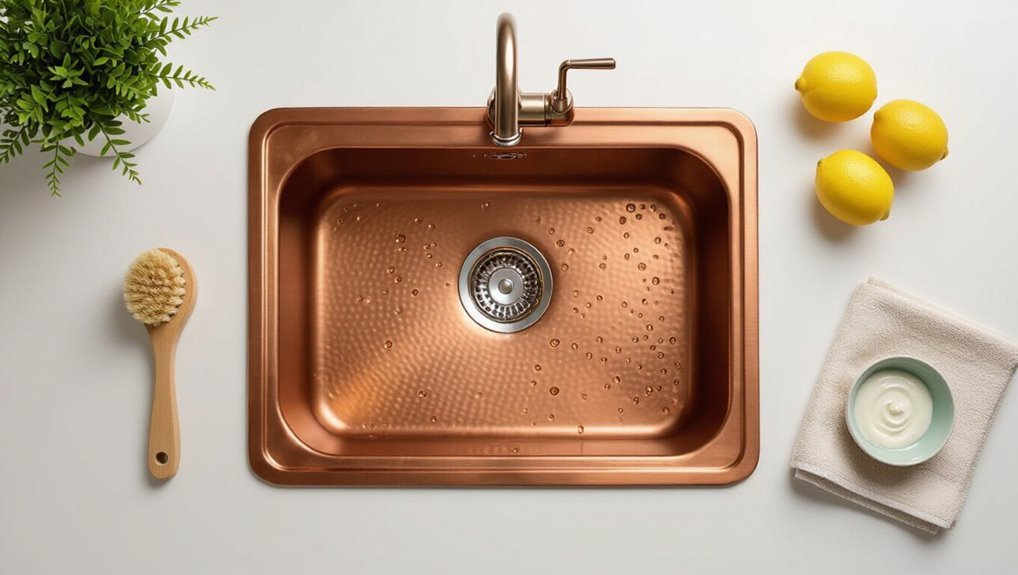
Copper reacts with moisture and acids to form a protective patina, unlike nonreactive stainless steel or glazed porcelain, so its appearance and care needs differ.
Homeowners can expect finishes ranging from bright polished to satin or intentionally aged patinas, each developing color and texture changes over time.
Because finish type determines which cleaners and techniques are safe, maintenance recommendations should be matched to the specific finish to avoid damage.
Why copper reacts differently than stainless steel or porcelain
Why does a copper sink patina where stainless steel gleams and porcelain stays unchanged?
Copper is reactive: it oxidizes and forms surface compounds when exposed to air, water, acids, or salts.
Metals like stainless resist corrosion via chromium oxide; porcelain is inert.
Understanding copper’s chemistry helps owners learn how to clean copper sinks gently to preserve appearance and prevent unwanted corrosion.
Common finishes and patina: what to expect
Because its surface chemistry leads to visible changes over time, a copper sink is offered in several finishes and will develop a patina that owners should expect and manage.
Common options include lacquered (sealed) for long-lasting shine, brushed or hammered textures that hide wear, and unlacquered surfaces that age naturally.
Patina varies by environment, creating warm browns, greens, or matte silvered tones.
How finish type affects cleaning method
Different finishes demand different care routines, so identifying whether a sink is lacquered, brushed, hammered, or unlacquered is the first step in choosing a cleaning method.
Lacquered surfaces require mild soap and soft cloths to protect coating.
Brushed or hammered textures tolerate gentle nonabrasive cleaners and soft brushes.
Unlacquered copper benefits from periodic waxing to control patina and prevent staining.
Quick Answer: Safe and Effective Way to Clean a Copper Sink
For everyday cleaning, use a soft cloth or sponge with mild dish soap and warm water, then dry the sink to prevent water spots.
To remove stains and restore shine, gently rub a paste of baking soda and lemon juice (or a commercial copper cleaner) with a soft cloth, then rinse and dry.
These simple steps keep the patina intact while maintaining a clean, polished surface.
One-sentence method for everyday cleaning
Wipe the sink daily with a soft cloth dampened in warm water and a drop of mild dish soap, then rinse and dry immediately to prevent water spots and preserve the patina.
For routine care, avoid abrasive pads and harsh chemicals; gently remove debris, pat dry with a microfiber cloth, and allow air to circulate around the basin to minimize mineral buildup and incidental staining.
One-sentence method for removing stains and restoring shine
Apply a paste of equal parts white vinegar and fine sea salt (or baking soda for a gentler option) to stained areas.
Rub gently with a soft cloth in circular motions, rinse thoroughly with warm water, and dry immediately to lift spots and restore shine without harming the patina.
This method removes tarnish and mineral deposits safely; repeat for stubborn stains and avoid abrasive pads or acidic cleaners that strip finish.
Tools and Supplies You Need
A concise list of appropriate tools and supplies sets the foundation for safe copper sink care. Recommended items include gentle commercial cleaners or simple homemade alternatives, soft cloths and nonabrasive sponges while avoiding steel wool or harsh scouring pads.
Additionally, protective products such as waxes or sealants help to preserve the finish. Choosing the right items minimizes damage and extends the sink’s lifespan.
Gentle cleaners and homemade alternatives
Select gentle cleaners and simple homemade solutions that remove grime without stripping a copper sink’s protective patina.
Recommended options focus on mild acidity and nonabrasive action to preserve finish and evoke care.
- White vinegar diluted with water
- Lemon juice and baking soda paste
- Mild dish soap solution
- Olive oil buff for warm sheen
Soft tools to use and tools to avoid
Choose soft, nonabrasive tools that clean without scratching or dulling the copper surface: microfiber cloths, soft sponges, natural-bristle brushes, and nonmetallic scrubbing pads are appropriate, while steel wool, abrasive scouring powders, and stiff wire brushes should be avoided.
Recommended items evoke care and confidence:
- Microfiber cloth — gentle polish
- Soft sponge — everyday washing
- Natural-bristle brush — crevice cleaning
- Nonmetallic pad — stubborn spot removal
Protective products to maintain finish (waxes, sealants)
When properly applied, protective products—such as clear carnauba waxes, food-safe beeswax blends, and specialized copper sealants—form a thin barrier that slows oxidation, repels water and stains, and preserves the sink’s polished appearance.
Recommended are nonabrasive, food-safe formulas; apply sparingly, buff to a sheen, and reapply every few months or after heavy use.
Avoid silicone-based sprays that can alter patina.
Step-by-Step Daily and Weekly Cleaning Routine
A straightforward daily routine keeps a copper sink looking its best: rinse away debris, wipe with a soft cloth, and remove spots promptly.
Once a week, follow a simple deeper-clean sequence using a gentle cleaner and a nonabrasive pad to address buildup without harming the patina.
Finish each cleaning by thoroughly drying and buffing with a soft microfiber to maintain a scratch-free shine.
Daily rinse and wipe procedure
Several short steps keep a copper sink bright: rinse away food particles, apply a mild soap if needed, then wipe dry with a soft cloth to prevent water spots and mineral buildup.
Perform this after each use, checking drain and edges.
Use gentle circular motions, avoid abrasive pads, and guarantee all soap residue is removed.
Finish by buffing with a dry microfiber.
Weekly deeper clean: step-by-step instructions
After the routine rinse-and-wipe, a weekly deeper clean restores shine and removes buildup that daily care can miss.
Fill the sink with warm water, add mild dish soap, and soak for five minutes.
Gently scrub with a soft sponge and nonabrasive cleaner. Rinse thoroughly, inspect for spots, treat stubborn deposits with a paste of baking soda and water, then rinse again.
Drying and buffing for scratch-free shine
Dry and buff the copper sink promptly to prevent water spots and fine scratches: use a soft, lint-free towel to remove all moisture, then follow with a gentle circular buff using a microfiber cloth to restore luster without abrading the surface.
Perform daily drying after use; weekly, apply a light, approved copper polish sparingly, then buff to blend and maintain an even, scratch-free sheen.
How to Remove Specific Stains and Problems
This section outlines targeted methods for common copper sink issues, including step-by-step removal of mineral deposits and hard water rings.
It contrasts techniques for controlling tarnish versus preserving desirable patina, and gives specific remedies for food stains like tomato, coffee, and citrus.
Procedures for addressing rust around drains and hardware are also presented with safety and finish considerations.
Mineral deposits and hard water rings step-by-step
Tackle mineral deposits and hard water rings by removing the alkaline buildup that dulls copper and creates rough, whitish crusts; using mild acidic solutions and gentle abrasion restores luster without harming the metal.
Apply diluted white vinegar or lemon juice, let sit briefly, scrub with a soft cloth or nonabrasive pad, rinse thoroughly, dry immediately, repeat spot-treated areas until deposits dissolve, then polish gently.
Tarnish and patina control vs. preservation
Many copper sink owners must decide whether to remove tarnish and restore a bright finish or to preserve the aged patina that developed naturally over time.
The choice depends on aesthetic preference and maintenance tolerance. Removing tarnish requires gentle polishing and protective sealant; preserving patina favors light cleaning and applying a clear wax occasionally.
Documented test spots prevent unwanted alteration.
Removing food stains (tomato, coffee, citrus)
Several common foods — tomato, coffee, and citrus — can leave distinct stains or etch marks on copper sinks that require targeted treatment.
For fresh stains, rinse and blot promptly. Use a mild, pH-neutral cleaner or a paste of baking soda and water for gentle abrasion.
For acidic etching from citrus, neutralize with a diluted baking soda rinse, then dry and reapply protective wax.
Dealing with rust around drain and hardware
A few common sources of rust around the drain and hardware—mineral-rich water, trapped moisture, and corroding metal components—require prompt, targeted attention to prevent spread and pitting.
Use a soft brush and white vinegar or lemon juice to dissolve surface rust; rinse thoroughly.
For persistent corrosion, apply a mild chelating cleaner per instructions, replace damaged fittings, and dry the area to inhibit recurrence.
How to Remove Scratches and Restore Surface
The text begins by noting that evaluating scratch depth and whether patina variation is acceptable guides the choice of repair.
It then outlines step-by-step methods for addressing light surface scratches without harming the finish.
Finally, it explains indicators—such as deep gouges or widespread damage—when professional refinishing is advisable.
Assessing scratch depth and acceptable patina changes
Many copper sink owners must first determine whether scratches are superficial or penetrate the metal before deciding on repair.
Inspect under bright light, run a fingernail across the mark, and compare color differences. Minor surface abrasions may only affect lacquer or patina; deeper gouges reveal raw copper and risk corrosion.
Note acceptable patina variation before choosing restoration methods.
Scratch removal steps for light surface scratches
Begin by cleaning the scratched area with a mild, pH-neutral cleaner and a soft cloth to remove oils and debris that could interfere with repair.
Light scratches are gently buffed using a non-abrasive pad or 0000 steel wool following grain direction.
Apply a small amount of copper polish, buff until even, then wipe residue and seal with a thin layer of wax to protect the finish.
When to call a professional for refinishing
When is it appropriate to involve a professional for refinishing? A professional is recommended when scratches are deep, widespread, or penetrate patina, when repairs risk altering sink shape or causing uneven color, or when DIY methods fail. Also seek pros for antique or high-value sinks, warranty concerns, or when a consistent, durable finish and color-matching are essential.
Safe Homemade Cleaning Recipes and When to Use Them
The section outlines safe homemade recipes and guidance for choosing copper-safe products.
Recommended topics include a gentle vinegar–baking soda mix with cautions, a lemon-and-salt method with cautions, and how to identify safe commercial cleaners.
Readers should consider:
- Effectiveness
- Potential abrasion
- Chemical compatibility
- Finish protection
Gentle vinegar-baking soda mix recipe and cautions
Mixing a mild solution of white vinegar and baking soda offers an effective, low-abrasion option for routine copper sink care.
Combine one part white vinegar with two parts water, add a teaspoon of baking soda to form a gentle paste.
Apply briefly, rinse thoroughly, dry with a soft cloth.
Avoid prolonged contact, harsh scrubbing, and use on lacquered or damaged finishes.
Lemon and salt method recipe and cautions
Another mild, food-safe option is a lemon-and-salt scrub that brightens copper while providing gentle abrasion.
Mix coarse salt with fresh lemon juice to form a paste. Rub lightly with a soft cloth following the grain, rinse thoroughly, and dry to prevent water spots.
Avoid prolonged contact, acidic soaking, or abrasive pads that can dull or scratch the finish.
Commercial cleaners that are copper-safe what to look for
When choosing a commercial cleaner for copper sinks, look for products labeled specifically as safe for copper or non-abrasive metals and for formulas that are pH-neutral or mildly acidic rather than strongly alkaline. Select cleaners with mild chelating agents, avoid bleach, test inconspicuous areas, and follow manufacturer instructions.
| Feature | Benefit | Note |
|---|---|---|
| pH-neutral | Preserves patina | Safe for finishes |
| Mild acid | Removes tarnish | Use sparingly |
| Non-abrasive | Prevents scratches | Gentle application |
| No bleach | Prevents corrosion | Read label |
Preventive Measures to Keep Copper Sinks Shiny
Practical preventive measures keep a copper sink looking bright and minimize the need for abrasive cleaning. Recommendations include daily habits to avoid staining and scratches, guidance on detergents, sponges, and limiting direct contact with metal cookware, and a simple seasonal schedule for deeper maintenance.
Following these concise practices preserves the finish and reduces long-term wear.
Daily habits that prevent staining and scratches
Establishing simple daily habits can greatly reduce staining and surface damage to a copper sink.
Regular rinsing removes residues; gentle drying prevents water spots. Avoid leaving acidic foods or standing water. Promptly address spills to maintain patina and prevent dulling.
- Rinse after use
- Wipe dry with soft cloth
- Remove spills immediately
- Inspect for debris daily
Best practices for detergents, sponges, and metal cookware contact
Although careful daily rinsing and drying are essential, selecting the right detergents, sponges, and cookware practices is equally important for preserving a copper sink’s finish.
Use mild, pH-neutral cleaners; avoid bleach, ammonia, and acidic detergents. Choose soft microfiber or non-abrasive sponges. Never scrub with steel wool.
Lift heavy cookware instead of dragging; place silicone or rubber pads under pots to prevent scratches and dents.
Seasonal deep maintenance schedule
After mastering daily rinsing and careful product choices, a seasonal deep maintenance schedule preserves a copper sink’s luster and prevents long-term wear.
Quarterly tasks include gentle polishing with approved copper cleaners, inspecting and reapplying protective wax or sealant, checking for scratches or verdigris, and addressing hard-water deposits with diluted vinegar.
Documenting dates guarantees consistent care and timely repairs to maintain finish integrity.
Common Mistakes to Avoid When Cleaning Copper Sinks
Cleaning copper sinks requires avoiding certain common errors that can damage the metal.
Harsh abrasives and strong acidic cleaners can strip protective coatings, while over-polishing may remove a desirable patina.
Using improper tools or techniques can cause scratches and accelerate wear.
Harsh abrasives and acidic cleaners to avoid
Avoid abrasive pads and strong acids when caring for copper sinks because they strip the metal’s protective patina and can create permanent discoloration or pitting.
Scouring powders, steel wool, bleach, and undiluted vinegar should be avoided. Instead, use soft cloths, mild soap, and pH-neutral cleaners.
Test unfamiliar products on an inconspicuous area first to prevent irreversible damage.
Over-polishing and stripping desirable patina
Polish sparingly to preserve the rich, protective patina that gives copper sinks their character and corrosion resistance. Excessive polishing removes this beneficial layer, exposing softer metal and accelerating wear, discoloration, and potential corrosion.
Maintain patina with gentle cleaning and occasional light buffing; reapply appropriate wax or sealant rather than aggressive polishing. Preserve finish integrity to extend sink lifespan and aesthetic appeal.
Improper tools and techniques that cause scratches
Using the wrong tools or techniques can quickly mar a copper sink’s surface, turning gentle wear into visible scratches and abrasions.
Abrasive pads, steel wool, gritty cleaners, and harsh brushes remove finish and gouge metal. Excessive force, circular scrubbing, and power tools cause permanent damage.
Instead, use soft cloths, nonabrasive sponges, mild cleaners, and light, directional motion to preserve finish and patina.
Comparing Maintenance for Different Copper Sink Finishes
Different copper sink finishes require distinct maintenance approaches, with hammered, smooth, and lacquered surfaces each responding differently to cleaners and abrasives. A concise comparison helps homeowners choose between preserving a natural patina or restoring a bright, polished look and outlines pros and cons of each choice. The table below summarizes key cleaning differences and the trade-offs of patina preservation versus brightening.
| Finish Type | Maintenance Notes |
|---|---|
| Hammered | Gentle cleaning to protect texture; patina can enhance character |
| Smooth / Lacquered | Smooth needs mild cleaners; lacquered resists patina but can be damaged by abrasives |
Hammered vs. smooth vs. lacquered: cleaning differences
While all copper sinks require gentle care to preserve their appearance, maintenance needs vary considerably with finish: hammered, smooth, and lacquered surfaces each respond differently to water spots, acids, and abrasive cleaners.
Hammered sinks hide minor scratches and require gentle wiping; smooth sinks show spots and benefit from mild polish; lacquered sinks need nonabrasive cleaners and avoidance of solvents to protect the coating.
Pros and cons of preserving patina vs. restoring bright finish
Deciding between preserving a natural patina and restoring a bright finish hinges on desired aesthetics and acceptable maintenance: patina offers a low-gloss, lived-in look that masks wear but evolves unpredictably, whereas a bright finish delivers uniform sheen and easier spot-cleaning at the cost of frequent polishing and greater vulnerability to scratches and harsh chemicals.
Owners choosing patina accept variability and gentler cleaners; bright finishes need consistent care and protective coatings.
When to Refinish, Reseal, or Replace a Copper Sink
Visible wear such as peeling sealant, persistent staining, or uneven patina often indicates the need for resealing or refinishing.
Refinishing can be more cost-effective than replacement but requires time for prep and curing, whereas replacement is costlier and more permanent.
Temporary fixes like spot cleaning or touch-up coatings may suffice short-term, but a full reseal or refinish is recommended for lasting protection.
Signs you need resealing or refinishing
How can a homeowner tell when a copper sink needs resealing or refinishing? Observable signs include dull, uneven patina; persistent stains or verdigris that cleaning won’t remove; water pooling or beading changes indicating seal failure; surface scratches exposing bare metal; flaking or blistering of finish; and recurring odors or corrosion spots.
If damage affects appearance or protection, reseal or refinish.
Cost and timeline considerations for refinishing
After identifying worn or damaged areas that warrant attention, homeowners should weigh the costs and time involved in refinishing versus resealing or replacing a copper sink.
Refinishing typically costs more than resealing but restores appearance and patina for several years, taking a day to a few days including curing.
Replacement incurs higher materials and labor costs and longer downtime; resealing is quickest and least expensive.
Temporary fixes vs. permanent solutions
Decide whether a temporary patch or a permanent fix best fits the sink’s condition by evaluating the severity of wear, the owner’s long-term plans, and budget constraints.
Minor scratches and patina can be corrected with polishing or resealing as interim measures.
Deep corrosion, persistent leaks, or structural damage warrant refinishing or replacement.
Choose refinishing for cost-effective restoration; replace when integrity or style demands it.
Checklist: Cleaning and Maintenance Timeline
A simple, consistent checklist helps maintain a copper sink’s finish and catch minor issues before they worsen.
The schedule balances daily care with deeper maintenance, preserving patina and preventing damage.
Follow a concise timeline to stay proactive and calm:
- Daily: Rinse, dry, mild soap.
- Weekly: Gentle polish, inspect drains.
- Monthly: Sealant check, touch-up.
- Yearly: Professional inspection, reseal.
Conclusion
A copper sink, like a trusted old coin, rewards gentle attention: routine wiping and occasional mild scrubbing preserve its warm glow while preventing scratches and stubborn stains. With proper tools, safe cleaners, and timely resealing, most issues—patina changes, verdigris, mineral buildup—remain manageable. Avoid abrasive pads and harsh chemicals; monitor finish type and act when wear or persistent blemishes appear. Consistent, simple care keeps copper both functional and striking.