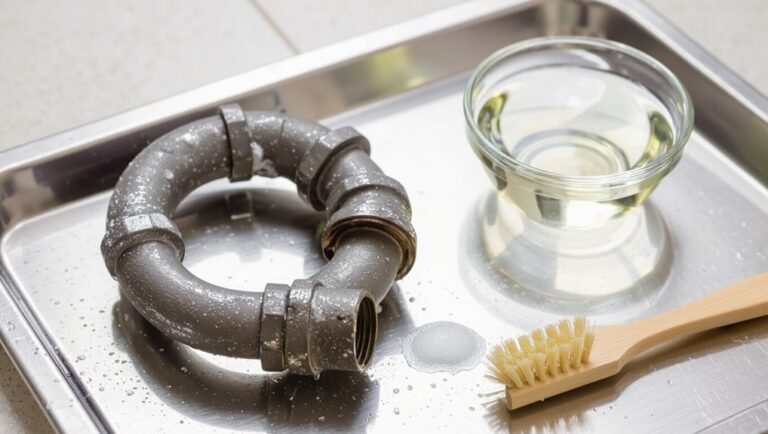
How to Clean a Drain Trap: Step-by-Step Guide to Remove Odors and Clogs
To effectively clean a drain trap and eliminate odors and clogs, follow these steps: First, shut off the water supply and place a bucket underneath the trap. Next, loosen the slip joints to remove the trap for inspection. Clear any debris using brushes, then rinse the trap with hot water before reassembling it. Finally, check for leaks to ensure everything is secure. For in-place clogs, consider using a snake, wet/dry vacuum, or enzymatic cleaner. Regular flushing can help prevent future issues. Further troubleshooting tips are available if needed.
What a Drain Trap Is and Why It Smells or Clogs
A drain trap—most commonly a P-trap or S-trap—holds water in a curved section of pipe to block sewer gases from entering a home.
Odors and clogs arise when that water seal evaporates, when debris like hair, grease, or mineral buildup accumulates, or when the trap is improperly installed or vented.
Persistent smells, slow drainage, gurgling sounds, or frequent backups indicate the trap needs cleaning or attention now.
How a P-trap and S-trap work to block sewer gases
When water fills the curved section of a P-trap or S-trap, it forms a seal that prevents sewer gases from traveling back into the room.
The trapped water acts as a barrier while gravity directs waste onward; venting equalizes pressure.
Regular maintenance, including how to clean a drain trap, preserves the water seal and prevents loss of the barrier due to evaporation or leakage.
Common causes of odors and clogs in traps
Many common odors and clogs in drain traps stem from organic buildup, hair, grease, and trapped debris that accumulate in the curved section where water normally sits.
Food particles, soap scum, and mineral deposits foster bacterial growth and odor.
Improperly installed vents, slow drains, and foreign objects worsen accumulation.
Chemical reactions and stagnant water amplify smells and solidify blockages over time.
Signs your trap needs cleaning now
Following buildup from organic matter, hair, and grease, signs that a trap requires immediate cleaning become more apparent.
Persistent foul odors, slow draining or standing water, gurgling sounds during flushing, frequent backups, and recurring insect sightings indicate blockage.
Visible residue when inspecting the trap, sulfury or rotten-egg smells, and repeated need for chemical treatments also signal that disassembly and manual cleaning are necessary.
Tools, Materials, and Safety Precautions
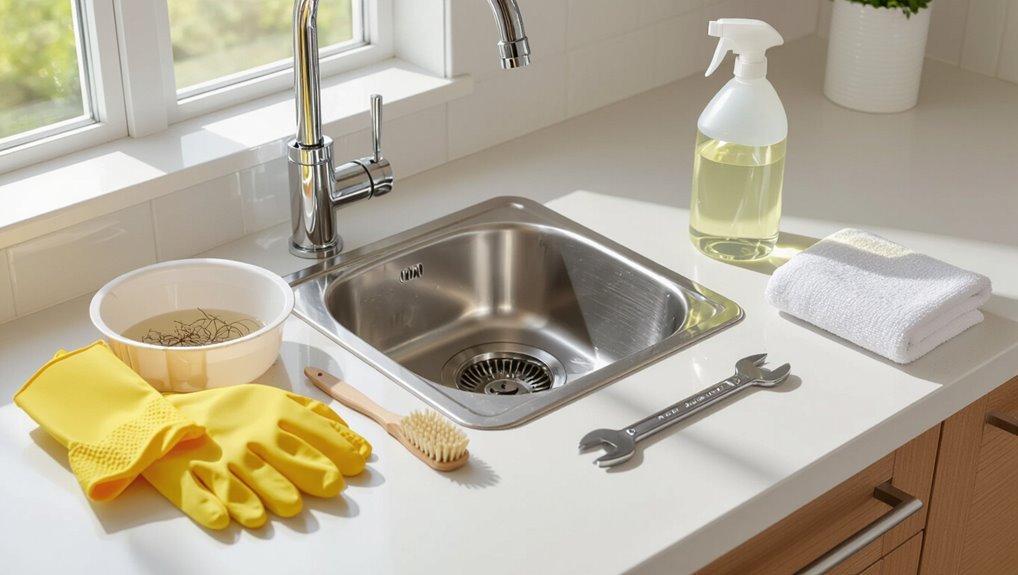
Before beginning, a concise checklist of essential tools and supplies—such as a wrench, bucket, gloves, and suitable cleaners—should be assembled.
Appropriate personal protective equipment and good ventilation are emphasized to prevent chemical exposure and skin or eye injuries.
If corrosion, persistent leaks, or complex blockages are present, a professional plumber should be contacted.
Essential tools and supplies checklist
A concise kit of tools, materials, and safety gear makes drain trap cleaning efficient and safe:
basic hand tools (adjustable wrench, pliers), a bucket and rags, a replacement washer or slip-nut, mild drain-safe cleaner or baking soda and vinegar, and protective items (gloves and safety glasses) to prevent contact with debris and chemicals.
- Tools: wrench, pliers, screwdriver
- Supplies: bucket, rags, replacement parts
- Cleaners: baking soda, vinegar, mild detergent
Personal protective equipment and ventilation
Several key pieces of personal protective equipment and proper ventilation greatly reduce exposure to biological debris and cleaning chemicals when working on a drain trap.
Gloves, safety goggles, and a mask protect skin, eyes, and respiratory passages. Long sleeves and closed-toe shoes add barrier protection.
Verify windows or fans provide cross-ventilation; consider a respirator for strong chemical use. Dispose of contaminated PPE properly.
When to call a professional plumber
When should a homeowner consider calling a professional plumber? A professional should be contacted if persistent odors, recurring clogs, visible leaks, damaged trap components, or signs of sewer backup occur.
Also call when tools or replacement parts are lacking, chemical treatments fail, plumbing access is complex, or local codes and warranties require licensed service.
Prompt professional assessment prevents damage and health risks.
Step-by-Step Guide to Remove and Clean a Drain Trap
The following section outlines a concise, step-by-step procedure for removing and cleaning a drain trap, beginning with preparation such as shutting off water, staging tools, and placing a bucket.
It then covers removal techniques for both slip-joint and threaded traps, methods for clearing debris and buildup, and options for cleaning including manual, enzymatic, and mild chemical approaches.
Finally, it explains reassembly and testing for leaks to guarantee the repair is secure.
Preparation: shut-offs, staging, and placing a bucket
Before loosening any connections, confirm water sources are isolated and the work area is prepared: shut off the sink’s cold and hot supply valves (or the home’s main if necessary), clear space beneath the sink, and position a bucket directly under the trap to catch water and debris.
Wear gloves, lay down rags or a tray for small parts, and keep flashlight and pliers within reach.
Removing the trap: step-by-step for slip-joint and threaded traps
Begin by confirming the bucket is positioned and the supply valves remain shut; then work methodically from the sink tailpiece down.
For slip‑joint traps, loosen the slip nuts with channel pliers, slide the nut and washer off, and lower the trap into the bucket.
For threaded traps, unthread the connections by hand or with a wrench, supporting the trap to prevent sudden spills.
Clearing debris and buildup from the trap body
Once removed, the trap body should be emptied into the bucket and inspected for clogs, greasy residue, hair, and mineral scale.
Use a brush and gloved fingers to dislodge compacted material, tapping gently to free sediment.
Rinse with water to confirm flow through the inlet and outlet.
Set aside parts for further cleaning or replacement if pitting or excessive corrosion is evident.
Cleaning methods: manual, enzymatic, and mild chemical options
Choose the appropriate cleaning approach based on the type of buildup, material of the trap, and household safety considerations:
Manual scrubbing with a brush and warm soapy water removes hair and grime safely;
enzymatic cleaners digest organic residue over hours without harming pipes;
mild chemical solutions (diluted bleach or drain cleaners) can tackle stubborn clogs but require ventilation, protective gloves, and manufacturer guidance to avoid damage or hazard.
Reassembling the trap and testing for leaks
Reassemble the trap by aligning the slip nuts and washers, hand-tightening them evenly to avoid cross-threading while ensuring the gasket seats properly.
Then snug each nut with a wrench—careful not to overtighten plastic fittings.
Place a bucket beneath, run water to fill the trap, and observe joints for drips.
If leaks appear, tighten incrementally or reseat washers; retest until dry.
Preventing immediate odors after cleaning
To prevent immediate odors after cleaning a drain trap, flush the trap and surrounding pipes with hot water for several minutes to dissolve residual grime.
Then run a mixture of equal parts baking soda and white vinegar—allowing it to fizz for 5–10 minutes—before flushing again.
Finally, pour a small amount of household bleach or a commercial enzymatic cleaner down the drain if odors persist, and confirm the trap remains filled with water to maintain its seal.
Verify vents are clear and traps are rechecked for leaks.
Alternative Methods When You Can’t Remove the Trap
When the trap cannot be removed, several non-invasive options are available.
A plumber’s snake or auger can be fed down the drain to break up or retrieve obstructions, while a wet/dry vacuum may pull clogs upward.
For routine buildup, in-place flushing and enzyme treatments offer a safe chemical-free alternative.
Using a plumber’s snake or auger from the drain
If removing the trap is impossible, a plumber’s snake or hand auger can be fed down the drain to break up or retrieve the clog.
Wear gloves, insert the cable slowly, and rotate the handle to catch debris. Withdraw periodically to clear material.
Use a shorter, flexible auger for sinks; avoid excessive force to prevent pipe damage.
Finish with a hot water flush.
Wet/dry vacuum technique for pulling clogs
As an alternative to feeding a snake, a wet/dry vacuum can be used to pull clogs out of a drain when the trap cannot be removed.
Seal the vacuum hose against the drain with a wet rag or adapter, set to liquid mode, and apply short bursts of suction.
Inspect collected debris, repeat as needed, and sanitize the hose afterward.
Use caution with fragile pipes.
Safe in-place flushing and enzyme treatments
Use low-pressure water and biological cleaners to clear and maintain a trap without removing it. A gentle flush dislodges soft buildup; avoid high pressure to protect seals.
Enzyme or bacterial formulations digest organic debris and control odors when used per label directions. Repeat treatments weekly until clear, then monthly for prevention.
Monitor for leaks and discontinue if deterioration appears.
Troubleshooting Common Problems
If odors persist after cleaning, the text outlines specific areas to inspect such as residual debris, venting issues, and seal integrity.
It then explains how to distinguish a loose connection that needs tightening from a seal or fitting that requires replacement when leaks appear after reassembly.
Finally, it describes common signs of cracked or corroded trap components and the basic steps for removing and installing replacement parts.
Persistent odor after cleaning: what to check
Why does an odor linger after a thorough trap cleaning?
Remaining smells often stem from buildup in nearby piping, a dry secondary trap, or trapped debris in branch lines.
Check vent blockages, overflow or shower drains, and rubber seals under sinks.
Inspect for mold in cabinet cavities and residue on fixtures.
If sources persist, consider professional video inspection to locate hidden deposits.
Leaks after reassembly: tightening vs replacing parts
Inspecting the reassembled trap for leaks begins with a systematic check of connections and seals: tighten slip nuts finger‑tight plus a quarter turn with a wrench, but stop if threads bind or plastic parts deform.
If minor seepage persists, reseat or replace worn washers and clean mating surfaces. Continuous leaks after cautious tightening indicate component failure requiring replacement rather than further force.
Damaged trap components and how to replace them
Begin by identifying which trap components show visible damage or persistent failure signs—cracked or warped trap bodies, stripped or cracked slip nuts, deteriorated washers and gaskets, or corroded metal parts.
Remove the trap, note part sizes and materials, buy matching replacements, and install new washers, nuts, or trap sections.
Tighten evenly, test for leaks, and replace corroded connectors or seals promptly to prevent recurrence.
Routine Maintenance to Prevent Future Clogs and Odors
Regular weekly and monthly cleaning habits help stop buildup before it becomes a clog, and simple routines are outlined below.
The guide also lists common items that should never be poured down a drain and explains which commercial products work best versus effective natural alternatives.
Following these practices reduces odors and extends the life of the trap.
Weekly and monthly cleaning habits
Although minor buildup may go unnoticed day-to-day, establishing concise weekly and monthly cleaning habits keeps drain traps clear and odors at bay.
Weekly: rinse with hot water, run a brush or drain snake, and remove visible debris.
Monthly: inspect trap for leaks, flush with a mild enzymatic cleaner, and tighten fittings as needed.
Record maintenance dates for consistency.
What not to put down the drain
Maintaining weekly and monthly habits reduces buildup, but preventing clogs starts with what is never allowed down a drain.
Grease, coffee grounds, fibrous vegetable peels, egg shells, and starchy pasta or rice should be discarded, not washed.
Flushed wipes, cotton swabs, hair clumps, and heavy chemical mixes also cause blockages.
Proper disposal and mindful rinsing prevent odors and costly plumbing issues.
Recommended products and natural alternatives
Several effective options exist for routine drain care, ranging from commercial enzymatic cleaners and enzyme-based tablets that break down organic buildup to simple natural remedies like baking soda with vinegar, hot water flushes, and a monthly pour of diluted bleach for non-septic systems.
- Enzymatic cleaners — safe for pipes, regular use prevents buildup.
- Baking soda + vinegar — inexpensive, periodic maintenance.
- Hot water flushes — preserves flow, avoids chemicals.
Comparing Trap Materials and Replacement Options
When considering trap materials and replacement options, the discussion compares plastic and metal traps by durability, cost, and ease of installation while noting low-profile designs for tight cabinet spaces. Homeowners weigh longevity and corrosion resistance of metal against the affordability and corrosion-free nature of plastic. Space-saving traps and low-profile models are highlighted for installations where clearance is limited.
| Feature | Plastic Traps | Metal Traps |
|---|---|---|
| Durability | Moderate, can crack over time | High, resists impact and wear |
| Cost | Low | Higher upfront |
| Installation | Lightweight, easier to fit | Heavier, may require tools/skill |
| Space-saving options | Available (low-profile models) | Some low-profile brass options |
| Corrosion resistance | Excellent (PVC/ABS) | Varies (stainless resists best) |
Plastic vs metal traps: durability, cost, and installation
A choice between plastic and metal drain traps hinges on differences in durability, cost, and ease of installation:
plastic (typically PVC or ABS) is lightweight, inexpensive, and simple to fit, while metal (usually brass or chrome-plated brass) offers greater longevity and resistance to heat and solvent exposure but costs more and can require tools or threads that complicate replacement.
Plastic resists corrosion; metal withstands impact and high temperatures.
Low-profile and space-saving trap options for cabinets
Beyond material choice, cabinet layout often dictates the form factor of the trap installed beneath a sink. Low-profile traps, segmented P-traps, and bottle traps minimize intrusion, preserving storage and allowing closer positioning to walls.
Flexible or slip-joint designs simplify alignment in tight spaces. Selection balances clearance, ease of cleaning, leak resistance, and code compliance; professionals often recommend compact metal or durable ABS options.
Quick Reference: Tools, Steps, and Timings
Several essential tools and a simple timeline make clearing a drain trap efficient and predictable.
The technician assembles minimal tools, follows concise steps, and expects set timings to finish without surprises.
- Tools: bucket, wrench, gloves — 5 minutes setup.
- Steps: shutoff, loosen, empty, clean, reassemble — 20–30 minutes.
- Timings: test and tidy — 5–10 minutes.
Conclusion
The guide empowers homeowners to identify causes, gather tools, and act safely; it explains how to remove, inspect, and clean traps, and how to use alternatives when removal is impossible. It outlines troubleshooting for leaks, stubborn clogs, and damaged seals, and it recommends routine maintenance to prevent recurrence. It compares materials and replacement options, and it summarizes tools, steps, and timings—clear, practical, and actionable for lasting odor control and reliable drainage.