How to Stop the Toilet From Overflowing: Quick Fixes and Long-Term Solutions
To stop a toilet from overflowing, first turn off the water supply and press the float or flapper to halt the flow. Use a plunger or toilet auger to clear common clogs, and for mild blockages, hot water and baking soda can be effective. Regular maintenance, including inspecting and replacing worn flappers, fill valves, or adjusting floats, can prevent future issues. If you suspect a sewer backup, it’s best to call a professional. After any incident, sanitize spills and check seals to prevent mold growth. For detailed step-by-step instructions on unclogging, maintenance, and replacements, continue reading.
What Causes a Toilet to Overflow
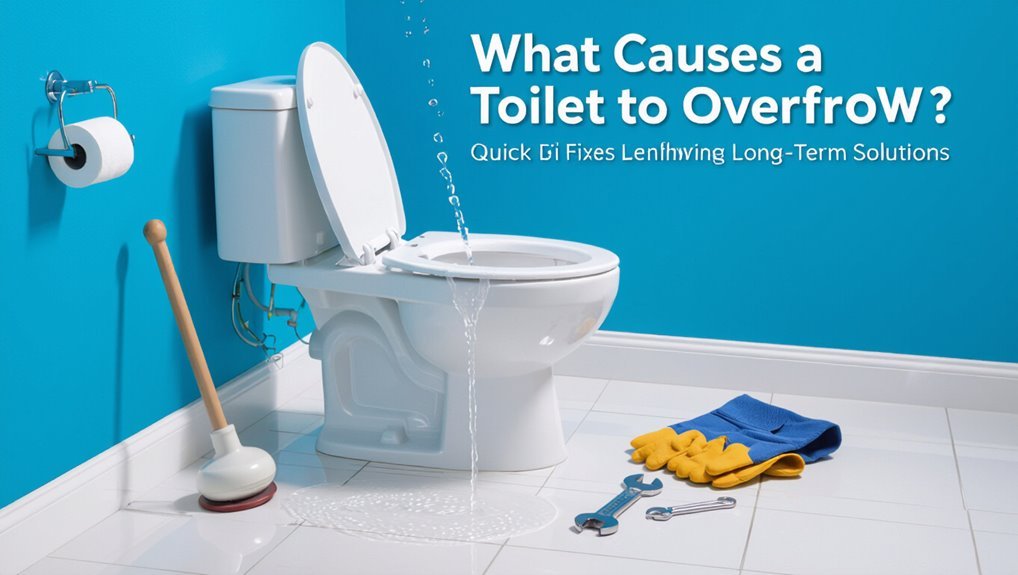
A range of mechanical faults can trigger a toilet to overflow, from internal tank components failing to external sewer problems.
Common causes include clogs from toilet paper or foreign objects in the trap or drain, malfunctioning fill valves, floats, or flappers that mismanage water levels, and backups in the sewage line due to tree roots or municipal issues.
Identifying the specific source guides the appropriate corrective steps.
Common mechanical issues that lead to overflow
Many toilet overflows stem from simple mechanical failures within the tank or drain line that disrupt water flow and level control.
Faulty fill valves, worn flappers, improperly adjusted float arms, and malfunctioning overflow tubes commonly cause continuous filling or insufficient shutoff.
Toilet owners seeking how to stop the toilet from overflowing should inspect and replace these components, ensuring correct alignment and seals to restore reliable operation.
Clogs and blockages: materials and locations
Several common materials and specific locations in the drain system create the blockages that trigger toilet overflows.
Hair, paper towels, wipes, sanitary products, grease, and mineral buildup commonly lodge in the trap, S-bend, or near the outlet.
Tree roots and collapsed pipe sections cause deeper obstructions.
Each obstruction restricts flow, raising water level until backflow or overflow occurs.
Problems with the fill valve, float, and flapper
Malfunctions in the fill valve, float, and flapper are frequent mechanical causes of toilet overflow because they control water entry and discharge. A stuck or misaligned float can allow continuous filling. A worn or warped flapper can fail to seal the flush valve and permit constant leakage into the bowl (prompting the fill mechanism to run).
A faulty fill valve can either overfill the tank or fail to shut off properly, all of which upset the tank–bowl balance and lead to spills. Routine inspection, timely replacement, and proper adjustment restore reliable shutoff and prevent tank overfill.
Sewage line backups and external causes
Sewage line backups and external factors can push wastewater back into a toilet, causing sudden or recurrent overflows that are unrelated to the tank’s internal components.
Blocked sewer mains, municipal system failures, heavy rain causing sewer surcharge, tree root intrusion, or collapsed pipes can force sewage into fixtures.
Professional inspection, sewer cleaning, and municipal coordination are usually required to resolve and prevent recurrence.
Immediate Actions to Prevent an Overflow Right Now
When a toilet shows signs of imminent overflow, immediate steps focus on stopping the water flow and relieving pressure in the bowl.
Recommended actions include pushing the flapper or turning the shutoff valve to stop water, using a plunger with proper technique to clear the trap, and shutting off the supply if problems persist.
For minor spills, quick, safe cleanup with gloves, absorbent materials, and disinfectant prevents contamination and further damage.
How to stop the water flow quickly
Act quickly to stop the water flow by shutting off the toilet’s water supply valve—usually located on the wall or floor behind the bowl—and turning it clockwise until it stops.
If the valve is inaccessible or stuck, lift the tank lid and firmly press the float to halt incoming water or push the flapper down to seal the flush.
Wipe spills, remove excess water with a bowl or container, and call for repairs.
Using a plunger correctly to relieve overflow risk
Grasping and using a plunger correctly can quickly relieve a partial blockage and reduce the risk of an overflow.
Position the flange plunger to form a tight seal over the drain, then push down slowly and pull up sharply several times without breaking the seal.
Inspect water level; repeat if needed.
Clean and disinfect the plunger and surrounding area afterward.
When to shut off the toilet water supply
How quickly should the water be shut off depends on visible signs of an impending overflow: rising water, continuous gurgling, or repeated failed plunging attempts indicate immediate shutoff is necessary. The valve behind the toilet should be turned clockwise until flow stops. If the valve is stuck or water continues, close the home’s main supply and call a plumber. Act promptly to limit damage.
Safe cleanup steps for minor overflows
Once the water supply is stopped, immediate cleanup of a minor toilet overflow focuses on containing water, reducing contamination spread, and protecting surfaces.
Wear gloves and boots, ventilate the area, blot and mop standing water toward the drain, and remove soaked rugs or porous items for disposal.
Disinfect affected floors and surfaces with appropriate cleaner, allow thorough drying, and wash hands and clothing afterward.
Step-by-Step Guide to Unclogging a Toilet
A clear checklist of basic tools and safety items precedes any unclogging attempt.
The guide then describes the correct plunging motion, safe use of a toilet auger, and which household remedies can be tried or should be avoided.
Emphasis is placed on when to stop and call a professional.
Tools you’ll need
Preparing the right tools before attempting to unclog a toilet saves time and prevents damage.
Essential items include rubber gloves, a flange or cup plunger, a toilet auger, a bucket, and absorbent rags.
Optional but useful: protective eyewear, biohazard disinfectant, and a hand pump or wet/dry vacuum.
Make certain tools are clean, accessible, and designated for bathroom use only.
Proper plunging technique for toilets
With tools gathered, attention shifts to the plunging technique that resolves most blockages.
The person positions a flange plunger to seal the bowl outlet, guarantees water covers the rubber cup, then uses steady, forceful thrusts—60% push, 40% pull—to dislodge debris.
After several pumps, they break suction with a final strong pull, flush to verify flow, and repeat if necessary.
Using a toilet auger/snake safely
Insert the auger carefully and feed it slowly to avoid damaging porcelain or the trap; the technician keeps a firm grip on the handle, advances the cable while turning clockwise, and stops when resistance is met to begin breaking through the obstruction.
Retract gently, clear debris into a bucket, sanitize the auger and surrounding area, inspect the bowl for flow restoration, and repeat if necessary.
Household remedies to try and when to avoid them
Although simple fixes can clear many clogs, homeowners should know which household remedies to try first and which to avoid to prevent damage or health risks.
Try hot (not boiling) water and a plunger, or a baking soda-vinegar fizz followed by hot water.
Avoid chemical drain cleaners, bleach mixtures, or excessive force that can crack porcelain, damage seals, or release toxic fumes.
Fixing Common Tank Mechanism Problems
Attention turns to the tank, where a constantly running or overfilling toilet often signals a malfunctioning float, fill valve, or flapper.
The section will explain how to diagnose the problem, adjust or replace the float and fill valve, and inspect or swap out a faulty flapper.
Guidance will also indicate when replacing the entire fill assembly is the most reliable solution.
Diagnosing a running or constantly filling toilet
Diagnosing a toilet that runs or keeps filling begins with observing the tank while it cycles to identify where water is escaping or refilling improperly.
Common culprits include a faulty flapper, a misadjusted float, or a damaged fill valve.
Inspect flapper seating, chain slack, overflow tube height, and residual water level.
Listen for continuous flow, test by adding dye, and note intermittent versus constant leaks.
How to adjust or replace the float and fill valve
Begin by shutting off the water supply and flushing to empty the tank.
Then inspect the float and fill valve assembly to determine whether a simple adjustment will restore proper water level or if replacement is required.
Tighten or bend the float arm, adjust the float height, or replace a worn fill valve per manufacturer instructions.
Test for steady shutoff and correct overflow tube alignment.
How to inspect and replace a faulty flapper
After adjusting or replacing the float and fill valve, attention shifts to the flapper, a common source of slow leaks and constant refilling.
Inspect for warping, mineral buildup, or brittle rubber. Turn off water, drain tank, unhook flapper chain, and remove old flapper.
Match size/type, install new flapper, reconnect chain with slight slack, restore water, and test for a firm seal and proper flush.
When to replace the entire fill assembly
When should the entire fill assembly be replaced rather than repaired?
Replace it when persistent leaks, corrosion, warped or cracked components, or repeated malfunctions occur despite part replacements.
Also replace if models are obsolete or spare parts unavailable, if water usage is excessive due to inefficiency, or if multiple failure points exist.
Full replacement restores reliability, conserves water, and prevents recurring overflow risks.
Addressing Drain Line and Sewer Backups
Visible water backing up in multiple fixtures or sewage odors indicate a main sewer backup, whereas a single slow or clogged toilet usually points to a local blockage.
Homeowners can attempt limited remedies like a plunger, toilet auger, or enzymatic drain cleaner for minor sewer line obstructions, but mechanical snaking and chemical treatments have practical and safety limits.
Professional plumbers or sewer specialists should be contacted when backups affect multiple drains, recurring clogs persist, or when cleanouts and camera inspection are required.
Signs of a main sewer backup versus a local clog
How can one tell if a backup stems from the main sewer line or a local clog?
Signs of a main sewer backup include multiple fixtures backing up simultaneously, gurgling drains throughout the house, sewage odors in the yard or basement, and water rising from outdoor cleanouts.
A local clog typically affects a single fixture, produces isolated slow drains, and emits localized odors.
How to clear sewer line blockages (DIY limits)
Begin by evaluating the situation calmly: simple clogs in a single fixture can often be cleared with a plunger, drain snake, or enzymatic cleaner.
However, repeated backups, sewage odors, multiple affected fixtures, or sewage at cleanouts indicate a main sewer issue that exceeds typical DIY remedies and requires professional service.
For manageable blockages, use a hand auger, hot water with mild detergent, or enzyme treatments; avoid harsh chemicals and excessive force.
When to call a professional plumber or sewer specialist
When backups involve multiple fixtures, persistent sewage odors, sewage emerging from cleanouts, repeated clogs despite correct DIY attempts, or sewage backing up into the home, a professional plumber or sewer specialist should be called promptly.
These signs indicate a main sewer or deep drain-line failure that requires specialized equipment, diagnostic tools, and often corrective repairs beyond typical homeowner methods.
A specialist assesses causes, performs camera inspections, and executes repairs like hydro-jetting, pipe repair, or replacement.
Preventive Maintenance to Keep Toilets from Overflowing
Preventive maintenance focuses on routine checks of flapper, fill valve, bowl seal, and supply connections to catch wear before it causes overflow.
It also includes household habits to avoid—such as flushing wipes, paper towels, and grease—and guidance on how often to schedule a plumber for professional inspection.
Finally, simple upgrades like pressure-assist units or anti-siphon fill valves can materially reduce the risk of future overflows.
Regular inspection checklist for toilet components
Although often overlooked, a concise regular inspection checklist helps identify small faults before they cause an overflow.
Inspect tank components: fill valve, flapper, flush valve seat, and refill tube for wear or leaks.
Check bowl and trap for cracks, guarantee bolts and seals are tight, and verify water level and float operation.
Test for slow leaks and listen for continuous running.
Habits to avoid (what not to flush)
Many common items that seem flushable are actually culprits behind clogs and overflows; avoiding them is a simple, effective preventive step.
Paper towels, wipes (even “flushable” ones), feminine products, cotton balls, dental floss, diapers, and excessive toilet paper should be disposed of in trash.
Grease, medication, and solids not designed for sewage systems also pose risks.
Consistent user habits reduce backups.
Recommended frequency for professional maintenance
After establishing user habits that reduce clogs, professional inspections and tune-ups provide a technical layer of prevention.
A licensed plumber should inspect toilets and drain lines every 12–24 months, with annual checks recommended for older fixtures or homes with frequent blockages.
Include valve, seal, and fill-mechanism assessments; schedule immediate service if recurring slow drains, gurgling, or odors appear.
Simple upgrades to reduce overflow risk (pressure-assist, anti-siphon)
Consider upgrading key toilet components to cut overflow risk: pressure-assist bowls reduce backup by using compressed air to create a stronger flush, while anti-siphon fill valves and overflow protection devices prevent backflow and uncontrolled tank-to-bowl or drain discharge.
These upgrades shorten clearances, lower clog frequency, and add passive safeguards. Installation by a qualified plumber guarantees compatibility and reliable performance over time.
Tools, Materials, and Costs
The following section lists common tools and replacement parts homeowners may need for toilet repairs, with typical price ranges for DIY fixes versus hiring a professional.
It also outlines factors to evaluate when selecting a plumber and what service fees typically cover.
This information helps readers weigh cost, skill level, and time when deciding whether to attempt repairs themselves or call a pro.
Recommended tools and replacement parts
A concise kit of tools and replacement parts reduces repair time and prevents repeated trips to the hardware store.
Essential items include common tools and spare components for quick fixes and reliable replacements.
- Adjustable wrench, pliers, and screwdriver set
- Flapper, fill valve, and refill tube
- Toilet auger, replacement wax ring, and supply-line washer
Typical cost ranges for DIY repairs vs. professional service
After assembling the recommended kit, homeowners can compare typical costs for handling toilet issues themselves versus hiring a professional. DIY parts (flapper, fill valve, wax ring) usually run $10–$40; basic tools often already owned. Professional service averages $75–$250 for simple repairs, more for complex work. Consider time, warranty, and risk when deciding.
| Option | Typical cost |
|---|---|
| DIY parts | $10–$40 |
| Tools | $0–$50 |
| Professional | $75–$250 |
How to choose a plumber and what to expect in service fees
Often homeowners prioritize reliability and licensing when choosing a plumber, since credentials, reviews, and clear pricing indicate professional competence and reduce the risk of unexpected costs.
Candidates should be insured, offer written estimates, and guarantee work. Expect a trip fee, hourly or flat-rate labor, parts markup, and emergency surcharges.
Compare quotes, check references, and confirm permits for larger repairs.
Troubleshooting Scenarios and Solutions
The next section presents common toilet trouble patterns and clear fixes for each situation.
- Overflow only when flushed
- Toilet continuously fills without flushing
- Multiple fixtures backing up in the house / intermittent overflows during heavy rain
Each bullet will be followed by likely causes and step‑by‑step remedies to isolate and resolve the problem.
Overflow only when flushed
When a toilet only overflows during flushing, the issue typically lies with restricted drain flow or a malfunctioning flush mechanism rather than constant siphoning or tank leaks.
Inspect for partial clogs in the trap or sewer line, a slow-draining bowl, or a misadjusted flapper/overflow tube causing excessive water release.
Clearing blockages or adjusting/replacing flush components usually resolves episodic overflow.
Toilet continuously fills without flushing
Investigate continuous filling as a sign of internal tank or valve failure rather than normal operation; it commonly results from a faulty fill valve, a deteriorated flapper, a misaligned float, or debris obstructing moving parts.
Inspect flapper seating and chain slack, check float height and fill-valve diaphragm, clean or replace clogged components, and verify refill tube placement.
Test until the fill stops at the proper waterline.
Multiple fixtures backing up in the house
If multiple fixtures begin backing up simultaneously, it usually indicates a blockage or pressure issue in the main sewer line or a shared branch rather than isolated fixture faults.
Immediate steps include stopping water use, checking visible cleanouts, and calling a licensed plumber.
Professional inspection with a sewer camera and snaking or hydro-jetting resolves blockages; root intrusion or collapsed pipe replacements may be required.
Intermittent overflows during heavy rain
Because stormwater can overwhelm drainage systems, intermittent toilet overflows during heavy rain typically point to issues with the building sewer, storm-sewer cross-connections, or a clogged/undersized municipal main.
Inspection by a plumber with a camera can confirm blockages or improper connections.
Remedies include clearing roots/debris, repairing or replacing damaged sewer lines, installing backflow preventers, and coordinating with the municipality to address main capacity.
Safety, Sanitation, and Clean-Up After an Overflow
After an overflow, attention must turn to health risks posed by contaminated water and the need to protect occupants from exposure.
The article will outline proper disinfection, drying procedures, and disposal of affected materials to prevent mold and bacterial growth.
Guidance will also cover indicators for hiring water damage or restoration professionals when contamination or structural damage exceeds homeowner remediation.
Health risks from contaminated water
When sewage or contaminated water spreads during a toilet overflow, it introduces bacteria, viruses, and parasites that can cause gastrointestinal, skin, and respiratory illnesses.
Vulnerable populations—young children, the elderly, and those with weakened immune systems—face the highest risk. Exposure can lead to nausea, diarrhea, dermatitis, and respiratory infections.
Indirect risks include contaminated surfaces, aerosolized pathogens, and cross-contamination of food or belongings.
Proper disinfection and drying steps
If contamination is present, thorough disinfection and rapid drying are essential to eliminate pathogens and prevent mold growth.
Remove excess water, ventilate the area, and use protective gear.
Apply EPA-registered disinfectant per label, scrub surfaces, then rinse.
Dry all materials with fans and dehumidifiers until moisture meters read safe levels.
Dispose contaminated porous items following local guidelines.
When to involve water damage/restoration professionals
One clear sign that professional water-damage or restoration services are needed is the presence of contaminated (black-water) sewage, large volumes of standing water, or damage extending beyond a single room.
Professionals assess structural compromise, hidden moisture, and mold risk, provide safe sewage removal, remediation, and drying, and coordinate repairs and insurance claims.
Hire certified restorers for extensive or hazardous damage.
Signs You Need Replacement Instead of Repair
When overflows recur despite repairs or a toilet is decades old, replacement often becomes the more reliable option.
Evaluating long-term costs versus repeated fixes helps determine whether investing in a new unit makes financial sense.
Choosing a replacement should prioritize reliable flushing performance, modern overflow-prevention features, and proper fit for the bathroom.
Age and recurring failure indicators
Several visible and performance-based signs indicate a toilet has reached the end of its useful life rather than needing another repair.
Persistent leaks, repeated flange or seal failures, frequent clogs from decreasing trap efficiency, and constant reliance on temporary fixes signal systemic deterioration.
Visible corrosion, cracked porcelain, or wobbling despite tightened connections further confirm replacement is warranted to prevent recurrent overflows and failures.
Cost-benefit considerations for replacement
Although repair can be cheaper upfront, the long-term expense of repeated fixes, higher water bills, and potential water damage often makes replacement the more economical choice.
Decision factors include frequency and cost of past repairs, estimated lifespan remaining, water usage efficiency, and resale or insurance implications.
Calculate cumulative repair costs versus replacement price and choose the option with lower total cost and risk over time.
Selecting a replacement toilet for performance and overflow prevention
Many homeowners will find that clear performance and safety indicators point to replacement rather than repair. Signs include frequent clogs, persistent leaks, unstable mounting, obsolete flush mechanisms, and recurring overflow events.
Choosing a replacement focuses on high-efficiency, powerful siphon or pressure-assisted models, proper trapway size, reliable fill valves, and correct bowl height.
Professional installation guarantees seal integrity and peak performance.
Quick Reference Checklist for Preventing and Responding to Toilet Overflows
A concise checklist helps homeowners prevent and quickly respond to toilet overflows by outlining immediate actions, routine maintenance tasks, and emergency contacts.
It lists steps to stop flow, inspect mechanisms, and schedule servicing. Key items include shutoff location, basic tools, and plumber contact. Guidance is actionable, prioritized, and easy to follow.
- Locate shutoff valve and main water
- Keep a plunger and auger accessible
- Note trusted plumber and warranty details
Conclusion
When a toilet threatens to spill over, swift action and routine care keep problems from snowballing. Knowing immediate steps, how to clear clogs, and when to repair tank mechanisms or call a plumber helps avoid bigger headaches. Addressing sewer or drain issues promptly, following sanitation steps after any overflow, and recognizing when replacement is wiser than repair keep bathrooms functioning smoothly. With simple habits and timely fixes, one can keep calm and carry on.