How to Backflush Water Lines in Your House: Step-by-Step Guide for Clear, Safe Pipes
Backflushing water lines in your house is an effective way to clear out rust, sediment, and biofilm, restoring proper water flow. To do this, shut off the main water supply, open high and low fixtures, attach a hose to a drain or cleanout, and use clean, pressurized water to flush the system until the discharge runs clear. Afterward, gradually re-pressurize the system while checking for leaks. Always wear protective gear, secure all fittings, and test the water if discoloration remains. For detailed steps, troubleshooting advice, and safety tips, continue reading.
What Backflushing Water Lines Means and Why It Matters
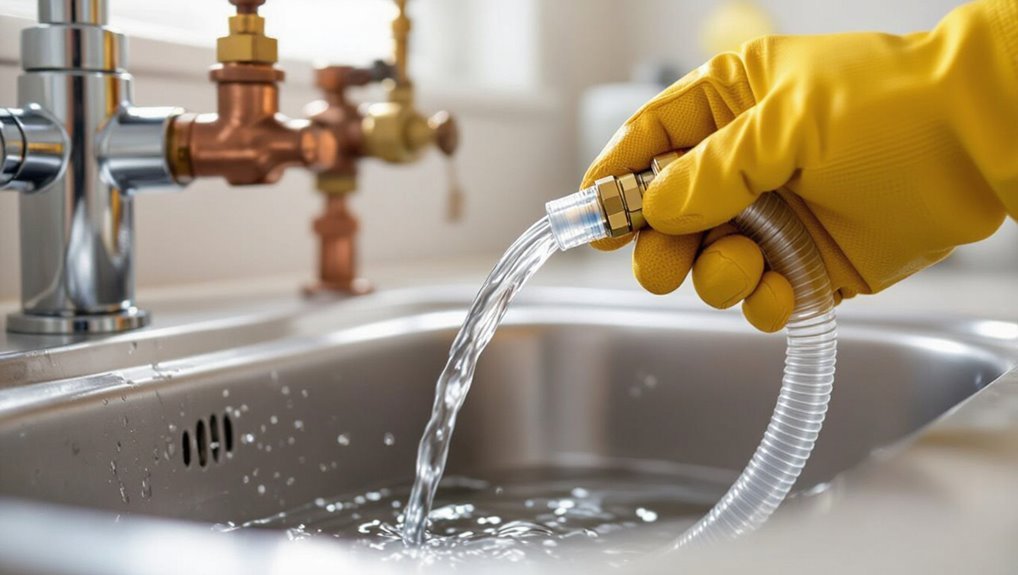
Backflushing in residential plumbing refers to forcing water back through pipes to dislodge and flush out accumulated debris, sediment, chlorine residue, or contaminants after repairs.
Homeowners commonly use the method to clear rusty or cloudy water, remove disinfectant taste, or address bacterial concerns following service work.
Compared with chemical treatments or line replacement, backflushing is often quicker and less invasive but can temporarily mobilize sediments and requires proper disposal and follow-up testing.
Definition of backflushing for residential plumbing
Flushing water lines in reverse, known as backflushing, forces water through pipes and fixtures in the opposite direction to dislodge and carry away accumulated sediment, mineral scale, and debris.
In residential plumbing, backflushing is a targeted maintenance procedure that restores flow, prevents blockages, and improves water quality.
Homeowners seeking how to backflush water lines in house should follow manufacturer and local code guidelines.
Common reasons to backflush (sediment, chlorine taste, bacterial concern, after repairs)
When sediment, chlorine taste, bacterial concerns, or recent repairs affect a home’s water system, reversing flow through the pipes can address each problem effectively.
Backflushing clears accumulated grit and rust, expels lingering disinfectant taste, dislodges biofilm or stagnant pockets that foster microbes, and removes debris introduced during work.
Homeowners often choose backflushing after visible particles, foul taste, or post-repair turbidity to restore water clarity and safety.
Benefits and risks of backflushing versus other cleaning methods
Clarity of flow and system integrity determine whether reversing water direction is the most effective cleaning approach.
Backflushing quickly dislodges loose sediment, minimizes chemical use, and is cost-effective for whole-line flushing. Risks include mobilizing biofilms, spreading contaminants, and stressing fittings.
Alternatives—chemical shock, scrubbing, or filter replacement—offer targeted control but may be slower, more expensive, or require professional handling.
Signs Your Home Water Lines Need Backflushing
Visible signs such as discolored water, floating particles, or a foul odor often indicate sediment or biofilm buildup in the lines.
Performance issues like low flow, sputtering faucets, or uneven pressure can also signal the need for backflushing.
Additionally, trigger events—recent pipe repairs, nearby main line work, or long periods of stagnation—warrant flushing to clear disturbed or stagnant contaminants.
Visible indicators (discolored water, particles, bad odor)
Discolored water, floating particles, and unpleasant odors are clear, practical signs that a home’s water lines may require backflushing.
Visible rust tint, brown or cloudy streams, or sediment settling in containers indicate pipe corrosion or debris buildup.
Persistent metallic, musty, or sulfur-like smells suggest contamination.
Such visual and olfactory cues warrant inspection and prompt backflushing to protect water quality.
Performance indicators (low flow, sputtering faucets, uneven pressure)
Many homeowners notice performance issues—reduced flow, sputtering faucets, or uneven pressure among fixtures—long before any visible contamination appears.
These signs often indicate internal buildup: mineral deposits, sediment, or trapped air disrupting delivery.
Intermittent sputter, weak shower streams, and pressure differences between hot and cold taps warrant inspection and may justify backflushing to restore consistent flow and prevent further degradation.
Trigger events (pipe repairs, main line work, long-term stagnation)
Several common events can necessitate backflushing: recent pipe repairs, municipal main-line work, or extended periods of household vacancy.
These incidents introduce sediment, air, or dislodged scale into domestic plumbing. After repairs or main disturbances, residents should flush lines until clarity and steady flow return.
Long stagnation similarly warrants flushing to remove biofilms and stale water before regular use resumes.
Safety Precautions Before You Start
Before beginning a backflush, the homeowner should assemble a clear checklist of required tools, materials, and protective gear.
They must also verify power is off where necessary and identify main and localized shut-off valves to prevent flooding.
If plumbing is complex, inaccessible, or involves electrical or gas risks, a licensed professional should be contacted rather than attempting DIY.
Tools, materials, and protective gear checklist
A concise checklist guarantees the backflushing procedure proceeds safely and efficiently: essential items include adjustable wrenches and pliers for valve access, a dedicated garden hose long enough to reach outdoor drains, a pressure-rated hose adapter or vacuum breaker to prevent backflow, a bucket and rags for spills, and replacement washers or small fittings for quick repairs.
- Work gloves
- Safety goggles
- Hose adapter set
- Bucket and rags
- Replacement washers
Turning off electricity and locating shut-off valves
Shut off any nearby electrical appliances and locate the main water shut-off and individual isolation valves to prevent accidental power contact and uncontrolled flow during backflushing.
Confirm power to nearby outlets and pumps is disconnected.
Identify and label valves for the target circuit, test that isolation works by briefly opening a downstream tap, and keep a wrench and flashlight handy for emergency valve operation.
When to call a professional instead of DIY
When should a homeowner stop and call a professional?
If leaks, corroded pipes, unclear valve locations, low water pressure, persistent contamination, or unfamiliar plumbing systems are encountered, a licensed plumber should be contacted.
Also seek help for gas-related appliances, complex backflow devices, permits, or failed DIY attempts.
Prioritize safety, code compliance, and preventing costly damage by choosing professional assessment and repair.
Step-by-Step Backflushing Process for Typical Residential Systems
The procedure begins with preparation: isolate the system and protect fixtures before any work.
First, shut off the main water supply and open the highest and lowest fixtures to drain the lines.
Next, attach a hose to the drain or designated cleanout and force a flow reversal using city water pressure or a pump, following the chosen method’s specifics.
Preparation: isolate system and protect fixtures
Begin by isolating the section of the plumbing to be backflushed and protecting all fixtures and appliances that could be affected.
Close valves to separate zones, tag them if needed.
Remove or cover aerators, strainers, and inline filters.
Disconnect sensitive appliances or supply lines.
Lay out towels and buckets, and guarantee drain paths are clear to capture expelled water and debris safely.
Step 1 Shut off main water supply
Locate and close the home’s main shutoff valve to stop incoming water before any backflushing begins.
Confirm closure by checking a nearby fixture for no flow. Note valve type and orientation for reopening.
If multiple supply zones exist, isolate each.
Wear gloves and protect surrounding surfaces.
Record valve condition and position to guarantee proper restoration after backflushing.
Step 2 Open highest and lowest fixtures to drain lines
Open the highest hot and cold fixtures and a low-level drain or outdoor spigot to create a clear path for gravity to empty the supply lines.
After shutting the main, open taps top and bottom to relieve pressure and let water run out.
Verify flow stops, check for slow drains indicating trapped pockets, and leave fixtures open until the system is ready for the next backflush step.
Step 3 Attach hose to drain or designated cleanout
With the highest and lowest fixtures left open to provide an empty pathway, the next action is to connect a hose to the chosen drain or cleanout point.
Secure fittings with appropriate clamps or thread tape to prevent leaks.
Route the hose to a safe discharge area or receptacle.
Verify a tight, unobstructed connection before proceeding to apply flow reversal in the next step.
Step 4 Force flow reversal using city water or pump (detailed methods)
Initiate the reversal by introducing higher-pressure supply water or a dedicated pump into the line at the hose-connected cleanout, creating a flow opposite the normal direction to dislodge sediment and biofilm.
Use a pressure-regulated connection, monitor upstream valves to prevent backflow into the main, and employ pulsation or variable pump speed to break deposits.
Verify fittings remain tight and observe for leaks.
Step 5 Flush until clear water runs (timing and visual checks)
After flow reversal is established and pressure is stable, the operator should continue backflushing until the expelled water is visibly clear.
Monitor turbidity, color, and particulate presence at the discharge. Typical durations vary from one to ten minutes per line segment; extend until clarity persists for at least 30–60 seconds.
Adjust flow rate if cloudiness remains. Record times and observations for each fixture.
Step 6 Re-pressurize system and check for leaks
Close the discharge valves and slowly restore normal flow to the system, allowing pressure to rebuild while observing gauges and exposed joints for any signs of leakage.
Monitor pressure rise to normal operating range; watch meter, pressure relief, and visible fittings.
Tighten loose connections and isolate any persistent drips.
Confirm stable pressure for several minutes before declaring the procedure complete and returning system to typical service.
Step 7 Sanitize if needed after backflushing (chlorination or shock methods)
With the system repressurized and confirmed leak-free, the homeowner should determine whether sanitization is necessary based on water quality, recent contamination risk, or following municipal advisories.
If required, apply chlorine shock or standard chlorination per product instructions, circulate for recommended contact time, then flush until chlorine odor is gone.
Verify with test strips or lab analysis before resuming normal use.
Backflushing Specifics for Different Systems
Backflushing procedures vary with the source and components of a household water system, requiring different precautions for municipal connections versus private wells.
Attention must be paid to isolating or protecting water heaters, hot-water lines, irrigation circuits, and any appliances or filtration units that could be damaged or contaminated during the process.
The following section outlines when to shut off valves, bypass or protect equipment, and specific steps for outdoor and well-based systems.
Municipal water connection versus private well systems
Municipal water connections and private well systems require different approaches when backflushing because their pressure sources, plumbing layouts, and regulatory constraints vary markedly.
Municipal systems often demand coordination with utility rules, use higher constant pressure, and may allow flushing to drains.
Private wells need attention to pump protection, pressure tank cycling, and possible sediment buildup.
Procedures and safety checks differ accordingly.
Water heater and hot-water line considerations
After outlining differences between municipal and private well systems, attention shifts to water heaters and hot-water lines, where temperature, tank design, and recirculation loops affect backflushing procedures.
Shut off power or gas and isolate the heater. Cool-down prevents scalding.
Bypass thermostatic mixing valves and recirculation pumps, drain sediment from tank, and flush lines gently to avoid thermal shock to fittings and fixtures.
Irrigation and outdoor line backflush procedures
Start by shutting off irrigation controllers and isolating any zone valves or quick-coupling valves to prevent accidental activation during the procedure.
Open manual drain valves or use adapters at hose bibs to reverse-flow flush each lateral. Flush until water runs clear, checking for debris, air, or pressure loss.
Close drains, restore valves, and test each zone for proper operation and leaks.
Appliances and filtration systems: what to bypass or protect
When backflushing household water lines, appliances and filtration systems should be either bypassed or isolated to prevent damage and contamination; this typically means closing supply valves to water heaters, shutting off and bypassing whole-house filters, putting softeners into bypass mode, and disconnecting or capping point-of-use devices like reverse-osmosis units and dishwasher inlet hoses.
Remaining fixtures should be protected with inline caps or temporary shutoffs to avoid debris entry.
Tools, Equipment, and Consumables Needed
The section lists the basic hand tools, hoses, adapters, and pumps required to perform a backflush safely and effectively.
It then covers recommended disinfectants and neutralizers for sanitizing lines and flushing residual chemicals.
Finally, it notes optional diagnostic tools such as a pressure gauge and turbidity tester to verify system performance.
Hand tools, hoses, adapters, and pumps
Essential hand tools and reliable hoses make backflushing a residential water line efficient and safe; common items include adjustable wrenches, pliers, tubing cutters, braided or reinforced hoses rated for potable water, quick-connect adapters, and a suitable pump or pressure source.
Tools and fittings must match pipe sizes and pressure ratings.
Recommended items:
- Adjustable wrench
- Slip-joint pliers
- Tubing cutter
- Potable-rated hose
- Quick-connect adapter
Recommended disinfectants and neutralizers
Several effective disinfectants and compatible neutralizers are recommended for backflushing residential water lines to guarantee microbial control without damaging plumbing or leaving harmful residues.
Common choices include household bleach (sodium hypochlorite) with sodium thiosulfate neutralizer, chlorine dioxide with sodium bisulfite, and hydrogen peroxide stabilized formulations paired with catalase-based neutralizers.
Dosages follow manufacturer guidance and local regulations; rinse thoroughly after treatment.
Optional diagnostic tools (pressure gauge, turbidity tester)
A few compact diagnostic tools can greatly clarify system condition during backflushing: a pressure gauge verifies line pressure and detects leaks or blockages, while a turbidity tester quantifies water clarity to confirm removal of particulates and residual disinfectant byproducts.
Operators may record baseline and post‑flush readings, compare against acceptable ranges, and use results to decide if additional flushing, filter replacement, or professional inspection is required.
Troubleshooting Common Problems During Backflushing
When backflushing yields persistent discoloration or sediment after several attempts, the cause may be lodged deposits, cartridge failure, or source-side contamination and should be inspected systematically.
Low or no flow during flushing, leaks or pressure loss after repressurizing, and signs suggesting bacterial contamination each require specific diagnostics—valve blockages, damaged seals, pressure tests, and microbial testing, respectively.
The following section outlines simple checks and corrective steps for these common failures.
Persistent discoloration or sediment after multiple flushes
If discoloration or gritty sediment persists after several backflush cycles, it usually indicates a deeper source such as corroded piping, a compromised water heater anode, or sediment accumulation in a shared mains line rather than a simple trapped pocket of debris.
Recommend inspection: check internal heater components, sample water upstream and downstream, and consult the utility or a licensed plumber for pipe evaluation and targeted remediation.
Low or no flow when attempting to backflush
Diagnose low or no flow by systematically isolating potential causes and ruling them out one at a time.
Check upstream shutoffs, closed valves, clogged filters, or partially closed service stops.
Inspect hoses and fittings for kinks or obstructions.
Verify supply pressure and pump operation.
Temporarily bypass suspect components to localize restriction.
Replace or clean the failing element before retrying backflush.
Leaks or pressure loss after re-pressurizing
Inspecting for leaks and pressure loss after re-pressurizing is a critical step because even small failures can compromise system performance or cause water damage.
Technicians should monitor gauges, listen for hissing, and check joints, valves, and hose connections.
Isolate sections to locate decreases, tighten or replace fittings, and verify pump integrity.
Retest pressure and observe for gradual drops before restoring normal operation.
Detecting and addressing bacterial contamination
Bacterial contamination presents a distinct health risk during backflushing and requires prompt detection and targeted remediation.
Inspect water for odor, discoloration, or cloudiness; collect samples for laboratory testing when suspicious.
Disinfect lines with chlorine or approved biocides following manufacturer and local guidelines.
Flush until residual disinfectant is achieved, then retest.
If contamination persists, consult a licensed plumber or water specialist for source identification and corrective action.
When to Schedule Professional Service and What to Expect
A homeowner should consider hiring a licensed plumber when persistent low pressure, contamination concerns, complex pipe layouts, or code-related work exceed DIY skills.
Professionals typically use pressurized flushing rigs, video inspection cameras, and chemical-safe cleaners, and will explain the methods they plan to use.
Expected costs, service guarantees, and warranty terms should be confirmed before work begins.
Criteria for hiring a licensed plumber
Several clear indicators signal when a licensed plumber should be called for backflushing water lines: persistent cloudy or discolored water after DIY flushing, recurring low pressure localized to a single fixture, visible sediment or rust in multiple outlets, or failed attempts to isolate and purge trapped air or debris.
A licensed plumber is recommended when issues persist, when permits or shutoff coordination are needed, or when diagnosis exceeds homeowner capability.
Typical professional methods and equipment
Schedule professional service when routine flushing fails or indicators suggest systemic contamination. Technicians will arrive prepared to diagnose and execute targeted backflushing using established methods and specialized equipment.
They assess pressure, locate dead legs, and verify water quality post-procedure. Typical tools and approaches include:
- High-pressure pumps
- Reverse-flow manifolds
- Portable filtration units
- Chemical dosing systems
- Pressure and turbidity meters
Estimated costs and warranties
Typically, homeowners can expect professional backflushing services to range from modest to significant expense depending on system size, complexity, and required diagnostics.
Estimates often span $150–$800 for routine jobs; extensive remediation or pump rental can exceed $1,200.
Reputable contractors provide itemized quotes, service warranties (commonly 30–365 days), and parts guarantees.
Schedule service when discoloration, pressure loss, or persistent sediment occur.
Preventive Measures to Reduce Future Need for Backflushing
A proactive maintenance plan can minimize the frequency of backflushing by scheduling routine inspections of pipes and routine filter replacements.
Regular water quality testing—covering turbidity, turbidity-related particle counts, and microbial indicators—helps identify problems early.
Strategic upgrades such as sediment filters and water softeners reduce buildup of sediment and biofilm and prolong system performance.
Regular maintenance schedule for pipes and filters
Creating a simple, recurring maintenance calendar helps keep pipes and filters functioning and reduces the need for emergency backflushing.
It outlines monthly visual checks, quarterly filter replacements, semiannual flushing of low-use lines, and annual professional inspections. Records note dates, actions, and observations to spot trends.
Consistent scheduling minimizes sediment buildup, prevents microbial growth, extends component life, and lowers repair costs over time.
Water quality testing frequency and parameters
Routine inspections and documented maintenance provide the context for an effective water quality testing plan that helps prevent future backflushing.
Testing frequency adapts to risk: baseline, seasonal, post-repair, and after contamination events.
Key parameters guide response and scheduling:
- Turbidity
- Total coliform/E. coli
- Chlorine residual
- pH
- Iron and manganese concentrations
Upgrades that reduce sediment and biofilm buildup (filters, softeners)
Several targeted upgrades can substantially reduce sediment and biofilm accumulation in household plumbing, lowering the frequency and intensity of backflushing.
Whole-house sediment filters capture particulates before pipes, cartridge or multimedia units offer varying micron ratings, and activated carbon reduces organic matter.
Water softeners prevent scale that traps bacteria.
Regular maintenance and correct sizing guarantee these systems effectively minimize buildup and extend pipe cleanliness.
Quick Reference Checklist for DIY Backflushing
A concise, step-by-step checklist summarizes the essential actions for a DIY backflush, from isolating lines to flushing and restoring normal flow.
Included are brief safety quick checks to confirm valves, pressure relief, and electrical considerations before finishing.
This checklist serves as a rapid reference to guarantee the job is completed safely and efficiently.
Step-by-step condensed checklist
Begin by confirming the water supply is off and the backflush destination (drain or hose) is ready; this checklist condenses the essential, ordered actions for a homeowner to perform a safe, effective backflush without full procedural detail.
- Isolate affected fixture and close valves
- Attach hose to access point
- Open downstream drain/vent
- Turn on brief, controlled supply pulse
- Observe flow, then close and restore system
Safety quick checks before finishing
Once the brief supply pulse has been observed and the system is being restored, a quick set of safety checks should be performed before finishing to confirm no leaks, proper valve positions, and clear drainage.
Inspect joints and fittings for drips, verify isolation and supply valves are correctly set, guarantee air vents and drain lines are clear, flush a final fixture to confirm clarity, and log completion time.
Comparative Summary of Cleaning Options for Water Lines
The section compares backflushing, chemical chlorination, mechanical pigging, and full pipe replacement to highlight their relative effectiveness, cost, and suitability for common household scenarios.
It contrasts backflushing’s simplicity and low cost with chlorination’s disinfection strength and pigging’s ability to remove stubborn deposits.
The summary also notes when replacement may be the only practical long-term solution.
Backflushing vs. chemical chlorination
Although both backflushing and chemical chlorination aim to restore waterline flow and quality, they employ fundamentally different mechanisms and suit different problems: backflushing uses high-velocity water reversals to dislodge and remove physical debris and biofilm, while chemical chlorination relies on oxidizing agents to kill microbes and break down organic residues.
| Method | Targets | Limitations |
|---|---|---|
| Backflushing | Debris, loose biofilm | Ineffective vs. entrenched microbes |
| Chlorination | Microbial control, organics | Requires contact time, safety controls |
| Best use | Mechanical cleaning | Disinfection and residual protection |
Backflushing vs. mechanical pigging and pipe replacement
Moving from comparisons with chemical chlorination, the discussion now contrasts backflushing with mechanical pigging and full pipe replacement as alternative strategies for restoring flow and condition in building water lines. Each method differs in scope, cost, downtime, effectiveness, and suitability; selection depends on deposits, pipe material, and budget.
| Method | Key Consideration |
|---|---|
| Backflushing | Low cost, quick, surface debris |
| Pigging | Thorough, moderate cost, fits larger mains |
| Replacement | Permanent, high cost, for severe damage |
Conclusion
Backflushing marries simple action with surprising consequence: a brief, controlled reversal of flow that clears years of unseen sediment, yet it demands caution where complacency once reigned. Homeowners gain cleaner, safer water through a few deliberate steps, yet risk persists if procedures are rushed or ignored. When DIY limits are reached, skilled technicians restore confidence. In practice, regular vigilance and modest maintenance tip the balance from reactive repair to preventive assurance, preserving plumbing reliability.