
How to Add a Toilet Drain: Step-by-Step Guide for DIYers and Pros
To add a toilet drain, you’ll need to carefully plan your project, locate the appropriate rough-in, and install DWV piping with the correct slope. This process includes cutting the subfloor or core drilling if you’re on a slab, connecting to the sewer or septic main, and securing a flange with proper seals. It’s crucial to comply with local building codes and obtain necessary permits. Gather your materials and personal protective equipment (PPE), check for leaks, and ensure proper slope and support throughout the installation. For a detailed step-by-step guide, alternatives, estimated costs, and troubleshooting tips, continue reading.
What adding a toilet drain involves and when you need one
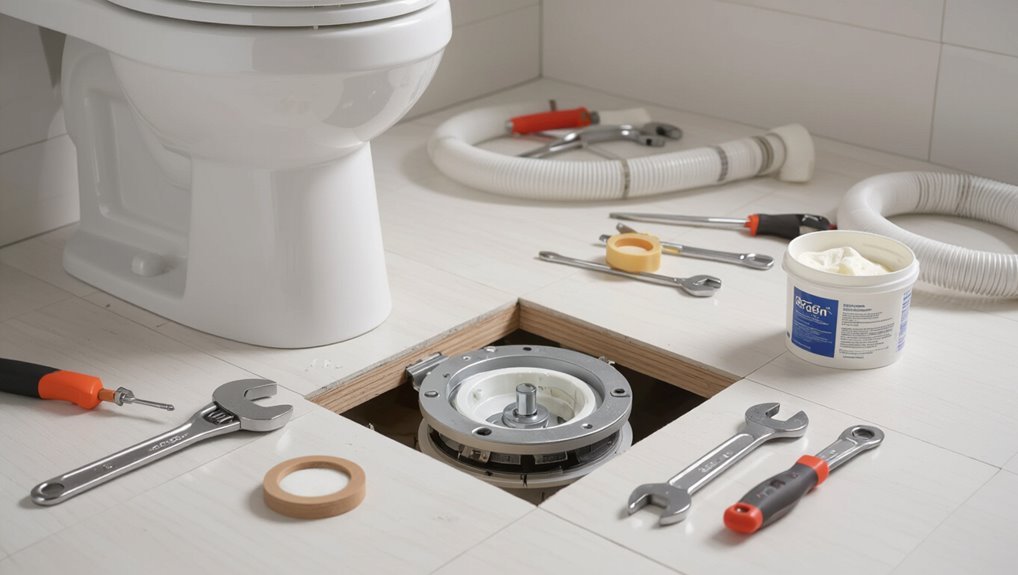
Adding a toilet drain typically arises during remodels, new bathroom construction, or when relocating fixtures and requires evaluating site-specific plumbing needs.
The process includes selecting an appropriate drain system and rough-in distance, and ensuring compliance with local building codes and permit requirements.
Homeowners should assess structural access, pipe routing, and code constraints before proceeding.
Reasons to install a new toilet drain (remodels, new bathrooms, moving fixtures)
When remodeling a bathroom, installing a new toilet drain becomes necessary whenever the layout changes, a new fixture is added, or subfloor damage prevents reuse of the existing flange.
Reasons include full remodels, adding bathrooms in unfinished areas, relocating fixtures for accessibility, and replacing failed cast-iron or corroded pipes.
DIYers researching how to add a toilet drain should assess subfloor, waste stack position, and venting.
Building codes and permit overview for toilet drains
Because toilet drains connect to the home’s sanitary system and affect ventilation, they are subject to local plumbing codes and often require permits, inspections, and compliance with sizing, slope, trap, and venting standards.
Homeowners should check jurisdictional requirements, secure permits before rough‑in work, schedule inspections at prescribed stages, and retain documentation.
Noncompliance can delay projects, incur fines, or require costly corrective work.
Types of toilet drain systems and rough-in distances
A toilet drain installation depends on the type of drain system—floor‑mounted, wall‑hung, or offset—and the rough‑in measurement, which determines the distance from the finished wall to the center of the waste outlet.
Choosing the correct configuration guarantees proper fit, trap placement, and venting.
Installers must verify standard rough‑ins (10, 12, 14 inches), account for subfloor depth and drain slope, and select compatible flanges.
Quick overview: Can you add a toilet drain yourself?
A homeowner with basic plumbing experience, the right tools, and a few hours can often install a toilet drain for a straightforward replacement or new rough-in.
Complex situations—cast-iron stacks, unusual joist layouts, sewage ejector requirements, or local code complications—typically require a licensed plumber.
Time, tools, and skill level should be honestly assessed before starting to avoid costly mistakes.
Who should DIY and who needs a pro
When homeowners face the choice of installing a toilet drain themselves or hiring a professional, the decision hinges on skill level, local code complexity, and the scope of work.
Simple flange replacement or repositioning within the same drain line can be DIY for those comfortable with plumbing basics, while cutting new soil stacks, working with cast-iron or concrete slabs, or managing strict municipal inspections typically requires a licensed plumber.
Experienced DIYers with basic tools, confidence in rough-in measurements, and willingness to obtain permits may proceed.
Novices, projects involving structural alterations, or uncertain sewer conditions should hire a pro.
Time, tools, and skill level required
Deciding between DIY and professional help naturally leads to evaluating the time, tools, and skill required for adding a toilet drain.
A competent DIYer should expect several hours for demo, rough-in, and testing.
Essential tools: wrench set, reciprocating saw, drill, level, sealing materials.
Moderate plumbing experience, comfort with drain pitch and venting, and local code familiarity are required; otherwise hire a licensed plumber.
Materials, tools, and preparations
A concise list of required plumbing materials and appropriate fittings should be assembled before work begins.
Necessary tools and safety gear, plus clear measurements for the rough-in and planned drain location, must be confirmed.
The site should be prepared by shutting off the water, removing nearby fixtures as needed, and protecting floors and finishes.
List of required plumbing materials
Before beginning the installation, gather all necessary plumbing materials, tools, and safety gear to guarantee the job proceeds without interruption; missing items can cause delays and improper fits.
Essential plumbing materials include flange assemblies, PVC or ABS trap primer and waste pipe, wax or rubber seals, and fasteners.
- Flange and bolts
- Waste pipe sections
- Seal rings or wax ring
- Couplings and screws
List of necessary tools and safety gear
Several essential tools and safety items should be assembled before beginning a toilet drain installation to guarantee efficiency and reduce risk.
A concise toolkit and protective gear streamline work and protect against hazards.
- Wrench set, adjustable and pipe wrenches
- PVC saw, hacksaw, and deburring tool
- Level, tape measure, and marker
- Gloves, safety glasses, dust mask, knee pads
How to measure rough-in and plan drain location
With tools and protective gear at hand, measuring the rough-in and planning the drain location proceeds as the next practical step.
Measure from finished wall to flange center (standard 12″, 10″, or 14″) and confirm floor joist layout beneath.
Mark flange position, verify slope for drainpipe, locate stack or soil line, and check for obstacles.
Record dimensions and sketch placement before cutting or drilling.
Site preparation: shutting off water, removing fixtures, protecting the area
Once the rough‑in location is confirmed, the site must be prepared by shutting off the water supply, draining and disconnecting fixtures, and protecting surrounding surfaces and finishes.
The installer isolates valves, drains lines, and removes toilet and nearby plumbing as needed.
Cover floors and cabinetry with drop cloths, tape seams, and protect trim.
Gather tools, PPE, buckets, and absorbent rags before cutting or accessing the subfloor.
Step-by-step guide to adding a toilet drain (detailed how-to)
The guide begins by marking the toilet location and rough-in to guarantee proper alignment with the flange.
Next, it explains how to expose either a wood subfloor or a concrete slab, then cut the subfloor or core drill the slab to create the drain opening.
Finally, it covers installing DWV piping with the required slope and tying the new run into the existing sewer or septic main.
Step 1 Locate and mark the drain position and rough-in
Begin by measuring the planned toilet location from two fixed room references—typically the finished wall behind the toilet and one adjacent wall—and mark the centerline and the 12-inch (or specified) rough-in distance to the drain flange on the subfloor.
Confirm alignment with room layout, check for obstructions beneath, note slope direction, and transfer measurements to a clear, permanent mark for cutting and plumbing reference.
Step 2 Expose subfloor or slab (wood floor vs concrete slab)
After marking the drain position, the subfloor or slab must be exposed to access framing and plumbing paths.
For wood floors, remove finish, flooring and subfloor panels to reveal joists; check for hidden wiring and insulation.
For concrete slabs, clear surface finishes and adhesives to locate slab thickness and reinforcement.
Document conditions, note impediments, and prepare for cutting or core drilling.
Step 3 Cutting subfloor or core drilling concrete
Remove material only after confirming measurements and utilities, then cut the subfloor or core-drill the slab to the exact diameter required for the toilet flange while keeping edges square and debris controlled.
Use proper blades or diamond core bits, steady guides, and vacuum dust collection. Protect surrounding finishes, wear PPE, and verify hole alignment with flange test-fit.
Clean edges and remove loose material before proceeding.
Step 4 Installing DWV piping and slope requirements
Install the drain-waste-vent (DWV) piping so it provides a continuous, properly sloped path from the toilet flange to the building sewer or existing stack; maintain 1/4 inch per foot (2%) slope for horizontal runs 3 inches and smaller, and follow local code for larger diameters.
Use straight runs where possible, minimize fittings, support pipes at code intervals, guarantee solvent-welded or gasketed joints, and test for proper flow and leaks.
Step 5 Connecting to existing sewer or septic main
Connect the new DWV run to the building sewer or septic main at a single, accessible junction that maintains the required slope, uses compatible pipe materials and fittings, and preserves venting continuity.
Locate an appropriate cleanout or tee, cut and deburr existing pipe, dry-fit components, then solvent-weld or gasket-connect per code.
Test for leaks and proper flow before backfilling or closing access.
Step 6 Setting up the toilet flange and anchoring to the floor
With the drain line in place and the waste connection verified, the next task is positioning and securing the toilet flange to confirm a watertight, stable seat for the fixture.
Center the flange over the drain, set its elevation flush with finished floor, fasten using stainless screws or bolts into subfloor or concrete anchors, ascertain level, and seal base with appropriate caulk or gasket as needed.
Step 7 Installing wax ring or rubber gasket and placing the toilet
Carefully position the chosen seal—wax ring or rubber gasket—on the toilet outlet or flange, ensuring the sealing surface is clean and dry so the ring seats evenly.
Then lower the toilet straight down onto the flange, aligning the bolt holes without rocking, to compress the seal uniformly and create a watertight connection.
Tighten nuts alternately to secure the bowl, trim bolt ends, and reinstall caps.
Step 8 Testing for leaks and verifying venting
Begin by flushing the toilet several times and observing the base, tank connections, and the drain flange for any signs of water; a slow drip or pooling indicates an imperfect seal or loose fittings that must be tightened or reseated.
Check supply line and bolts, then inspect the trap for leaks.
Verify venting by running multiple consecutive flushes and listening for gurgling or slow drainage, indicating vent obstruction.
Step 9 Repairing subfloor or concrete and finishing the floor
Once the drain and flange are confirmed watertight, attention shifts to restoring the subfloor or concrete and finishing the floor surface to guarantee a stable, level base for the toilet and surrounding finishes.
Damaged plywood is replaced or sistered, gaps filled with exterior-grade plywood or patch compound; concrete is patched and leveled.
Install moisture barrier, underlayment, and chosen finish (tile, vinyl, or wood) ensuring flatness and secure fastening.
Step 10 Final hookup, water supply connection, and toilet testing
Attach the final components and verify operation by connecting the water supply, setting the toilet, and performing pressure and leak checks.
Tighten the supply line to the fill valve, open shutoff slowly, and flush repeatedly to purge air.
Inspect base, wax ring seal, and supply connections for leaks.
Adjust flange bolts and toilet position if necessary.
Confirm tank refill rate and stable seating before finishing.
Special procedures and alternatives
When work must proceed on a concrete slab, the procedure changes to include core drilling, slab cutting, and careful moisture and reinforcement considerations.
Where a gravity drain is impractical, alternatives such as an add‑a‑drain, up‑flush or macerator toilet can provide an effective solution with minimal slab work.
The choice between repositioning an existing toilet and installing a new drain hinges on plumbing layout, cost, and long‑term access requirements.
Adding a toilet drain on a concrete slab: step differences and tips
Adding a toilet drain through a concrete slab requires different steps than cutting into framed floor joists because it involves coring through solid aggregate, managing sub-slab plumbing, and ensuring a watertight seal against soil gases and groundwater.
Use a diamond core bit, plan slope to existing sewer, install PVC sleeve and booted flange with appropriate sealant, compact backfill, and test for leaks and odor infiltration.
Using an add-a-drain or up-flush/macerator toilet where gravity drain isn’t feasible
A compact macerator or add-a-drain system provides a practical alternative where a gravity-fed connection is impossible, converting toilet waste into a pumped slurry that can be routed to a higher or distant sewer inlet.
Installation requires a compatible toilet, secure mounting, electrical supply, and correct discharge piping with check valve.
Maintenance includes periodic cleaning and avoiding solids that clog blades; sound isolation is recommended.
Repositioning an existing toilet vs creating a new drain
Following the discussion of macerators and add-a-drain units as alternatives where gravity flow is impractical, homeowners and plumbers must weigh whether to reposition an existing toilet or construct a new drain line.
Repositioning uses existing waste connections but may require slab cutting or joist alterations; creating a new drain offers ideal layout and slope control yet demands excavation, permits, higher cost, and time.
Common problems, how to avoid them, and troubleshooting
Common issues that arise when adding a toilet drain include improper pipe slope causing slow drainage, leaks at the flange or joints, sewer gas odors from venting problems, and structural damage from cutting the subfloor or slab.
Each problem has clear signs—standing water, visible moisture, persistent odors, or weakened flooring—and specific fixes ranging from regrading pipes and resealing connections to correcting venting and reinforcing cuts.
Practical prevention and troubleshooting tips focus on accurate measurements, proper materials and seals, pressure or smoke testing, and conservative cutting with structural supports.
Improper slope and slow drainage: diagnosis and fixes
Inspecting the drain line reveals whether improper slope is the cause of slow drainage: pipes should descend roughly 1/4 inch per foot for 3–4 inch toilet drains, and deviations lead to pooling, backups, or gurgling.
Verify slope with a level; correct by regrading or adjusting pipe hangers. Remove obstructions, replace sagging sections, and test flow.
Preventative support and proper bedding guarantee long-term performance.
Leaks at flange or joints: causes and repairs
Slow or irregular flow can sometimes point away from slope issues and toward leaks at the toilet flange or nearby joints, which allow water to escape or air to be drawn into the line.
Common causes include a damaged wax ring, loose flange bolts, cracked flange, or degraded joint seals.
Inspect, tighten, replace seals or flange, and use proper gaskets and torque to prevent recurrence.
Sewer gas odors and venting issues: detection and remedies
Detecting sewer gas odors and venting issues begins with noting persistent rotten-egg smells, gurgling fixtures, or intermittent pressure-driven sounds that indicate a compromised seal or blocked vent.
Inspect trap seals, wax ring integrity, and vent pipe obstructions.
Remedy includes replacing wax ring, re-seating flange, clearing vents with a plumber’s snake or compressed air, and ensuring proper vent height and slope to prevent recurrence.
Structural damage when cutting subfloor or slab: prevention and solutions
When cutting a subfloor or concrete slab, care must be taken to prevent undermining structural members, severing reinforcement, or creating uneven loads that lead to cracks, sagging, or moisture infiltration.
Identify joists, rebar, and load paths with scanning tools. Limit cut size, support edges with blocking or steel plates, and consult an engineer for beams.
Repair cracks, replace compromised reinforcement, and seal joints to prevent moisture.
Cost, permits, and hiring considerations
Estimating expenses and required approvals helps determine whether adding a toilet drain is a DIY project or should be contracted.
Typical material costs for a homeowner are compared with full professional installation quotes, while permits, inspections, and local code requirements are summarized.
Guidance on vetting plumbers — key questions to ask and red flags to watch for — completes the decision framework.
Typical DIY material costs vs professional installation costs
Cost comparisons between DIY and professional toilet drain work hinge on labor, materials, and local permitting; a homeowner can expect to pay only for pipe, fittings, wax seal or flange, and basic tools if no major rework is required, typically ranging from $50–$300 for parts, while a licensed plumber’s invoice commonly starts around $300–$800 for a straight swap and can exceed $1,000 if drain lines must be rerouted, cast-iron replaced, or structural access is needed.
| Option | Typical parts | Typical total |
|---|---|---|
| DIY simple swap | $50–$300 | $50–$300 |
| Pro straight swap | Includes labor | $300–$800 |
| Pro complex | Reroute/replace | $1,000+ |
Permits, inspections, and code requirements to expect
Verify local permit and inspection requirements before starting toilet drain work, since plumbing codes and enforcement vary widely by municipality and can dictate who may perform the work, what materials and pipe sizes are acceptable, and whether inspections are required at rough-in and final stages.
Failure to obtain permits can result in fines, mandated rework, or denied occupancy.
Confirm venting, trap standards, slope, and approved fittings with local authorities.
How to vet and hire a plumber: questions to ask and red flags
Once permit and inspection obligations are understood, deciding whether to hire a professional becomes the next practical step.
Homeowners should request licenses, insurance, references, and written estimates; confirm permit handling and warranty terms.
Ask about experience with toilet drain installations and timeline.
Red flags: vague quotes, refusal to provide documentation, pressure tactics, unmarked vehicles, or insisting on large upfront cash payments.
Best practices, safety tips, and maintenance after installation
The section outlines essential safety precautions to follow during installation, including proper ventilation, protective gear, and secure support for cast or PVC piping.
It then presents a concise checklist for long-term maintenance—periodic leak inspections, flange seal checks, and recommended cleaning intervals—to prevent clogs and deterioration.
Finally, it summarizes tips for ensuring a durable, code-compliant installation, such as correct slope, approved materials, and verified permit adherence.
Long-term maintenance checklist for toilet drains
A straightforward maintenance checklist helps guarantee toilet drains remain functional and leak‑free over years of use.
Regular inspections catch slow leaks and seal deterioration early. Clean traps and vents monthly; monitor for odors and backups; tighten flange bolts and reseal as needed.
Follow these steps to preserve performance and prevent costly repairs:
- Inspect seals and bolts
- Clear vents and traps
- Monitor for slow leaks
- Reseal when necessary
Safety precautions during installation
Begin by prioritizing personal and structural safety: wear gloves and eye protection, shut off water at the supply valve, and place absorbent towels or a bucket beneath the work area to catch residual water.
Use proper tools, secure the toilet location to prevent shifting, ventilate when using adhesives or solvent welds, and verify connections for leaks.
Afterward, inspect periodically and replace worn seals.
Tips to ensure a durable, code-compliant installation
Follow local plumbing codes, manufacturer instructions, and accepted trade practices to guarantee a durable, code-compliant toilet drain installation.
Use approved materials, correct flange height, secure wax or wax-free seals, and properly sloped waste lines.
Test for leaks and venting function before finishing.
Provide accessible shutoffs, document permits/inspections, and schedule periodic checks for seal integrity, bolts, and caulking to prevent future failures.
Useful references and resources
The article points readers to relevant code sections, tool guides, and how-to videos to guarantee compliance and proper technique.
It also offers a printable checklist to organize materials and steps before beginning work.
These resources support safe, code-compliant installation and easier follow-through.
Links to code sections, tool guides, and how-to videos
Where can one find authoritative code citations, detailed tool guides, and step‑by‑step videos to support installing a toilet drain?
Official municipal plumbing codes, manufacturer installation manuals, reputable trade sites, and vetted video tutorials provide reliable guidance.
Suggested resources:
- Local plumbing code website
- Toilet/flange manufacturer guides
- Professional trade organizations
- High‑quality instructional videos
Printable checklist for adding a toilet drain
Several concise sections organize a printable checklist for adding a toilet drain, covering permits and codes, tools and materials, preparatory steps, installation tasks, testing, and cleanup.
The checklist is structured for clarity and calm, prompting confidence and control.
- Confirm permits and codes
- Gather tools and materials
- Follow stepwise installation tasks
- Perform testing and cleanup
Conclusion
The final wrench turns; silence follows. A new drain lies hidden beneath a floor patched to match its past, waiting for the first cautious flush. Pipes align like unseen arteries, the seal holding faith against leak and odor. Tools are set aside, plans tucked into a drawer. Whether DIYer or pro, the work’s success is measured not by speed but by that quiet moment when water disappears and the room returns to ordinary life—steady, reliable, resolved.
