
How to Drain a Garden Hose for Winter: Quick Steps to Prevent Freezing and Cracks
How to Drain a Garden Hose for Winter
To prevent freezing and damage, properly drain your garden hose before winter. Start by shutting off the outdoor spigot and disconnecting the hose along with any nozzles. Elevate one end of the hose and walk its length while squeezing to push out remaining water. For any stubborn water, use gravity or a low-pressure air blowout. After draining, inspect the fittings and O-rings, coil the hose loosely, and store it in a frost-free location. Following these steps will save you from costly repairs and extend the life of your hose. For more detailed tips and tool recommendations, keep reading.
Why Draining Your Garden Hose Before Winter Matters
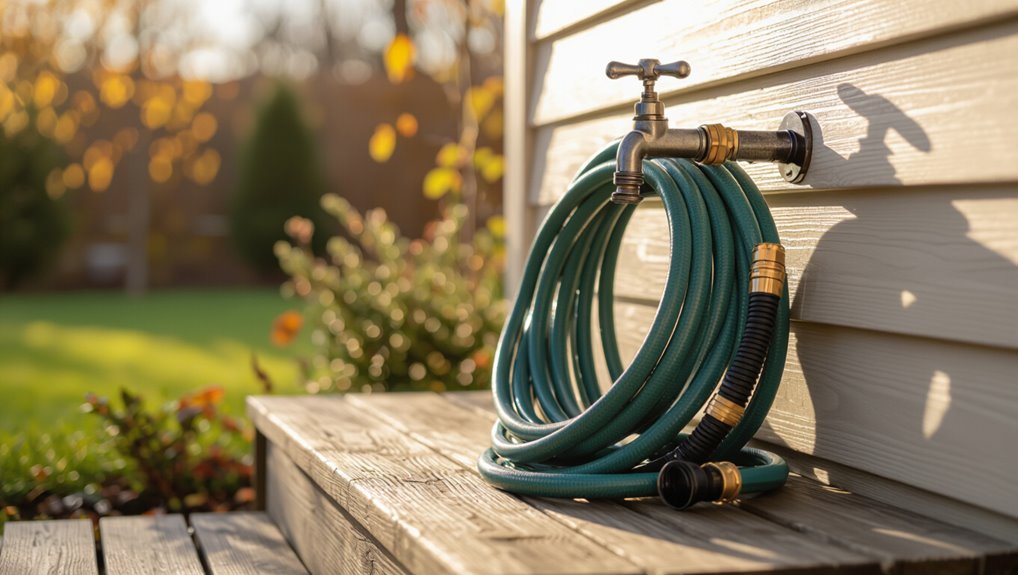
Freezing water expands and can crack hose material and loosen or burst fittings, compromising usability.
Over time those damages lead to repair or replacement expenses that exceed the small effort of winter draining.
Visible signs of freeze-thaw damage include bulges, brittle or split sections, leaking joints, and reduced water flow.
How freezing water damages hoses and fittings
Water trapped inside a garden hose expands as it turns to ice, exerting pressure on the hose walls, couplings, and the spigot. That pressure can split rubber or plastic tubing, crack metal fittings, and warp internal seals.
Freezing creates bulges, pinhole ruptures, and seized threads. Understanding how to drain hose for winter prevents internal fracture, fitting failure, and loss of water-tight connections.
Long-term costs of leaving water in hoses
Neglecting to fully drain a garden hose before winter leads to cumulative material and financial consequences: trapped moisture accelerates rubber and plastic degradation, corrodes metal fittings, and increases the likelihood of splits or leaks that require repair or replacement.
Over seasons, repeated freeze-related damage reduces hose lifespan, raises maintenance costs, and forces earlier replacement, diverting funds from other garden needs and increasing long-term household expenses.
Signs a hose has been compromised by freeze-thaw cycles
Several visible and tactile cues indicate a hose has been weakened by freeze-thaw cycles: kinks that do not spring back, brittle or cracked rubber, swollen or distorted sections, and corrosion or pitting on metal fittings.
Additional signs include persistent leaks at seams, stiffened or discolored material, and reduced water flow from internal collapse.
Such damage often precedes sudden failure under pressure.
Quick Step-by-Step Guide to Drain a Garden Hose for Winter
A brief checklist lists the tools and materials needed before beginning.
First, the water supply is shut off at the spigot and the hose is disconnected from the spigot and any attachments.
Next, the hose is elevated with a slight slope and walked from one end to the other to push remaining water out.
Tools and materials you’ll need
Essential tools and materials streamline the hose-draining process: an adjustable wrench or pliers to loosen fittings, a hose bib shutoff or interior shutoff valve if available, a short section of spare hose or a drain adapter to direct water away, a collapsible storage reel or sturdy coil to store the hose, and a pair of gloves to improve grip and protect hands.
- Wrench/pliers
- Drain adapter/spare hose
- Storage reel/coil
- Gloves and towel
Step 1 Turn off the water supply at the spigot
Shut off the outdoor spigot completely to stop water flow before disconnecting the hose.
The person checks that indoor valves feeding the outdoor line are closed if applicable, then confirms zero pressure by briefly opening an outside faucet downstream.
Any integrated shutoff or frost-free valve is set to off. This prevents residual water from staying under pressure and reduces freeze damage risk.
Step 2 Disconnect the hose from the spigot and any attachments
Disconnect the hose from the spigot and remove any nozzles or attachments to allow trapped water to escape.
The person loosens the coupling, unscrews fittings, and inspects threads and washers for wear.
Removed accessories are set aside to dry.
Any remaining water is shaken or gently expelled through the open end.
Corroded or damaged parts are noted for repair or replacement.
Step 3 Elevate and slope the hose to let water flow out
Raise one end of the hose and create a steady downhill slope so residual water runs toward the open end and drains completely.
The hose should be angled progressively, avoiding dips or high spots that trap water. Support with a ladder, railing, or stakes as needed.
Maintain the slope until no more water exits, ensuring internal moisture is minimized before storage.
Step 4 Walk the hose from one end to the other to push remaining water out
With the hose sloped so water naturally moves toward the outlet, the next action is to walk its length while gently squeezing and guiding the tubing to push any remaining water ahead of the movement.
Proceed steadily from one end to the other, using firm, even pressure to force pockets forward.
Finish at the outlet, ensuring visible flow and no trapped sections remain.
Step 5 Blow out excess water with compressed air (optional)
Attach a compressed-air source to the hose bib and apply short bursts to displace remaining water toward the outlet.
Use 40–80 psi and brief pulses to avoid hose damage. Move along the length, pausing at bends and fittings to clear pockets.
When clear, release pressure, disconnect the air, and cap the hose.
This step is optional but speeds drying and reduces freeze risk.
Step 6 Inspect hose and fittings for damage before storage
Inspect the hose and fittings for cracks, kinks, corrosion, or loose connectors before storing to prevent leaks and deterioration over winter.
Examine the entire length, flexing sections to reveal hidden splits. Check rubber washers and metal threads for wear or rust.
Replace damaged washers, tighten or swap corroded fittings, and note areas needing future repair to guarantee reliable performance next season.
Step 7 Coil and store the hose properly indoors or in a protected space
Coil the drained hose neatly and place it in a dry, sheltered location to prevent kinks, freezing, and UV damage over winter.
Use large, even loops and avoid tight bends; secure with straps or a loose tie.
Store off the ground on a rack or shelf, away from direct sunlight and rodents.
Label if multiple hoses are stored for easy retrieval.
Variations for Different Hose Types and Setups
Different hose materials and connection types require tailored draining techniques to prevent damage and trapped water.
Lightweight vinyl, rubber, and reinforced hoses each behave differently, while swivel or quick‑connect fittings, permanently attached or buried lines, and soaker or drip systems need specific handling.
The following points outline practical variations and steps for each setup.
Draining lightweight vinyl hoses vs. rubber and reinforced hoses
Lightweight vinyl hoses require gentler handling than rubber or reinforced varieties because their thinner walls are more prone to kinking and cracking when emptied and stored.
Drain vinyl by elevating one end, allowing gravity to expel water slowly, then coil loosely without tight bends.
Rubber and reinforced hoses tolerate firmer pressure and tighter coils; still, fully drain, straighten, and store off the ground to prevent deformation.
Handling swivel or quick-connect fittings
Inspect swivel and quick-connect fittings for debris, corrosion, and worn O-rings before draining to guarantee they release water and seal properly during winter storage.
Disconnect or open fittings to expel trapped water, replace damaged O-rings, and lubricate threads lightly with a silicone-based lubricant.
Reassemble dry, test for leaks, and store detachable connectors indoors to prevent freezing damage.
Draining permanently attached or buried hoses
When hoses are permanently attached or buried, clearing water requires methods beyond simple disconnecting and draining; access points, slope, and the hose material determine the best approach.
Use accessible shutoff valves, install or open low-point drain access, and employ compressed air to push water out.
For long buried runs, excavate minimal sections to create a gravity drain or add inline drains before freezing weather.
Special steps for soaker hoses and drip irrigation lines
Moving from buried or permanently attached lines, soaker hoses and drip irrigation require different handling because their porous walls and small emitters trap water and debris.
Flush lines thoroughly, then detach and elevate ends to drain by gravity. Blow out remaining water with low-pressure air if available.
Clean or replace clogged emitters, coil hoses loosely for storage, and store indoors to prevent freezing and UV damage.
Tools and Techniques to Make Draining Easier
Practical tools can greatly speed up hose draining: a shop vacuum or air compressor can blow residual water out quickly, while hose reels and gravity-assisted setups let water run free without manual winding.
Simple adapters and quick-connect fittings reduce time spent disconnecting and reattaching lines. The following section outlines when to use each method and the basic steps for safe operation.
Using a shop vacuum or compressor to blow out water
A shop vacuum or air compressor can quickly clear remaining water from a garden hose by forcing air through its length, reducing the risk of freeze damage more effectively than gravity alone.
Attach securely, check fittings, and use moderate pressure to avoid damaging couplings. Work from faucet toward nozzle, intermittently reversing or tapping the hose to dislodge pockets, then cap ends and store indoors.
Hose reels and gravity-assisted draining options
Consider mounting or angling the hose reel so gravity assists drainage: positioning the reel higher at the faucet end and sloping it toward the nozzle encourages water to run out naturally when the spigot is shut.
A swivel or pivoting reel helps maintain slope while winding.
Portable reels with built-in rollers, wall-mounted cranks, and elevated storage racks all reduce trapped water and simplify winter prep.
Adapters and connectors that speed up the process
Attach quick-connect adapters and purpose-built connectors to cut draining time considerably: these fittings let one disconnect hoses, purge sections, or redirect flow without tools.
Useful options include shutoff valves, drain tees, angled adapters, and compression fittings.
Benefits: faster emptying, reduced bending, cleaner storage, and fewer joints retaining water.
- Shutoff valve
- Drain tee
- Angled adapter
- Compression fitting
Common Mistakes and How to Avoid Them
Common errors when preparing a hose for winter include leaving it kinked or pinched during storage, neglecting to drain attachments and spray nozzles, and storing the hose in locations that still allow freezing.
Overlooked inline backflow preventers and shutoff valves can trap water and cause hidden bursts. Addressing these specific points reduces the risk of damage and extends hose lifespan.
Leaving hose kinked or pinched during storage
Leaving a hose kinked or pinched during storage traps water and stresses the material, increasing the risk of leaks and permanent damage when temperatures drop.
Coiling a hose loosely on a wide reel or hanging it on a smooth hook prevents sharp bends.
Ensuring gentle curves and supporting the hose at intervals avoids flat spots and prolongs flexibility, reducing winter cracking and failures.
Forgetting to drain attachments and spray nozzles
After coiling and storing the hose properly, attention should turn to fittings and spray nozzles, which often retain small amounts of water that can freeze and expand.
Neglecting these parts risks cracked threads and damaged seals.
Detach nozzles, drain and shake them dry, open any adjustable valves, and store attachments indoors in a dry place to prevent winter damage.
Improper storage locations that still allow freezing
Many homeowners mistakenly stash hoses in unheated garages, sheds with gaps, or along exterior walls, believing that any covered spot will prevent freezing.
Such locations can expose hoses to cold drafts or radiant chill from exterior surfaces.
Proper storage means choosing insulated interior areas, elevated racks away from doors, or sealed basements.
Regularly check storage spots for cold penetration to avoid frozen, cracked hoses.
Overlooking inline backflow preventers and valves
Because inline backflow preventers and shut-off valves sit between the spigot and hose, they are often forgotten when winterizing, which can leave trapped water to freeze and crack fittings or burst pipes.
Inspect for such devices, open or remove them, and drain residual water.
If removal is impractical, insulate and use a faucet key or compressed air to clear lines before storage.
How to Store Your Hose Over Winter for Maximum Lifespan
For maximum lifespan, hoses are best stored indoors in a dry, temperature‑controlled space such as a garage or shed, with outdoor storage limited to insulated or heated enclosures.
They should be loosely coiled on a wide reel or hanger to prevent kinks and supported off the ground, and labeled by length or location for easy retrieval.
A simple seasonal checklist—drain, inspect for damage, clean fittings, apply light lubricant, and replace worn washers—completes the winter prep.
Best storage locations (indoor, garage, shed)
Choosing the right storage location—indoors, in a garage, or in a shed—has the biggest impact on a hose’s winter survival because temperature stability, protection from UV and pests, and drainage options vary widely between these spaces.
Indoors offers consistent warmth and dryness; garages provide moderate shelter but may freeze at edges; sheds protect from sun and animals but can be damp.
Prioritize dry, frost-free spots.
Recommended coiling and support methods
Coil the hose loosely in large loops and support it off the ground to prevent kinks, crushing, and moisture buildup; tight spirals or stacking the hose on a hard surface concentrate stress points and invite cracking during freeze–thaw cycles.
Use wide-diameter hangers, wall-mounted racks, or shelf storage with padding to distribute weight evenly. Secure fittings and avoid sharp bends to preserve integrity.
Using insulation or heated enclosures if outdoor storage is necessary
When outdoor storage cannot be avoided, insulating the hose or housing it in a small heated enclosure prevents residual water from freezing and reduces thermal stress on fittings and walls.
Foam pipe wrap, insulated hose covers, or a weatherproof box with low-wattage heat tape maintain temperatures above freezing.
Guarantee ventilation to avoid condensation, secure fittings, and monitor thermostat or heat source for consistent protection.
Labeling and seasonal maintenance checklist
A simple labeling system and a short seasonal checklist make winter storage predictable and extend a hose’s usable life.
A tag notes length, fittings, and last repair date. Before storage, drain, coil, inspect, and apply a protector. Re-check in spring for damage.
- Drain fully
- Coil neatly
- Inspect fittings
- Label and date
Troubleshooting After Winter: Re-using a Stored Hose
On first use after storage, the hose is inspected for cracks, leaks, stiff or brittle sections along its length.
Next, water flow and pressure are tested safely at a low setting to confirm performance without causing further damage.
If problems are found, options include patching small leaks, replacing worn couplings, or replacing the hose entirely when damage is extensive.
Inspecting for cracks, leaks, and brittle sections
Begin by laying the hose out in bright light and running a careful hand along its length to detect surface cracks, soft spots, or rigid, brittle sections that indicate freeze damage.
Inspect fittings and couplings for hairline fractures, corrosion, or loose connections. Mark compromised areas for repair or replacement.
Discard hoses with extensive brittleness; small punctures may be patched or reinforced with appropriate tape or sleeve.
Testing water flow and pressure safely
Once cracked sections and questionable fittings have been marked or repaired, the next step is to check that the hose delivers steady flow and holds pressure before returning it to regular use.
Attach the hose to a faucet, run water at moderate pressure, observe for leaks and bulges, and note flow consistency.
Test under higher pressure briefly to confirm fittings remain secure and no seepage appears.
Repair options: patching, replacing couplings, when to replace
Assess options for repair based on the hose’s condition and the location of damage.
Small cuts or pinholes may be patched with adhesive repair tape or a rubber sleeve; larger splits or deteriorated ends warrant replacing couplings or cutting back to sound material and installing a new fitting.
Replace the hose when multiple failures, brittleness, or internal collapse compromise flow and reliability.
Eco-Friendly and Cost-Saving Alternatives
The article contrasts full winterizing of in-ground irrigation systems with the simpler removal and storage of garden hoses to show which approach best reduces waste and cost.
It notes low-maintenance hose options that resist kinking and freeze damage as ways to cut replacement frequency.
It also outlines recycling and repurposing ideas for damaged hoses to prevent landfill disposal and save money.
Winterizing irrigation systems vs. removing hoses
Comparing winterizing an irrigation system with removing garden hoses reveals distinct trade-offs in cost, environmental impact, and labor:
Winterizing—blowing out lines, insulating backflow devices, and shutting down controllers—requires upfront investment and occasional professional service but minimizes water waste and protects infrastructure.
On the other hand, detaching and storing hoses is low-cost and immediate but leaves exposed components vulnerable and can encourage repeated water use in spring.
Both choices affect long-term maintenance.
Low-maintenance hose types that resist freezing
Several durable hose types offer low-maintenance, freeze-resistant performance that can reduce winter prep and long-term costs.
Expandable hoses with kink-free designs and lightweight polymer blends drain easily and resist cracking.
Thermoplastic rubber and silicone-reinforced hoses retain flexibility at low temperatures, lowering rupture risk.
Insulated, reinforced commercial-grade hoses provide longevity for frequent use, minimizing replacements and overall environmental impact.
Recycling or repurposing damaged hoses
Repurpose damaged garden hoses to cut waste and recoup value: sections can become drip irrigation lines, flexible edging, or protective covers for tool handles, while worn material is suitable for craft projects or as tie-down straps.
- Convert segments to drip irrigation
- Use as flexible garden edging
- Wrap handles for grip protection
- Craft straps, mats, or planters from scraps
Quick Reference Checklist: Draining and Storing a Garden Hose
A concise checklist helps guarantee a garden hose is properly drained and stored before winter to prevent freezing damage and extend service life. Follow steps succinctly: disconnect, drain, inspect, coil, elevate, and cover. Use frostproof storage and avoid kinks. Reference quick table for essentials.
| Task | Action | Tip |
|---|---|---|
| Disconnect | Shut valve | Reduce pressure |
| Drain | Elevate end | Remove puddles |
Conclusion
Draining a garden hose before winter is a simple chore with outsized importance: it saves headaches, money, and countless shattered fittings. By following the quick steps and choosing the right method for hose type and setup, one can prevent freezing, cracks, and premature replacement. Proper storage and simple tools make the process nearly effortless, and mindful troubleshooting in spring guarantees reliable performance—so the hose survives the season like a champion against icy doom.
