How to Remove a Moen Kitchen Faucet With Sprayer: Step-By-Step DIY Guide
To remove a Moen kitchen faucet with a pull-out sprayer, start by shutting off the water supply and relieving any pressure in the lines. Next, disconnect the hot and cold supply lines and detach the sprayer hose, catching any residual water. From beneath the sink, use a basin wrench to loosen the mounting nuts, then free the sprayer hose and lift the faucet assembly out of the sink. After removing the faucet, clean the sink deck and inspect gaskets for any needed repairs. If you require further assistance, additional troubleshooting steps are available.
Overview of Removing a Moen Kitchen Faucet with Sprayer
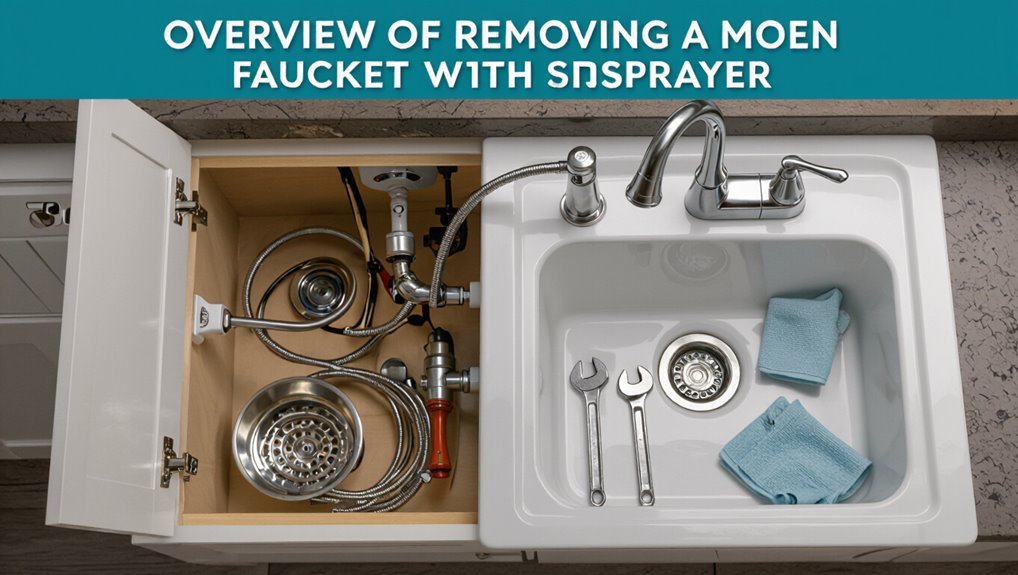
This overview summarizes steps for removing a Moen kitchen faucet with a side sprayer, identifies who will benefit from the guide, and lists basic tools and safety requirements.
It gives an estimated time and straightforward difficulty rating to help readers plan the task.
Recommended precautions — shutting off water, wearing eye protection, and protecting cabinetry — are noted before procedures begin.
What this guide covers and who it’s for
When faced with a leaking, clogged, or outdated Moen kitchen faucet that includes a pull-out or side sprayer, this guide explains the step-by-step process to remove the entire fixture safely and efficiently. It targets DIYers and homeowners seeking clear instructions on how to remove a moen kitchen faucet with sprayer, necessary tools, and common pitfalls.
| Relief | Confidence | Renewal |
|---|---|---|
| Calm | Skill | Fresh |
| Ready | Empowered | Clean |
Estimated time, difficulty level, and required safety precautions
Although the exact time varies with sink access and component condition, removing a Moen kitchen faucet with a pull-out or side sprayer typically takes between 45 minutes and 2 hours for a homeowner with basic tools and moderate plumbing experience.
Difficulty is moderate; expect confined-space work and basic plumbing disassembly.
Safety: shut off water, relieve pressure, wear gloves and eye protection, and verify electrical clearance under sink.
Tools and Materials Needed
A concise list of essential tools and materials begins the task, including basin wrenches, adjustable wrenches, plumber’s putty, and replacement supply lines.
Optional items and replacement parts—such as a socket set, flashlight, silicone sealant, and a new cartridge or sprayer—are noted for smoother removal and easier reinstallation.
Guidance on selecting the correct replacement faucet or parts focuses on model compatibility, finish match, and valve type to guarantee a proper fit.
Essential tools list
Proper preparation requires a concise set of tools and materials tailored to removing a Moen kitchen faucet. The technician gathers essentials to disconnect water, unfasten mounting hardware, and protect surfaces.
Items focus on access, grip, and basic plumbing safety.
- Adjustable wrench and basin wrench
- Phillips and flathead screwdrivers
- Bucket and towels
- Flashlight and work gloves
Optional helpful tools and replacement parts
Several additional tools and a few common replacement parts can simplify removing a Moen kitchen faucet and reduce the risk of delays or damage.
A compact inspection light, basin wrench extension, silicone grease, and replacement O-rings or spray hose are useful.
Consider keeping these on hand to inspect, loosen tight fasteners, lubricate seals, and swap worn parts quickly.
- Compact inspection light
- Basin wrench extension
- Silicone grease
- Replacement O-rings and spray hose
How to choose the right replacement faucet or parts
Which replacement parts or faucet model best match the sink’s configuration and the homeowner’s needs should be determined before purchasing tools or materials.
Inspect mounting holes, deck thickness, supply line types, and spray hose compatibility.
Verify Moen model numbers or measure dimensions for basin depth and spout reach.
Choose matching finish, compatible valve cartridges, and necessary mounting kits to guarantee proper fit and function.
Prepare the Work Area and Shut Off Water
Before beginning removal, the person locates the hot and cold shutoff valves beneath the sink and turns them clockwise to close, testing the faucet to confirm water is off.
If under-sink valves are absent or leaking, the main house shutoff should be used and verified at an indoor faucet.
Cabinet surfaces are protected with towels or cardboard and a bucket or towels are placed under the supply lines to catch residual water.
How to locate and shut off shutoff valves
Locate the shutoff valves under the sink by kneeling in front of the cabinet and visually tracing the hot and cold supply lines from the faucet down to the fittings; they are typically small, round or oval valves on the supply pipes near the back wall. Turn each valve clockwise to close, test faucet to confirm no flow.
| Valve | Action |
|---|---|
| Hot | Turn clockwise |
| Cold | Turn clockwise |
| Test | Open faucet slightly |
| Inspect | Check for leaks |
How to shut off water at the main if needed
If shutting off the sink valves does not stop the flow or they are inaccessible, the homeowner should shut off the main water supply to the house.
This is done by finding the main shutoff valve—usually near the water meter, where the service line enters the building, in a basement, crawlspace, or utility area—and turning it clockwise until it stops to fully stop water to the property.
After shutting off, open a nearby faucet to relieve pressure and confirm flow has stopped.
Protecting cabinets and catching water (towels, bucket)
With the water supply off and pressure relieved, attention shifts to protecting cabinets and containing residual water. Lay towels in cabinet bases, place a shallow bucket beneath supply lines, and use plastic sheeting to shield wood. Wring towels frequently and empty the bucket. Inspect for leaks before proceeding.
| Item | Purpose | Tip |
|---|---|---|
| Towels | Absorb drips | Fold thickly |
| Bucket | Catch runoff | Shallow, wide |
| Sheeting | Protect wood | Tape edges |
| Rags | Quick cleanup | Keep spare |
| Tray | Collect parts | Magnetized preferable |
Disconnecting Water Supply and Sprayer Hose
Before disconnecting fittings, the technician relieves residual pressure by opening the faucet and draining any remaining water into a basin.
The hot and cold supply lines are then loosened at their shutoff valves and disconnected with an adjustable wrench.
Finally, the sprayer hose is detached from the faucet body and the diverter, taking care to catch any trapped water.
Steps to relieve residual water pressure
Shut off the cold and hot supply valves completely, then open the faucet to drain remaining water and relieve line pressure.
Next, press the sprayer trigger until flow stops to evacuate hose water.
Place a towel or small bucket beneath the valve area to catch drips.
Wait a few minutes, recheck for steady no-flow, and close the faucet before proceeding to disconnection.
How to disconnect hot and cold supply lines
Begin by loosening the compression nuts that secure the hot and cold supply lines to the shutoff valves, using an adjustable wrench while holding the valve body with a second wrench to prevent twisting.
After backing off both nuts, drain remaining water into a bucket, capture drips with a towel, and fully remove the nuts.
Inspect ferrules and threads for damage before proceeding.
How to detach the sprayer hose from faucet and diverter
Loosen the sprayer hose retaining nut beneath the sink with an adjustable wrench, then guide the hose down through the faucet body while supporting the diverter to prevent it from turning.
Disconnect the hose from the diverter by unscrewing its coupling or releasing the quick‑connect clip.
Inspect O‑rings and replace if worn.
Pull hose fully free, routing carefully to avoid kinks or damage.
Removing the Faucet from Above the Sink
With the supply lines and sprayer hose disconnected, attention shifts to the mounting hardware accessible from the countertop to free the faucet body.
The escutcheon or deck plate, if present, should be removed or loosened as needed to expose mounting nuts and gaskets.
Single-hole installations typically lift out once fasteners are undone, while multi-hole setups may require removing the deck plate first and easing the faucet assembly clear of the sink.
Loosening mounting hardware accessible from countertop
A rag or small tray should be placed on the countertop to catch any loose screws or debris before handling the faucet’s mounting hardware accessible from above the sink.
Using the appropriate screwdriver or hex key, loosen visible mounting nuts or screws a few turns. Keep removed fasteners organized.
Avoid forcing stuck hardware; apply penetrating lubricant and reattempt gently to prevent damage to the countertop.
When and how to remove escutcheon or deck plate
Begin by verifying the faucet is fully disconnected from water and power sources.
Next, remove any accessory components—soap dispenser or sprayer—clear of the deck.
Slide or unscrew the escutcheon plate: lift gently if held by clips or rotate fasteners beneath for threaded mounts.
Clean sealant residue and inspect gaskets.
Store the plate and hardware together for reinstallation or replacement.
Handling single-hole vs. multi-hole installations
Differentiate the approach based on whether the faucet occupies a single hole or multiple deck openings. For single-hole installs, remove mounting nut and lift straight up. For multi-hole with escutcheon, remove the plate first, detach each supply line and mounting hardware, then lift. Confirm sprayer hose is free before extraction.
| Type | Key Step | Tip |
|---|---|---|
| Single-hole | Remove nut | Lift vertically |
| Multi-hole | Remove escutcheon | Disconnect lines |
| Sprayer | Free hose | Prevent snags |
Removing the Faucet from Under the Sink
Working from beneath the sink requires attention to posture, lighting, and protective gloves to prevent strain and injury in confined space.
The next steps explain how to access and remove the mounting nuts and retainers securing the faucet.
Practical tips for handling stubborn or corroded fasteners, including penetrating oil and the right tools, will follow.
Working in tight spaces safely
Crawling under the sink to remove a Moen kitchen faucet requires deliberate attention to posture, lighting, and tool placement to prevent strain and injury.
Use knee pads or a padded mat, maintain a neutral spine, and work with elbows tucked to reduce reach.
Employ a headlamp for clear visibility, keep frequently used tools within easy reach, and pause periodically to stretch and reassess positioning.
How to remove mounting nuts and retainers
Loosen the mounting nuts and retainers beneath the sink to free the faucet body: locate the threaded shanks and use the appropriate-sized basin wrench or socket to turn each nut counterclockwise, applying steady, controlled force to avoid slipping.
- Reach up into the cramped mounting area.
- Align wrench with nut.
- Turn slowly until threads clear.
- Lower faucet body carefully.
Tips for stubborn or corroded fasteners
Apply penetrating oil and let it soak before attempting to turn corroded nuts.
Use penetrating oil, wait 10–15 minutes, then try careful taps with a hammer to fracture rust bonds.
Employ a long-handled wrench or basin wrench for leverage.
Heat stubborn threads with a propane torch if safe, and protect surrounding plastic.
If seized, cut threads and replace mounting hardware during reinstallation.
Removing Additional Components (Diverter, Weight, Sprayer)
Next, the sprayer assembly and its counterweight are removed by disconnecting the hose from the faucet body and sliding off the weight.
The diverter is then detached, with a careful check for hidden clips or retainer rings that may need releasing.
Reusable parts should be inspected for wear and set aside for possible reuse.
How to remove the sprayer head and hose weight
Begin by locating the sprayer head and the hose weight under the sink; the sprayer typically sits beside the faucet spout and its hose runs down through the countertop into the cabinet.
Unscrew or pull the sprayer head off its hose connector.
Slide the hose weight away from the hose coupling and remove it by unclipping or separating its two halves to free the hose for faucet removal.
Detaching the diverter and checking for hidden clips
Detach the diverter by tracing the sprayer hose to the faucet body and loosening the retaining nut or clip that secures it; once freed, pull the diverter assembly straight out to inspect its O-rings and seating for wear or debris.
Next, probe beneath the sink for any hidden clips or brackets holding the hose or weight, release them, and gently remove the hose routing to clear the faucet.
Inspecting and saving reusable components
Carefully remove the diverter, weight, and sprayer to evaluate each part for reuse:
the diverter should be examined for intact O-rings and smooth seating.
The weight checked for corrosion or cracks at its clamp, and the sprayer head inspected for internal buildup, damaged threads, or worn seals.
Clean components with vinegar or mild detergent, replace any degraded seals, and label reusable parts for reinstallation.
Inspecting and Cleaning the Sink Area After Removal
Once the faucet and its components are removed, the sink area should be inspected for remaining putty, gasket material, and mineral buildup.
The surfaces and surrounding countertop ought to be checked for scratches, cracks, or water damage.
Any residues should be cleaned and surfaces prepped to guarantee a proper seal and secure installation of a new faucet.
Removing old putty, gasket, and mineral deposits
After the faucet is removed, the sink area should be inspected for remaining plumber’s putty, the old rubber or foam gasket, and any mineral buildup around the mounting hole and under the deck.
Use a plastic scraper to lift cured putty and peel away gasket remnants.
Apply a descaler or vinegar, wait, then scrub with a nylon brush.
Rinse and dry thoroughly before reinstalling.
Checking sink and countertop for damage
With the sink surface cleared of putty, gasket pieces, and mineral deposits, the installer should inspect the sink and surrounding countertop for chips, cracks, stains, or soft spots that could indicate water damage. Note rust, hairline fractures, and delamination; document findings and photograph areas for repair planning.
| Area | Issue Type | Severity |
|---|---|---|
| Sink basin | Chip | Low |
| Countertop edge | Crack | Medium |
| Underside | Soft spot | High |
| Seal area | Stain | Low |
Preparing surfaces for a new faucet
Begin by clearing any remaining debris and loosening residual sealant around the faucet openings. Then dry the area thoroughly to reveal chips, mineral deposits, or adhesive residue that could interfere with a new installation.
Inspect for corrosion, cracked caulk, and pitting. Remove mineral buildup with vinegar or a descaler, scrape off old sealant, and wipe surfaces with a degreasing cleaner.
Confirm surfaces are dry and smooth.
Common Problems and Troubleshooting During Removal
Removal of a Moen kitchen faucet can be complicated by seized nuts, rust, or mineral buildup that resist loosening.
The sprayer hose may also become stuck inside the faucet body, requiring specific extraction steps.
If corrosion, damaged components, or inaccessible fasteners prevent safe removal, a professional plumber should be contacted.
Dealing with seized nuts, rust, and mineral buildup
When attempting to free a Moen kitchen faucet, seized mounting nuts, rusted components, and mineral deposits are the most common obstacles and require patient, targeted techniques to avoid damage.
Apply penetrating oil, let it soak, then tap gently to break corrosion. Use heat cautiously for stubborn threads, protect nearby finishes, and employ appropriate pliers or a basin wrench.
Clean threads and replace damaged fasteners.
What to do if the sprayer hose is stuck inside the faucet
If the sprayer hose becomes lodged inside the faucet body, the extractor must proceed methodically to avoid kinking the hose or damaging internal components. Apply penetrating lubricant, work the hose back and forth, and pull gently while supporting the weight. If resistance persists, inspect for clips or clips broken fragments before attempting force.
| Step | Action |
|---|---|
| 1 | Lubricate |
| 2 | Wiggle |
| 3 | Support |
| 4 | Inspect |
| 5 | Retry |
When to call a professional plumber
After attempting to free a stuck sprayer hose, the extractor should assess whether the remaining tasks fall within their skill set or require a licensed plumber.
Call a professional if corrosion, stripped fasteners, hidden mount hardware, persistent leaks, damaged supply lines, compromised valve bodies, or inaccessible mounting nuts are present.
Also seek help when unfamiliar tools, extensive disassembly, or local code compliance concerns arise.
Reinstallation and Temporary Solutions
After removal, the article explains how to temporarily cap water lines to prevent leaks and contamination until a replacement is ready.
It then outlines the basic, high-level steps for installing a new faucet, from positioning and securing the unit to reconnecting supply lines.
Finally, it covers the essential procedure for testing connections and fixtures for leaks before finishing the installation.
How to temporarily cap water lines if replacing later
Prepare by shutting off the supply valves and draining the lines.
Then cap the hot and cold fittings with temporary plugs to prevent leaks and contamination while the faucet is out.
Use rubber or threaded brass caps sized to the supply tails, secure with plumber’s tape, and hand-tighten plus a quarter turn with a wrench.
Label lines and inspect caps periodically for seepage.
Basic steps for installing a new faucet (high-level)
With the supply valves shut, lines drained, and temporary caps in place, the new faucet can be installed following a straightforward sequence:
position the gasket/trim, feed hoses through the sink, secure the faucet from beneath with mounting hardware, attach supply lines and sprayer hose, reconnect to shutoff valves, remove caps, and restore water slowly.
Tighten fittings and tidy connections before finishing.
Testing for leaks after reinstallation
Begin by turning the shutoff valves on slowly and observing all joints, connections, and hose fittings for any sign of moisture or seepage; use a dry paper towel or tissue to detect small drips.
Operate hot and cold handles, sprayer, and shutoffs while watching.
Inspect beneath sink after five minutes and again after an hour.
Tighten fittings or reseat seals immediately if any leak appears.
Maintenance Tips to Avoid Future Removal Issues
Routine maintenance can prevent the stubborn corrosion and mineral buildup that complicates future faucet removal.
Inspecting the spray hose, diverter, and weight regularly and replacing hoses or components at manufacturer-recommended intervals keeps the assembly functioning smoothly.
Clear, scheduled cleaning and prompt replacement of worn parts reduce the risk of seized fittings and simplify any future disassembly.
Regular cleaning to prevent mineral buildup
Regular light cleaning greatly reduces mineral buildup on a Moen kitchen faucet and eases any future removal or repair.
A weekly wipe with a soft cloth and mild soap prevents deposits. For tougher spots, a vinegar solution applied briefly dissolves scale without damaging finishes.
Pay attention to aerator, spray head, and base crevices; rinse thoroughly and dry to avoid water spots.
Recommended replacement intervals for hoses and weights
Beyond weekly cleaning, attention to internal components like pull-down hoses and counterweights helps prevent failures that necessitate faucet removal.
Manufacturers typically recommend replacing braided or nylon spray hoses every 5–7 years under normal use; sooner if signs of wear appear.
Counterweights may last longer but should be checked and replaced every 7–10 years or whenever damage, cracking, or loosening compromises spray function.
How to inspect and maintain spray hose and diverter
Inspect the spray hose and diverter by visually checking for kinks, fraying, mineral buildup, and loose connections. Clean buildup with vinegar, tighten fittings, replace damaged hose, and lubricate O-rings. Test diverter action and spray flow. Schedule checks every 6–12 months.
| Issue | Action |
|---|---|
| Kinks/fray | Replace hose |
| Mineral buildup | Vinegar soak |
Quick Checklist Before You Start
Before beginning faucet removal, a brief safety and tool check prevents surprises and damage. The technician confirms water is shut off, power (if any) is disconnected, and workspace lighting and ventilation are adequate.
Next, the proper wrenches, basin tools, replacement parts, and a bucket are gathered to streamline the job.
- Shut off hot and cold water supply and relieve pressure
- Turn off nearby electrical power and clear the area beneath the sink
- Gather adjustable wrench, basin wrench, pliers, and flashlight
- Prepare a bucket, towels, and replacement parts for quick access
Pre-removal safety and tool checklist
A brief, focused checklist helps guarantee safety and efficiency before removing a Moen kitchen faucet: gather the necessary tools (adjustable wrench, basin wrench, bucket, towels, flashlight, and plumber’s putty or tape), shut off both hot and cold water valves, drain the lines by opening the faucet, disconnect the supply lines, and clear the area under the sink of obstructions and fragile items.
- Pile towels and bucket ready
- Wrenches accessible
- Supply lines detached
- Area cleared and lit
Conclusion
After hours under a sink, a homeowner remembered the stubborn Moen sprayer that once leaked like a dripping stopwatch—60 drips a minute, a tiny metronome of wasted time. Removing the faucet can feel like untying a knot of habits and rust, but with the right tools and patience the task unwinds. The effort not only restores function but also buys back quiet minutes, turning a small repair into reclaimed calm.