How to Aerate Lawn With a Sprinkler System: Step-By-Step Guide for Even Watering
Aerating your lawn using a sprinkler system enhances water absorption and alleviates soil compaction, which helps prevent runoff and promotes deeper root growth. To effectively aerate, follow these steps:
- Timing: Select the right time for aeration based on your grass type.
- Soil Preparation: Moisturize the soil 24–48 hours prior to aeration.
- Mark Components: Clearly mark any irrigation components to avoid damage.
- Aerate: Use a core aerator to make straight, overlapping passes, then go over the area perpendicularly for uniform holes.
- Adjust Sprinklers: After aeration, test and adjust sprinkler heads to ensure even coverage.
- Watering: Lightly water the area to help settle the soil plugs.
- Overseeding: If necessary, overseed to promote grass growth.
Follow these steps for effective aeration, and consult our troubleshooting guidance for any issues.
Why Lawn Aeration Matters for a Sprinkler-Irrigated Yard
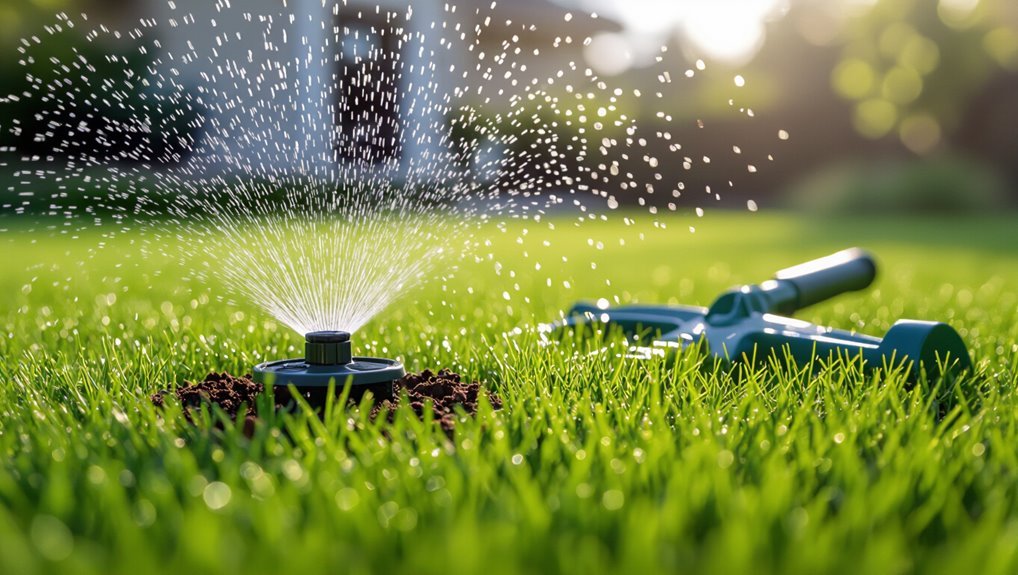
Compacted soil and a heavy thatch layer can block sprinkler spray and prevent water from reaching grassroots, reducing irrigation efficiency.
Aeration breaks through these barriers, improving water infiltration and oxygen delivery to roots for stronger turf.
Even with a sprinkler system, puddling, spongy turf, thin growth, or shallow roots are clear signs aeration is needed.
How compaction and thatch affect sprinkler effectiveness
When soil becomes densely packed or a thick layer of thatch accumulates, sprinkler water struggles to penetrate beyond the surface, reducing deep root hydration and promoting runoff or evaporation.
Compaction limits pore space and redirects spray, while thatch acts like a sponge, holding moisture near the surface.
Guidance on how to aerate lawn with sprinkler system addresses these barriers so irrigation reaches roots efficiently.
Benefits of aeration for water penetration and root health
Addressing compaction and thatch opens the way to improved irrigation outcomes because aeration removes the physical barriers that trap water at the surface.
Puncturing soil increases infiltration, reduces runoff and pooling, and promotes deeper, more extensive root growth.
Enhanced oxygen and nutrient movement support resilient turf, drought tolerance, and efficient use of applied water, maximizing sprinkler effectiveness while lowering disease risk and maintenance needs.
Signs your lawn needs aeration despite using a sprinkler
How can a homeowner tell that a sprinkler system isn’t enough on its own?
Compact, spongy turf, surface pooling after irrigation, thin or yellowing grass despite regular watering, and slow drainage indicate compaction.
Shallow roots revealed by easy pull-up and increased run-off after rain also signal need for aeration.
Addressing these signs improves water infiltration, root depth, and overall turf resilience under sprinkler irrigation.
When to Aerate Based on Grass Type and Climate
Timing for aeration depends on whether a lawn is planted with cool-season or warm-season grasses, with cool-season types best aerated in early fall (September–October) and warm-season types in late spring to early summer (May–June).
Local climate shifts those windows, so regional recommendations should be followed and month ranges adjusted accordingly.
Recent weather and soil moisture also matter: aerate when soil is moist but not saturated, and avoid compacted or drought-stressed periods.
Cool-season vs warm-season grass timing
Because cool-season and warm-season grasses have different growth cycles and stress periods, aeration should coincide with each type’s peak root activity to maximize recovery and benefit.
Cool-season lawns respond best when roots actively grow, minimizing stress and promoting repair.
Warm-season lawns require aeration timed to their vigorous growth phase to enhance uptake and resilience without interrupting dormancy or peak heat tolerance.
Best seasons and specific month recommendations
When planning aeration, homeowners should match the season and month to the grass species and local climate so the turf is in active growth and can recover quickly.
Cool-season grasses are best aerated in early fall (September–October) or early spring in cooler regions, while warm-season grasses benefit most from late spring to early summer (May–June) after green-up.
Regional adjustments include northern, intermediate, and southern zones.
How recent weather and soil moisture affect timing
If recent weather has been unusually wet or dry, soil moisture becomes the primary determinant of suitable aeration days. This is because overly saturated ground compacts under equipment, and bone-dry turf resists plug removal.
Homeowners should test moisture by squeezing soil to feel crumbly but cohesive.
Cool-season grasses tolerate spring/fall aeration when soil is moist; warm-season varieties need late spring through summer when active and soil conditions permit.
Preparing Your Sprinkler System and Lawn for Aeration
Before aeration begins, the sprinkler system should be inspected and any misaligned or leaking heads adjusted to prevent damage and guarantee even coverage afterward.
Hardscape edges, shallow utilities, and visible irrigation lines must be clearly marked to avoid equipment strikes, while mowing and a light watering 24–48 hours prior will bring soil to the ideal slightly moist—not soggy—condition for effective core removal.
These preparatory steps minimize risks to the system and lawn and improve aerator performance.
Inspecting and adjusting sprinkler heads before aeration
A thorough inspection of sprinkler heads secures even water coverage and prevents damage during aeration. Technicians should check for broken nozzles, misaligned heads, clogged filters, and proper pop-up height.
They should adjust spray patterns, replace damaged components, tighten loose risers, and verify pressure at zones. Documenting locations and adjustments secures consistent irrigation after aeration and reduces risk of turf disruption.
Marking hardscape, shallow utilities, and irrigation lines
Marking hardscape edges, shallow utilities, and irrigation lines clearly identifies hazards and prevents equipment damage during aeration.
Use spray paint, flags, or stakes to outline patios, sidewalks, shallow cable conduits, and visible drip tubing.
Locate and tag valve boxes, backflow devices, and buried heads.
Maintain a map for reference.
Communicate markings to any crew to avoid accidental strikes or disruption.
Mowing, watering, and soil moisture ideal levels pre-aeration
With hardscape, utilities, and irrigation clearly flagged, attention shifts to preparing turf height and soil moisture for aeration.
Mow to one-third of blade length, removing clippings to prevent matting.
Water 24–48 hours before aeration to achieve moist but not soggy soil—finger-test at 2–3 inches depth.
Avoid watering immediately after mowing; target friable soil for effective core extraction.
Tools and Methods for Aeration
A comparison of core aerators, spike aerators, and manual tools highlights differences in soil penetration, thatch removal, and ease of use.
Decisions about renting equipment, hiring a professional, or tackling the job DIY should weigh cost, lawn size, and personal experience.
An equipment checklist and basic safety precautions complete the planning stage before aeration begins.
Core aerator vs spike aerator vs manual tools
Choosing the right aeration method depends on soil type, lawn condition, and desired results: core aerators remove soil plugs and improve root access to air and water.
Spike aerators create holes by displacement which can compact surrounding soil.
Manual tools (such as hand corers or garden forks) offer targeted intervention for small areas but require more labor.
Core aeration suits compacted, clay-heavy lawns; spikes for light maintenance.
Renting vs hiring a pro vs DIY considerations
After comparing core, spike, and manual aeration methods, the next decision is who will perform the work: the homeowner, a rental operator, or a professional service.
Homeowners balance cost and effort; rentals suit occasional use and heavier machines; professionals offer expertise, time savings, and warranty.
Choice depends on lawn size, soil compaction severity, physical ability, budget, and desired convenience.
Equipment checklist and safety precautions
Necessary items and clear safety steps guarantee aeration proceeds efficiently and without injury. A concise checklist and sensible precautions minimize risk and protect sprinkler components.
Essential tools:
- Aerator (manual or machine) — confidence
- Spike or plug tines — relief
- Protective gloves and boots — reassurance
- Marker flags for heads — vigilance
- First-aid kit and water — calm
Follow lockout and tool-handling protocols.
Step-by-Step Aeration Process for Even Watering
The procedure begins by confirming soil moisture and shutting down the irrigation to prevent puddling during aeration.
Sprinkler zones should be set to off and heads protected while the lawn is aerated systematically in a planned pattern with slight overlap to guarantee full coverage.
After aeration, decide whether to remove or leave plugs based on lawn use and timing, then reconnect and test the sprinkler system.
Step 1 Confirm soil moisture and irrigation shutdown
Why check soil moisture before aeration? The practitioner probes soil to verify it’s slightly moist — not saturated or bone dry — enabling efficient core removal and minimal compaction.
Next, the irrigation system is temporarily shut down to prevent wetting the lawn during aeration, reducing clumping and machinery slippage.
Confirmation prevents damage and optimizes aeration effectiveness and subsequent watering.
Step 2 Set sprinkler zones to off and protect heads
Before aeration begins, all sprinkler zones are turned off and each sprinkler head is protected to prevent damage and secure even watering afterward.
Covers or cones are placed over exposed heads, risers are lowered or removed where possible, and valves are locked to prevent accidental activation.
This preserves equipment integrity and guarantees irrigation patterns remain consistent once aeration is complete.
Step 3 Aerate systematically across the lawn (pattern and overlap)
Begin aeration by working in straight, parallel lines across the lawn so each pass creates evenly spaced holes and the machine’s path can be easily tracked.
Maintain consistent spacing, overlap adjacent rows slightly to avoid missed areas, and vary direction on a second pass (perpendicular) for uniform coverage.
Slow, steady movement guarantees consistent core depth and prevents skips or doubled compaction.
Step 4 Remove plugs vs leaving plugs: when to pick up
When should the soil plugs be removed versus left to break down in place?
Plugs may be collected when aesthetics, heavy thatch, or reseeding are priorities.
Leave plugs when soil improves, temperatures favor decomposition, or minimal disturbance is desired.
Remove plugs after rain softens soil for easier pickup.
Evaluate lawn goals, turf type, and timeline to decide.
Step 5 Reconnect and test sprinkler system after aeration
Reattach sprinkler heads and reconnect valves promptly after aeration to restore system integrity and guarantee even water delivery to newly opened soil.
Inspect fittings for debris or damage, tighten connections, and replace worn seals.
Activate zones sequentially, observing spray patterns and pressure.
Adjust head alignment and run times for uniform coverage.
Note leaks or clogs and repair before normal irrigation resumes.
Step 6 Immediate post-aeration watering schedule for even absorption
With the sprinkler system restored and no leaks detected, the lawn requires immediate, measured watering to help moisture penetrate the new aeration holes and settle soil plugs.
Apply 0.25–0.5 inch of water within two hours of aeration, then water lightly twice daily for three days.
Afterward, resume normal deep, infrequent watering—about 1 inch weekly—adjusted for rainfall and soil type.
Adjusting Sprinkler Settings After Aeration
After aeration, soil absorbs water differently, so run times and watering frequency often need reduction to prevent runoff and overwatering.
Implementing cycle-and-soak schedules and using smart controllers helps match shorter, more frequent applications to the temporarily increased infiltration.
The homeowner should monitor coverage and adjust each zone individually based on wetting patterns and turf response.
How aeration changes run-time and frequency needs
Aeration alters soil permeability and water retention, so sprinkler run-times and scheduling should be reassessed to match the lawn’s new absorption rate.
Reduced surface runoff and faster infiltration often mean shorter, more frequent cycles to avoid saturation and promote root uptake.
Monitor soil moisture for a week, then incrementally shorten runtimes and slightly increase frequency until even, nonponding coverage and steady soil moisture are achieved.
Using cycle-and-soak and smart controllers for aerated lawns
Having adjusted runtimes and frequency to match the lawn’s new absorption, the next step is to apply cycle-and-soak practices and smart controller features to protect soil structure and optimize water delivery.
Shorter cycles with intervals prevent runoff from aeration holes; repeat cycles until target depth is reached.
Smart controllers use soil moisture or weather data to skip cycles when unnecessary, preserving aeration benefits.
Monitoring coverage and making zone-by-zone adjustments
One clear step is to inspect each irrigation zone individually to confirm uniform coverage and identify spray patterns disrupted by cores or shifted heads.
Technicians should run short test cycles, note dry spots or overspray, adjust arc, distance, or nozzle types, and realign heads.
Update run times for newly aerated soil, document changes per zone, and retest after 24–48 hours for consistency.
Additional Lawn Care Steps to Maximize Aeration Benefits
After aeration, best results come from timely overseeding and targeted fertilization to fill bare spots and support new growth.
Incorporating topdressing or compost into the aeration cores can improve soil contact and nutrient availability.
Continued proper mowing height and an adjusted watering schedule maintain the benefits while seedlings establish.
Overseeding and fertilizing after aeration: timing and methods
When is the best time to overseed and fertilize following aeration?
After aeration, seed should be applied immediately to maximize soil contact; follow with a starter fertilizer high in phosphorus if soil test supports it.
Lightly rake to guarantee seed placement, then water gently and frequently to keep surface moist.
Continue regular watering until seedlings establish, then shift to deeper, less frequent irrigation.
Topdressing and compost application through cores
Apply a thin layer of topdressing or compost directly over aeration cores to accelerate soil improvement and seed-to-soil contact.
This practice fills voids, moderates surface texture, and supplies organic matter that enhances microbial activity and moisture retention.
Use finely screened compost or sandy loam, spread evenly at a light depth, and allow cores to break down naturally, integrating material into the turf root zone.
Ongoing mowing and watering practices post-aeration
Following topdressing, maintenance shifts to mowing and watering routines that protect cores and encourage root recovery.
Mowing height should remain slightly higher for several weeks to reduce stress; avoid scalping.
Water lightly but more frequently initially to settle soil and encourage roots, then shift to deeper, less frequent irrigation.
Delay heavy traffic and fertilization until roots reestablish for best results.
Common Problems and How to Fix Them
Common problems after aerating with a sprinkler system include uneven aeration patterns that cause patchy watering, physical damage to sprinkler heads or underground lines from aerator tines, and increased weed or disease risk if the turf is not managed properly.
Practical fixes range from adjusting aeration passes and realigning sprinkler heads to inspecting and repairing damaged components before use.
Preventive actions such as timely overseeding, applying appropriate fungicides or herbicides when needed, and following a post-aeration watering schedule help minimize long-term issues.
Uneven aeration patterns and patchy watering solutions
Why does aeration sometimes leave irregular pockets while sprinklers wet only portions of the turf?
Uneven aeration often stems from inconsistent aerator passes, soil compaction variability, or obstacles causing skipped areas.
Patchy watering results from misaligned sprinkler coverage and varying soil absorption.
Remedies: map coverage, adjust sprinkler heads and run times, repeat aerator passes in missed zones, and topdress thin spots to equalize moisture retention.
Damaged sprinkler heads or lines from aerator tines
Inspecting a lawn after core aeration often reveals sprinkler heads struck or risers bent where tines punctured or dragged across the turf.
Technicians should shut off zones, expose damaged components, tighten or replace cracked heads, straighten risers or swap sections of lateral pipe.
Test pressure and spray pattern, then mark high-risk areas and adjust aerator settings or mowing passes to prevent repeat impacts.
Weed or disease risks after aeration and preventive actions
Although aeration improves soil aeration and root growth, it temporarily exposes soil and creates entry points for weed seeds and soil-borne pathogens.
Technicians should consequently anticipate an elevated short-term risk of weed germination and foliar or crown diseases in the weeks following the operation.
Preventive actions include timely overseeding with certified seed, light irrigation to favor desired seedlings, targeted pre- or post-emergent herbicides, fungicide use when warranted, and proper mowing and fertility management.
Maintenance Schedule and Long-Term Strategies
Frequency of aeration should be set according to lawn use, soil type, and overall turf health, with high-traffic or compacted soils needing more frequent attention.
A seasonal checklist can align aeration timing with sprinkler inspection, nozzle adjustments, and irrigation system winterization or startup.
Professionals should be contacted for persistent compaction, large-scale repair, or when diagnostics and equipment needs exceed simple DIY capabilities.
How often to aerate based on use, soil type, and lawn health
Typically, aeration intervals depend on lawn use, soil composition, and overall turf health, with higher-traffic or compacted areas needing more frequent treatment than lightly used, sandy soils.
Lawns with clay or heavy compaction benefit from annual or biannual aeration. Moderate-use, loamy lawns often require aeration every 1–2 years.
Weak, diseased, or thatch-prone turf may need targeted aeration and monitoring.
Seasonal checklist integrating aeration with irrigation maintenance
When planning seasonal lawn care, a concise checklist aligning aeration with irrigation maintenance guarantees tasks occur at ideal times to promote root health and water efficiency.
A practical schedule sequences inspections, aeration, repairs, and watering adjustments to maximize absorption and resilience.
- Inspect sprinkler heads: reassurance
- Aerate in early fall: relief
- Adjust schedules post-aeration: confidence
- Repair leaks promptly: calm
- Winterize system: security
When to call a professional vs continuing DIY
How should a homeowner decide between continuing DIY maintenance and calling a professional?
A homeowner should assess time, skill, equipment needs, problem complexity, and lawn goals.
DIY suits routine aeration, simple repairs, and limited budgets.
Call a professional for persistent drainage, major sprinkler system repairs, severe compaction, or when seeking optimized schedules and warranties.
Cost-benefit and lawn health guide the choice.
Cost, Time, and ROI Considerations
Typical rental, professional, and material costs for aeration range widely and should be compared against the size and condition of the lawn.
Time estimates vary from under an hour for small yards to several hours or a full day for larger properties, including setup and cleanup.
Expected returns include improved water efficiency and noticeably better turf vigor, which can offset expenses through reduced irrigation and lawn care needs.
Typical rental, professional, and material costs
Costs for aerating a lawn with a sprinkler system fall into three main categories—rental equipment, professional labor, and consumable materials—and each carries distinct price ranges and time implications that affect overall ROI. Typical costs: rentals $40–$100/day, pros $50–$150/hr, materials $10–$60. Budgeting considers frequency and lawn condition.
| Category | Typical Range | Notes |
|---|---|---|
| Rental | $40–$100/day | Walk-behind core aerator |
| Professional | $50–$150/hr | Includes pickup, cleanup |
| Materials | $10–$60 | Seed, compost, sand |
Time estimate for different lawn sizes
Having outlined rental, labor, and material expenses, attention shifts to how time requirements scale with lawn size and affect overall cost and ROI.
Small lawns (under 5,000 sq ft) typically require 2–4 hours including setup.
Medium yards (5,000–15,000 sq ft) take 4–8 hours.
Large properties (over 15,000 sq ft) may need a full day or multiple sessions, impacting labor charges and scheduling.
Expected improvements in water efficiency and turf vigor
When soil cores are removed and thatch reduced, water infiltrates more evenly and root systems access moisture deeper in the profile, leading to measurable reductions in surface runoff and irrigation frequency.
Aeration typically cuts seasonal water use and promotes denser, deeper-rooted turf that resists drought and disease.
Savings in water and reduced maintenance often offset aeration costs within one to three seasons, improving long-term ROI.
Quick Troubleshooting Reference
A brief troubleshooting checklist addresses common post‑aeration irrigation issues, such as nozzle misalignment and uneven spray patterns caused by displaced heads.
It outlines fast fixes for realigning sprinklers and flushing lines, plus immediate steps to follow if the aerator contacts an irrigation line or utility mark.
Recommended actions include shutting off water, inspecting for leaks or damage, marking the location, and arranging prompt repair to prevent further harm.
Fast fixes for irrigation misalignment after aeration
Inspect the sprinkler layout immediately after aeration to identify misaligned heads, broken risers, or clogged nozzles that can leave aerated areas dry or overwatered.
Quick fixes restore coverage and protect cores:
- Reposition heads for accurate arcs
- Replace cracked risers immediately
- Clean nozzles to restore spray patterns
- Adjust trajectory to avoid compaction spots
- Shorten run times while confirming uniform wetting
Immediate steps if aerator strikes an irrigation line or utility mark
Stop work immediately and secure the area if an aerator contacts an irrigation line or utility mark. The operator should shut off equipment and cordon the spot to prevent further damage or injury.
Assess visible damage, note pipe or wire exposure, and record location. Notify the property owner and utility companies if marked lines are hit.
Arrange professional repair, document incident, and resume work only after clearance.
Conclusion
Aerating a sprinkler-irrigated lawn is essential for healthier turf and more efficient watering. After proper timing, preparation, and choosing the right tools, following a clear step-by-step aeration routine improves water penetration and root growth. Addressing common problems and maintaining a seasonal schedule sustains benefits long-term. The modest investment of time and money often pays dividends in reduced water waste and lusher grass—like breathing fresh air after a storm, the lawn seems to revive and relax.