How to Tighten Pipe Fittings Without Leaks: Step-by-Step Fixes for DIYers
To tighten pipe fittings without leaks, first identify the fitting type and turn off the water supply. Drain the line and inspect all components—threads, ferrules, O-rings, and seating surfaces—for damage. Use two wrenches for proper alignment, apply PTFE tape or pipe compound to clean NPT threads, and snugly tighten compression nuts to re-seat ferrules. Replace any worn O-rings in push-fit connectors. Gradually tighten and test under low pressure, monitoring for any leaks. Follow further steps for repairs, replacements, and preventive measures.
How to Stop Leaks by Tightening Pipe Fittings: Quick Overview
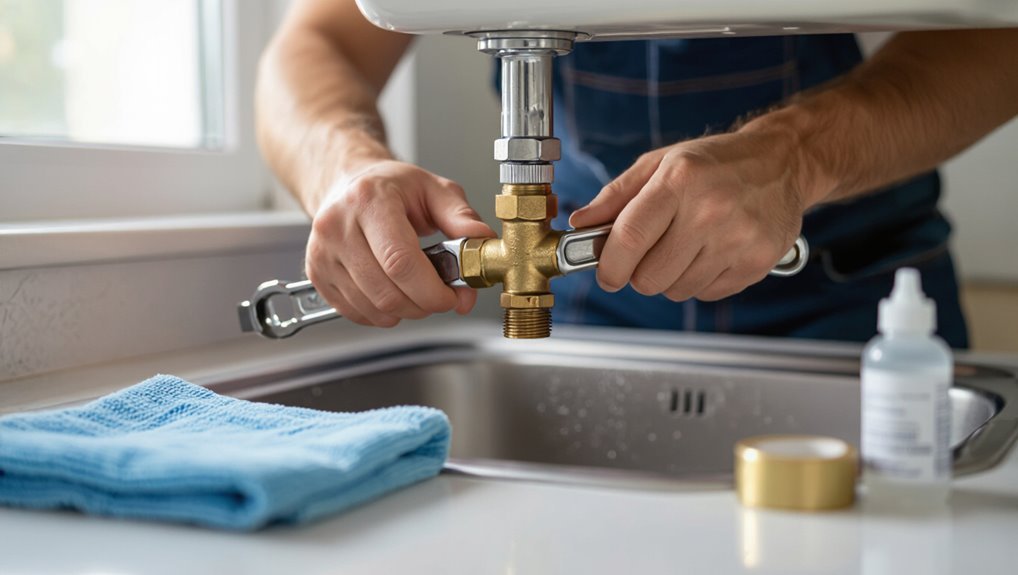
A brief assessment determines whether tightening will stop a leak or if a damaged seal, corroded threads, or a cracked fitting require replacement.
The right-fit tools and materials—adjustable wrenches, pipe thread sealant or tape, replacement washers or fittings, and safety gloves—should be gathered before attempting any repair.
Proceeding carefully with the correct supplies and knowledge minimizes further damage and saves time.
When tightening is the right fix and when it isn’t
Diagnosing whether tightening will stop a leak begins with locating the leak’s source and identifying its cause.
If threads are loose or seals are slightly shifted, learning how to tighten pipe fittings and applying modest torque often resolves the issue.
If fittings show corrosion, cracked bodies, warped seats, or persistent seepage after snugging, replacement or sealant application is required rather than further tightening.
Tools and materials you’ll need at a glance
Checklist-style clarity helps: a handful of basic tools and a few consumables cover most tightening jobs, so gather an adjustable wrench, tongue-and-groove pliers, a strap wrench for polished finishes, plumber’s tape (PTFE), pipe joint compound, replacement washers or O-rings, and a flashlight.
- Wrenches and pliers for grip
- Tape, compound, seals for threads
- Light and spare parts for inspection and swap
Identify the Type of Fitting and Leak Source
Before attempting any tightening, the reader should identify the fitting type—compression, NPT threaded, push‑fit, flared, or sweat/soldered—since each requires a different approach.
They should then pinpoint the leak with careful visual inspection, a dry-paper or tissue check, or a pressure test to confirm the exact source.
Finally, basic safety steps must be taken: shut off and depressurize the line, isolate electrical hazards, and wear appropriate PPE.
Common fitting types (compression, NPT threaded, push-fit, flared, sweat/soldered)
A quick visual and tactile inspection can distinguish the common fitting types—compression, NPT threaded, push-fit, flared, and sweat/soldered—each of which leaks for characteristic reasons: worn ferrules or loose nuts on compression fittings, damaged threads or missing tape on NPT, debris or failed O‑rings in push‑fit connectors, cracked flare faces or under‑torqued flare nuts, and poor solder joints or flux residue in sweat connections.
- Dented ferrule, frayed tape, gummed O‑ring
- Distorted flare face, loose nut, cold joint
- Visible corrosion, misaligned parts, trapped debris
How to locate the exact leak point (visual checks, dry-paper test, pressure test)
Several simple tests pinpoint a leak’s exact location by combining observation with targeted pressure checks.
Inspect fittings for corrosion, wetness, or mineral deposits. Wipe joints dry, then use a dry-paper or tissue to detect fresh moisture.
Pressurize the line briefly and watch for bubbles at threaded joints using soapy water or for sudden tissue dampening. Mark the precise failing spot for repair.
Safety checks before you start (shutoff, depressurize, electricity, PPE)
Preparation guarantees safety and a successful repair: the water (or gas) supply must be shut off, the system depressurized, and any nearby electrical sources isolated before touching fittings.
The technician should wear gloves, eye protection, and respirator if solvents or gas are present.
Verify zero pressure with a gauge or bleed valve, lock out circuits, and keep a fire extinguisher nearby.
Preparatory Steps Before Tightening
Before attempting any tightening, the water supply should be shut off and the line drained to prevent pressure or residual flow.
Threads, ferrules, and sealing surfaces must be cleaned and inspected for debris, corrosion, or deformation.
Any significant damage identified during inspection should be evaluated to determine whether replacement is required or a repair will suffice.
Shutting off water and draining the line
Shut the supply at the nearest shutoff valve and relieve pressure in the line before attempting any tightening.
Then open a downstream faucet or bleed valve to drain residual water.
For fixtures on multi-branch systems, close the correct branch valve or the main as required, and catch remaining water with a bucket or towel.
Verify flow has stopped and pressure gauge reads zero before proceeding.
Cleaning and inspecting threads, ferrules, and sealing surfaces
Clean and inspect all mating surfaces, threads, ferrules, and sealing faces to guarantee a reliable connection.
Remove dirt, old tape, corrosion, and sealant with a wire brush or soft cloth.
Verify threads are straight and burr-free; chase with a die or tap if needed.
Check ferrules for cracks or deformation and clean sealing faces until smooth and dry before reassembly.
Assessing damage: when to replace vs. repair
Evaluating damage determines whether a fitting can be salvaged or must be replaced. The inspector checks for deep thread gouges, cracked ferrules, deformed seating surfaces, corrosion pitting, and persistent leaks after tightening.
Minor scratches, light corrosion, or loose packing often permit repair with sealant, rethreading, or ferrule replacement.
Severe structural damage or compromised safety requires full component replacement.
Step-by-Step Tightening Procedures by Fitting Type
The section outlines step-by-step tightening procedures organized by common fitting types to guarantee secure, leak-free connections.
It covers proper torque and thread sealant guidance for NPT threads, correct compression nut advancement to seat the ferrule, reseating and testing of push-fit joints, forming and inspecting flared connections, and alternatives for securing sweat/soldered joints when tightening is unsuitable.
Each procedure emphasizes preventing damage to fittings and pipe while confirming a reliable seal.
Threaded fittings (NPT) tightening without overdoing it
The section outlines how to remove old sealant, clean threads, and correctly apply pipe thread sealant or PTFE tape to guarantee a proper seal.
It then explains recommended torque values and an incremental tightening sequence to prevent over‑stress and leakage.
Practical tips on checking for leaks after final torque are provided so the installer can confirm a reliable joint.
How to remove, clean, and apply pipe thread sealant or tape
Prepare for a clean, leak-free joint by removing old sealant, inspecting threads, and applying the correct new sealant or tape with controlled tension.
Remove remnants with a wire brush or solvent, check for damage, and replace if necessary.
For PTFE tape, wrap clockwise three to five turns; for pipe dope, apply evenly to male threads only.
Reassemble and test for leaks.
Correct torque and incremental tightening method
Several NPT threaded fittings require careful, incremental torqueing to achieve a leak-free seal without damaging threads or crushing sealant.
The installer should hand-tighten until snug, then use a wrench in 1/8–1/4 turn increments, testing for leaks after each increment.
Stop when leak-free or when recommended torque spec is reached.
Avoid overtightening; back off slightly if sealant extrudes excessively.
Compression fittings secure the ferrule without cracking the pipe
The section explains how to safely back off and retighten a compression nut to re-seat the ferrule without over-compressing or cracking the pipe.
It outlines signs indicating that a ferrule or nut must be replaced rather than reused.
Practical step-by-step actions and inspection points guide proper adjustment and component replacement.
How to back off and retighten a compression nut safely
When a compression connection leaks or needs repositioning, backing off and retightening the compression nut must be done carefully to seat the ferrule without deforming the pipe.
This requires loosening the nut only enough to relieve pressure, inspecting the ferrule and pipe end, and then applying controlled torque while preventing over-compression.
Use two wrenches, back the nut off a quarter turn, align tubing, hand-start, then tighten to original mark.
When to replace the ferrule or nut
Inspect the ferrule and nut for visible wear or damage before attempting further tightening.
If the ferrule shows deep scoring, deformation, or loss of bite, replace it. Replace the nut if threads are stripped, rounded, or cracked.
Also replace components when leaks persist after correct torque or when repeated re-tightening indicates material fatigue.
Use matching materials and proper seating to guarantee a reliable seal.
Push-fit fittings reseating and ensuring a proper seal
When addressing push-fit fittings, the technician first disconnects the pipe by depressing the collet and pulling straight back to free the tube.
The O-rings and sealing surfaces are then inspected for cuts, debris, or deformation, with damaged O-rings replaced.
A thin layer of compatible lubricant is applied before fully reseating the pipe to guarantee a smooth insertion and proper seal.
How to disconnect, inspect O-rings, lubricate, and reseat
Begin by isolating the section of piping and relieving pressure according to system type and local codes to guarantee a safe working environment.
Disconnect push-fit with proper tool, noting orientation. Inspect O-rings for cuts, compression set, or debris. Replace damaged rings.
Apply compatible lubricant sparingly to O-rings. Reinsert pipe fully, ensuring audible or tactile engagement.
Test under pressure and check for leaks.
Flared fittings achieving a leak-free flare connection
Flared fittings require a careful inspection of the flare face and tubing for cracks, uneven bevels, or burrs before any tightening is attempted.
The technician should snug the flare nut by hand, then apply incremental turns with a wrench while checking for deformation of the flare and avoiding over-torquing.
If any distortion appears or leaks persist, the flare should be re-cut and re-formed rather than forcing additional tightening.
How to inspect the flare and retighten without deforming
Inspect the flare visually and by feel to confirm a smooth, even contact surface and correct alignment before any retightening is attempted.
If nicks or unevenness appear, disassemble and reflare or replace the fitting.
When retightening, use the correct wrench on the nut, apply incremental turns (1/8–1/4 turn), avoid overrunning torque, and recheck for leaks with low pressure before full system restoration.
Sweat/soldered joints identifying tightening alternatives
When a sweat joint cannot be tightened because the soldered connection is fixed or damaged, the recommended options shift to re-soldering the joint or replacing it with a compression adapter.
Re-soldering requires desoldering the joint, cleaning the surfaces, and applying fresh solder with proper flux and heat control.
Using a compression adapter involves cutting back to sound pipe, deburring, and installing the adapter per manufacturer torque guidelines to restore a leak-free connection.
When tightening isn’t possible and how to re-solder or use compression adapters
If a sweat (soldered) joint cannot be tightened because the fitting is seized, damaged, or lacks accessible threads, the repairer should remove and re-solder the joint or convert it to a compression fitting; both options restore a reliable seal without forcing parts that could fracture or leak.
Remove solder with heat and flux, clean surfaces, apply new solder, or cut back pipe and install a properly sized compression adapter with ferrule and nut.
Proper Use of Sealants and Tapes
The section compares PTFE tape and pipe dope to help determine which sealant suits thread type and service conditions.
It then outlines correct application techniques for both tape and paste, including wrap direction, layer count, and curing time.
Finally, common sealant mistakes that lead to leaks—contamination, overuse, and using the wrong product—are highlighted.
PTFE tape vs. pipe dope: choosing the right sealant
Which sealant suits a given joint depends on thread type, material, and service conditions. PTFE tape resists chemicals and suits metal threads; pipe dope fills imperfections and bonds dissimilar materials. Consider temperature, pressure, and fluid. Choose compatibility and ease of future disassembly.
| Sealant | Strength | Best use |
|---|---|---|
| PTFE tape | Moderate | Metal threads, chemicals |
| Pipe dope | High | Imperfect threads, mixed materials |
Correct application techniques for tape and paste
Having chosen between PTFE tape and pipe dope based on thread type and service conditions, attention turns to correct application techniques that guarantee a reliable seal and allow future disassembly.
For tape, wrap clockwise 3–5 tight turns from first full thread outward, avoid covering the lead-in.
For paste, apply a thin, even coat to male threads only.
Assemble promptly and torque to spec.
Sealant mistakes that cause leaks
Avoidable errors with thread sealants and tapes account for most joint leaks: incorrect product choice, improper application, and contamination.
Users often use tape on tapered and parallel threads indiscriminately, apply too little or too much, or wrap against thread direction.
Oil, dirt, and old sealant prevent adhesion.
Choosing PTFE tape thickness, using paste where required, and cleaning threads prevents leaks.
Tools and Techniques to Avoid Common Pitfalls
This section addresses common mistakes by focusing on proper torque, correct wrench selection, and methods to protect fittings during tightening.
Recommended torque ranges and signs of overtightening help prevent leaks and damage.
Guidance on wrench types, gripping techniques, and protective padding reduces the risk of marring or deforming fittings.
Torque recommendations and avoiding overtightening
Proper torque is critical to reliable pipe connections: manufacturers’ specifications and material limits determine the target torque, while joint type and thread condition modify the required value.
Use calibrated torque wrenches when specified, tighten incrementally, and recheck after system pressurization.
Avoid overtightening; stripping, crushing seals, or distorted threads indicate excess torque.
Follow documented torque charts and manufacturer guidance for each fitting.
Wrench types and proper gripping methods
Select the correct wrench and grip for the fitting and material to prevent damage and guarantee consistent torque transfer.
Use adjustable wrenches for general use, strap or basin wrenches for round or recessed fittings, and pipe wrenches for threaded iron.
Position jaws squarely on flats, center the load, and pull—never twist—while maintaining steady, controlled force to avoid slippage and rounded corners.
How to protect fittings from damage during tightening
Multiple simple precautions prevent damage when tightening fittings: using the right tool, protecting contact surfaces, applying controlled torque, and checking alignment before load.
Use adjustable or pipe wrenches sized to the nut, employ jaw pads or non-marring pliers, wrap soft cloth or tape over soft fittings, torque gradually with a calibrated wrench, avoid over-tightening, and inspect threads and seals for deformation after final seating.
Testing for Leaks After Tightening
After tightening, the installer should verify joints with appropriate pressure testing for household plumbing and observe for any drops or irregularities.
Small leaks can be located using a soap solution or careful visual inspection around fittings and connections.
Systems should be monitored and rechecked after 24 to 48 hours to confirm seals remain secure.
Pressure testing methods for household plumbing
When fittings are tightened, verifying a watertight seal requires systematic pressure testing to reveal leaks that are not visible under normal use.
Methods include isolating the section, capping ends, and pressurizing with water or air to recommended household levels.
Monitor gauge readings for pressure loss over a set interval.
Use certified gauges, bleed trapped air, and document results before returning the system to service.
Soap solution and visual inspection for small leaks
Following pressure testing, a focused soap solution and visual inspection helps detect small leaks that gauge readings or bulk water tests can miss.
A soapy mix applied to joints reveals bubbling at pinhole leaks; inspect seams, threads, and compression fittings under good light.
Wipe excess, reapply where needed, and mark any bubbling locations for immediate tightening or seal replacement before restoring full service.
Monitoring and rechecking after 24 to 48 hours
Why wait 24 to 48 hours before a final verdict? Affected fittings settle, seals compress and slow leaks may emerge only after pressure cycles.
After initial soap and visual checks, reinspect connections, feel for moisture, and monitor surrounding surfaces and water meter for unexplained movement.
Document findings, tighten if necessary, then retest. Record completion time and any follow-up actions for reference.
When to Replace Parts or Call a Professional
If tightening fails to stop leaks or visible corrosion, cracked fittings, or damaged threads are present, replacement rather than further tightening is usually required.
When repairs involve high parts cost, complex pipe runs, or potential water damage, a professional plumber should be engaged.
Document the problem with clear photos, measurements, and a concise description of actions taken to expedite assessment and repair.
Signs that tightening won’t fix the problem (corrosion, cracked fittings, damaged threads)
When leaks persist despite careful tightening, the problem often lies beyond loose connections: visible corrosion, hairline cracks in fittings, or stripped threads indicate that simple torque will not restore a reliable seal.
Other signs include metal pitting, flaking plating, warped components, or persistent seepage after retightening. Such damage requires part replacement or professional assessment to guarantee safe, durable repairs and prevent recurrence.
Cost and complexity thresholds for DIY vs. professional repair
Assess the scope of the problem against available skills and budget to decide whether to replace parts or hire a professional.
Simple leaks, accessible fittings, and inexpensive parts favor DIY repairs.
Complex tasks—hidden pipes, gas lines, extensive corrosion, specialty fittings, or high replacement costs—justify professional service.
Factor time, tools, warranty, and risk of repeat damage when choosing between self-repair and hiring a plumber.
How to document and communicate the issue to a plumber
Prepare a clear, concise record of the problem before contacting a plumber:
Note the exact location, describe symptoms (drip, spray, pressure loss, noises), record when the issue started and any recent changes or repairs, and list visible materials (pipe type, fittings, corrosion).
Include photos, video of leaks or sounds, water meter/pressure readings, part numbers, previous repair attempts, and preferred access times for inspection.
Preventive Maintenance to Keep Fittings Leak-Free
A consistent preventive maintenance routine helps guarantee fittings remain leak-free by scheduling regular inspections to check for corrosion, looseness, and moisture.
Choosing durable materials and compatible fittings—such as brass or stainless steel for corrosive environments and proper thread sealants—extends service life.
Seasonal measures, including insulating lines against freezing and monitoring water quality, reduce stress and corrosion that lead to leaks.
Regular inspection schedule and what to look for
Several routine inspections spaced throughout the year help catch early signs of wear or loosening before leaks develop.
Inspect fittings monthly in high-use areas, quarterly elsewhere. Check for corrosion, dampness, mineral buildup, and slight movement. Note any odor or staining and tighten gently when needed.
- Visual: rust, residue, stains
- Touch: dampness, movement
- Smell: musty, metallic
Best materials and fitting choices for longevity
After establishing an inspection rhythm to spot early signs of wear, selecting durable materials and proper fittings reduces the frequency of interventions and the risk of leaks.
Recommend corrosion-resistant metals (copper, stainless steel), PEX or CPVC where compatible, and high-quality brass or stainless compression and threaded fittings.
Use correct pressure-rated components, matched materials to avoid galvanic corrosion, and reliable seals like PTFE tape or approved thread sealants.
Seasonal tips (freezing prevention, water quality management)
How can seasonal changes be leveraged to prevent pipe fitting failures and maintain water quality?
Guidance recommends insulating exposed pipes, draining outdoor lines before freezing temperatures, and using heat tape where needed.
Regularly flushing systems in spring removes sediment; winterize irrigation and hose bibs.
Test and adjust water softeners before heavy use; monitor corrosion indicators year-round to preempt leaks and fittings degradation.
Troubleshooting Guide: Persistent Leak Scenarios
When a leak reappears after tightening, the technician follows a stepwise diagnostic checklist to identify root causes such as damaged threads, misaligned fittings, or degraded seals.
The guide distinguishes low-pressure weeps from high-pressure failures and recommends different fixes based on pressure regime and failure mode.
It also outlines safe temporary emergency repairs and short-term measures to control leakage until permanent repairs can be made.
Leak reappears after tightening stepwise diagnostic checklist
What explains a leak that returns despite methodical tightening? A focused checklist isolates causes and actions.
- Inspect: corrosion, cracked ferrule, damaged thread — visualize flakes, hairline gap, stripped spiral.
- Seal: remove, clean, apply correct tape or compound — picture clean metal, even wrap.
- Replace: worn fitting or gasket, retest under normal flow — imagine a snug, dry joint.
Low-pressure leaks vs. high-pressure failures and tailored fixes
After confirming that seals, threads, and ferrules are intact, attention shifts to distinguishing low-pressure leaks from high-pressure failures because each demands different fixes.
Low-pressure seepage often stems from minor misalignment, loose compression nuts, or degraded O-rings and benefits from reseating, gentle torque adjustments, or replacing soft seals.
High-pressure failures indicate material fatigue, hairline cracks, or improper fittings requiring component replacement and pressure-rated upgrades.
Temporary emergency fixes and safe short-term measures
Apply quick, controlled measures to reduce damage and buy time while arranging a proper repair.
Affected water must be isolated by shutting valves; drain lines and relieve pressure.
Use approved pipe clamps, rubber patches with hose clamps, or epoxy putty per manufacturer directions.
Monitor for seepage, avoid heat or adhesive on hot pipes, and schedule permanent replacement promptly to restore full integrity and safety.
Useful Replacement Parts and Upgrades for Reliable Seals
A compact kit of replacement parts and upgrade options prevents most seal failures and speeds repairs.
Typical items to keep on hand include a few essentials:
- PTFE tape, pipe dope, and replacement washers or O-rings
- Brass or stainless fittings and compression adapters for long-term upgrades
- Adjustable wrenches, basin wrenches, and a thread-cleaning tool
When leaks persist or the system is stressed, the article advises switching to higher-quality materials and adapters for reliable seals.
Recommended fittings, sealants, and tools to keep on hand
Reliable seals begin with the right mix of fittings, sealants, and a compact set of tools tailored to the pipe material and connection type.
Recommended items include spare compression nuts, olives, O-rings, PTFE tape, pipe dope for threaded joints, silicone for drains, a bench vise, adjustable wrenches, basin wrench, tubing cutter, reamer, and a set of hex keys for valve stems.
When to upgrade to higher-quality materials (brass, stainless, compression adapters)
After listing the basic spare parts and sealants, attention should turn to when upgrading to higher-quality materials makes sense.
Brass and stainless fittings resist corrosion, galling, and deformation in high-use or exposed installations. Compression adapters improve seal reliability where threads are damaged or dissimilar metals meet.
Upgrade when leaks recur, when longevity is prioritized, or when chemical or temperature conditions exceed standard fitting limits.
Conclusion
Like a cautious gardener pruning a stubborn vine, the DIYer learns that steady hands and the right tools coax pipes into silence. Tightening, sealing, replacing—each small act stitches a leak closed, turning drips into stillness. When effort meets judgment, routine care keeps the system calm; when doubt arrives, a pro’s steady step finishes the weave. In the end, careful attention spins metal and sealant into quiet order, one fitting at a time.