How to Use a Water Leak Detector in Your House: Step-by-Step Guide for Homeowners
How to Use a Water Leak Detector in Your House: Step-by-Step Guide for Homeowners
A water leak detector helps you identify moisture issues by sounding alerts and sending notifications to your phone. To effectively use one in your home, place spot sensors under sinks, behind appliances, near water heaters, and in low areas. Alternatively, consider cable sensors for broader coverage. Choose between battery-operated or hardwired models with smart alert features. Before use, test each sensor with water to ensure functionality.
To maintain your system, regularly check and replace batteries, clean the sensors, and verify Wi-Fi and firmware updates. Following a clear setup and maintenance routine will help you prevent costly water damage. Here’s a practical step-by-step guide to get you started.
What a Water Leak Detector Is and Why It Matters
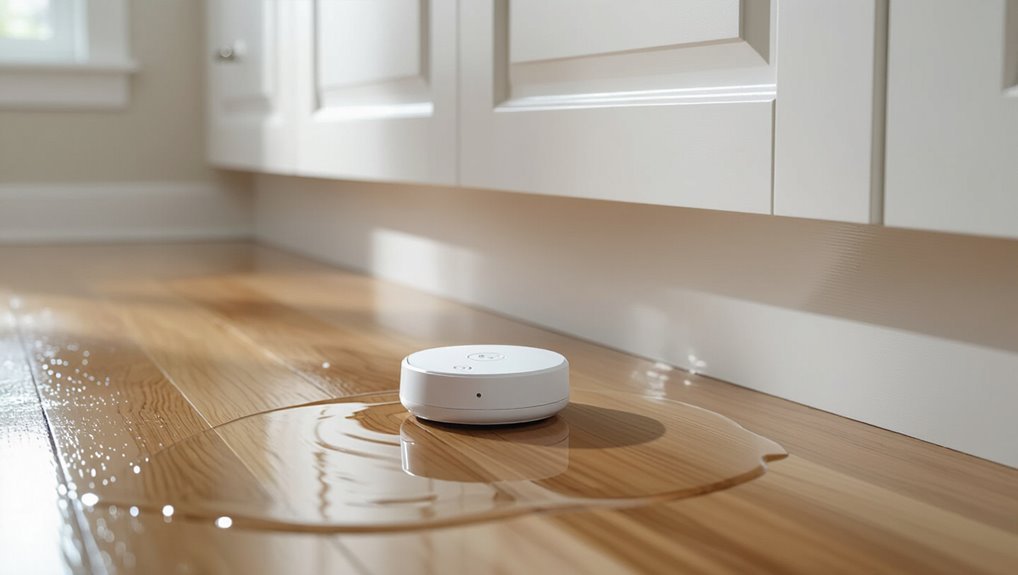
A water leak detector is a device that uses sensors, alarms, and often wireless connectivity to identify unwanted moisture or abnormal flow.
Common forms include spot sensors, cable sensors, smart detectors, and flow-based units, each suited to different locations and risks.
For homeowners, these devices can prevent costly water damage, reduce utility bills, and support insurance claims or discounts.
How water leak detectors work (sensors, alarms, wireless connectivity)
Detects leaks by combining sensors, alarms, and connectivity to translate moisture or pressure changes into alerts.
The device monitors conditions, triggers local sirens or notifications, and relays events via Wi‑Fi, Bluetooth, or hub networks.
Integration enables homeowner action and automated shutoff.
Practical guidance on how to use water leak detector in house emphasizes placement, testing, and interpreting alerts for timely response.
Common types of detectors (spot sensors, cable sensors, smart detectors, flow-based detectors)
Different designs suit different leak risks and installation needs: spot sensors sit at single points like beneath appliances.
Cable sensors run along edges and across large areas.
Smart detectors combine local sensing with app alerts and integrations.
Flow-based detectors monitor plumbing for abnormal water use indicating hidden leaks.
Selection depends on coverage area, power source, connectivity, maintenance, and compatibility with existing systems.
Benefits for homeowners (prevent damage, lower bills, insurance advantages)
Water leak detectors act as early-warning systems that help homeowners avoid costly water damage, reduce wasted utility costs, and strengthen insurance positions.
They limit structural and mold harm by enabling rapid response, lower water bills through early detection of hidden leaks, and can support insurance claims or discounts by documenting proactive risk mitigation.
Quick Answer When and Where to Use a Water Leak Detector
A water leak detector is most useful in high-risk areas such as basements, laundry rooms, under sinks, and near water heaters and dishwashers.
Immediate use is warranted when there are visible signs of moisture, unexplained drops in water pressure, or the sound of running water when no fixtures are in use.
Placing detectors in these locations helps identify leaks early and prevent costly damage.
High-risk locations in a typical house
Homes contain predictable hotspots where leaks are most likely to start, so placing detectors near those points maximizes early detection and minimizes damage.
Common high-risk locations include:
- Under kitchen and bathroom sinks.
- Behind washing machines and dishwashers.
- Around water heaters and boilers.
- Near sump pumps, basements, and crawlspaces.
Detectors in these spots alert homeowners before significant loss occurs.
Signs you need a detector immediately
Placing detectors at known hotspots reduces risk, but certain signs indicate an immediate need for a device.
Sudden unexplained water stains, persistent damp or musty odors, unexplained spikes in water bills, visible mold growth, puddles or pooling near appliances or under sinks, and hearing running water when fixtures are off all warrant immediate placement of a leak detector and prompt inspection.
Choosing the Right Water Leak Detector for Your Home
Selecting a suitable water leak detector requires comparing key features such as sensor type, detection range, alarm methods, and durability.
The choice between battery, hardwired, or plug-in models affects installation, maintenance, and reliability, while smart-home compatibility and app features determine remote alerts and integration.
Price varies widely, so buyers should weigh upfront cost against long-term value, including battery replacements, subscription fees, and expected lifespan.
Key features to compare
When comparing water leak detectors, focus on sensor type, connectivity options, alert methods, power source, installation ease, and compatibility with existing home systems; these factors determine detection speed, reliability, and long-term maintenance requirements. Evaluate sensitivity, range, app integration, local alarms, and replaceable parts to match home layout and user preferences.
| Feature | Why it matters |
|---|---|
| Sensor type | Detection accuracy |
| Connectivity | Alert reach |
| Alerts | Response time |
| Compatibility | System integration |
Battery vs. hardwired vs. plug-in models
Many homeowners balance trade-offs among battery, hardwired, and plug-in water leak detectors based on power reliability, installation complexity, and monitoring needs.
Battery units offer portability and work during outages but require periodic replacement.
Hardwired detectors provide continuous power and integration with alarm panels but need professional installation.
Plug-in models are easy to install and reliable if outlets remain powered, yet are vulnerable to blackout periods.
Smart home compatibility and app features
Because modern leak detectors often double as smart devices, compatibility with a homeowner’s existing ecosystem and the capabilities of the companion app become central selection criteria.
Evaluate platform support (Alexa, Google, Apple HomeKit), reliable push and SMS alerts, remote monitoring, multi-sensor grouping, event history, firmware updates, and automation triggers.
Secure authentication and encryption, plus intuitive setup, improve long-term usability and reliability.
Price ranges and typical value for money
A range of budgets and feature needs shapes the market for water leak detectors, from basic spot sensors under $20 to integrated smart hubs and multi-sensor kits exceeding $200.
Buyers should weigh up-front cost against reliability, sensor quality, warranty terms, and ongoing expenses like battery replacements or subscription services.
Midrange units ($50–$120) often offer best value: decent build, wireless alerts, and occasional cloud features without heavy subscriptions.
Step-by-Step Setup and Installation
A concise pre-installation checklist should confirm required tools, power sources, and a placement plan before any hardware is mounted.
Spot sensors are then positioned near appliances like washers, water heaters, and dishwashers while cable sensors are routed for perimeter protection.
Finally, the system is integrated with any flow-based shutoff or smart valve and connected to WiFi with mobile app configuration.
Pre-installation checklist (tools, power, placement plan)
Before beginning installation, gather the necessary tools, confirm power options, and map sensor locations to guarantee efficient coverage and safe wiring.
The homeowner should verify battery or mains compatibility, measure distances for wireless range, assemble mounting hardware, and plan cable routes.
Follow this concise checklist:
- Screwdriver, drill, tape measure
- Batteries/adapter type confirmed
- Coverage map drawn
- Cable and mounting plan finalized
Installing spot sensors near appliances (washer, water heater, dishwasher)
Begin by positioning each spot sensor so its probe or contact point sits directly where leaks would first appear—under the washing machine drain pan, at the water heater base, and beside dishwasher supply lines.
Secure sensors to stable, dry surfaces, route cords to avoid trip hazards, and test each unit per manufacturer instructions.
Confirm wireless range to the hub and label locations for maintenance.
Installing cable sensors for perimeter protection
Install cable sensors along the perimeter where water is most likely to collect—around basement walls, under cabinets, and along entry points for pipes—ensuring continuous contact between the sensing cable and the floor.
Route cables to avoid trip hazards, secure with clips or adhesive per manufacturer instructions, maintain snug placement at corners and thresholds, test continuity, label runs, and connect to the detector for zone monitoring.
Integrating with flow-based shutoff systems or smart valves
Integrating a water leak detector with a flow-based shutoff system or smart valve requires coordinating sensor outputs, control logic, and plumbing connections so the detector can reliably trigger an automatic shutoff when abnormal flow or a leak is detected.
Homeowners should verify compatibility, position sensors and flow meters correctly, configure thresholds and delay settings, test shutoff responses, and secure manual override access for maintenance and emergency resets.
Connecting the detector to Wi’Fi and mobile app configuration
Before connecting the detector to Wi‑Fi and the companion app, the user should confirm the network name (SSID), password, and that the detector is within reliable signal range.
This preparation prevents common connection failures and speeds the setup process.
Follow the manufacturer app prompts: create or log into an account, select the detector model, enter Wi‑Fi credentials (typically 2.4 GHz), and complete device pairing.
Testing the detector after installation
Begin by confirming the detector is powered, paired, and positioned as meant; then perform a series of simple functional checks to verify sensing, alerts, and connectivity.
Gently apply water to the sensor area, observe immediate local alarm and mobile notification, and confirm hub or Wi-Fi status.
Repeat with battery removal and restore to test failover.
Log results and adjust placement if needed.
Daily Use and Routine Maintenance
Daily use and routine maintenance guarantee the detector remains reliable through scheduled tests, battery and power checks, and periodic firmware and app updates.
Users should perform brief functional tests on a regular cadence, replace batteries before end-of-life, and verify device connectivity after updates.
Cleaning contacts and sensors as recommended will prevent false alarms and prolong sensor accuracy.
Regular testing schedule and how to perform tests
When maintained on a clear schedule, a water leak detector will remain reliable and responsive; users should establish routine checks that fit the device’s specifications and household risk profile.
Test monthly by activating test mode or simulating a small contact with water per manufacturer instructions. Verify audible/visual alerts and connectivity.
Log results, note anomalies, and increase frequency after incidents or seasonal risk changes.
Battery replacement and power checks
Guarantee consistent power by scheduling regular battery replacements and quick daily checks of indicators and connections.
Homeowners should note battery type, replace before low-voltage warnings, and inspect contacts for corrosion.
Test device power LED and alarm weekly.
For wired units, verify backup battery functionality and secure connectors.
Record replacement dates and dispose of batteries per local regulations to maintain uninterrupted protection.
Firmware updates and app maintenance
Check firmware and app updates regularly to confirm the detector operates with the latest security patches, performance improvements, and compatibility fixes.
Homeowners should enable automatic updates when available or schedule periodic manual checks via the device app.
Review release notes for important changes, back up settings before major updates, and make certain the mobile app remains current to preserve notification reliability and cloud connectivity.
Cleaning and sensor care
Inspect sensors and clean them regularly to guarantee reliable detection and prevent false alarms.
Wipe probes and housings with a soft, damp cloth and mild detergent; avoid abrasive cleaners or solvents. Remove debris from contact points and check for corrosion.
Test sensors after cleaning. Replace batteries and worn probes per manufacturer guidance.
Store spare sensors properly and log maintenance dates for routine tracking.
What to Do When an Alarm Triggers
When the detector sounds, the person should first take immediate safety steps to shut off electricity to wet areas if safe and to limit water spread.
They should then locate the leak quickly by following sensor alerts, checking visible pipes, and tracing dampness, using shutoff valves or temporary fixes like hose clamps as needed.
If the leak is large, uncontrolled, or involves structural or electrical risk, they should contact a plumber or emergency services without delay.
Immediate safety steps to limit damage
Act quickly to limit water damage and protect people and property once the detector sounds.
The homeowner should follow immediate safety steps to minimize risk and preserve belongings:
- Shut off main water supply if safe.
- Cut power to affected area to prevent electrical hazards.
- Remove valuables and absorbent items from the wet zone.
- Ventilate and document damage for insurance.
How to locate the leak quickly
Move quickly but methodically: after an alarm sounds, the homeowner should trace sounds and moisture, starting at the device and following audible drips, wet spots, or damp smells toward their source while avoiding unsafe areas.
They should check nearby fixtures, appliances, pipes, and concealed spaces (cabinets, basements, ceilings).
Note changes in flooring, paint, or mold odor to pinpoint hidden leaks efficiently.
Using shutoff valves and temporary fixes
Shut off the water supply immediately at the nearest accessible valve to limit damage, then close the main valve if the source is unclear or the leak persists.
Apply temporary measures: place buckets, towels, or a drain pan to catch water; use pipe repair tape, a rubber patch and hose clamp, or a compression sleeve for small pinholes.
Monitor for continued seepage and document the situation.
When to call a plumber or emergency services
When a water leak detector alarm sounds, assess the situation quickly to determine severity and immediate risk—significant flooding, rapid pressure loss, visible burst pipes, electrical hazards, or inability to stop the flow all warrant calling a plumber or emergency services right away.
For nonurgent leaks, shut main valve, isolate affected fixtures, document damage, and schedule a licensed plumber; evacuate if structure or safety is compromised.
Troubleshooting Common Problems
The guide next addresses common troubleshooting topics: false alarms and ways to minimize them, connectivity and app notification problems, and sensor malfunctions with replacement guidance.
It outlines quick checks and practical fixes for each issue so users can restore reliable operation. Recommended maintenance intervals and when to contact support are also summarized.
False alarms and how to reduce them
Although sensitive detectors are designed to catch even small leaks, they can also register benign triggers that lead to false alarms.
Inspect for condensation, splashes, nearby humidity sources, and wiring contact. Confirm sensors sit on dry, level surfaces and clean probes regularly.
Calibrate sensitivity if available and relocate sensors away from showers, dishwashers, or HVAC drains to minimize unnecessary alerts.
Connectivity and app notification issues
Many issues with water leak detectors stem from simple connectivity or notification problems that interrupt alerts and remote monitoring.
Homeowners should verify Wi‑Fi strength near the device, confirm account credentials, and guarantee app permissions allow notifications.
Restarting the detector and router, updating firmware and app, and checking network encryption or firewall settings often restore reliable alerts without replacing hardware.
Sensor failures and replacement guidelines
Inspect sensor components and logs immediately when a detector stops responding or reports false readings, since failures usually stem from moisture intrusion, corroded probes, depleted batteries, or internal electronics faults.
Verify probe integrity, clean corrosion, replace batteries and reseal housings. If issues persist, consult manufacturer diagnostics and warranty.
Replace sensors showing persistent faults or physical damage; follow model-specific replacement intervals and recycling guidelines.
Comparing Water Leak Detection Strategies
A comparison of detection approaches highlights differing coverage and sensitivity: spot sensors alert to localized puddles, cable sensors monitor broader areas, and flow-based systems detect changes in water use.
Choice also hinges on installation: DIY setups reduce upfront cost but may miss ideal placement, while professional installation raises expense yet can guarantee thorough coverage and integration.
Evaluating property layout, risk tolerance, and budget helps determine the most appropriate strategy.
Spot sensors vs. cable sensors vs. flow-based systems
How do spot sensors, cable sensors, and flow-based systems differ in detecting leaks and preventing damage? Spot sensors alert to localized pooling. Cable sensors cover linear areas. Flow-based systems detect abnormal usage and shut valves. Choice depends on risk areas and coverage needs.
| Type | Best for |
|---|---|
| Spot | Appliances |
| Cable | Under floors, long runs |
DIY installation vs. professional installation (costs and trade-offs)
When weighing DIY installation against hiring a professional, cost, skill level, and risk tolerance determine the best approach.
DIY saves labor costs and suits simple spot or cable sensors but demands time, basic tools, and warranty-awareness.
Professional installation costs more but guarantees correct placement, integration with plumbing or smart hubs, and reduced false alarms.
Choice balances budget, complexity, and desired reliability.
Cost, Insurance, and Long-Term Value
Typical installation and maintenance costs for water leak detectors range from basic one-time purchases and battery replacements to professional system installation and periodic servicing.
Insurers may offer discounts or streamline claims when detectors and automatic shutoffs are in place, affecting premiums and claim outcomes.
Homeowners can calculate ROI by comparing potential water-damage repair and mold-remediation expenses avoided against the upfront and ongoing detector costs.
Typical installation and maintenance costs
Installation and maintenance costs for water leak detectors vary widely based on system complexity and features, ranging from inexpensive plug-and-play sensors to professionally installed, integrated whole-home systems.
Basic standalone sensors cost $20–$100 each with minimal upkeep; smart kits run $100–$500.
Professional installation and multi-sensor networks add $200–$1,500+.
Annual battery, sensor replacement, and occasional service checks typically cost $10–$150.
How detectors affect homeowners insurance and claims
Installing water leak detectors can lower both the frequency and severity of water damage claims by enabling faster detection and response.
Insurers often offer premium discounts, reduced deductibles, or credits for documented detector installations and monitoring.
For claims, detectors provide timestamped logs and alerts that support faster assessments and liability resolution.
Documentation and maintenance records strengthen underwriting and claim negotiations over time.
Calculating ROI: preventing damage vs. detector investment
When homeowners weigh the upfront cost of water leak detectors against potential savings, they should compare device and monitoring expenses to likely avoided repair, replacement, and mitigation costs over a multi-year horizon.
Calculate expected annualized savings by estimating failure probability, average claim size, and reduction percentage due to early detection.
Include insurance premium discounts, maintenance, and replacement intervals to determine net present value and payback period.
Best Practices and Pro Tips for Maximum Protection
The section outlines ideal sensor placement patterns to guarantee full coverage of likely leak sources and water pathways.
It also explains how detectors can be integrated with smart home automations to stop water flow, send alerts, and minimize damage.
Finally, it covers seasonal checks and winter-proofing measures to keep detectors reliable in cold conditions.
Optimal sensor placement patterns for full coverage
Effective sensor placement follows patterns that prioritize likely leak origins and water flow paths to guarantee continuous coverage with the fewest devices.
Logical zones, overlaps, and elevation awareness minimize gaps.
Recommended pattern elements:
- Perimeter baseline around appliances and wet rooms.
- Linear spacing along exposed pipes.
- Low points near drains and water heaters.
- Redundant coverage at junctions and valve locations.
Combining detectors with smart home automations
After outlining practical placement patterns, attention turns to integrating detectors with smart-home automations to amplify response speed and reduce damage.
Homeowners should link sensors to alerts, shutoff valves, sump pumps, and lighting scenes.
Prioritize reliable triggers, redundancy, and low-latency networks.
Test routines, set escalation rules, and log events for diagnostics.
Use secure accounts and firmware updates to maintain system integrity and trusted automation.
Seasonal checks and protecting detectors in winter
When temperatures drop and freeze–thaw cycles begin, homeowners should perform targeted seasonal checks to guarantee water leak detectors remain functional and protected through winter.
Inspect batteries, clean sensors, reposition units away from drafty windows and exterior walls, and elevate devices above potential flood points.
Insulate exposed pipes, verify wireless connectivity, and test alerts after cold snaps to confirm reliable early warnings.
Recommended Tools and Accessories
The section lists essential tools required for proper installation, such as screwdrivers, drill bits, and a level, to guarantee sensors are mounted securely and operate correctly.
It also covers useful accessories like extension sensors for hard-to-reach areas, automatic shutoff valves for rapid response, and mounting brackets or adhesive pads for flexible placement.
Practical notes on selecting and using these items help streamline setup and improve long-term reliability.
Essential tools for installation
A small set of reliable tools and accessories makes installation faster and reduces errors; essential items include a screwdriver set, adjustable wrench, drill with appropriate bits, tape measure, level, wire strippers/crimpers, and silicone sealant or plumber’s tape for waterproofing connections.
Technicians should also have clear instructions, replacement batteries, mounting hardware, and safety gloves.
- Screwdrivers and wrench
- Drill and bits
- Wire tools
- Sealants and tape
Useful accessories (extension sensors, shutoff valves, mounts)
After gathering basic tools and sealants, attention turns to accessories that expand detection range and automate responses.
Extension sensors link distant areas—basements, crawlspaces, garages—into a unified network.
Automatic shutoff valves stop flow when leaks are detected, minimizing damage.
Mounts and brackets secure sensors near drains or appliances.
Homeowners should choose compatible, reliable accessories to guarantee thorough, responsive protection.
Real-World Scenarios and Examples
Typical household and appliance failures are described alongside examples of how leak detectors provided early warning and curtailed damage.
One case study recounts a detector alert that enabled timely action to prevent a major basement flood after a burst sump pump line.
These scenarios illustrate practical benefits and decision points for selecting and placing detectors.
Typical leak scenarios and how detectors helped
Homes, businesses, and public facilities frequently face water leaks that start small but escalate quickly; detectors have repeatedly proven their value by catching slow pipe weeps, hidden slab leaks, appliance failures, and roof runoff before major damage occurs.
Sensors alerted owners to condensation under HVAC units, unnoticed washer hose ruptures, and gradual supply-line seepage, enabling timely shutoffs, targeted repairs, and minimized mold, structural, and content losses.
Case study: preventing a major basement flood
Prevention often comes down to timing: a midwinter sensor alert in a suburban basement prompted a homeowner to investigate a slow but steady drip from a corroded supply line beneath a laundry tub.
The leak was repaired within hours, a shutoff valve closed, and a sump pump inspected.
Early detection prevented carpet damage, mold growth, and costly structural repairs, saving thousands in remediation.
Resources for Further Help
For users seeking additional assistance, professional installers and independent review sites offer comparisons and local service options.
Manufacturer manuals, FAQs, and support channels provide model-specific troubleshooting and warranty information.
Combining third-party reviews with official support helps guarantee reliable installation and correct use.
Where to find professional installers and reviews
Where can homeowners turn when installation or expert advice is needed?
Professional installers and reliable reviews can streamline decisions. Trusted sources include local licensed plumbers, certified smart-home technicians, independent review sites, and community recommendations.
Consider credentials, warranty handling, and recent customer feedback before hiring.
- Local licensed plumbers
- Certified smart-home technicians
- Independent review sites
- Community recommendations
Manufacturer manuals and support channels
Although a quick web search can surface basic tips, the manufacturer’s manual and official support channels remain the most authoritative resources for installation details, troubleshooting steps, firmware updates, and warranty information.
Users should consult official documentation and contact support for device-specific guidance.
- Read the manual fully.
- Register the product.
- Check firmware updates.
- Use official support channels.
Conclusion
Like a quiet sentinel beneath the floorboards, a water leak detector watches for the first whisper of trouble, turning potential disaster into manageable inconvenience. Homeowners who choose the right device, install it thoughtfully, and maintain it regularly can sleep with greater peace, knowing small drips won’t swell into oceanic regrets. With proper tools, vigilance, and quick action, a simple sensor becomes an invisible shield, safeguarding memories, finances, and the heart of the home.