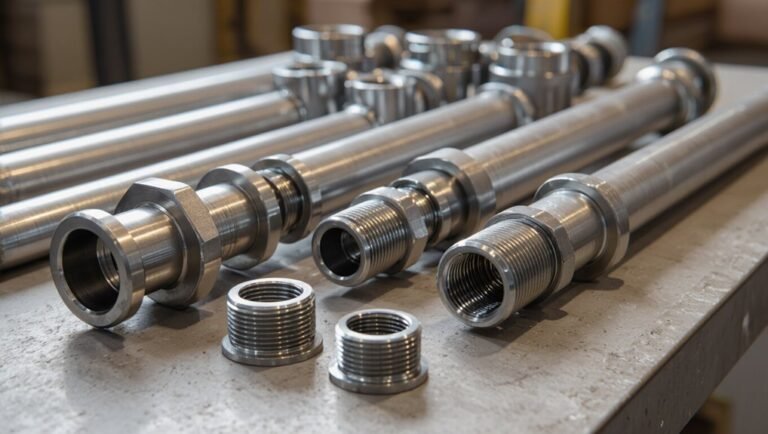
How to Install a Shower Pump: Step-by-Step Guide for Beginners
Installing a shower pump can significantly improve weak or inconsistent water pressure in your home. This step-by-step guide will help you successfully install a shower pump, ensuring proper flow to your shower and other outlets. You’ll need to choose the right type of pump, confirm local regulations, and follow safety precautions while securing, connecting, and testing the unit. Let’s get started!
Why Install a Shower Pump and When It’s Needed
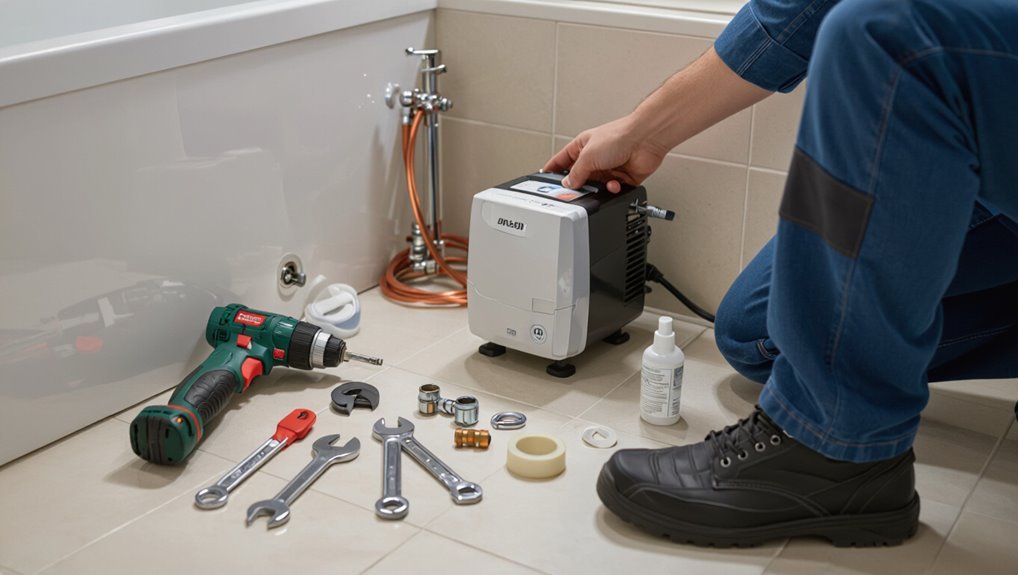
Signs such as weak flow, fluctuating pressure, or inability to run multiple outlets simultaneously indicate a home may need a shower pump.
Installing a pump can restore consistent pressure, improve spray quality, and make showers more comfortable.
Different pump types—single- or twin-impeller and positive- or negative-head—serve varying system configurations and performance needs.
Signs your home needs a shower pump
When does a household truly need a shower pump? Low pressure, weak flow, or inconsistent hot water suggest insufficient mains supply or distance from the water source.
Multiple outlets failing simultaneously, noisy pipes, or reliance on gravity-fed tanks are indicators.
Before learning how to install a shower pump, homeowners should confirm pressure issues, check boiler performance, and consult a plumber to assess suitability.
Benefits of installing a pump for shower performance
Several clear benefits follow from installing a shower pump: stronger, more consistent water flow, quicker temperature recovery between uses, and improved performance across multiple bathroom outlets.
It reduces frustrating pressure drops when others use taps, enhances showering comfort, and can enable higher-pressure fittings.
Pumps also improve efficiency by shortening warm-up time and reducing wasted water, aiding overall household convenience and perceived value.
Types of shower pumps and how they differ
Having established the performance gains a pump can provide, the next consideration is which type of pump will best meet a household’s needs. Common options differ by application, noise, and pressure delivery: single impeller for boost, twin impeller for balanced pressure, and positive head for gravity-fed systems.
| Type | Key trait |
|---|---|
| Single | Boosts hot water |
| Twin | Maintains balanced flow |
Legal, Safety and Planning Considerations Before You Start
Before any work begins, the installer should verify applicable building regulations and plumbing codes and confirm whether permits or inspections are required.
Decisions about DIY versus hiring a qualified plumber must be based on local legal requirements, the complexity of the job, and the installer’s competence.
Appropriate safety gear and precautions—electrical isolation, protective equipment, and safe handling of tools and fittings—should be planned and documented.
Building regulations and plumbing codes to check
When planning a shower pump installation, homeowners must verify applicable building regulations and local plumbing codes to guarantee compliance with safety, water efficiency, and ventilation requirements.
Failure to do so can lead to failed inspections, fines, or the need to undo work.
Check requirements for pump type, noise limits, isolation valves, backflow prevention, pipe sizing, electrical bonding, and permitted locations.
Obtain necessary permits and inspections.
When to hire a qualified plumber vs DIY
How should a homeowner decide between tackling a shower pump installation personally or hiring a qualified plumber?
Assess skill level, confidence with electrical and plumbing work, and available tools.
Hire a qualified plumber for complex systems, mains-pressure pumps, electrical connections, cramped spaces, or where warranty, insurance, or safety risks apply.
DIY suits straightforward replacements with clear instructions and minimal wiring or pipe alterations.
Required permits and inspections
Although many small shower-pump replacements proceed without official oversight, local building codes, electrical regulations, and water authority rules can require permits or inspections for installations that alter wiring, create new plumbing connections, or affect mains pressure.
Homeowners should check with local authorities, obtain required permits, schedule mandatory inspections, and retain documentation.
Noncompliance risks fines, voided insurance, and mandated corrective work.
Safety gear and precautions
Before beginning work on a shower pump, the installer should assemble appropriate personal protective equipment and follow basic site precautions to reduce risks from electricity, water, and confined-space plumbing.
Required items include insulated gloves, safety goggles, hearing protection, and non-slip footwear.
Isolate electrical supply, shut off water, ventilate confined areas, secure tools and ladder, and verify lockout/tagout procedures before commencing work.
Tools, Materials and Pump Selection
A concise checklist of hand tools, fittings and consumables sets expectations for a typical shower pump installation.
Guidance on selecting the correct pump—single or twin, required head and flow—and on compatible shower types and system layouts helps guarantee efficient performance.
The next section lists specific tools and materials and explains the calculations and compatibility considerations needed to pick the right model.
Checklist of tools for a typical installation
Several essential tools and materials are required to complete a typical shower pump installation safely and efficiently.
A concise checklist guarantees readiness and reduces delays. Basic tools, measuring and cutting implements, and electrical testers are commonly needed.
Typical items include:
- Adjustable spanner, pipe wrench, and pliers
- Hacksaw, pipe cutter, and deburring tool
- Multimeter, voltage tester, and screwdriver set
Materials and consumables you’ll need
With tools accounted for, attention turns to the materials and consumables required to complete a shower pump installation and to select the correct pump type.
Essential items include pipework, fittings and seals; electrical kit; and mounting and isolation components.
Typical list:
- Copper or plastic pipe and compatible fittings
- Isolation valves, unions, clips, sealant tape
- Electrical cable, connectors, fuse or RCD protection
How to choose the right pump size and model (single vs twin, head and flow calculations)
When selecting a shower pump, homeowners should first decide between a single or twin impeller model based on whether only the shower or multiple outlets (bath, basin, additional showers) require boosted pressure.
Single impeller pumps boost either hot or cold feed, while twin impeller pumps boost both simultaneously and suit systems serving several outlets.
Calculate required head (m) and flow (L/min), match pump curve to system demand, and allow modest safety margin.
Compatible shower types and system layouts
Identify compatible shower types and system layouts before purchasing tools, materials, or a pump: low-pressure mixer showers, electric showers, power showers, and thermostatic or bar-valve setups each interact differently with pumped supplies.
System layouts—gravity-fed cold and hot tanks, combi boilers, or mains-only systems—determine whether a pump is appropriate, which impeller configuration is needed, and what fittings and isolation valves are required.
Assess inlet pressures, pipe diameters, backflow risk, and manufacturer restrictions; match single or twin pumps to hot/cold demands, verify non-return valves, and confirm electrical and access requirements.
Pre-Installation Assessment and Site Preparation
Before installation, the installer inspects the existing plumbing layout and incoming water supply to confirm flow direction, pipe sizes, and pressure.
Precise measurements for pump placement and clearance are taken while the electrical supply is checked for a suitable RCD/MCB and correct cable routing.
The mounting surface is prepared and accessible isolating valves are identified or fitted to allow safe connection and future maintenance.
Inspecting your current plumbing layout and water supply
A thorough inspection of the existing plumbing layout and water supply establishes whether a new shower pump can be installed safely and will deliver the expected performance.
The installer verifies pipe material, diameters, flow direction, branch connections, and accessible isolation valves.
Cold and hot feed pressures, flow rates, and header tank levels are measured.
Check for leaks, corrosion, and suitable electrical supply proximity.
Measuring for pump placement and clearance
Proper siting of the pump requires precise measurement of available space, pipe runs, and required clearances to guarantee safe operation and maintenance access.
Measure wall or floor mounting areas, distance to inlet/outlet pipe centers, and length of flexible hoses.
Allow manufacturer-recommended service clearance, ventilation gap, and access for isolation valves.
Record dimensions on a sketch and verify level, structural support, and nearby obstructions.
Checking electrical supply and RCD/MCB requirements
Several key electrical checks must be completed to confirm the supply can safely power the shower pump.
Verify circuit capacity, cable size and condition, and that the supply is on a dedicated radial or ring as required.
Confirm a functioning RCD protects the bathroom circuit and select an MCB with appropriate rating and type (B or C) per pump starting current and local regulations.
Preparing the mounting surface and isolating valves
Begin by evaluating and preparing the pump mounting area to confirm a stable, level surface free from moisture and obstructions.
The installer selects a dry, ventilated location near existing pipe runs, fits a sturdy mounting board or bracket, and ascertains wall fixings suit substrate.
Install accessible isolation valves on inlet and outlet pipes for maintenance, verify flow direction, and test for clearance and serviceability.
Step-by-Step Shower Pump Installation
The installer begins by isolating supplies and ensuring both water and electrical feeds are switched off and drained.
Next, the pump is positioned and securely mounted before the suction and delivery pipes are connected, with a choice made between flexible hoses and copper lines.
Finally, non-return valves, isolating valves and service tees are fitted to complete the installation and allow future maintenance.
Step 1 Turn off water and electrical supply
Shut off both the mains water supply and the electrical circuit before any work on the pump begins to eliminate risk of flooding and electric shock.
Confirm isolation at the consumer unit and the stopcock, and label or lock out the circuit.
Verify zero voltage with a tester and check for residual pressure in accessible fittings.
Only proceed when both systems are confirmed isolated.
Step 2 Drain and isolate existing plumbing sections
Drain down and isolate the sections of plumbing that will be worked on to prevent water ingress and limit the volume that must be removed.
Open nearest drain valves, unload cold and hot lines, and operate taps until flow stops.
Close and tag isolation valves.
Use hose attachments or buckets for residual water, and place absorbent cloths to catch drips before cutting or disconnecting pipes.
Step 3 Position and mount the pump securely
Measure and mark the chosen installation location, ensuring the pump sits as close as practical to the existing pipework, on a flat, load-bearing surface free from vibration transmission.
Check alignment with mounting holes, access for future maintenance and clearances for electrical connection.
Use manufacturer-supplied brackets or isolation feet, level the unit, secure with appropriate fasteners, and verify rigidity before proceeding to pipe connections.
Step 4 Connect suction and delivery pipes (use of flexible hoses vs copper)
Begin by confirming the pump’s suction and delivery orientations. Then prepare the pipe runs so joints are clean, accessible, and supported.
Use short flexible hoses for vibration isolation and where alignment is difficult, keeping runs minimal. Prefer rigid copper for long, fixed runs to reduce flow resistance and improve durability.
Verify correct bore sizes, smooth internal joints, and secure clamps to prevent movement.
Step 5 Install non-return valves, isolating valves and service tees
Install the non-return valves, isolating valves, and service tees in accessible positions close to the pump to control flow, prevent backflow, and allow future maintenance.
Fit NRVs on both suction and delivery lines oriented per manufacturer markings.
Install full-bore isolating valves for easy shut-off and service tees for pressure measurement or temporary bypass.
Pressure-tight joints, correct alignment, and support reduce leaks and strain.
Step 6 Make electrical connections safely (fixed wiring, IP rating, cable sizing)
Proceed to make the electrical connections, guaranteeing all work complies with local regulations and the pump manufacturer’s instructions.
A qualified electrician should perform fixed wiring, install an appropriately rated isolation switch, and select cable size per load and run length.
Verify the pump’s IP rating suits its location and that connections are secure in a correctly rated junction box.
Earth and protective devices must be fitted.
Step 7 Pressure test the system and check for leaks
Once electrical and plumbing connections are complete, the system should be pressure tested to confirm integrity and detect any leaks before commissioning.
Isolate pump per manufacturer instructions, attach a pressure gauge and use mains or an approved test pump to reach recommended test pressure.
Hold pressure for the specified duration, inspect all joints and seals for drops or visible weeps, and repair any faults before proceeding.
Step 8 Commissioning: bleed air, check flow and adjust pump settings
With the pressure test passed and any detected leaks repaired, attention shifts to commissioning the pump to guarantee reliable operation.
Air is bled from inlet and outlet until steady water flow appears. Electrical connections are verified under load.
Flow rate and pressure are measured at the shower, then pump speed or pressure settings adjusted per manufacturer recommendations to optimize performance and prevent noise.
Step 9 Final checks and tidy up
Complete a final inspection and tidy the work area to guarantee the shower pump functions reliably and the installation meets safety and aesthetic standards.
Verify all connections are tight, isolating valves accessible, and electrical terminations secure.
Remove debris, label controls, and test operation under normal load.
Check for leaks after 24 hours.
Restore any disturbed insulation or finishes and document warranty details for the owner.
Common Problems During Installation and How to Fix Them
Common installation problems include airlocks and poor priming, excessive noise or vibration from the unit, and electrical faults that trip RCDs.
Typical fixes cover bleeding and re-priming, fitting dampers or improving mounts, and checking wiring, earth connections, and fuse/RCD compatibility.
The guide will also address low pressure after installation and specific troubleshooting steps for each issue.
Airlocks and poor priming solutions
Airlocks and inadequate priming are frequent causes of weak or intermittent pump performance and can usually be resolved without replacing equipment.
To clear airlocks, isolate pump, open downstream taps, and slowly loosen priming plugs or inlet unions until steady water flows.
Verify inlet pipe remains full, check non-return valve orientation, and retighten.
Repeat bleeding until consistent pressure and flow are restored.
Noisy pump causes and damping fixes
Several factors can make a shower pump noisy, including cavitation from inadequate inlet flow, vibration transmitted through rigid pipework or mounting, worn bearings, and trapped air in the casing.
To reduce noise, guarantee correct inlet sizing, fit flexible connectors, bleed air, replace degraded bearings or impellers, and install acoustic foam or isolation pads around the pump housing without altering required ventilation or service access.
Vibration and mounting problems
Mounting errors and unchecked vibration are frequent causes of pump noise, leaks, and premature wear during installation. When a pump is fixed to rigid pipework, mounted on an uneven surface, or bolted without isolation, vibrational energy transmits into the building structure and accelerates component fatigue.
Use rubber anti-vibration mounts, flexible connectors, and a level, solid base. Torque bolts evenly and recheck alignment to prevent resonance.
Electrical faults and tripping RCDs
Electrical faults and nuisance trips of residual current devices (RCDs) are a common source of frustration during shower pump installation, often stemming from incorrect wiring, poor earthing, moisture ingress, or incompatible RCD ratings.
Technicians should isolate circuits, inspect connections for tightness and correct polarity, verify earth continuity, replace damaged cable or seals, and consult a qualified electrician if persistent trips occur to guarantee safety and compliance.
Low pressure after installation troubleshooting
Diagnose low pressure by methodically checking the pump and system components for common faults: confirm inlet and outlet isolating valves are fully open, inspect filters and strainers for blockages, verify correct pump rotation and secure electrical supply, and guarantee the pump is sized and installed at the proper height relative to the water source.
Also check for airlocks, collapsed suction hose, worn impeller, restrictive fittings, and inadequate mains pressure.
Maintenance, Servicing and Troubleshooting After Installation
After installation, a clear routine maintenance schedule helps preserve pump performance and prevent failures.
Regular tasks include cleaning filters, inspecting check valves, and monitoring wear to determine when components or the whole unit should be replaced.
Seasonal measures — draining or insulating the pump before frost and following storage steps during long periods of disuse — reduce risk of damage.
Routine maintenance schedule
A simple, regular maintenance schedule keeps a shower pump reliable and extends its service life.
Inspections and minor servicing prevent faults and preserve performance.
Suggested routine:
- Monthly visual check for leaks, noise and secure fittings.
- Quarterly operational test to confirm pressure and vibration levels.
- Annual professional service for electrical safety, wear assessment and planned replacements.
How to clean filters and check valves
Inspecting and cleaning filters and check valves is a straightforward but essential task that preserves flow, prevents blockages, and avoids pump strain.
Periodically isolate pump, relieve pressure, then remove inlet strainer and check valve housings.
Rinse debris, use a soft brush for sediment, inspect seals and spring action, replace damaged O-rings, reassemble, and test for leaks and correct flow before returning to service.
When to replace parts or the entire pump
Recognize signs that individual components or the entire shower pump need replacement to prevent failure and maintain performance.
Persistent noise, reduced flow, leaks, overheating, or repeated breakdowns indicate worn impellers, seals, bearings, or motor failure.
Replace specific parts when faults are isolated; consider full unit replacement if repairs are frequent, parts unavailable, or cost approaches new pump price for reliable long‑term operation.
Seasonal tips for frost protection and long periods of disuse
When signs point to worn components or impending pump failure, seasonal care can prevent new problems during cold weather or long idle periods.
Drain and isolate the pump, open drain valves, and blow out lines where accessible. Protect exposed pipework with insulation and heaters; fit frost-stat controls if needed.
For long disuse, run briefly monthly to lubricate seals and verify operation.
Cost, Timeframe and ROI Expectations
A clear account of costs and timeframes helps homeowners set realistic expectations before installing a shower pump.
Typical expenses — including the pump unit, fittings, electrical work, and any plumbing alterations — are outlined alongside contrasts between DIY and professional installation time estimates.
The discussion also covers energy consumption and ongoing running costs to frame potential return on investment.
Typical installation cost breakdown
Although costs vary by pump type, property layout, and local labor rates, a typical shower pump installation falls into clear ranges for budgeting: parts and pump units commonly cost between $200 and $900, professional installation labor usually adds $250–$800, and incidental expenses (pipework, electrical upgrades, waste disposal) can push totals toward $1,500–$2,000 for standard jobs.
| Item | Low | High |
|---|---|---|
| Pump | $200 | $900 |
| Labor | $250 | $800 |
| Extras | $100 | $300 |
Estimated project time for DIY vs professional install
Following the cost breakdown, time and return considerations help decide whether to attempt a DIY pump install or hire a pro.
A competent DIYer can finish removal, mounting, plumbing, wiring and testing in 4–8 hours; novices should allow a full day or weekend.
A professional typically completes the job in 2–4 hours.
Consider travel, permits and potential rework when estimating total project time.
Energy use and running costs
Estimate running costs by combining a pump’s power draw, typical daily runtime, and local electricity rates to determine annual energy consumption and expense.
Include standby losses and duty cycles for accurate figures.
Compare single‑ and twin‑impeller models: higher flow often means greater consumption.
Factor maintenance, potential efficiency degradation, and expected lifespan to calculate lifecycle cost and approximate payback versus comfort benefits.
Tips, Best Practices and Mistakes to Avoid
Practical tips and proven practices help guarantee a shower pump installation is reliable and long-lasting.
Common beginner mistakes—incorrect pipe sizing, poor sealing, and improper electrical connections—are highlighted with clear prevention steps.
Guidance is provided on when to evaluate upgrading related components such as the boiler, hot water cylinder, or shower unit to match pump performance.
Top practical tips for a durable installation
Start by prioritizing a solid plan that addresses site access, pipe runs, electrical supply, and noise control to confirm the pump performs reliably over time.
Use quality materials, secure mounting, and correct electrical protection. Ascertain accessible isolation valves and easy maintenance clearance. Follow manufacturer torque and alignment specs.
- Mount on vibration mounts
- Use short, straight pipe runs
- Install accessible isolation valves
Common beginner mistakes and how to avoid them
Many installers trip over a handful of predictable errors—incorrect pump sizing, poor electrical protection, inadequate pipework, and improper mounting—that compromise performance and safety.
Careful measurement, correct cable and RCD use, and secure, vibration-damped mounting prevent issues. Check seals and flow direction; pressure loss often stems from avoidable mistakes.
- Verify pump size and head
- Use RCD-protected wiring
- Slope and support pipework correctly
When to upgrade other components (boiler, cylinders, showers)
After correcting common installation errors, attention should turn to whether surrounding components can support the new pump’s demands.
Assess boiler capacity, cylinder size and pressure, and existing shower fittings; upgrade if output falls short or if components are older than a decade.
Prefer professional flow and pressure testing.
Avoid mismatched upgrades that waste expense; prioritize compatibility and certified installers.
Examples and Scenario-Based Guides
The article presents clear, scenario-based examples for common installations: a pump added to a gravity-fed hot water system and one paired with a combi boiler.
It contrasts considerations for a small single-bathroom fit-out versus upgrades for a house with multiple bathrooms.
Each scenario outlines key steps, required components, and typical pitfalls to watch for.
Installing a pump for a gravity-fed hot water system
Begin by evaluating the existing gravity-fed system’s layout, water tank head, and pipe configuration to determine the correct pump type and location for ideal flow and pressure.
Isolate cold and hot tanks, fit a compatible positive head or negative head pump accordingly, place pump near the feed to minimize suction lift, install non-return valves, flexible connectors, and provide accessible isolation taps for maintenance.
Installing a pump for combi-boiler-fed systems
Several common combi-boiler setups require different pump choices and placements depending on pipe layout, flow requirements, and boiler compatibility.
For combi systems, select a compatible low-loss inline or diverter pump rated for system pressure.
Install on the hot feed or return per manufacturer guidance, include isolation valves, check valve, and inertia protection.
Test for short-cycling and adjust pump speed to match boiler controls.
Small bathroom vs multiple-bathroom house scenarios
Size and usage patterns drive pump selection and placement: a single small bathroom usually needs a compact, low-head pump installed close to the shower to boost shower pressure only.
In contrast, a multi-bathroom house demands a higher-capacity or twin pump system, careful zoning, and strategic central placement to serve simultaneous draws without cavitation.
Consider flow rate, cylinder size, valve priority and noise isolation when planning.
Quick Reference Checklists
A set of concise checklists guides the reader through the key stages: pre-installation, installation, and post-installation commissioning.
The pre-installation checklist verifies site readiness, tools, and safety precautions.
The installation and commissioning checklists confirm correct fittings, electrical connections, leak tests, and operational performance.
Pre-installation checklist
Before beginning work, verify that all required tools, components, and safety equipment are present and in good condition so installation proceeds without interruption.
A concise pre-installation checklist guarantees readiness and prevents delays. Confirm site access, measurements, and water supply type. Inspect pump compatibility and seals. Verify electrical supply meets specifications.
- Tools and PPE
- Pump parts and fittings
- Measurements and supply checks
Installation checklist
With the pre-installation items confirmed, the installation checklist organizes the sequence of tasks into a concise, on-site reference to keep work efficient and safe.
It lists key steps, verifies tools and fittings, and highlights safety checks before energizing the pump.
- Position and mount pump per layout
- Connect inlet/outlet pipework with correct seals
- Wire isolation switch and earth, then test continuity
Post-installation commissioning checklist
Several concise checks guarantee the shower pump operates safely and efficiently after installation. A technician verifies electrical connections, confirms correct flow and pressure, and inspects for leaks.
Perform these quick tests before leaving site:
- Confirm electrical isolation, correct fuse and secure wiring.
- Run pump under load, observe pressure stability and noise.
- Inspect all joints, valves, and maker’s commissioning notes.
Conclusion
In the end, the guide proves timely: a homeowner who delayed found that a weak shower coincided with a neighbor’s newly installed pump, prompting swift action and a successful DIY installation. Legal checks, careful planning, correct pump choice and patient testing turned potential chaos into steady water pressure and peace of mind. With precautions observed and common mistakes avoided, the modest investment rewarded reliable showers, greater comfort and a quieter, more efficient plumbing system.