
How to Fix Corroded Pipes: Step-by-Step Repair Tips for Lasting Results
To effectively fix corroded pipes, homeowners should start by assessing the type and extent of corrosion, looking for signs like rust, deposits, leaks, and pressure loss. For minor issues such as surface corrosion and small pinhole leaks, you can use epoxy putty, silicone, fiberglass wrap, or mechanical clamps after properly cleaning and drying the affected area. However, if you encounter severe corrosion or extensive damage, it’s necessary to cut out the affected sections and replace them with compatible materials, utilizing soldered, threaded, or push-fit joints. Additionally, addressing underlying causes—such as water chemistry or galvanic action—is crucial to prevent future corrosion. Follow these practical methods and precautions for lasting repair results.
What Causes Pipe Corrosion and How to Recognize It
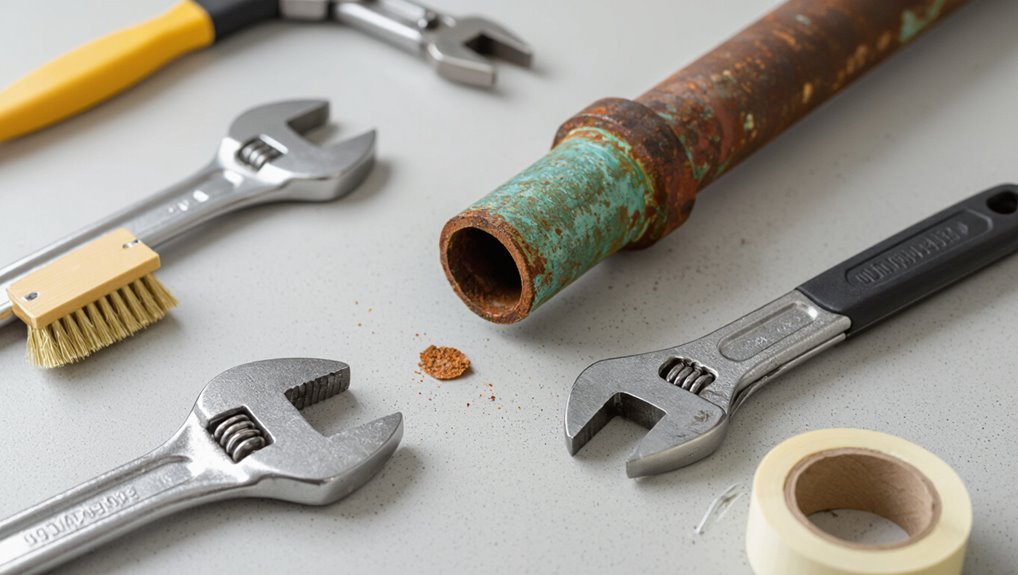
Household plumbing commonly experiences uniform, galvanic, pitting, and crevice corrosion, each driven by material, water chemistry, and stray electrical currents.
Visual cues—rust, flaking, green or white deposits, and pinhole leaks—along with reduced water pressure, discoloration, and odd tastes or odors indicate corrosion affecting performance.
Corrosion that causes persistent leaks, structural weakening, or contaminant leaching should be treated as a potential safety or health hazard requiring prompt assessment.
Common types of corrosion in household plumbing
Corrosion in domestic plumbing arises from chemical, electrochemical, and environmental interactions that progressively weaken metal pipes; recognizing the type of corrosion helps determine appropriate repairs.
Common forms include uniform thinning from dissolved minerals, pitting from localized chemical attack, galvanic corrosion between dissimilar metals, and microbiologically influenced corrosion.
Identifying mechanisms informs choices on materials, protective coatings, and procedures for how to fix corroded pipes.
Visual and performance signs of corroded pipes
When metal pipes begin to deteriorate, signs often appear long before a collapse, and recognizing those visual and performance cues enables timely repair.
Visible cues include rust flakes, greenish or white mineral deposits, pitting, and swollen fittings.
Performance indicators are reduced flow, discolored or metallic-tasting water, frequent leaks or damp spots, and noisy pipes.
Prompt inspection prevents escalation.
When corrosion becomes a safety or health hazard
Recognize that pipe deterioration crosses from nuisance to hazard when structural integrity or water quality is compromised: thinning walls, deep pitting, active leaks, or visible scale accompanied by foul odors, discoloration, or metallic taste signal increased risk.
Immediate professional assessment is advised if corrosion threatens collapse, contamination, mold growth, or fire risk in gas lines; temporary isolation and testing precede permanent repair or replacement.
Quick assessment: Is repair or replacement the right choice?
A quick assessment weighs factors such as pipe age, material, extent of damage, and water quality to determine if repair will suffice or full replacement is warranted.
A basic, safe DIY inspection—visual checks for leaks, pinhole corrosion, discoloration, and simple tests for pressure—can clarify the situation, but only noninvasive checks should be attempted.
If damage is extensive, hidden, or involves gas lines, a licensed plumber should be called.
Factors to evaluate: age, material, extent of damage, water quality
Although corrosion can show in similar ways, deciding whether to repair or replace piping requires a quick, systematic evaluation of four key factors: the system’s age, the pipe materials, the extent and location of damage, and the quality of the water they carry.
Older systems, mixed metals, widespread or structural corrosion, and aggressive water chemistry tilt toward replacement; isolated, superficial corrosion on durable materials favors targeted repair.
How to perform a basic DIY inspection safely
Before touching pipes, the homeowner should pause to assess hazards and gather basic tools: flashlight, wrench, wire brush, camera or phone, gloves, and safety glasses.
Visually inspect accessible runs for rust, pitting, leaks, and scale. Photograph damage, note locations and severity, check fittings and supports, and test small sections for weakness by gentle pressure.
Use findings to decide repair versus replacement.
When to call a licensed plumber
When should a homeowner escalate from DIY fixes to a licensed plumber? A professional is needed when corrosion is extensive, leaks recur, water pressure drops, discolored water persists, or structural damage appears.
Complex systems, galvanized or lead piping, and code-sensitive replacements require licensed assessment. A plumber evaluates whether targeted repair suffices or full replacement guarantees safety, longevity, and compliance with local regulations.
Tools, materials, and safety gear you’ll need
Before starting repairs, one should assemble the essential tools—pipe cutters, wrenches, soldering or crimping equipment, and leak repair kits—appropriate to the job.
Materials must be chosen by pipe type, such as solder and flux for copper, threaded fittings for galvanized steel and iron, or solvent cement and couplers for PVC and PEX fittings and clamps.
Proper personal protective equipment—gloves, eye protection, respirator where fumes or rust are present—and basic safety precautions should be in place before work begins.
Essential tools for pipe repair
A concise kit of tools, materials, and safety gear makes corroded pipe repair faster and safer; essential items typically include a pipe cutter or hacksaw, adjustable wrenches, wire brush or emery cloth, pipe joint compound or solder, replacement fittings, corrosion-resistant tape or epoxy, gloves, eye protection, and a respirator for soldering or working with solvents.
Also include plumber’s tape, flashlights, a torque-limited wrench, and a fire extinguisher.
Materials by pipe type (copper, galvanized steel, iron, PVC, PEX)
Different pipe materials demand specific supplies and protective gear to guarantee effective, code-compliant repairs.
For copper: solder, flux, torch, and replacement tubing.
Galvanized steel and iron: pipe wrenches, cutting tools, thread sealant, and replacement nipples or couplings.
PVC: primer, solvent cement, PVC pipe and fittings.
PEX: crimp or clamp tools, rings, and compatible fittings.
Appropriate corrosion inhibitors and replacement sections complete the list.
Personal protective equipment and safety precautions
Several essential items protect workers and bystanders when addressing corroded pipes: gloves, eye protection, respirator, and steel-toe boots.
Additional gear includes chemical-resistant aprons, hearing protection, and flashlights. Tools should be insulated and grounded.
Work areas require ventilation, drip containment, and clear signage.
Before starting, shut off water, de-energize nearby circuits, test for gas, and confirm structural stability.
Step-by-step repairs for surface corrosion and small leaks
Before beginning repairs, the work area is secured and the water supply is shut off to prevent flow and protect surroundings.
Surface rust is cleaned and treated, then appropriate fixes—wraps, epoxy putty, or repair clamps—are applied to seal small leaks or stabilize corroded sections.
After curing, the repair is tested and water is returned to service while checking for leaks and proper function.
Preparing the work area and shutting off water
Clear the immediate area, gather tools and safety gear, and locate the main shutoff to isolate the affected pipe before any repairs begin.
Verify power to nearby appliances is off, drain residual water via faucets, and place buckets and towels.
Confirm adequate lighting and ventilation, protective gloves and eye protection are worn, and access panels are removed for clear inspection and unobstructed repair work.
Cleaning and treating surface rust on metal pipes
Begin by evaluating the extent of surface rust and any small leaks to determine the appropriate cleaning and treatment method.
Remove loose rust with a wire brush or abrasive pad, then wipe with a damp cloth.
Apply a rust converter or metal primer to neutralize corrosion.
Allow to dry fully, then inspect for remaining pitting; repeat treatment as needed before finishing.
Applying wraps, epoxy putty, and repair clamps
For surface corrosion and small leaks, select the least invasive repair method that reliably restores integrity: self-fusing silicone or fiberglass wraps for sealing and reinforcement, epoxy putty for filling pits and small breaches, or a mechanical repair clamp for more persistent weeps.
Prepare the area by drying and abrading.
Apply wrap tightly per instructions, mold epoxy into voids, cure fully, or position and torque clamp evenly to stop leakage without overtightening.
Testing repairs and returning water to service
Once the repair materials have fully cured and any clamping hardware is secured, the repaired section should be tested methodically before restoring normal service.
Gradually reintroduce water, monitor for leaks and pressure loss, and inspect joints and seals.
Maintain pressure for a specified duration, document observations, and if no issues arise, fully restore flow.
Recheck after several hours to confirm long-term integrity.
Replacing corroded pipe sections
When pipe corrosion is extensive, removing and replacing the affected section becomes necessary to restore system integrity.
The process begins with safely cutting out the damaged length, selecting compatible replacement pipe and fittings, and choosing an appropriate joining method—soldering, compression, threaded joints, or push-fit—based on material and access.
After installation, the new joints should be pressure tested and sealed as needed to verify a leak-free connection.
Cutting out damaged sections safely
Begin by isolating the corroded section and shutting off water to the affected line. Then drain and relieve pressure before any cutting begins.
Inspect corrosion extent, mark cut lines beyond weakened metal, and wear safety gear.
Use appropriate cutters or a reciprocating saw with steady support, cutting squarely to prevent burrs.
Deburr edges, clean surrounding area, and confirm no remaining leaks before fitting replacement.
Choosing compatible replacement materials and fittings
Selecting compatible replacement materials and fittings requires matching pipe material, size, pressure rating, and connection type to the existing system to secure mechanical integrity and prevent accelerated corrosion.
The technician verifies metallurgy compatibility (e.g., copper to copper), selects corrosion-resistant options where needed, confirms dimensional and rating conformity, and uses dielectric or isolation measures when dissimilar metals cannot be avoided to prolong service life.
Joining methods: soldering, compression fittings, threaded joints, push-fit
After confirming compatible materials and fittings, the technician chooses an appropriate joining method for replacing corroded sections, balancing durability, ease of installation, and site conditions.
Soldering offers permanent copper joins; compression fittings suit tight spaces without heat.
Threaded joints work for metal pipes needing disassembly.
Push-fit connectors speed repairs, tolerate minor misalignment, and require no special tools, though they may be less permanent.
Pressure testing and leak-proofing new joints
Pressure-testing and leak-proofing verify the integrity of new joints before returning a system to service.
Technicians pressurize sections with air or water to specified PSI, monitor for drops, and inspect joints for seepage.
Leaks are marked, depressurized, and repaired—tightening fittings, replacing seals, or redoing solder.
After passing, systems are slowly brought to normal pressure and rechecked for stability.
Addressing systemic corrosion problems
Systemic corrosion requires identifying underlying causes such as galvanic action between dissimilar metals and the absence of dielectric unions.
Treatment often combines water chemistry adjustments — pH correction, filtration, and corrosion inhibitors — with mechanical measures.
Decisions about replacing entire runs versus spot repairs hinge on comparative costs, expected service life, and the extent of deterioration.
Dealing with galvanic corrosion and dielectric unions
Many instances of in-home corrosion stem from galvanic reactions where dissimilar metals in contact — commonly copper and galvanized steel — create an electrochemical cell that accelerates metal loss.
Addressing this requires both identification of affected joints and installation of proper dielectric unions or insulating fittings to interrupt the electrical path and restore longevity.
Technicians should also replace severely pitted sections, secure fittings to prevent movement, and verify continuity is broken.
Water chemistry fixes: pH adjustment, filtration, and corrosion inhibitors
Although mechanical fixes stop local reactions, correcting the water chemistry addresses the root causes of widespread pipe corrosion. Adjusting pH, removing aggressive ions, and applying approved corrosion inhibitors can greatly slow metal loss across an entire plumbing system.
Practical steps include testing water, using neutralizing filters or chemical feed systems, installing ion-exchange or carbon filtration, and dosing compatible inhibitors per manufacturer guidelines and regulatory limits.
Replacing whole runs vs. spot replacement: cost and longevity comparison
Addressing water chemistry can slow corrosion across a system, but decisions about physical repairs still shape long-term outcomes: replacing entire runs of pipe versus performing spot repairs requires weighing upfront costs, expected service life, and the likelihood of future failures. Whole-run replacement increases longevity and reduces future labor; spot fixes lower immediate expense but risk repeat work.
| Option | Trade-off |
|---|---|
| Whole-run | Higher cost, longer life |
| Spot repair | Lower cost, shorter life |
| Hybrid | Targeted replacement, moderate cost |
| Warranty | Peace of mind, added cost |
Corrosion prevention and long-term maintenance
The section outlines a concise routine inspection checklist to catch early signs of corrosion, including visual checks, thickness measurements, and leak indicators.
It then reviews protective coatings, wraps, and insulation options that extend service life and reduce environmental exposure.
Finally, it explains indicators for when upgrading to more durable piping materials is cost-effective versus continued repair.
Routine inspection checklist
When establishing a routine inspection checklist for corrosion prevention and long-term maintenance, technicians should focus on measurable, repeatable items that identify early degradation and track mitigation effectiveness over time.
A concise checklist guarantees consistent monitoring and timely intervention.
- Record visual corrosion extent, pitting depth, and coating condition.
- Measure thickness, pressure, and leak rates at defined intervals.
- Log environmental factors, chemical exposure, and remediation actions.
Protective coatings, wraps, and insulation options
Select appropriate protective coatings, wraps, and insulation based on substrate, environment, and service conditions to create durable barriers against corrosion.
Use epoxy, polyurethane, or zinc-rich primers for metal; elastomeric or bituminous wraps for external protection; and foam or mineral wool insulation for thermal and condensation control.
Guarantee surface preparation, correct thickness, UV resistance, and proper sealing at joints for long-term performance.
When to upgrade piping materials for durability
After evaluating coatings, wraps, and insulation effectiveness, owners should determine whether substrate replacement or material upgrades are warranted to achieve long-term corrosion resistance.
Decisions hinge on deterioration extent, failure frequency, fluid chemistry, and maintenance costs.
Upgrade to corrosion-resistant alloys, nonmetallics, or linings when repair recurrence, safety risks, or lifecycle economics favor replacement; document material compatibility and install per standards to guarantee durability.
Cost estimates and budgeting for repairs and replacements
Typical price ranges for patching, relining, and full pipe replacement vary by material—copper and stainless steel usually cost more than PVC or PEX—so homeowners should compare quotes for the specific repair type and pipe material.
Costs rise with access difficulty, extent of corrosion, needed permits, and emergency service fees, while careful scheduling, obtaining multiple estimates, and addressing localized damage early can help minimize expenses.
A brief budget outline that accounts for labor, materials, contingency, and disposal fees provides a practical starting point for planning.
Typical price ranges by repair type and pipe material
When planning repairs or replacements, homeowners should budget according to both the type of intervention—spot repairs, relining, section replacement, or full repipe—and the pipe material involved, since costs vary substantially between copper, galvanized steel, PVC, and PEX.
Typical ranges: spot repairs $50–$300, relining $500–$3,000, section replacement $200–$1,200 per run, full repipe $2,000–$15,000 depending on material.
Factors that increase costs and how to minimize them
Costs escalate when hidden damage, difficult access, or rushed scheduling increases labor, materials, or both.
Unexpected corrosion, contaminated water, structural repairs, and specialty fittings raise estimates.
To minimize costs, prioritize early inspection, obtain multiple quotes, bundle repairs, choose durable materials, and schedule during normal hours.
Contingency budgeting of 10–20% and clear contractor scopes prevent surprises and change-order markups.
Real-life examples and troubleshooting scenarios
Several real-life cases illustrate how corrosion presents and is resolved: a few pinhole leaks in a galvanized line, extensive rust in a basement supply run, and common issues that arise after repairs.
Each case highlights different diagnostic steps, repair choices, and cost trade-offs.
Troubleshooting guidance focuses on identifying remaining corrosion, preventing recurrence, and addressing leaks or pressure problems that persist after work is done.
Case: small pinhole leaks in galvanized pipe
A homeowner discovers a tiny wet spot on a ceiling and traces it to a series of aging galvanized supply pipes, where small pinhole leaks have formed at seams and along internal corrosion pits.
These failures typically show slow drips or staining rather than sudden bursts, making them easy to overlook until secondary damage appears.
The homeowner isolates the feed, confirms active seepage, cleans, applies epoxy patch or sleeve, and schedules replacement planning for affected runs.
Case: widespread rust in a basement supply line
When widespread rust appears along a basement supply line, it typically signals long-term exposure to moisture, oxygen, or corrosive water chemistry rather than an isolated defect.
The homeowner should inspect for leaks, poor ventilation, and nearby soil or masonry contact.
Replacement with corrosion-resistant materials and correcting drainage or water chemistry are common solutions; professional assessment is advised for systemic deterioration and code-compliant repairs.
Troubleshooting common post-repair issues
Begin by documenting the repair details, as clear records of materials, locations, and procedures make post-repair troubleshooting far more efficient.
Then inspect for leaks, pressure loss, discolored water, and strange noises.
Check joints, seals, and replaced sections for thermal expansion, misalignment, or residual debris.
In one case, flushing restored flow; in another, tightening a coupling stopped a slow drip.
Useful resources and when to seek professional help
The section outlines how to confirm plumber credentials, warranties, and insurance before hiring.
It also lists helpful products, manufacturer manuals, and relevant building-code references for safe repairs.
Readers are advised when issues exceed DIY scope and professional assessment is warranted.
How to verify plumber credentials and warranties
How can a homeowner confidently verify a plumber’s credentials and warranty terms before hiring?
Check state licensing and insurance online, confirm license numbers and active status, and request proof of liability and workers’ compensation.
Ask for written estimates and explicit warranty terms covering parts and labor, including duration and exclusions.
Verify references, read reviews, and retain all signed contracts for future claims.
Helpful products, manuals, and code references
When tackling corroded pipes, homeowners benefit from a concise toolkit of corrosion-inhibiting products, inspection manuals, and up-to-date plumbing codes to guide safe repairs and to know when to call a pro.
Recommended items include corrosion inhibitors, pipe patches, and dielectric unions; reference national and local codebooks; consult manufacturer manuals.
Seek licensed plumbers for structural damage, active leaks, or code compliance.
- Corrosion inhibitors, patches, unions
- National/local plumbing codes
- Manufacturer manuals, professional help
Conclusion
In closing, the homeowner is advised to treat corroded pipes like a patient needing attentive care: timely assessment, appropriate repairs, and preventive maintenance keep systems flowing. Small fixes can buy time, while full replacements restore long-term reliability. With the right tools, safety measures, and budget planning, corrosion becomes manageable rather than catastrophic. When uncertainty or complexity arises, calling a qualified professional guarantees durable results and peace of mind.
