
How to Clean Sand Mound Pipes: Step-by-Step Guide for Safe, Effective Maintenance
To effectively clean sand mound pipes and prevent backups or contamination, follow these steps: First, locate and inspect the perforated distribution pipes. Technicians will then secure power, open access ports, and mechanically remove any roots or solid obstructions. Next, use high-pressure jetting to flush the lines thoroughly. After flushing, apply EPA-approved disinfectants, replace seals, and resume flow while monitoring for leaks or odors. Ensure proper personal protective equipment (PPE) is used, obtain necessary permits, and conduct camera inspections to minimize risks. Adhering to maintenance schedules and keeping documented records will help prolong the system’s lifespan. Detailed procedures and troubleshooting tips are available for further guidance.
What a Sand Mound System Is and Why Pipe Cleaning Matters
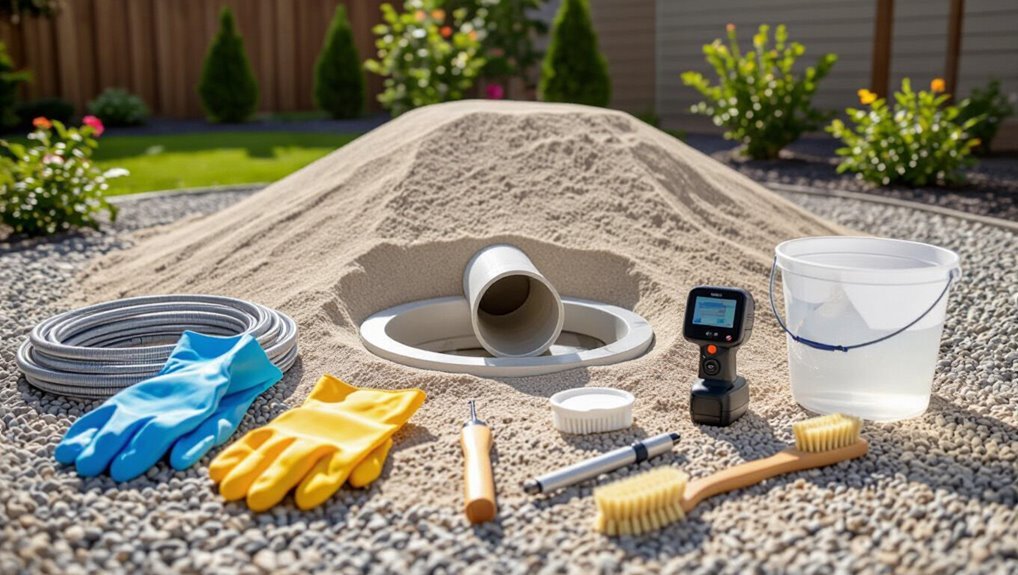
A sand mound system elevates the drainfield by filtering effluent through sand-filled layers and perforated distribution pipes before it reaches the soil.
Pipes in these systems commonly clog from solids, biofilm buildup, roots, and mineral deposits that restrict flow and distribution.
Neglecting pipe maintenance can cause backups, uneven treatment, groundwater contamination, and costly repairs.
How sand mound septic systems work
Sand mound septic systems use layers of sand and gravel to treat and disperse household wastewater when natural soil conditions are unsuitable for standard leach fields.
Effluent travels from the house to a septic tank, then to distribution pipes within the sand mound where biological filtration and percolation occur.
Understanding flow, valve operation, and inspection points helps inform how to clean sand mound pipes efficiently.
Common causes of sand mound pipe blockages
Understanding how effluent flows through the tank and distribution pipes highlights why blockages occur in sand mound systems.
Common causes include solids buildup from inadequate tank pumping, grease and household chemicals that congeal, root intrusion into joints, sediment and sand infiltration from damaged linings, and biofilm or bacterial slimes narrowing passages.
Improperly sized or sloped pipes and frozen sections exacerbate obstruction risks.
Risks of neglecting pipe maintenance
Neglecting routine maintenance on sand mound distribution pipes accelerates system deterioration and raises the likelihood of failures that are costly and disruptive.
Without inspection and cleaning, blockages, biofouling, and root intrusion reduce effluent distribution, causing uneven treatment, surface backups, and contamination risks.
Repairs and replacements escalate expenses, regulatory violations may occur, and public health and property values can suffer from prolonged neglect.
Signs Your Sand Mound Pipes Need Cleaning
Indicators that sand mound pipes require cleaning include persistent slow drains and occasional backups, noticeable foul odors near the mound, and soggy or wet ground above the system.
Residents may also observe alarm activations or warning lights on system monitors signaling reduced flow or blockage.
Prompt attention to these signs helps prevent larger failures and costly repairs.
Slow drains and backups
Slow or recurring backups in household drains often signal that a sand mound’s distribution pipes are becoming clogged or compromised.
Flow reduction may appear in multiple fixtures simultaneously, indicating system-wide restriction rather than single-pipe blockage. Homeowners should note frequency, affected locations, and whether backups follow heavy use or storms.
Prompt inspection and professional cleaning prevent sewage backups, surface pooling, and system failure.
Unusual odors near the mound
When slow drains and backups persist, a new and often more obvious sign appears as unpleasant odors near the mound.
Foul smells indicate trapped sewage or bacterial buildup in distribution pipes or sand layers.
Detection warrants prompt inspection to locate breaches, blockages, or biofilm accumulation.
Timely cleaning and targeted repairs prevent odor recurrence and reduce health risks and further system deterioration.
Wet or soggy area over the mound
Any persistent wet or soggy patch on or above the sand mound often signals compromised distribution pipes or saturated sand unable to absorb effluent.
The area may feel spongy, support standing water, or show unusually lush vegetation. Such signs indicate uneven flow, blockages, or pipe leaks requiring inspection and cleaning.
Prompt assessment prevents system failure and groundwater contamination.
Alarm or system indicator warnings
Visible sogginess or pooling above a sand mound often precedes electronic warnings from the system; alarm lights, audible buzzers, or digital error codes provide a clear, objective signal that distribution pipes may be clogged, broken, or otherwise compromised.
Prompt response to alarms limits damage: inspect control panels, record codes, check floats and sensors, and engage qualified service to diagnose blockage, leaks, or electrical faults before contamination or system failure occurs.
Safety Precautions and Required Permits
Before beginning any sand mound pipe cleaning, a clear checklist of personal protective equipment (PPE) should be established to protect against biological and chemical hazards.
Environmental and health safety considerations, including containment of effluent and prevention of groundwater contamination, must be addressed.
Local regulations and permit requirements should be verified and, where conditions are complex or permits are needed, a licensed professional should be engaged.
Personal protective equipment (PPE) checklist
A concise personal protective equipment (PPE) checklist assures all workers engaged in sand mound pipe cleaning don appropriate gear to minimize exposure to contaminants and physical hazards.
Required items include chemical-resistant gloves, N95 or higher respirator, splash goggles, face shield, impermeable coveralls, steel-toe boots, and hearing protection.
Ensure proper fit, inspection before use, and replacement of damaged or contaminated PPE.
Environmental and health safety considerations
Several critical environmental and health safety considerations govern sand mound pipe cleaning and must be addressed through specific precautions and permits to prevent contamination, protect workers, and comply with regulations.
Waste handling protocols, spill containment, and decontamination procedures minimize soil and groundwater risks.
Airborne pathogen controls, proper PPE use, and medical monitoring reduce worker hazards.
Documentation, labeling, and restricted disposal guarantee responsible, traceable waste management.
Local regulations, permits, and when to call a professional
Following the outlined waste handling, containment, and worker-protection measures, attention must shift to the regulatory framework that governs sand mound pipe cleaning.
Practitioners should verify local septic and environmental codes, obtain required permits, and follow disposal rules.
When systems are complex, damaged, or inspections reveal contamination risks, hiring a licensed septic professional or environmental contractor is mandatory to guarantee compliance and public safety.
Tools and Materials Needed
Before beginning work on sand mound pipes, assemble appropriate inspection and cleaning tools, including a flashlight or inspection camera and cleaning gear such as hydrant hoses, jetters, augers, and hand tools.
Also gather disinfection agents and repair supplies to address contamination or minor fixes on site.
Consider whether renting specialized equipment or hiring a contractor is more practical based on the job’s scope and the operator’s experience.
Inspection tools (flashlight, inspection camera)
A reliable flashlight and a compact inspection camera are essential for evaluating sand mound pipes, providing illumination and visual access to joints, bends, and sediment accumulations that are otherwise out of reach.
Lightweight, waterproof cameras with articulated heads and recording capability document conditions; a high-lumen, focused-beam flashlight assists close inspection. Inspectors use these tools to identify blockages, corrosion, root intrusion, and joint failures before cleaning.
Cleaning tools (hydrant hose, jetter, auger, hand tools)
Gathering the right cleaning tools sets the foundation for effective sand mound pipe maintenance. A hydrant hose supplies pressurized water; a jetter clears roots and sediment with adjustable nozzles.
A manual or powered auger removes blockages from deeper sections. Basic hand tools—wrenches, pliers, screwdrivers, gloves—enable access and minor adjustments.
Select durable, purpose-built equipment for safety and efficiency.
Disinfection and repair supplies
Prepare a compact kit of disinfection and repair supplies tailored to the size and configuration of the sand mound system.
Include EPA-approved disinfectant (bleach solution or commercial sanitizer), measuring syringe, nitrile gloves, eye protection, spare PVC couplings, pipe clamps, primer and solvent cement, Teflon tape, clean rags, and a small hand pump for flushing.
Store items in a waterproof container for field use.
Recommended equipment rental vs. hiring a contractor
Evaluate whether renting specialized equipment or hiring a contractor best suits the sand mound project’s scope, budget, and risk tolerance.
Renters can save money for single, simple tasks but must assess tool availability, safety training, and liability.
Contractors provide expertise, warranties, and full insurance, often costing more.
Choose rental for low-risk, short jobs; hire professionals for complex, high-risk, or compliance-sensitive repairs.
Preparing the Site for Pipe Cleaning
Before any cleaning begins, the location of distribution pipes and access points should be confirmed so work is focused and safe.
The system must be shut off and electrical components secured to prevent accidental energization during service.
Measures to contain wastewater and protect nearby vegetation should be established to avoid contamination and damage.
How to locate distribution pipes and access points
How can the distribution pipes and access points be found quickly and reliably on a sand mound site?
Inspect records and as-built drawings, then walk the mound noting valve boxes, risers, inspection ports, and dosing chambers.
Use probing rods and utility locators to confirm buried pipe lines.
Mark locations with flags or spray paint, document positions, and verify access clearances before cleaning operations begin.
Shutting off system components and electrical safety
One clear priority is to isolate mechanical and electrical components to prevent accidental flow, activation, or electrocution during cleaning.
Power to pumps, alarms, and timers should be switched off and locked out; breakers tagged. Confirm de-energization with a voltage tester.
Disable automatic controls and remove batteries.
Provide clear signage and restrict site access until testing verifies safe, complete isolation.
Containing runoff and protecting nearby vegetation
With electrical and mechanical systems secured, attention shifts to preventing contaminated effluent from leaving the work area and harming nearby plants.
Workers place impermeable barriers and diversion berms downhill, route wash water into containment tanks or sanitary drains, and cover sensitive vegetation with tarps or temporary mulch.
Dispose of collected runoff per local regulations and inspect plants afterward for signs of stress or contamination.
Step-by-Step Pipe Cleaning Procedure
The procedure outlines a clear sequence for locating and removing obstructions, accessing system components safely, and restoring normal flow.
It progresses from visual inspection and safe opening of access points to mechanical and high-pressure cleaning methods, finishing with flushing and flow verification. The steps emphasize appropriate tool and nozzle choices and confirmation that the mound is functioning properly.
- Inspect pipes and identify blockage locations.
- Open access ports and distribution boxes safely.
- Mechanical clearing, high-pressure jetting, and final flushing.
Step 1: Inspect pipes and identify blockage locations
Begin by visually and physically inspecting the sand mound piping system to determine where flow is impeded.
Note sagging, discoloration, wet spots, and odor.
Check joints, risers, and accessible trench areas for debris, roots, or sediment buildup.
Use a flashlight and gentle hand probing; mark suspected blockage points and record depth and location for targeted cleaning and for communicating findings to technicians.
Step 2: Open access ports and distribution boxes safely
Open access ports and distribution boxes only after confirming the system is depressurized and electrical components are isolated.
Wear gloves, eye protection, and a mask.
Remove covers slowly to relieve residual pressure and inspect seals, gaskets, and pipe connections for damage or corrosion.
Clear accumulated debris with nonpowered tools, document findings, and reseat covers using manufacturer-recommended torque and replacement parts as needed.
Step 3: Mechanical clearing with hand auger or snake
Having cleared and inspected access ports and distribution boxes, attention moves to mechanically clearing blocked lines using a hand auger or snake.
The operator feeds the flexible coil into the lateral, rotating steadily to engage obstructions. Withdraw debris slowly, repeating passes until flow resumes.
Use appropriate coil size, maintain firm control to prevent kinking, and disinfect tools after use to reduce contamination risks.
Step 4: High-pressure water jetting technique and nozzle selection
Switch to high-pressure water jetting to dislodge compacted solids and biofilm from sand mound laterals, selecting a nozzle that balances thrust and rinsing action for the line diameter and bend frequency.
Operate at manufacturer-recommended pressures, advancing slowly to avoid damaging laterals.
Use rotary or multi-jet nozzles for heavy deposits; narrow jet nozzles for tight bends.
Monitor hose tension and wear continuously.
Step 5: Flushing and verifying flow through the mound
Begin flushing the mains with a controlled flow to carry residual debris and loosened biofilm through the sand mound and into the downstream disposal area.
Monitor flow rates and inspect clear downstream manholes or observation ports for turbid discharge. Continue until effluent clears, confirming unobstructed passage.
Record flow measurements, note any persistent cloudiness, and adjust flushing duration or repeat jetting if blockages remain.
Step 6: Disinfecting pipes and reassembling access points
Prepare disinfectant solutions and safety gear appropriate for the system and local regulations before entering the access points.
Technicians apply EPA-approved disinfectants, contact for specified dwell times, then thoroughly rinse to prevent chemical residue.
Inspect seals, gaskets, and access covers for damage; replace as needed.
Reassemble access points securely, torque fasteners to spec, and document disinfectant used, concentrations, and reassembly details for the maintenance record.
Step 7: Final inspection and system restart
A thorough final inspection verifies that all pipes, fittings, access covers, and disinfected surfaces meet operational and safety standards before restoring flow.
The inspector confirms seals, torque, and alignment; checks for leaks, odor, and debris; reviews pressure and flow readings; documents findings; and guarantees safety signage and permits are in place.
Only after satisfactory results should the system be gradually restarted and monitored.
How to Use an Inspection Camera Effectively
Selecting the right inspection camera and inserting it with steady control and appropriate protectors guarantees safe access to sand mound pipes.
The operator notes typical findings—root intrusion, grease buildup, and sediment deposits—and interprets their severity to guide cleaning choices.
Clear images and time-stamped notes are recorded for maintenance logs and to inform contractors.
Camera selection and insertion best practices
Several factors determine the right inspection camera for sand mound pipes: pipe diameter and length, image resolution and lighting, flex and articulation of the probe, and compatibility with recording or playback devices.
Selection favors compact, waterproof reels with adequate illumination and durable cables.
Insertion should be steady, avoiding forced bends; advance slowly, note depth markers, and secure the entry to prevent contamination or damage during withdrawal and reinspection.
Interpreting common camera findings (roots, grease, sediment)
Many inspection results fall into a few predictable categories—roots, grease, and sediment—each producing distinct visual cues that guide diagnosis and action.
Roots appear as fibrous intrusions expanding joints; grease shows as shiny, dark coating narrowing flow; sediment collects as granular buildup or flat layers reducing slope.
Accurate identification informs targeted cleaning: mechanical cutting for roots, descaling or hot-water/biochemical treatments for grease, and flushing or jetting for sediment.
Documenting findings for records or contractors
Clear, consistent documentation turns a camera inspection from a momentary observation into a durable record that contractors and owners can act on.
Photographs, timestamps, distance markers, and concise notes on defect type and severity should be logged. Use standardized forms or digital reports, annotate video clips with locations, and store files securely.
Clarity enables accurate quotes, prioritized repairs, and regulatory compliance.
When Mechanical Cleaning Isn’t Enough: Repair and Replacement Options
When mechanical cleaning no longer restores flow, visible signs such as persistent backups, odors, soggy or settling mound areas, or recurring clogs indicate the pipes or mound may need repair or replacement. The homeowner should compare options — targeted pipe repair, partial replacement, or full mound reconstruction — considering cost, disruption, and expected lifespan. The following table summarizes common repair choices and their typical lifespans to guide decision-making.
| Repair Option | Typical Lifespan | Disruption/Cost |
|---|---|---|
| Pipe patching/spot repair | 3–10 years | Low–moderate |
| Sectional pipe replacement | 10–20 years | Moderate |
| Full pipe replacement | 20–30 years | High |
| Full mound reconstruction | 25–40+ years | Very high |
Signs that pipes or the mound need repair
If mechanical cleaning fails to restore proper flow, visible and operational signs indicate that pipes or the mound require repair or replacement.
Persistent slow drainage, recurrent backups, foul odors, wet or soggy areas above the mound, erosion or settling, exposed or crushed pipes, and sewage surfacing are clear indicators.
Increased chlorine demand or unexplained high system pressures also suggest structural failure needing professional assessment.
Comparison table of repair options and expected lifespan
After identifying signs that cleaning cannot restore function, homeowners and technicians can evaluate repair and replacement options side-by-side to weigh costs, disruption, and longevity. The table summarizes typical fixes, expected lifespan, and trade-offs to guide decisions.
| Option | Expected lifespan |
|---|---|
| Spot pipe repair | 5–10 years |
| Full pipe replacement | 25–50 years |
| Mound rebuild | 20–40 years |
| Alternative system conversion | 20–50 years |
Preventive Maintenance Schedule and Best Practices
A concise preventive maintenance plan helps preserve sand mound pipe function and avoid costly repairs. Recommended actions include scheduled cleanings based on household size and water use, simple routine inspections homeowners can perform, and clear dos and don’ts for what enters the wastewater system.
The following checklist summarizes practical frequency, checks, and everyday behaviors to minimize clogs and system stress.
- Recommended cleaning frequency based on usage (e.g., annual for small households, semiannual for larger or high-use homes).
- Routine checks homeowners can perform (visual inspection of drainfield, monitor unusual odors or slow drains, and test outlet tees).
- Dos and don’ts for household wastewater to reduce clogs (do use low-flow fixtures and strainers; don’t flush grease, wipes, or harsh chemicals).
Recommended cleaning frequency based on usage
Frequency recommendations for sand mound pipe cleaning depend primarily on household size, water usage patterns, and wastewater load; typical guidance ranges from annual inspections for small, low-use systems to biannual or quarterly cleanings for larger households or systems handling higher organic or particulate loads.
Systems with intermittent heavy use or visible performance decline merit accelerated schedules; professional assessment refines intervals and documents historic trends for proactive planning.
Routine checks homeowners can perform
Several simple checks can help homeowners catch issues early and extend the life of sand mound pipes:
- Inspect mound surface for erosion or pooling.
- Verify access riser covers are secure and dry.
- Listen for unusual plumbing noises.
- Monitor system alarms and alarm batteries.
- Note changes in vegetation or odors.
- Check distribution box area for saturation.
- Record observations with dates for professional review.
Dos and don’ts for household wastewater to reduce clogs
Follow a clear set of dos and don’ts for household wastewater to minimize clogs and protect sand mound pipes:
Dispose of grease, oils, coffee grounds, feminine products, wipes (even those labeled flushable), and harsh chemicals in the trash rather than drains;
Use drain strainers and routinely remove trapped solids;
Run cold water while using the garbage disposal and operate it only with small amounts of waste;
Avoid pouring paint, solvents, or concentrated cleaners down sinks or toilets;
Limit laundry loads and use phosphate-free, septic-safe detergents;
Keep tree roots and heavy vehicle traffic away from the mound area.
Regular adherence prevents blockages, reduces treatment stress, and extends system life.
Common Mistakes and How to Avoid Them
Common errors in sand mound pipe care include overreliance on chemical drain cleaners, which can corrode materials and harm microbial action.
Improper high-pressure jetting can fracture or dislodge pipes, and postponing repairs allows minor issues to become systemic failures.
Each mistake carries specific risks and requires different preventative steps or professional intervention.
The following section outlines how to recognize these errors and adopt safer, more effective practices.
Overuse of chemical drain cleaners and risks
Excessive reliance on chemical drain cleaners can damage sand mound pipe systems and create safety hazards.
Prolonged use corrodes pipe materials, weakens seals, and disrupts beneficial microbial communities essential for treatment.
Chemical residues may leach into surrounding soil and groundwater, posing environmental and health risks.
Recommended alternatives include mechanical cleaning, biological treatments, and consulting professionals before applying strong chemicals.
Improper jetting techniques that damage pipes
After outlining the hazards of chemical cleaners, attention turns to mechanical methods like high-pressure jetting, which—when misapplied—can cause similar or greater damage to sand mound pipes.
Excessive pressure, incorrect nozzle selection, and prolonged exposure can erode pipe walls, dislodge joint seals, and compact surrounding media.
Operators should match pressure to pipe material, use appropriate nozzles, and employ experienced technicians to prevent harm.
Delaying repairs and escalating system failures
Procrastinating on necessary repairs allows minor issues in sand mound systems to worsen rapidly, turning simple fixes into costly, system-wide failures.
Ignoring early signs—slow drainage, odors, surface pooling—permits clogging, soil saturation, and bacterial growth.
Routine inspections and prompt intervention prevent escalation.
Scheduling timely repairs, documenting issues, and consulting qualified technicians minimize downtime, extend system life, and reduce long-term expenses.
Cost Estimates and When to Hire a Professional
A brief comparison outlines typical DIY expenses versus contractor rates for sand mound pipe cleaning, helping homeowners weigh savings against professional assurances.
Key questions to ask a septic professional—certifications, inspection methods, warranty and itemized estimates—clarify scope and cost before hiring.
Immediate professional intervention is recommended when there are sewage odors, surfacing effluent, or sudden system backups.
Typical DIY vs. contractor cost breakdown
When evaluating whether to tackle sand mound pipe cleaning as a DIY project or hire a contractor, cost is often the deciding factor; homeowners should weigh equipment and material expenses, time, and potential repair risks against professional labor rates and guarantees.
DIY typically costs $50–$300 for tools and supplies plus time; contractors charge $200–$1,200 depending on clog severity, access difficulty, and warranty inclusion.
Questions to ask a septic professional before hiring
How much should be budgeted and how urgent is the work are two critical questions to clarify before hiring a septic professional; clear answers help homeowners compare cost estimates, understand scope, and decide whether immediate intervention is required.
Ask for written estimates, itemized fees, warranty details, licensing and insurance proof, expected timeline, necessary permits, and references.
Confirm payment terms and cleanup responsibilities.
Emergency signs that require immediate professional intervention
Clear estimates and timelines help decide if immediate action is needed; certain observable problems, however, always warrant calling a septic professional right away.
Visible sewage surfacing, strong sewage odors indoors or outdoors, rapid lawn saturation, gurgling drains, or repeated backups indicate system failure.
Professionals assess costs, provide emergency repairs, and prevent health risks. Immediate intervention limits damage and reduces long-term expenses.
Case Examples and Troubleshooting Scenarios
Typical case examples present clear signs and responses for common sand mound issues.
One scenario describes gradual absorption decline from a partial clog and the corrective steps taken to restore flow.
Other examples compare identification and removal of root intrusion with distinguishing a clogged distribution box from blocked lateral lines to guide targeted repairs.
Scenario: Partial clog causing slow absorption steps taken
When a sand mound system begins to exhibit slow absorption without a complete stoppage, the operator first documents recent usage patterns, visible ponding, and any odors or surfacing effluent to establish whether the issue is localized or systemic. This initial assessment guides targeted troubleshooting steps such as inspecting distribution boxes, verifying baffle integrity, and checking lateral lines for root intrusion or partial blockage before committing to excavation or chemical treatments.
Next, flow testing quantifies clog severity. Spot-cleaning or jetting restores partial flow, and monitoring confirms recovery.
Scenario: Root intrusion identification and resolution
Slow absorption linked to partial clogs often prompts inspection for biological causes, and root intrusion is a common culprit that warrants focused evaluation.
Technicians document symptoms, perform camera inspection, and probe laterals. When roots are confirmed, selective mechanical cutting and careful chemical root control are applied, followed by flushing and monitoring.
Repair or replacement of damaged sections is scheduled when structural compromise is evident.
Scenario: Clogged distribution box vs. clogged lateral lines
Differentiating a clogged distribution box from clogged lateral lines hinges on symptom patterns and targeted diagnostics: distribution box blockages commonly produce uneven flow from multiple laterals and visible backups at the box, while lateral line clogs cause isolated wet spots, surfacing, or reduced discharge in specific trenches.
Technicians inspect the box, run dye or smoke tests, and perform targeted jetting or sectional probing to confirm and resolve the fault.
Maintenance Checklist for Record-Keeping and Seasonal Care
A concise maintenance checklist helps track routine care and seasonal actions for sand mound pipes.
It should include printable monthly and annual items and specify what to record after each cleaning or inspection. Clear records improve troubleshooting and regulatory compliance.
- Monthly: visual inspections, filter checks, and surface drainage observations.
- Annual: system performance test, dye test for leaks, and professional inspection.
- After each cleaning/inspection: date, technician name, actions taken, parts replaced, and any anomalies observed.
Printable monthly and annual checklist items
Monthly and annual checklist items for sand mound pipe maintenance provide concise, trackable tasks to guarantee system integrity and regulatory compliance.
Monthly items: visual inlet/outlet checks, odor/leak detection, surface drainage inspection, pump/float verification, and record date/status.
Annual items: full system inspection, pressure test, sediment sampling, component replacement as needed, vegetation control, and permit/report submission to authorities.
What to record after each cleaning or inspection
When completing any cleaning or inspection of sand mound pipes, technicians should record the date, time, inspector’s name, and specific location or component inspected to guarantee an auditable trail.
Also note observed conditions, measurements (flow rates, pressure), actions taken, materials used, photos or diagrams, and any follow-up recommendations with deadlines.
Retain records digitally and in hard copy for regulatory compliance and trend analysis.
Conclusion
Beneath a sun-warmed mound, the pipes breathe like hidden rivers; cleaning them restores the quiet rhythm of the system. With tools set aside and sediment shaken loose, the mound returns to its steady, patient work, filtering life beneath the grass. Regular care keeps clogs from turning into collapse, each checkmark on a maintenance log a small, steady lantern against failure. In diligent attention, the landscape’s unseen plumbing finds renewed balance and longevity.
