How to Replace Cast Iron Plumbing: Step-by-Step Guide for Homeowners
To replace cast iron plumbing, homeowners need to first assess for signs of corrosion, recurring backups, and odors. Begin by mapping visible plumbing runs and obtaining necessary permits. Choose modern materials such as PVC, ABS, or HDPE, along with the correct connection couplings. The replacement process involves isolating the water supply, cutting out damaged sections, installing the new pipes at the proper slope, and conducting pressure or water tests before inspection. Always use safety gear and ensure that fittings comply with local codes. For detailed step-by-step instructions, cost estimates, and professional tips, continue reading.
Overview of Replacing Cast Iron Plumbing in a Home
An overview of replacing cast iron plumbing explains when aging or corroded pipes warrant full or partial replacement and why proactive work can prevent structural damage and health risks.
It outlines common signs of failure to inspect for—such as leaks, slow drainage, sewage odors, and visible corrosion—to help prioritize repairs.
It also summarizes the benefits of modern materials like PVC or ABS, including improved flow, reduced leakage, and easier future maintenance.
When and why cast iron pipes should be replaced
Homeowners should consider replacing cast iron plumbing when symptoms of deterioration—persistent clogs, slow drains, foul odors, visible leaks, or chronic corrosion—become recurring despite repairs.
Replacement is recommended to prevent structural damage, sewer backups, and health risks from contamination.
Cost, pipe age, and frequency of repairs guide timing.
Professionals explain how to replace cast iron plumbing and evaluate whether partial or full replacement is appropriate.
Signs of failing cast iron plumbing to inspect
When cast iron plumbing begins to fail, clear, observable signs appear that homeowners and inspectors should note immediately: recurring slow drains, persistent clogs, foul sewer odors, and water stains on walls or ceilings.
Rust flakes or discolored water, visible external corrosion, and sagging or misaligned pipe runs also indicate deterioration.
Frequent backups and increased repair frequency warrant thorough evaluation and possible replacement.
Benefits of replacing cast iron with modern materials
Replacing cast iron with modern plumbing materials delivers immediate and long-term advantages: reduced risk of leaks and blockages, improved flow capacity, and resistance to corrosion and root intrusion.
Homeowners benefit from lower maintenance, fewer emergency repairs, and longer service life.
Lighter piping simplifies installation, enabling cost-effective retrofits and easier future access.
Improved water quality and compliance with current codes add resale value.
Safety, Permits, and Preparations
Before work begins, the homeowner must verify required permits and applicable building-code requirements to avoid fines and guarantee inspections.
Proper safety gear, jobsite precautions, and a complete tools-and-materials checklist reduce injury risk and project delays.
Clear criteria for when to call a licensed plumber versus proceeding as a DIY project should be established based on complexity and local regulations.
Required permits and building-code considerations
Several jurisdictions require permits and specific inspections for removing or altering cast iron plumbing. Homeowners or contractors must verify local building-code requirements before work begins.
Obtain necessary permits, submit plans if required, and schedule inspections for rough‑in and final connection.
Confirm venting, slope, seismic/bracing, and material approvals (cast iron replacement options).
Retain records of permits and inspection certificates.
Safety gear and jobsite precautions
Wear appropriate personal protective equipment and establish clear jobsite controls to minimize injury and property damage when working on cast iron plumbing replacement.
Use gloves, eye protection, hearing protection, dust masks or respirators for cutting or coring, and sturdy footwear.
Isolate work area, shut off water and utilities, ventilate confined spaces, secure ladders, and post warning signs.
Keep fire extinguisher and first-aid kit accessible.
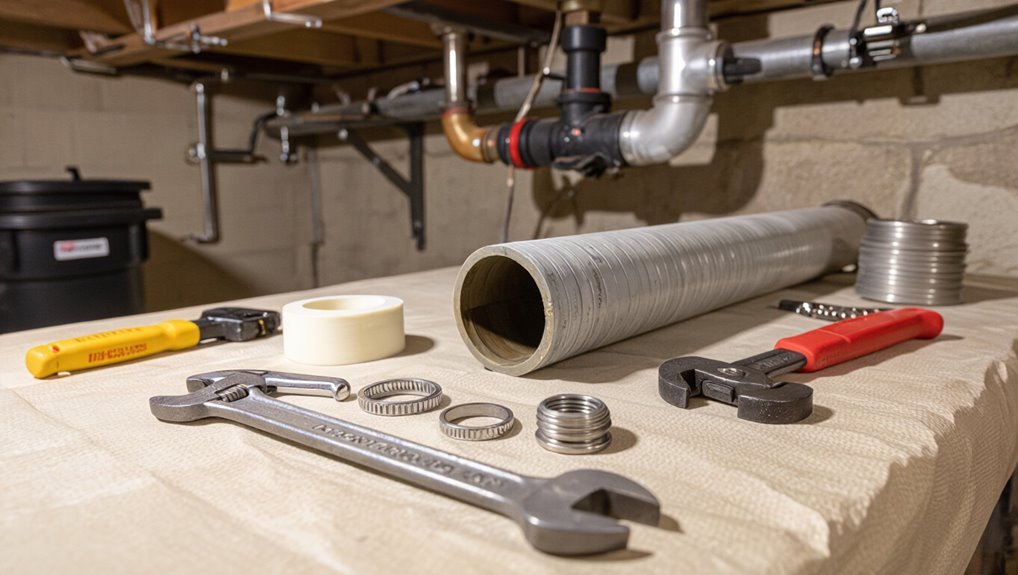
Tools and materials checklist
With safety measures and site controls in place, attention shifts to assembling the tools, materials, and documentation required for a cast iron plumbing replacement.
Essential items include cutting and lifting tools, replacement piping, and seals. Permits and disposal arrangements should be confirmed.
- Tools: cutter, jack, pry bars, torque wrench, safety gear
- Materials: PVC/ABS/HDPE pipe, couplings, sealant, hangers
- Docs: permits, disposal plan, measurement sketches
When to call a licensed plumber vs. DIY
When should a property owner attempt a cast iron plumbing replacement and when is a licensed plumber required?
A homeowner may handle short, accessible runs, basic cuts, and low-risk connections if skilled, equipped, and permitted.
A licensed plumber is required for main stacks, sewer lateral work, complex fittings, structural alterations, gas interaction, or where local codes and inspections demand certification to guarantee safety and liability coverage.
Assessing the Existing Cast Iron System
The technician begins by mapping the visible pipe layout and marking access points to establish a clear workplan.
Measurements are taken to identify pipe sizes, fittings, and connection types while probes and inspection cameras locate hidden sections and common failure areas.
Findings are documented and used to create a prioritized replacement plan with required materials and access strategies.
Mapping the pipe layout and access points
Begin by systematically tracing each run of cast iron piping from fixtures to main soil and branch lines to establish a reliable schematic of the system.
Note junctions, cleanouts, vents and where pipes pass through walls, floors, or foundations.
Mark accessible access panels, crawlspace openings and potential demolition points.
Record elevations and distances to aid planning, permitting and safe removal sequencing.
Identifying pipe sizes, fittings, and connections
Having mapped the runs and access points, attention shifts to identifying pipe sizes, fittings, and connection types to determine removal and replacement methods.
Measure diameters with calipers; note hub-and-spigot, bell-and-spigot, leaded, or rubber-coupled joints.
Catalogue elbows, tees, cleanouts, and offsets.
Record materials adjacent to cast iron (soil stack, traps, vents) and any nonstandard or deteriorated fittings for proper replacement planning.
Locating hidden sections and common problem areas
Where are the cast iron runs concealed and what signs betray their condition?
Cast iron often hides in crawlspaces, basements, between joists, inside walls and under floor slabs.
Look for stains, musty odors, sagging floors, slow drains, and hairline wall cracks.
Accessible cleanouts, fittings and soil stacks are frequent failure points; junctions, offsets and changes to copper or PVC commonly show corrosion and leaks.
Documenting condition and creating a replacement plan
After identifying likely concealment locations and common failure points, documentation of the cast iron system proceeds with a methodical assessment to guide replacement work.
Record pipe locations, diameters, slope, joint types, and visible corrosion. Photograph damage and mark access points on plans.
Prioritize segments by risk and cost, estimate material and labor, and develop a phased replacement schedule with contingency allowances.
Choosing Replacement Materials and Methods
The homeowner must evaluate common replacement materials—PVC, ABS, and copper—against factors such as durability, cost, code compliance, and ease of installation.
Each material brings specific pros and cons, plus distinct solutions for joining to existing cast iron (conversion fittings, couplings, or no-hub connectors) and for matching pipe size and required slope.
Decisions should prioritize approved conversion methods, correct diameters, and gravity-flow slope to guarantee long-term performance.
Comparison of common replacement materials
Material choice shapes the durability, cost, and installation method when replacing cast iron plumbing. A concise comparison highlights weight, joint type, typical lifespan, and suitability for repairs versus full replacement. Consider local codes, access constraints, and planned longevity when selecting materials.
| Material | Weight | Typical Use |
|---|---|---|
| PVC | Light | Drain lines |
| Cast iron | Heavy | Structural runs |
| Copper | Medium | Supply lines |
Pros and cons of PVC, ABS, ABS-to-cast-iron transition, and copper
Choosing replacement piping requires weighing performance, cost, and compatibility; each option—PVC, ABS, ABS-to-cast-iron connection fittings, and copper—offers distinct advantages and trade-offs in durability, installation ease, joining methods, and code acceptance.
PVC: inexpensive, easy solvent-weld joints, limited heat tolerance.
ABS: similar strengths, different code status.
ABS-to-cast-iron: practical for retrofit.
Copper: durable, costly, soldered joints, corrosion considerations.
Transition fittings and coupling options for cast iron
Although cast iron pipe remains common in older buildings, effective replacement hinges on selecting the right changeover fittings and couplings to guarantee a durable, code-compliant connection between old and new materials.
Common options include:
- Fernco rubber couplers with stainless clamps for vibration isolation and ease.
- No-hub (hubless) stainless band couplings for mechanical strength.
- Bell-and-spigot or adapter fittings for tapered cast iron joins.
Selecting appropriate pipe sizes and slope requirements
After selecting suitable coupling types to join cast iron to modern pipe, attention shifts to matching pipe diameters and ensuring correct slope for reliable drainage.
The installer verifies fixture branch, waste, and soil line sizes per code, typically 1¼–2 inches for traps and 3–4 inches for mains.
Maintain 1/4 inch per foot for 2–4 inch lines and adjust slope for larger runs.
Step-by-Step Replacement Process (Typical Interior Drain Line)
The technician begins by isolating the work area, shutting off water and any affected services to prevent contamination or accidental flow.
Fixtures and appliances are removed or disconnected, then sections of cast iron are cut and extracted using appropriate tools and safety measures.
Pipe ends and fittings are cleaned and prepared before installing new piping with correct slope to guarantee proper drainage.
Isolating the work area and shutting off services
Before any cutting or removal begins, the work area must be isolated and all relevant services shut off to prevent water damage, contamination, and injury.
Barriers and signage restrict access. Shut main water feed, close branch valves, and turn off electrical circuits serving nearby appliances or disposals.
Vent gas lines if present and notify occupants.
Verify de-energized and dry conditions before proceeding.
Removing fixtures and disconnecting appliances
Begin by removing fixtures and disconnecting appliances that tie into the affected drain to create clear access for cutting and replacement.
Detach sinks, tubs, toilets, washers and disposables following manufacturer guidelines. Cap or plug branch lines temporarily.
Label and photograph connections for reassembly. Remove trim, escutcheons and mounting hardware.
Store fasteners and small parts in labeled containers to prevent loss during pipe replacement.
Cutting and removing sections of cast iron pipe safely
With fixtures removed and connections labeled, attention shifts to cutting and extracting the damaged cast iron section.
Workers score the pipe to guide cuts, wear respirators and eye protection, and use an angle grinder with a diamond or carbide wheel or a reciprocating saw with a metal blade.
After slicing, they pry apart sections with a pipe fork or chisel and remove heavy fragments safely.
Preparing pipe ends and existing fittings for new connections
Prepare the remaining cast iron ends and any existing fittings to accept new connections by cleaning, measuring, and confirming square, sound surfaces.
Remove burrs, rust, old sealant, and debris with wire brush and scraper.
Verify end dimensions and alignment.
Replace damaged fittings or cut back to solid material.
Deburr and chamfer cut edges where specified by the new-connection method to guarantee proper seating.
Installing new piping and ensuring correct slope
Install the replacement sections by laying out the new piping along the run, confirming each joint aligns with the cleaned cast iron ends and any connection fittings.
Secure couplings, apply appropriate sealant or gaskets per manufacturer instructions, and tighten evenly.
Verify a consistent 1/4 inch per foot slope toward the main drain using a level or laser.
Test with water to confirm unobstructed flow.
Making proper transitions to remaining cast iron sections
Begin by evaluating each remaining cast iron section to determine the appropriate changeover method — whether a mechanical coupler, no-hub clamp with neoprene gasket, or a welded/leaded hub repair — based on pipe diameter, wall condition, and accessibility.
Prepare clean, square-cut ends, remove corrosion, and test-fit adapters.
Use stainless steel couplers or properly sized no-hub clamps, torque to spec, and seal joints per manufacturer instructions.
Replacing or resetting fixtures and traps
Remove the fixture and trap assembly systematically, documenting orientations and connections to guarantee accurate reassembly.
Disconnect supply lines, cap water, and remove mounting hardware.
Inspect flange, closet bend, and trap for damage or corrosion.
Replace gaskets, washers, and seals with compatible materials.
Set new or reset fixture ensuring proper pitch and alignment with drain stub.
Secure mounting and reconnect supply.
Flushing, testing for leaks, and final inspections
With the fixture reinstalled and supply lines reconnected, attention turns to flushing the line, testing for leaks, and completing final inspections.
Run hot and cold water for several minutes, exercise all valves, and observe joints for moisture.
Use dye or tissue at connections to detect slow leaks.
Restore trap seals, check venting, document results, and schedule any required municipal or warranty inspections.
Replacing Main Sewer Stack and Underground Cast Iron
Replacing a main sewer stack and underground cast iron requires careful planning of excavation and soil safety to protect workers and nearby structures.
The team must establish a temporary sewer bypass to maintain service while employing proper techniques for cutting, lifting, and removing heavy cast iron sections.
Final work focuses on correct bedding, compaction, backfill, and protective measures to guarantee the new underground pipes remain supported and watertight.
Excavation and soil safety considerations
Before any digging begins, an assessment of the excavation site and surrounding soils is required to guarantee worker safety, protect utilities, and prevent structural damage to nearby buildings.
Soil type, water table, and load-bearing capacity determine trenching methods, shoring, sloping, and permit needs.
Locate underground utilities, enforce confined-space protocols, control erosion and runoff, and use competent-person inspections throughout excavation activities.
Temporary sewer bypass and maintaining service
One essential step in replacing a main sewer stack or underground cast iron line is establishing a temporary sewer bypass to preserve service and prevent backups during excavation and pipe removal.
The contractor installs bypass pumps, hoses, and secured connections, routes flow to a safe discharge point, monitors for leaks and odors, and maintains access for inspections until the new pipe is pressure-tested and tied into the system.
Techniques for cutting and lifting heavy cast iron drains
With a secure bypass maintaining flow, attention shifts to the physical removal of old cast iron sections: cutting through brittle material, breaking flanged joints, and lifting heavy pipe segments without causing further damage to surrounding soil or structures.
Workers score and cold-cut sections with carbide blades or reciprocating saws, use pry bars and wedges for joints, and employ chains, straps, and mechanical hoists to control heavy lifts safely.
Bedding, backfill, and protecting new underground pipes
Begin by preparing a stable, well-compacted bedding layer sized to support the new pipe’s invert and distribute loads evenly; this establishes the foundation that prevents point loading and sagging.
Place granular sand or pea gravel, then set pipe to proper grade and slope.
Backfill in uniform lifts, compacting gently around the barrel.
Protect with warning tape and avoid heavy loads above until fully settled.
Common Problems and How to Fix Them
Common failures encountered during cast iron replacement include brittle or crumbling pipes, misaligned sections with improper slope, and recurring odors, root intrusion, or blockages.
Technicians routinely address these by cutting out deteriorated lengths, realigning and re-pitching runs, and clearing or rerouting roots and obstructions.
Special attention is required for hidden connections and unforeseen complications that can alter the scope and method of repair.
Dealing with brittle or crumbling cast iron
Brittle or crumbling cast iron sections present structural and leak risks that require prompt assessment. Deterioration often appears as flaking, powdery rust, or audible cracking when stressed.
Inspection should identify affected lengths, joints, and nearby supports. Small localized loss may allow sleeve repairs or epoxy liners; widespread decay mandates replacement of sections.
Always confirm stability, isolate water, and consult a plumber for safety and code-compliant solutions.
Fixing misaligned pipes and improper slope
Once corrosion or crumbling necessitates section replacement, attention must turn to alignment and grade—two frequent causes of poor drainage and recurring leaks.
Technicians verify slope (typically 1/4″ per foot), reestablish line using shims, re-cut and join pipes with proper fittings, and secure hangers to prevent sag.
Final testing confirms consistent flow and leak-free joints before backfill.
Addressing odor, root intrusion, and blockages
When odors, root intrusion, or recurring blockages appear, they signal different underlying failures in cast iron plumbing that require targeted responses.
Inspect traps, venting, and pipe joints for leaks or biofilm causing odors.
For roots, expose and remove affected sections, then replace with PVC or lined pipe.
Clear blockages with mechanical augers or hydro-jetting, then verify flow and reseal joints to prevent recurrence.
Handling hidden connections and unforeseen complications
How should a technician proceed when hidden connections or unexpected issues arise during cast iron plumbing replacement?
The technician documents conditions, isolates utilities, and pauses work to assess risks.
They trace lines with cameras, consult as-built plans, and notify the homeowner of options.
If needed, obtain permits, call specialty contractors, and reroute or adapt fittings while maintaining code compliance and corrosion-resistant materials.
Testing, Code Compliance, and Final Steps
After installation, the system is subjected to pressure testing and water‑tightness checks to confirm seals and joints are secure.
The contractor schedules required inspections and secures approvals to meet local code before covering work.
Finally, finishes are restored, a cleanup checklist completed, and simple maintenance tips are provided to extend the life of the new plumbing.
Pressure testing and water-tightness checks
Begin by isolating the replaced section and performing a controlled pressure test to verify joints and connections remain water-tight under expected operating conditions.
Monitor pressure gauge for the prescribed hold period, inspect all fittings, clean visible seams, and check traps and vents for leakage.
Document results, note any drops or dampness, repair faults, and retest until readings hold steady and no leaks are detected.
Scheduling inspections and obtaining approvals
Once the pressure test holds and visible seams remain dry, the contractor schedules required inspections and secures approvals to confirm the work meets local plumbing codes and safety standards.
Inspectors verify joint integrity, venting, trap installation, and slope.
The contractor addresses any punch-list items, submits final paperwork, and obtains the certificate of compliance or permit closure before the system is returned to regular service.
Restoring finishes and cleanup checklist
The contractor restores surrounding finishes and completes a focused cleanup sequence that readies the space for occupancy and final inspection.
Surfaces are repaired, debris removed, and documentation prepared. Final testing confirms leak-free operation and code compliance.
- Patch drywall, refinish floors, reinstall fixtures.
- Vacuum, disinfect, remove waste and materials.
- Provide test reports, permit sign-offs, homeowner instructions.
Maintenance tips to prolong new plumbing life
With finishes restored and final inspections scheduled, attention shifts to measures that extend the service life of the replacement plumbing while ensuring ongoing compliance and safe operation.
Regular leak inspections, periodic drain cleaning, and water pressure monitoring prevent premature failure.
Maintain documentation of permits and as-built changes for code verification.
Schedule annual professional inspections, replace worn seals promptly, and use approved materials for repairs.
Cost Estimates, Timeframe, and Project Planning
Typical cost ranges vary widely depending on scope, from modest sums for partial section repairs to several thousand dollars for full-system replacement.
Time and budget are influenced by factors such as pipe accessibility, home age, required permits, and unforeseen damage.
To get accurate estimates, homeowners should request itemized bids from multiple licensed contractors and compare scope, materials, timelines, and warranty terms.
Typical cost ranges by scope (partial vs full replacement)
A homeowner can expect a wide cost spread depending on whether only accessible sections of cast-iron plumbing are replaced or an entire system is swapped out. Partial replacements often run lower, full system swaps cost substantially more. Budget ranges (examples):
| Scope | Typical range | Notes |
|---|---|---|
| Partial | $1,000–$5,000 | Localized fixes |
| Full | $8,000–$25,000 | Whole-house repipe |
Factors that affect time and budget
Several key variables determine how long a cast-iron plumbing replacement will take and how much it will cost, including the extent of deterioration, accessibility of pipes, home layout and materials, required permits and inspections, and contractor availability.
Additional factors include:
- scope (partial vs full)
- need for structural repairs
- replacement material choice
- interruption to occupants
- local labor rates
- inspection timelines
- unexpected discoveries during demolition.
How to get accurate contractor bids and compare quotes
Requesting and comparing contractor bids requires a methodical approach to guarantee cost estimates, timelines, and scope align with the project realities.
Contractors should receive identical scope documents, permit details, and access schedules.
Review line-item pricing, materials, warranties, and change-order policies. Evaluate references and licensing before deciding.
- Standardized scope and site photos
- Line-item bids and contingencies
- References, license, and timeline commitments
Mistakes to Avoid and Professional Advice
Common DIY errors—improper pipe support, incorrect slope, and poor joint sealing—often lead to leaks and premature failure.
Certain situations, such as main stack replacement, complex sewer re-routing, or work under structural elements, should be handled only by licensed professionals.
Homeowners should prepare a short list of questions for a plumber about licensing, insurance, references, expected materials, and warranty coverage before hiring.
Common DIY errors that cause failures
Mistakes during DIY cast iron replacement often stem from improper assessment, poor preparation, or incorrect technique, each of which can lead to leaks, structural damage, or premature failure.
Common errors include inadequate support during removal, mismatched connector types, improper joint sealing, over- or under-torqued clamps, neglecting corrosion inspection, and poor pitch alignment.
These mistakes increase risk and repair costs; careful planning mitigates them.
When replacement should always be performed by pros
While many DIY errors can be avoided with patience and proper technique, certain cast iron replacement scenarios should be left to licensed plumbers and contractors.
Complex multi-story stacks, sewer-line connections under foundations, structural penetrations, extensive corrosion beyond accessible sections, and projects requiring permits, inspections, or specialty equipment demand professional assessment and skilled execution to guarantee code compliance, structural integrity, and long-term reliability.
Questions to ask a plumber before hiring
How should homeowners vet a plumber before committing to cast iron replacement?
The homeowner should confirm license, insurance, and local references; request written estimates detailing materials, scope, timeline, and cleanup; ask about cast iron experience and warranty terms; verify permit handling and inspection procedures; inquire about subcontractors and disposal methods; and obtain a clear change-order policy to avoid surprises and guarantee accountability.
Resources and Further Reading
The article lists key standards, local code references, and manufacturer installation guides relevant to cast iron replacement.
It also recommends essential tools and trusted parts suppliers for common fittings and couplings.
Readers are directed to those resources for authoritative specifications and reliable sources.
Useful standards, code references, and installation guides
Several authoritative standards and code documents inform safe, effective replacement of cast iron plumbing, including plumbing codes, material specifications, and manufacturer installation guides.
Key references address pipe materials, joint methods, corrosion protection, and local permitting.
Examples include:
- International Plumbing Code (IPC) and local amendments.
- ASTM standards for piping materials (ASTM A888, etc.).
- Manufacturer installation manuals and ANSI guidelines.
Recommended tools, manufacturers, and parts sources
Practical replacement work requires a concise set of tools, reliable manufacturers, and accessible parts sources that align with the standards and codes just discussed.
Recommended items include quality cutting, joining, and safety tools; trusted brands for fittings and pipe; and local or online suppliers with code-compliant stock.
- Tools: reciprocating saw, reamers, sealant, PPE
- Brands: Fernco, Mission, Oatey
- Sources: plumbing supply, big-box, certified online vendors
Conclusion
The house holds its breath as the last section of ancient iron yields to new pipe and careful hands. Quiet tests begin: a cautious flush, the soft promise of clear flow, the brief pause before inspectors arrive. Plans, permits and elbow grease converge into a single line that must now prove itself. For the homeowner who watched, relief and vigilance share the same heartbeat—knowing the job can end well, but only time will tell.