
How to Take Off a Bathroom Sink Drain: Step-by-Step Guide for Any Trap Type
To remove a bathroom sink drain, start by identifying the type of stopper and trap. First, shut off the water supply and prepare for potential spills. For pop-up stoppers, detach the pivot rod, lift the stopper, and unscrew the flange. If you have a slip-joint P-trap, place a bucket underneath, loosen the slip nuts, and remove the trap for cleaning. For bottle, drum, or wall traps, you may need a basin wrench to remove the nut or locknut. Once disassembled, inspect and clean the parts before following further instructions for reassembly and leak testing.
What Removing a Bathroom Sink Drain Involves and When to Do It
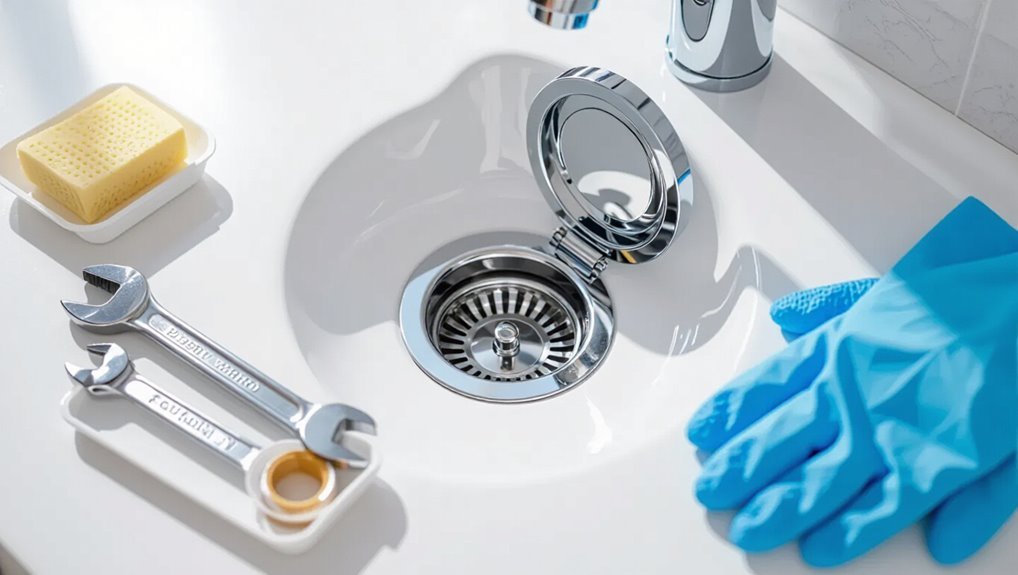
Removing a bathroom sink drain typically occurs for repair, replacement, clearing stubborn clogs, or during renovations.
The process varies with common drain and trap types—such as pop-up assemblies, lift-and-turn drains, and P-traps—which affect removal steps and required tools.
Before starting, a clear safety checklist and basic tools (gloves, pliers, bucket, wrench, and sealant) should be prepared to prevent leaks and injuries.
Reasons to remove a sink drain (repair, replacement, clogs, renovation)
Several common situations make taking off a bathroom sink drain necessary: persistent clogs that resist snaking, corroded or leaking drain assemblies, outdated fixtures during a renovation, and the need to replace worn seals or parts.
Reasons include facilitating thorough repairs, replacing damaged pop-up or tailpiece components, accessing hidden blockages, upgrading aesthetics, or preparing for plumbing modifications.
Guidance on how to take off bathroom sink drain helps.
Common drain and trap types found on bathroom sinks
Having established why a sink drain might need attention—clogs, leaks, corrosion, or upgrades—the next step is identifying the types of drains and traps a homeowner is likely to encounter.
Common drain types include pop-up, grid, and lift-and-turn stoppers.
Typical traps are P-traps, S-traps, and bottle traps in tight spaces.
Materials vary: PVC, chrome-plated brass, and cast iron, influencing removal methods.
Safety precautions and tools checklist before you start
Before any work begins, a clear understanding of the scope—whether it’s clearing a clog, replacing a corroded assembly, or swapping stopper types—helps determine the precautions and tools needed.
The task typically involves exposure to standing water, sharp edges, and sometimes old sealants or corrosion, so protective gear, simple plumbing tools, and a plan to contain spills are essential.
Required: gloves, eye protection, bucket, pliers, adjustable wrench, basin wrench, plumber’s putty or silicone, towels, flashlight, and hazard-aware disposal method.
Identify Your Sink Drain and Trap Type
The reader should first recognize the visible parts of a pop-up drain assembly—stopper, lift rod, flange—and trace the pipework below to the trap.
Common trap types include slip-joint P-traps, drum traps, bottle traps, and wall-connection traps, each with distinct fasteners and access points.
Note whether fittings are metal or plastic, since corrosion, thread type, and seal condition affect removal methods.
Pop-up drain assembly components
A pop-up drain assembly consists of several identifiable parts—stopper, pivot rod and nut, clevis strap, lift rod, tailpiece, and gasketed flange—that interact with the sink’s trap and mounting hardware; recognizing each component helps determine removal steps and necessary tools.
The stopper lifts and seals; the pivot rod and nut link to the clevis strap and lift rod. The tailpiece directs flow to the trap.
Slip-joint P-trap components
Identify the slip-joint P-trap by its distinctive U-shaped bend and the two compression nuts that join the trap to the tailpiece and wall drain.
Components include the curved trap arm, slip nuts, and cone or flat plastic/metal washers (washers/gaskets) that seal joints.
The trap may have a cleanout plug at the bottom and a short tailpiece connection; materials vary between PVC, chrome, and brass.
Drum trap, bottle trap, and wall-connection traps
Different trap styles beyond the common slip-joint can affect removal methods and required tools:
Drum traps are short, cylindrical units that sit directly under older sinks;
Bottle traps resemble an inverted bottle with a removable bottom for cleaning;
Wall-connection traps route waste directly into the wall and often use a threaded or glued connection.
Identifying style guides disassembly steps, access needs, and whether parts unscrew, pull apart, or require cutting.
Metal vs. plastic fittings and corrosion considerations
Following recognition of trap styles, attention shifts to whether fittings are metal or plastic and how corrosion—or its absence—affects removal and longevity.
Metal fittings may seize, show rust, require penetrating oil, heat, or careful cutting; plastic resists corrosion but can crack under stress or past-heat exposure.
Inspect connections, choose appropriate tools, and plan for seal replacement or fitting upgrades when deterioration appears.
Step-by-Step Guide to Removing a Pop-Up Drain
The guide lists the tools and materials needed for pop-up drains and outlines safety steps before beginning.
It then describes how to shut off the water, disconnect the pivot rod to remove the stopper, and unscrew the top flange to lift out the drain body.
Finally, it covers cleaning the flange seat and removing old putty or sealant to prepare for reinstallation.
Tools and materials specific to pop-up drains
Because pop-up drains combine mechanical linkages and seals, a distinct set of tools and materials is required to remove them safely and efficiently.
Essential items include adjustable pliers, basin wrench, screwdriver set (flat and Phillips), needle-nose pliers, plumber’s putty or silicone, replacement gaskets, plumber’s grease, bucket, shop rags, and small flashlight.
Optional: retaining clip pliers and a magnetic pickup tool.
Step 1 Prepare workspace and shut off water
Before any disassembly, clear the area under and around the sink, place a bucket and rags to catch water and debris, and locate the shutoff valves; then turn both hot and cold valves clockwise until fully closed and open the faucet to relieve pressure and drain remaining water.
Confirm no flow, disconnect any electrical devices nearby, protect finishes with towels, and guarantee adequate lighting and ventilation.
Step 2 Disconnect pivot rod and remove stopper
With the water shut off and the area cleared, attention turns to the pop-up mechanism under the sink.
The pivot rod connecting to the stopper is located at the tailpiece; loosen its retaining nut and pull the rod free.
Lift the stopper from the drain opening.
Inspect the rod, clevis clip, and stopper for corrosion or debris; clean or replace parts as needed before proceeding.
Step 3 Unscrew and lift out top flange and drain body
The next step is to remove the drain assembly from above and below the sink.
From above, the technician grips the top flange, breaks any remaining seal, and unscrews it counterclockwise.
From below, the locknut is loosened, then the drain body is pushed and lifted out.
Care is taken to catch falling components and inspect threads for damage before disposal or replacement.
Step 4 Clean flange seat and remove old putty or sealant
Scrape away old plumber’s putty or sealant from the flange seat using a putty knife or plastic scraper, working carefully to avoid scratching the sink surface.
Wipe residue with a rag and solvent (mineral spirits or rubbing alcohol) to dissolve remaining oils.
Inspect the seat for nicks or corrosion.
Remove stubborn bits with a plastic scraper or nylon brush, then dry thoroughly before installing new sealant.
Step-by-Step Guide to Removing a Slip-Joint P-Trap
A brief list of tools and materials—adjustable pliers, a bucket, rags, and replacement slip washers—prepares the reader for P-trap removal.
First, place a bucket under the trap and loosen the slip nuts to release any standing water. Then, remove the trap and inspect it for blockages.
Next, detach the tailpiece from the sink drain, clean the threads, and check or replace the washers before reassembly.
Tools and materials specific to P-traps
Several basic tools and a few common materials are required to remove a slip-joint P-trap safely and efficiently.
Essential items include an adjustable wrench or channel-lock pliers, a bucket for catching water, and plumber’s tape for reassembly.
A rag or sponge, replacement slip washers and nuts, and rubber gloves complete the list.
Optional: penetrating oil for seized fittings.
Step 1 Place bucket and loosen slip nuts
Place a bucket directly beneath the P-trap to catch residual water. Then use channel-lock pliers or an adjustable wrench to break loose the slip nuts at both ends of the trap.
Work slowly to avoid sudden spills. Hold the trap body steady while turning nuts counterclockwise. If nuts resist, apply penetrating lubricant briefly and retry.
Keep drain fittings aligned to prevent thread damage.
Step 2 Remove trap and inspect for blockages
With the slip nuts loosened and the bucket in position, the P-trap can be lowered and removed by pulling the trap straight down and away from the wall tailpiece and tail of the sink drain.
Inspect the curve for hair, soap scum, or mineral buildup. Clear obstructions manually or with a brush, rinse thoroughly, and check washers and threads for wear before reinstalling to guarantee a proper seal.
Step 3 Detach tailpiece from sink drain
Loosen the slip nut at the top of the tailpiece and slide it down the pipe to clear access to the sink drain fitting.
Support the tailpiece with one hand, then twist and pull it straight down from the drain tailpiece stub.
If resistant, apply gentle rocking motion or use pliers with cloth to avoid marring.
Set removed tailpiece aside on a clean surface.
Step 4 Clean threads and check washers for replacement
After the tailpiece has been removed and set aside, the exposed threads and slip-joint fittings should be inspected and cleaned before reassembly.
Use a brush and rag to remove grime, old plumber’s putty, and mineral buildup.
Examine slip washers and compression rings for cracks, flattening, or brittleness.
Replace damaged washers, guarantee proper seating, and lightly lubricate with plumber’s grease prior to reassembly.
Removing Drum Traps, Bottle Traps, and Wall-Connection Traps
The section outlines removal steps for drum traps, bottle traps, and wall-connection traps, noting common fasteners and sealing methods.
It explains how to disassemble each trap type, inspect and clear internal parts, and detach connections without damaging surrounding pipes.
Guidance on using appropriate pipe adapters and replacing fittings to guarantee a secure, code-compliant reconnection is included.
Drum trap removal steps
Begin by identifying the trap type and locating the slip nuts or retaining screws that secure it to the tailpiece and waste outlet.
Place a bucket beneath, loosen nuts with pliers, and support the drum to prevent sudden drops.
Detach the inlet and outlet connections, remove gaskets, and inspect for corrosion.
Clean mating surfaces, replace worn seals, and reassemble in reverse order, testing for leaks.
Bottle trap removal steps
Having removed a drum trap, attention turns to the bottle trap, which differs in shape and fastening but follows the same basic approach of securing the area, supporting components, and collecting water.
Loosen the slip nut beneath the sink, brace the trap to prevent twisting, lower it straight down into a basin, empty contents, inspect seals and washer, then clean or replace parts before reassembly.
Wall-connection trap removal steps and pipe adapters
Proceed to the wall-connection trap by first cutting water flow and placing a bucket beneath the trap to catch residual fluid; these traps attach directly into the wall outlet and require care when loosening the coupling nut and disconnecting the tailpiece to avoid stressing the wall pipe.
Support the wall outlet, loosen the nut with two wrenches, slide off the trap, inspect adapter types (compression, threaded, or soldered), and replace seals.
Dealing with Stuck, Corroded, or Stripped Drain Fittings
When fittings refuse to budge, the technician first tries targeted methods to free corroded nuts and threads.
Penetrating oil, applied and given time to work, combined with controlled heat and the correct wrenches or pliers, often restores enough movement to loosen connections safely.
If parts remain seized, cutting out and replacing the affected pipe or fitting is recommended rather than risking damage by excessive force.
Techniques to loosen corroded nuts and threads
Tackle corroded nuts and seized threads with steady, deliberate techniques that minimize damage and free stubborn fittings.
Work methodically: clear debris, protect nearby finishes with tape or cloth, stabilize the pipe to prevent twisting, use properly sized wrenches or basin pliers, apply controlled tapping to break crust, back off fasteners incrementally, and replace any compromised nuts or threads promptly to guarantee a secure, leak-free reassembly.
Using penetrating oil, heat, and proper leverage safely
After loosening surface corrosion and protecting nearby finishes, attention shifts to penetrating oil, controlled heat, and correct leverage to free stuck or stripped drain fittings.
Apply penetrating oil, allow dwell time, then tap fittings lightly.
Use a heat gun briefly on metal only; avoid plastics and surrounding sealants.
Employ proper wrenches, padded jaws, and steady, increasing leverage to prevent rounding or sudden breakage.
When to cut and replace pipe sections instead of forcing removal
Cutting out a section becomes the safer choice once fittings are seized, threads are badly corroded, or repeated attempts risk damaging adjoining fixtures or finishes.
A repairer should assess access, turn off water, and cut beyond damaged threads to sound pipe.
Replace with compatible fittings or a slip-joint replacement, deburr and test for leaks.
Document sizes and material for proper replacement.
Cleaning, Inspecting, and Preparing for Reinstallation
After removal, the drain assembly, tailpiece, and P-trap should be inspected for cracks, corrosion, or warped threads.
The P-trap and trap arm require thorough cleaning to remove hair, soap scum, and other debris before reassembly.
Any damaged gaskets, washers, or old sealant should be replaced and measurements taken to match new parts and appropriate plumber’s putty or silicone.
Inspecting drain, tailpiece, and trap for damage
Inspect the drain assembly, tailpiece, and trap closely for cracks, corrosion, mineral buildup, or worn seals that could compromise a watertight connection.
Note hairline fractures, pitted metal, warped plastic, or loose slip-nuts.
Check gasket condition and alignment where parts join.
Identify areas needing replacement rather than repair.
Record measurements and part types to guarantee correct replacements during reinstallation.
Cleaning P-trap and removing debris and hair
With damaged or worn parts identified, attention shifts to the P-trap, where accumulated debris and hair most often cause blockages.
Empty the trap into a bucket, then inspect inside by flashlight.
Use a brush, plumber’s snake, or gloved fingers to remove sludge and hair, rinsing with water.
Confirm passages are clear, dry the trap, and set aside components for reassembly.
Replacing gaskets, washers, and plumber’s putty or silicone
Begin by laying out the removed parts on a clean towel and examining each gasket, washer, and seal for cracks, flattening, or hardened putty. Any component showing deformation or brittleness should be replaced rather than reused.
Clean mating surfaces thoroughly, scrape old putty or silicone, dry completely, and choose appropriate new gaskets or fresh plumber’s putty/silicone to form reliable, even seals before reassembly.
Measuring and matching replacement parts
After cleaning and removing old seals, attention turns to measuring and matching replacement parts to secure a proper fit.
The technician records drain diameter, tailpiece thread pitch, flange size, and trap arm spacing.
Compare measurements to manufacturer specs and bring samples to hardware for exact matches.
Confirm material compatibility and finish to guarantee leak-free assembly and aesthetic consistency before reinstallation.
Reassembling and Testing the Drain System
The pop-up assembly is reinstalled and the pivot rod reattached, followed by reconnecting the P-trap or replacement trap and hand-tightening the nuts.
A systematic leak test is performed by running water and inspecting all joints for drips or seepage.
Finally, the stopper alignment and water flow are adjusted as needed to guarantee smooth operation and a watertight seal.
Reinstalling pop-up assembly and reconnecting pivot rod
Carefully lower the pop-up assembly into the tailpiece, aligning the stopper with the pivot rod opening so the horizontal rod can slide through the hole in the stopper shaft.
Insert the pivot rod, secure its retaining nut, and confirm the clevis clip engages the rod and lift linkage.
Cycle the lever to verify smooth operation and proper seating, adjusting linkage length or clip position if needed.
Reconnecting P-trap or replacement trap and tightening nuts
Reconnect the P-trap by sliding the trap arm into the tailpiece and aligning the curved trap with the wall outlet, ensuring the gasket seats properly.
Hand-tighten slip nuts onto the tailpiece and wall hub, then use channel-lock pliers for a final quarter-turn—avoid overtightening.
Confirm trap alignment, clear any debris, and reinstall any mounting brackets before proceeding to the leak test.
Leak test procedure and what to look for
Begin the leak test by running a steady stream of water through the sink for several minutes while observing all connection points for drips, seepage, or dampness.
Inspect slip nuts, tailpiece seams, and trap inlet/outlet.
Check under-sink cabinet for slow seepage.
Wipe joints dry, then retest to reveal intermittent leaks.
Note any movement, corrosion, or worn washers needing replacement.
Adjusting stopper alignment and water flow checks
After confirming there are no leaks, attention shifts to the stopper and flow performance: the stopper should seat smoothly and the lift mechanism align so water drains fully when opened and seals when closed.
Test by filling the basin, operating the stopper through its range, and watching drain speed and seal integrity.
Adjust pivot or linkage, trim rod length, and retest until operation is smooth and leak-free.
Cost, Time Estimates, and When to Call a Professional
Typical removal times and difficulty vary by trap type—P-traps often take 15–30 minutes for a DIYer, while older or access-restricted fittings can require an hour or more.
Parts such as new washers, slip nuts, or replacement traps generally cost $5–40, with specialty or corrosion-resistant components running higher.
Immediate professional help is advised for persistent leaks, major corrosion, sewer odors, or when connections are inaccessible or beyond the homeowner’s skill.
Typical time and DIY difficulty by trap type
Estimating time, cost, and difficulty for removing a bathroom sink drain depends largely on the trap type—P-trap, S-trap, bottle (bell) trap, or integral pop-up assemblies each present distinct steps and potential complications.
P-traps: 15–30 minutes, low difficulty.
S-traps: 20–40 minutes, moderate due to access.
Bottle traps: 20–45 minutes, moderate.
Integral pop-ups: 30–90 minutes, higher difficulty; consider a professional for sealed or corroded units.
Average parts cost estimates
Parts for bathroom sink drain repairs generally range from very inexpensive to moderately priced depending on material and complexity: basic P-trap kits and slip nuts can cost $5–$25, bottle traps and replacement tailpieces $15–$40, pop-up assemblies $20–$60, and higher-end brass or designer drains $60–$150 or more.
| Part | Typical Cost |
|---|---|
| P-trap kit | $5–$25 |
| Slip nuts/seals | $2–$10 |
| Pop-up assembly | $20–$60 |
| Brass/designer drain | $60–$150+ |
Signs you should hire a plumber immediately
Call a professional when the problem exceeds routine DIY fixes or poses immediate risk to property or safety.
Immediate plumbing service is advised for persistent leaks, major water damage, sewage backups, broken or corroded traps, or inaccessible pipe failures.
Expect higher labor costs and faster resolution; emergency calls may incur premium rates.
Routine clogs and minor gasket replacements can usually wait or be DIY.
Common Mistakes to Avoid and Practical Tips
To prevent damage, one should avoid over-tightening and stripping plastic threads when removing the drain.
Proper sealing techniques and using the correct gaskets help prevent future leaks.
Regular maintenance—clearing hair and checking seals—reduces the need for frequent removals.
Avoid over-tightening and stripping plastic threads
When loosening or reassembling a bathroom sink drain, excessive torque on plastic nuts and fittings can easily strip threads or crack components, compromising the seal and requiring part replacement.
Use hand force plus a snug quarter-turn with a wrench only when needed. Match tool size, support adjacent parts to prevent twist stress, and replace damaged plastic hardware rather than forcing repairs.
Best practices for sealing and preventing future leaks
Sealant best practices focus on establishing durable, clean connections and avoiding common installation errors that cause leaks.
Use plumber’s putty or silicone appropriate to the sink material, apply evenly, and remove excess before curing.
Verify mating surfaces are clean, dry, and free of old sealant.
Hand-tighten fittings, then secure per manufacturer torque.
Inspect joints after initial use and retighten if necessary.
Routine maintenance tips to reduce future removals
Regular, simple maintenance can greatly reduce the need to remove a bathroom sink drain by preventing clogs, corrosion, and seal failures before they worsen.
Routine actions minimize mistakes and extend component life.
- Flush with hot water weekly.
- Use a hair trap and clean monthly.
- Inspect and tighten slip nuts quarterly.
- Apply plumber’s grease to seals when reassembling.
Quick Troubleshooting Guide
If problems persist after removing and reinstalling the drain, a concise troubleshooting checklist helps determine next steps.
It notes actions for a still-clogged drain, a diagnostic sequence for persistent leaks after reassembly, and tests for unusual odors or slow drainage following reinstalling.
Each item directs the reader to the most likely cause and the appropriate corrective measure.
Drain still clogged after removal next steps
When the sink remains clogged after removing the drain assembly, proceed methodically to identify and clear the obstruction.
Inspect the tailpiece and trap for hidden debris, use a flashlight and small mirror to check the drain line, and run water while observing.
Try a plumbing snake or braided wire to reach deeper.
If blockage persists, consult a plumber to avoid damage or improper reassembly.
Persistent leaks after reassembly diagnostic checklist
After clearing a stubborn blockage, reassembly can reveal new issues: persistent leaks may indicate misaligned parts, degraded seals, or incorrect tightening.
Inspect slip-nut alignment, washer condition, and compression ring seating. Confirm thread engagement and avoid overtightening.
Check tailpiece and trap connections for hairline cracks. Reapply plumber’s putty or replace gaskets if needed.
Test with slow, steady water flow and observe for weeps.
Unusual odors or slow drainage after reinstalling
Recheck the drain assembly and surrounding plumbing for causes of lingering odors or slow drainage following reinstalling: trapped debris in the trap or tailpiece, a partially seated gasket, an obstructed vent, or a misaligned P-trap can all create slow flow or sewer smells.
Clear blockages, reseat gaskets and slip nuts, verify trap alignment and venting, and run water to confirm restoration of proper flow and odor-free operation.
Quick Reference: Tools, Parts, and Replacement Options
A concise kit of tools and a clear list of parts simplifies removing a bathroom sink drain; common essentials include an adjustable wrench, slip-joint pliers, a basin wrench, plumber’s putty or silicone, a screwdriver, and a drain removal tool or locknut wrench.
Recommendations focus on durability, correct sealant, and matching drain size. Consider brass or stainless replacements for longevity.
- Tools: wrench, pliers, basin wrench
- Parts: tailpiece, locknut, flange, gasket
- Sealants: plumber’s putty or silicone
- Options: replace with pop-up or grid drain
Conclusion
Removing a bathroom sink drain is like untangling a small knot: patience and the right approach make it vanish. The guide outlines identifying trap types, stepwise removal of pop-up and slip-joint drains, handling drum, bottle, and wall-connection traps, and offers time, cost, and troubleshooting tips. With proper tools and awareness of common mistakes, most homeowners can complete the job; professionals are recommended for stubborn, corroded, or complex assemblies.
