How to Unclog a Bathroom Floor Drain Fast: Step-by-Step Fixes That Work
To quickly unclog a bathroom floor drain, start by removing any visible debris and draining standing water. Wear gloves and eye protection for safety. Use a plunger or take off the grate to remove hair and gunk. Flush the drain with hot water or a mixture of baking soda and vinegar. If the clog persists, use an auger to reach deeper blockages. Avoid harsh chemicals to protect your fixtures. If you notice a sewage smell or the clog continues, you may be facing a more serious issue. Follow the steps for effective tools, prevention, and troubleshooting tips.
Fast Overview: What to Do Immediately When a Bathroom Floor Drain Is Clogged
Before attempting a repair, one should quickly check for electrical hazards, standing water depth, and any signs of sewage backup.
If conditions are safe, simple temporary measures—such as removing visible debris, using a plunger, or pouring hot water—can often restore drainage immediately.
These immediate steps prioritize safety while aiming for the fastest effective remedy.
Quick safety checks before attempting a fix
Assess the situation quickly to prevent hazards and further damage: check for signs of sewage backup, standing water depth, slippery floors, exposed electrical outlets or appliances nearby, and any unusual odors that could indicate gas.
Then don gloves and eye protection, turn off nearby power if water reaches outlets, ventilate the area, and avoid chemical mixing.
These precautions frame safe how to unclog bathroom floor drain attempts.
Fast temporary fixes to restore drainage immediately
Act quickly to limit water damage and restore flow: if water is pooling, remove visible debris with gloved hands or a plastic grabber.
Scoop out excess with a small container or towel, and use a plunger or a wet/dry vacuum on the floor drain to dislodge the blockage.
Follow by flushing with hot water, apply a quick enzyme drain treatment if available, and replace the grate securely.
Why Bathroom Floor Drains Clog: Common Causes
Bathroom floor drains commonly clog from accumulated hair, soap scum, and other organic debris that form dense, slow-moving blockages.
Hard water can leave mineral scale that narrows the drain over time, while small foreign objects can lodge and stop flow abruptly.
Some backups originate locally in the trap, but venting problems or deeper sewer line issues can produce recurring or widespread drainage failures.
Hair, soap scum, and organic debris buildup
Hair, soap scum, and other organic debris commonly combine to form sticky, fibrous clogs in floor drains.
Over time, strands of hair, shed skin cells, lint, and dissolved soap accumulate on pipe walls, trapping grease and tiny particles. Flow slows, odors develop, and bacterial films reinforce the blockage.
Regular removal and simple strainers prevent buildup before mechanical or chemical intervention becomes necessary.
Mineral deposits and hard water scale
Many bathroom drains develop slow, narrowing blockages from mineral deposits left by hard water.
Calcium and magnesium precipitate on pipe walls, reducing flow and trapping residues. Scale accumulates in traps and narrow passages, causing persistent slow drainage and occasional odors.
Mechanical scraping, acidic descalers, or vinegar and baking soda treatments can dissolve buildup when applied safely and periodically.
Foreign objects and small items
Small items dropped into floor drains can quickly obstruct flow and create stubborn blockages.
Common culprits include jewelry, razor caps, toy pieces, cotton swabs, and hair accessories. These objects lodge in the trap or pipe bends, trapping hair and debris.
Removal often requires removing the grate and extracting items with pliers or a retrieval tool; persistent obstructions may need a plumber.
Venting or sewer line issues vs. local trap clogs
Distinguish between local trap clogs and broader venting or sewer-line problems to diagnose floor drain issues accurately.
Local clogs—hair, debris, grease—produce slow drainage or standing water and respond to snaking or enzymatic cleaners.
Vent or sewer-line problems cause gurgling, multiple fixtures backing up, foul sewer gas, or sudden failures; they require roof vent inspection or professional sewer-line diagnosis and repair.
Tools and Materials You’ll Need
A concise kit of common household tools and cleaning supplies is usually enough to tackle minor floor-drain clogs.
For more stubborn blockages, a drain auger or plumber’s snake may be required, with guidance on when to escalate to these specialty tools.
Appropriate safety gear—gloves, eye protection, and a mask when using chemicals—should be used to protect the person performing the work.
Basic household tools and supplies
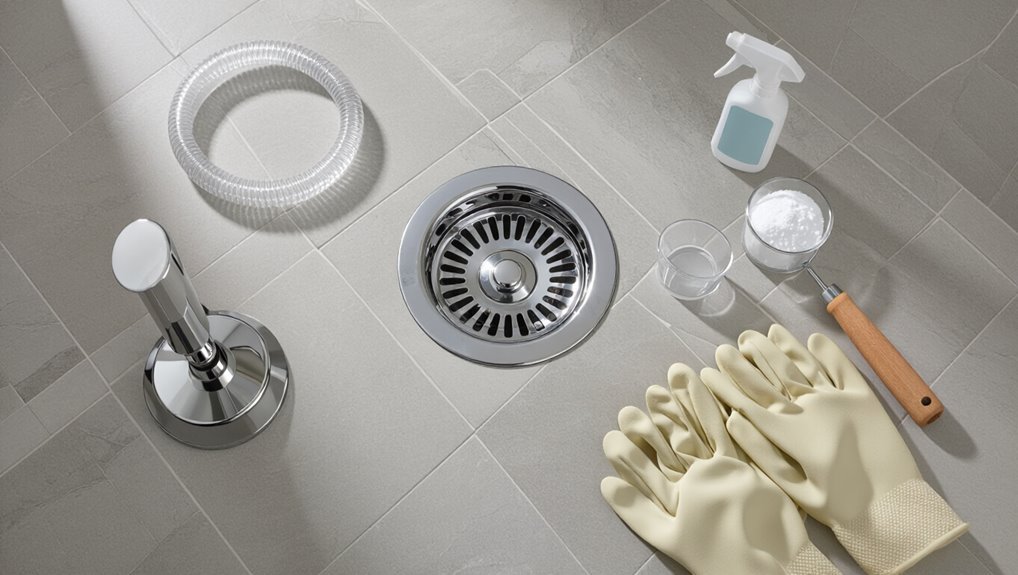
Essential tools for clearing a bathroom floor drain include a plunger, drain snake (or auger), adjustable wrench, screwdriver, bucket, rubber gloves, and a flashlight; these items cover most common clogs and basic access or removal tasks.
Additional household supplies help complete simple fixes and cleanups.
- Towels or rags
- Mild drain cleaner or baking soda and vinegar
- Trash bag
When to use specialty tools (drain auger, plumber’s snake)
Reach for a drain auger or plumber’s snake when a plunger or chemical treatment fails to clear standing water or when hair and compacted debris lie beyond the reach of a simple grab tool.
These tools reach deeper, break or extract clogs, and suit longer, curved runs in floor drains.
- Use an auger for stubborn, deep blockages.
- Choose a snake for flexible runs.
- Rent motorized options for severe obstructions.
Safety gear and protective products
After deciding a snake or auger is necessary, attention turns to protective items that keep users safe and surfaces intact.
Required gear includes chemical-resistant gloves, safety goggles, and a mask for splashes and fumes.
Knee pads protect joints when kneeling; waterproof shoe covers prevent slipping.
A work apron and disposable towels protect clothing and simplify cleanup.
A small flashlight aids inspection.
Step-by-Step Fast Unclogging Methods (From Easiest to Strongest)
The guide proceeds through five unclogging methods ordered from simplest to most forceful: manual removal and trap access, boiling or hot water flushes, a baking soda and vinegar treatment, plunger techniques for floor drains, and use of a drain snake or auger.
Each method is presented with clear, step-by-step actions and brief safety tips. Readers are advised to try methods in order until the clog clears, escalating only as needed.
Method 1 Manual removal and trap access
The first method focuses on manual removal and accessing the trap to clear blockages quickly.
It begins with safely removing the drain cover using the appropriate screwdriver or pry tool to avoid damage.
Once exposed, visible debris can be extracted by hand or with tweezers, taking care to wear gloves and remove obstructions from the trap.
How to remove the drain cover safely
Begin by clearing any visible debris from the drain area and gathering a screwdriver or wrench that fits the cover fasteners.
Wear gloves and eye protection.
Loosen screws or pry retaining clips gently to avoid damage.
Lift the cover straight up, noting orientation.
Inspect the exposed flange and surround for corrosion or sealant.
Set screws aside in a small container to prevent loss.
Techniques for removing visible debris by hand or with tweezers
Reach into the open drain with gloved hands or precise tweezers to extract hair, soap scum, and other visible debris, working from the top downward to prevent pushing material further into the trap.
Remove clogging matter gently, placing it in a disposable bag. Inspect the trap with a flashlight; repeat until clear.
Rinse with hot water to flush remaining residue and confirm flow.
Method 2 Boiling water and hot water flush
Boiling and hot water flushes are effective for clearing grease, soap buildup, and hair clogs when the drain and pipes are metal and there are no chemical cleaners present.
The procedure involves pouring boiling water slowly in stages or following with very hot tap water while wearing heat-resistant gloves to prevent splashes and burns.
Caution is advised for plastic or PVC pipes, which can warp, and for homes with septic systems where extreme temperature changes may be harmful.
When hot water is appropriate and how to do it safely
When a clog is caused by soap scum, grease, or soft organic matter and the drain and surrounding pipes are metal or heat-safe PVC, a hot-water flush can be an effective first-line remedy; however, care must be taken to avoid scalding and to confirm the pipe material and nearby fixtures tolerate high temperatures.
Pour boiling water in stages, allow cooling between pours, protect skin with gloves, and ventilate the area.
Method 3 Baking soda and vinegar natural flush
The baking soda and vinegar flush requires precise proportions and timing to maximize fizzing and loosening of debris.
Typically, one cup of baking soda is followed by one cup of white vinegar, with a 15–30 minute reaction period before flushing with hot water.
Adhering to these measurements and wait times improves consistency and reduces the need for repeat treatments.
Exact measurements and timing for best results
One clear, measured approach yields the best results: pour 1 cup (240 ml) of baking soda directly into the drain, follow with 1 cup (240 ml) of white vinegar, and wait 10–15 minutes for the fizzing reaction to loosen debris.
Then flush with 2–3 liters of hot (not boiling) water poured steadily over 30–60 seconds.
Repeat once if needed, allow another 10 minutes, then test flow.
Method 4 Plunger technique for floor drains
The plunger technique focuses on forming a tight seal around the floor drain and using controlled, rhythmic plunges to dislodge blockages.
Proper body positioning and alternating strong thrusts with brief rests increase hydraulic force without splashing.
If repeated plunging fails, attention turns to augers, removable drain covers, or professional help to avoid damage or incomplete clearing.
How to create a proper seal and effective plunging motions
When a plunger is used on a bathroom floor drain, creating an airtight seal and applying controlled, forceful strokes determines whether pressure dislodges the blockage or simply pushes water around it.
Make certain the plunger rim fully contacts the floor or grate; add or remove water to cover the cup.
Use steady compressions and quick pulls, maintaining alignment, until flow improves.
When plunging fails and next steps
If plunging fails to clear the floor drain, proceed to more targeted steps that escalate in intensity while minimizing damage and mess.
Remove the grate, inspect with a flashlight, and manually extract visible debris with gloves or pliers.
Try a drain snake or auger next.
If obstruction persists, use enzyme cleaners or consult a professional to avoid harming pipes with caustic chemicals.
Method 5 Use of a drain snake or auger
For tougher blockages, a drain snake or auger offers targeted mechanical clearing where a plunger cannot reach.
The technician first selects a snake type and diameter suited to the drain size and pipe material, then feeds the cable gently while rotating to catch or break the obstruction.
Extraction is performed slowly and with controlled rotation to pull debris free without scraping or bending the pipe.
Choosing the right snake type and size
Select the appropriate snake type and diameter based on the drain size, clog composition, and access constraints to guarantee effective, safe clearing.
Choose a flexible hand auger (1/4–3/8″) for hair and small debris in tight floor drains.
Use a 1/2–3/4″ heavy-duty cable or drum auger for thicker blockages or longer runs.
Prefer nylon-coated cables for cast iron to reduce abrasion.
How to feed, rotate, and extract clogs without damaging the pipe
After choosing the correct snake type and diameter, the operator should feed, rotate, and withdraw the cable with controlled motions to clear the clog while protecting the pipe.
Advance slowly, feeling resistance; rotate clockwise to engage debris, then reverse slightly to prevent snagging. Withdraw periodically to remove buildup.
Avoid forceful thrusts, sharp bends, or oversized cables that can gouge joints or deform plastic piping.
Method 6 Chemical drain cleaners: pros, cons, and safe use
Chemical drain cleaners containing lye (sodium hydroxide) or enzymes are effective against hair and soap scum, while strong acid products and solvent-based formulas should be avoided for most residential floor drains.
Users are advised to follow label instructions, wear protective gloves and eye protection, and guarantee good ventilation to reduce inhalation and splash risks.
Environmental impacts and pipe corrosion risks should be weighed before use, and mechanical methods are recommended when possible to minimize chemical exposure.
Which chemicals work on hair/soap clogs and which to avoid
Enzymatic or bacteria-based cleaners break down organic matter like hair and soap scum slowly but safely.
For faster action, alkaline cleaners (sodium hydroxide) can dissolve hair/soap mixes; oxidizers (peroxide-based) help too.
Strong acid cleaners and mixed oxidizer/alkali products should be avoided on plumbing with PVC, metal, or if residues remain, as they risk corrosion, fumes, and dangerous reactions.
Safety precautions and environmental considerations
Because chemical drain cleaners can release heat, fumes, and reactive residues, users should treat them as hazardous substances and follow strict safety and disposal practices.
Use gloves, eye protection, and adequate ventilation; avoid mixing products. Limit use to manufacturer guidance and labeled applications.
Neutralize spills per instructions and dispose of containers through hazardous-waste channels.
Consider enzymatic or mechanical alternatives to reduce environmental harm.
Method 7 Wet/dry vacuum extraction
Before using a wet/dry vacuum, the operator should clear the area, remove grates, and assemble a rigid nozzle or adapter sized for the drain.
Recommended vacuum settings, filter type, and wet mode selection are noted to prevent damage and maximize suction.
Proper sealing—using a rubber flange, duct tape, or a damp cloth around the hose—ensures effective extraction of debris and water.
Preparation, settings, and sealing techniques for suction
Gather necessary tools and assess the drain area before using a wet/dry vacuum.
The operator selects wet mode, low-to-medium suction, and a sealed adapter or rubber coupling.
Remove grates, clear visible debris, and position hose tightly over the opening.
Seal gaps with damp cloth or plumber’s putty, test suction briefly, and proceed in short bursts to prevent damage or clog migration.
How to Diagnose If the Problem Is Bigger Than the Floor Drain
If water backs up in multiple fixtures, foul sewer gas is present, or gurgling sounds come from drains, the issue may extend beyond the bathroom floor trap to the main sewer line or venting.
Simple tests—running water in sinks and tubs, checking for simultaneous slow drains, and sniffing for persistent odors—help confirm a systemic problem.
If these signs appear, a professional plumber should be contacted to perform camera inspection and safe repairs.
Signs of a main sewer or venting problem
Recognize that persistent or widespread drainage issues often indicate a problem beyond a single floor drain; clues such as multiple slow drains, recurring backups, strong sewer odors throughout the home, gurgling sounds from toilets or drains, or sewage surfacing in low fixtures point to a clogged main sewer line or a venting failure rather than a localized blockage.
Additional signs include unusually slow toilet flushes and sudden water level changes.
Tests to check for multiple slow drains or sewer odors
How can a homeowner quickly determine whether slow drains or sewer smells are isolated or symptomatic of a larger sewer or venting problem?
Perform simple tests: run simultaneous water in sinks, tubs, and toilets to see if multiple fixtures back up; block vents briefly and note gurgling; pour water into traps to confirm seals; sniff near fixtures and cleanouts to localize odor sources.
When to call a professional plumber
Call a professional when simple tests indicate problems beyond a single clogged trap or visible debris.
A plumber should be contacted if multiple fixtures drain slowly, persistent sewer odors persist, gurgling occurs, water backs up, or DIY methods fail.
Also call for suspected mainline blockage, collapsed pipes, recurring clogs, or sewer-system issues.
Licensed inspection, camera diagnosis, and safe repairs prevent damage and costly mistakes.
Preventive Measures to Keep Floor Drains Clear
Preventive care keeps floor drains flowing and reduces emergency clogs. Recommended steps include simple daily and weekly routines, installing strainers or hair catchers for continuous protection, and following a periodic deep‑cleaning schedule with appropriate methods and products.
These measures minimize buildup and extend the drain’s reliable function.
Daily and weekly maintenance routines
A simple routine of daily rinses and a short weekly inspection can greatly reduce the risk of clogs in a bathroom floor drain.
Daily warm-water flushes remove soap residue; weekly checks look for slow drainage and hair buildup.
Prompt removal of visible debris prevents blockages. Maintain records of any recurring issues to catch patterns early.
- Rinse with warm water daily
- Inspect grate weekly
- Remove visible debris promptly
Products and tools to install for ongoing protection (strainers, hair catchers)
After daily rinses and weekly inspections, installing simple devices provides continuous defense against common cloggers.
Mesh strainers, silicone hair-catchers, and recessed drain covers trap debris before it enters pipes. Choose corrosion-resistant materials sized to the drain, easy to remove for quick emptying.
Magnetic or snap-fit models suit tile drains; low-profile options maintain drainage while minimizing trip hazards and odor buildup.
Periodic deep-cleaning schedule and methods
Regularly scheduled deep-cleaning keeps small blockages from becoming plumbing emergencies by removing buildup that daily rinses and strainers miss.
Monthly inspections, quarterly enzyme treatments, and biannual mechanical scrubs balance effort with prevention.
Use a plumber’s snake, stiff brush, and noncorrosive cleaner; flush with hot water afterward.
Log dates and results to spot trends and act before clogs form.
Common Mistakes to Avoid When Unclogging Floor Drains
Many homeowners inadvertently damage pipes or traps by using improper tools or excessive force.
Mixing chemical cleaners or ignoring safety precautions can create toxic fumes or corrode plumbing.
Attempting complex fixes without the right knowledge often worsens blockages and increases repair costs.
Mistakes that can damage pipes or traps
Careless attempts to clear a floor drain can do more harm than the clog itself. Forcing tools, using excessive pressure, or inserting sharp objects can crack PVC, dislodge trap seals, or damage connections.
Improper use of plumbing snakes can bend pipes or tear gaskets. Over-tightening fittings or reassembling parts incorrectly causes leaks and odor issues, requiring professional repairs.
Chemical mixing and safety errors to avoid
One essential error is combining different drain-cleaning chemicals or using them in confined spaces without adequate ventilation. Such actions can produce toxic gases or violent reactions.
Also avoid applying acidic and alkaline cleaners sequentially, ignoring personal protective equipment, and pouring chemicals onto recent mechanical snake work.
Read labels, ventilate, wear gloves and eye protection, and neutralize spills promptly to minimize harm.
When DIY attempts make the problem worse
Attempting quick fixes without proper technique can turn a manageable floor-drain clog into a larger, more expensive problem.
Inexperienced plunging, improper snake use, or overreliance on chemicals can damage pipes, seals, or traps and push blockages deeper. Ignoring vent or secondary drainage issues delays diagnosis.
If simple, safe methods fail, consult a plumber to prevent costly repairs and hidden water damage.
Cost and Time Expectations for Different Fixes
Typical remedies range from quick DIY fixes taking 10–30 minutes, such as plunging or using a hand snake, to professional interventions that can take one to several hours for inspection and repair.
DIY costs are generally low—under $50 for tools or chemicals—while professional service fees commonly range from $100 to $400 or more depending on complexity.
Readers should weigh time, skill level, and cost when choosing between a simple home attempt and hiring a plumber.
Typical time required for each method
Because different unclogging approaches vary in complexity and tools required, the expected time to clear a bathroom floor drain ranges from a few minutes for simple plunging to several hours for disassembly or professional intervention. Typical durations:
| Method | Typical time |
|---|---|
| Plunging / snaking | 5–30 minutes |
| Chemical/biological cleaners | 30 minutes–overnight |
| Disassembly/professional | 1–4+ hours |
Approximate cost ranges for DIY vs. professional service
Cost considerations influence whether a homeowner chooses a quick DIY fix or calls a professional: basic DIY methods (plungers, hand augers, simple enzymatic cleaners) typically cost $5–$40 in tools or products, while renting or buying more capable snakes and specialty tools can raise that to $30–$150.
Pro plumbers charge $100–$400 for standard unclogs; complex jobs or diagnostics can reach $400–$1,000+.
Time vs. cost trade-offs guide decisions.
Troubleshooting: If the Drain Still Won’t Clear
If initial attempts fail, the next steps include using a plunger or hand auger, flushing with hot water, and checking nearby traps and vents for blockages.
If professional help is needed, note recent symptoms, what methods were tried, water level behavior, and any unusual noises or odors. Providing these details speeds diagnosis and reduces on-site time.
Secondary steps to try before calling help
When the basic methods—boiling water, a plunger, and a simple wire hanger—fail to clear the floor drain, proceed through a set of targeted secondary steps that escalate in complexity and safety risk.
These include using a plumbing snake, checking the trap and cleanout access, and applying enzyme cleaners, each performed methodically to avoid damage and to determine whether the blockage is localized or within the main line.
Use a hand auger, remove and inspect the trap, clear nearby vents, try slow-acting enzymatic treatments, and retest.
If resistance persists or sewage odors intensify, stop further DIY escalation.
What information to provide a plumber for faster diagnosis
Provide clear, specific details to help the plumber diagnose the issue quickly:
describe the drain’s symptoms (slow draining, standing water, gurgling, or foul odors), when the problem began, what DIY steps were already attempted and their results (plunger, hanger, auger, enzymatic cleaner, trap inspection),
any unusual sounds or backups in other fixtures, visible signs of leaks or corrosion, and accessibility of the floor drain or cleanout location.
Include photos, measurements, and recent plumbing work history.
Visual Guide and Quick Reference Checklist
A clear visual guide and printable checklist help users move through unclogging steps efficiently.
The checklist lists tools, safety steps, and sequential actions for fast clearing.
Common signs of specific problems are paired with recommended immediate actions to reduce trial-and-error.
Step-by-step printable checklist for fast unclogging
Follow this clear, numbered checklist to clear a bathroom floor drain quickly and safely; each step pairs a concise action with a brief visual cue for fast reference.
A printable, single-page list guides preparation, tools, step sequence, and safety reminders for rapid execution and tidy completion.
- 1. Prep area: gloves, bucket, flashlight.
- 2. Remove cover, extract debris, test flow.
- 3. Use plunger/auger, flush, sanitize.
Common signs mapped to recommended immediate action
When water backs up, bubbles persist, or slow drainage lingers, this visual guide maps each common sign to a clear immediate action—so users can quickly identify the problem and respond with the appropriate tool or safety step.
| Sign | Immediate action |
|---|---|
| Slow drain | Remove grate, fish debris |
| Gurgling | Vent check, plunge gently |
| Standing water | Bail, use wet vac |
| Foul odor | Clean trap, disinfect |
| Recurrent clog | Inspect with snake |
Conclusion
To conclude, unclogging a bathroom floor drain can often be resolved quickly with basic tools and correct technique, yet 40% of household plumbing issues result from hair and soap buildup, underscoring prevention’s value. Homeowners who act promptly and follow safe, escalating methods usually avoid costly repairs. If blockages persist despite plunging, snaking, or enzymatic treatments, professional inspection is warranted to rule out deeper sewer or pipe problems.