How to Keep Sprinklers From Freezing: Simple Steps to Protect Your Irrigation System
To prevent your sprinklers from freezing, take proactive steps before frost hits: shut off your irrigation system and close the main valves. Drain each zone using manual drains or an air-compressor blowout at a safe pressure, then cap the lines. Insulate exposed pipes, backflow preventers, and valves with foam sleeves or jackets, and protect controllers and electrical boxes from moisture. For drip systems, carefully remove delicate emitters and limit the blowout pressure to avoid damage. After thawing, inspect the system for any cracks. Follow these steps for effective winterization, troubleshooting, and cost guidance.
How to Prevent Sprinklers from Freezing This Winter
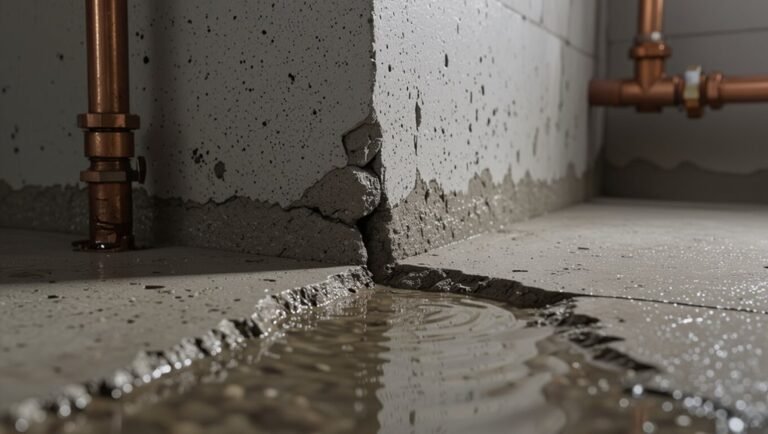
Freezing poses a serious risk to sprinkler systems because expanding ice can crack pipes, rupture valves, and damage heads.
Cold temperatures accelerate wear on seals and plastic components, leading to leaks and malfunctions when the system is pressurized again.
Indicator signs of freeze damage include visible cracks, sudden pressure loss, wet spots in the lawn, and sprinkler heads that fail to pop up or spray irregularly.
Why sprinkler freezing is a problem for your irrigation system
Ice formation within sprinkler components can crack pipes, seize valves, and warp delicate fittings, leading to costly repairs and compromised system performance.
Property owners seeking how to keep sprinklers from freezing face disrupted irrigation schedules, uneven watering, water loss, and higher utility costs.
Ice-related failures also shorten equipment lifespan and increase emergency maintenance needs, making proactive prevention financially and operationally prudent.
How cold temperatures damage sprinkler components
Cold temperatures cause water trapped in pipes, valves, and sprinkler heads to expand as it turns to solid, exerting pressure that can crack plastic and metal components.
Ice expansion warps fittings, ruptures seals, and loosens joints.
Electrical solenoids and control modules suffer moisture intrusion and fracture.
Repeated freeze–thaw cycles accelerate corrosion, deform pipes, and impair moving parts, increasing repair needs and shortening system lifespan.
Signs your sprinkler system has been affected by freezing
Several clear indicators reveal when a sprinkler system has been compromised by winter conditions: consistently wet spots or unexplained puddles near valves and joints, visible cracks or bulging in pipes and sprinkler heads, weakened water pressure or uneven spray patterns, and sprinklers that fail to retract or cycle properly.
Additional signs include frozen or burst fittings, air in lines causing sputtering, and control malfunctions or repeated zone failures.
Quick actions to take when frost is forecast
When frost is forecast, operators should immediately shut down irrigation and close main valves to stop water flow and reduce freeze risk.
Automatic controllers ought to be turned off or set to suspend schedules to prevent unexpected watering.
Above-ground fittings and backflow assemblies can be wrapped with insulation or heat tape as a short-term protective measure.
Immediate shutdown and main valve procedures
Act quickly to shut down irrigation systems at the first reliable frost warning: close the main shutoff valve, disable timers and controllers, and isolate any zone valves to prevent water remaining in lines from freezing.
Then drain or open manual drain valves, relieve pressure at backflow preventers, and record valve positions.
Confirm no residual flow, tag the system as winterized, and notify maintenance or the homeowner.
Turning off automatic controllers and scheduling
If frost is forecast, the automatic controller should be turned off immediately and all scheduled run times canceled to prevent programmed cycles from activating; confirm the controller display shows “OFF” or “Manual” and remove any battery backups that could restart the unit.
The controller’s wiring box should be secured against moisture, timers overwritten, and remote connections disabled to guarantee no accidental or wireless reactivation during cold periods.
Short-term insulation measures for above-ground components
With controllers secured, attention should move to protecting exposed above-ground components from impending frost.
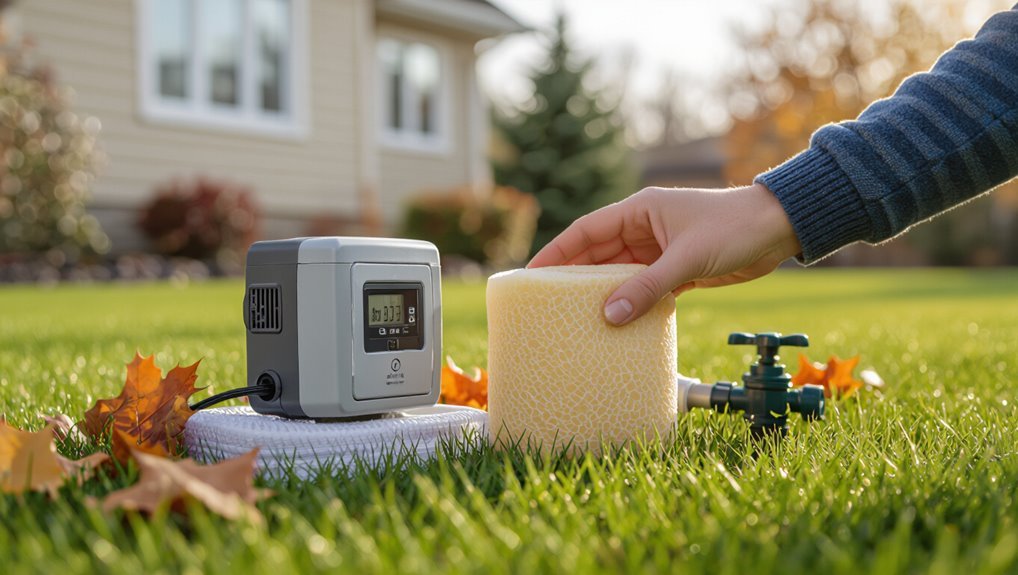
Quick measures include wrapping backflow preventers, valves, and exposed piping with insulating foam, heat tape, or blankets secured with tape or zip ties.
Add temporary covers over irrigation boxes and risers.
Confirm heat sources are safe and monitored; remove insulation once temperatures rise to prevent moisture buildup and damage.
Step-by-step winterization for pressurized sprinkler systems
The section outlines a concise, step-by-step winterization workflow for pressurized sprinkler systems, beginning with a tools list and safety checklist.
It then compares three practical methods—manual drain, automatic drain valves, and the air-compressor blowout—covering setup, testing, and specific safety and pressure limits for the blowout.
The discussion concludes with verification steps to confirm all zone drains and low points are fully cleared.
Preparing tools and safety checklist
Before beginning winterization, assemble a concise set of tools and run a brief safety checklist to minimize risk and avoid delays.
Required items: adjustable wrench, screwdriver set, air compressor or shop vac adapter, pipe caps, Teflon tape, gloves, safety glasses, flashlight.
Verify shutoff valve access, power isolation for electrical controllers, clear work area, and informed helpers.
Confirm weather window and notify occupants.
Method A Manual drain procedure
Begin by locating the system’s main shutoff and confirming water pressure is zero.
Then follow the manual drain sequence specific to the layout. Open each zone valve and manual drain point in order, bleed air until clear.
Close valves, cap and secure drains. Remove and store backflow device or insulate exposed fittings.
Verify all zones remain empty before winter onset.
Method B Automatic drain valves setup and testing
Install and test automatic drain valves by isolating the irrigation supply, relieving system pressure, and confirming each valve’s proper orientation and activation sequence.
Inspect valve bodies for debris, verify seals and float mechanisms, and guarantee drains open at designated pressure thresholds.
Operate zones to observe automatic draining, monitor for leaks, and adjust or replace faulty units before freezing temperatures arrive.
Method C Blowout method with an air compressor (pressure limits, step sequence, safety)
Use an air compressor to force out residual water from pressurized sprinkler systems, observing strict pressure limits and a clear step sequence to prevent damage and guarantee safety.
Technicians depressurize mains, attach a regulator set below 50 psi (residential) or manufacturer spec, blow zones sequentially until clear, cycle valves, and cap fittings.
Wear eye and hearing protection; never exceed recommended pressure.
Verifying drains and low-point blowouts
Verify all drains and low-point blowouts before finalizing winterization to guarantee trapped water cannot freeze and damage the system.
Inspect each valve, drain cock and blowout fitting for proper opening and clearance. Operate drains until clear water and air pass.
Remove debris and tighten loose fittings. Confirm low points are free-flowing and capped appropriately.
Document completed checks for future reference.
Winterizing drip irrigation and low-pressure systems
For drip and other low-pressure systems, winterization focuses on preventing trapped water from freezing in lines and fittings.
Recommended steps include flushing drip lines, removing and storing emitters, and using a modified blowout procedure with lower pressure and appropriate adapters to avoid damage.
Exposed tubing and connectors should be insulated or buried to reduce freeze risk.
Drip line flushing and removal of emitters
Prepare drip and low-pressure irrigation systems for freezing weather by thoroughly flushing lines and removing exposed emitters.
Water should be expelled from lateral lines until clear, preventing trapped ice. Detachable or aboveground emitters must be disconnected and stored.
Inline emitters should be inspected for clogs and replaced if brittle.
Seal mainlines, label removed components, and document locations for spring reinstallation to simplify maintenance.
Using blowout for drip systems (modifications and cautions)
Use a handheld compressor or shop vac configured for compressed air to blow out drip and low‑pressure tubing, but limit pressure and adjust fittings to prevent damage.
Reduce regulator to 20–30 psi, work zone by zone, and cap lines when finished.
Remove fragile emitters or bypass with plugs.
Avoid excessive pulses; inspect valves, filters, and stakes afterward for cracks or displacement.
Insulating exposed tubing and connectors
Many homeowners should insulate any exposed drip tubing and connectors that remain after blowout to prevent freeze damage and brittle fractures.
Foam pipe sleeves, split-loom tubing, heat tape rated for outdoor use, and waterproof tape protect fittings and short runs.
Secure insulation against wind, seal gaps at junctions, and elevate connectors off cold ground.
Regular inspection before thaw confirms integrity and prevents leaks.
Protecting above-ground and exposed components
Above-ground and exposed sprinkler components require targeted protection to prevent freeze damage.
Insulating backflow preventers and valves with foam or fiberglass and properly installing protective jackets can keep trapped water from freezing.
Controllers, electrical boxes, and manifolds benefit from weatherproof enclosures or temporary covers placed over heads and fittings during cold snaps.
Insulating backflow preventers and valves (materials and installation)
When temperatures approach freezing, insulating backflow preventers and exposed valves is essential to prevent pipe bursts and system damage; effective protection combines the right materials with careful installation to eliminate cold air intrusion and moisture buildup.
Use closed-cell foam, neoprene jackets, heat tape rated for outdoor use, and waterproof insulation tape.
Secure snugly, seal seams, elevate from standing water, and test for gaps before freeze events.
Enclosing controllers, timers, and electrical boxes
After insulating backflow preventers and valves, attention should shift to protecting controllers, timers, and electrical boxes mounted above ground.
These components are vulnerable to cold, moisture, and wind-driven drafts that can cause malfunctions or short circuits.
Enclose units in weatherproof, ventilated housings; seal cable entries with grommets or silicone; elevate boxes off wet surfaces; add foam or removable insulation panels for extra thermal protection.
Temporary covers for sprinkler heads and manifolds
Covering exposed sprinkler heads and manifolds with temporary insulation prevents freeze damage and makes winter maintenance simpler.
Use foam covers, waterproof tape, or molded caps sized to fit heads; wrap manifolds with insulated blankets or pipe wrap secured with zip ties.
Remove coverings in spring to avoid trapping moisture.
Inspect periodically during cold snaps and replace damaged insulation to maintain protection.
Long-term system upgrades to reduce freeze risk
Long-term upgrades can greatly lower freeze risk by adding automated freeze sensors and smart controllers that shut systems down or adjust cycles when temperatures approach danger levels.
Selecting frost-resistant pipes, valves, and fittings reduces vulnerability to cracking, while rerouting or burying exposed lines moves water below the frost line.
These measures require upfront planning but provide durable protection and fewer winter failures.
Installing freeze sensors and smart controllers
Consider upgrading the irrigation system with freeze sensors and smart controllers to prevent damage and wasted water during cold snaps.
Sensors detect low temperatures and automatically suspend watering; soil or ambient probes offer targeted protection.
Smart controllers integrate forecasts and remote control, resuming schedules when safe.
Installation by a qualified technician guarantees correct placement, calibration, and compatibility with existing valves and wiring.
Choosing frost-resistant materials and components
After adding sensors and smart controllers to manage watering during cold snaps, attention should turn to upgrading physical components so the system itself can better withstand freezing conditions.
Specify frost-rated valves, polyethylene or insulated PVC piping, brass or stainless fittings, and freeze-tolerant backflow preventers.
Use flexible drip lines and winterized sprinkler heads designed to minimize trapped water and resist cracking in low temperatures.
Re-routing or burying vulnerable lines
Reroute or bury vulnerable irrigation lines to reduce exposure to freezing temperatures and mechanical damage: relocating exposed runs to deeper trenches, shifting pipes away from wind-prone or shaded zones, and placing service lines beneath frost depth all lower the chance of freeze-related ruptures.
Professional assessment guarantees correct frost-depth placement, proper bedding, and gradient for drainage.
Insulate accessible valves and maintain clear records for future repairs.
Troubleshooting frozen or burst pipes and repairs
After a thaw, the system should be checked for leaks and unexplained pressure loss by observing the controller, valves, and visible piping.
Damaged sections — including pipe runs, fittings, and heads — can often be repaired or replaced with compatible parts and solvent-weld or threaded connections.
If leaks persist, pressure remains low, or the damage is extensive, a professional irrigation technician should be contacted for diagnosis and proper repair.
How to detect leaks and pressure loss after thaw
Inspecting the system visually and tracking water flow are the first steps in detecting leaks and pressure loss once frozen sprinkler lines thaw.
Technicians should monitor zone-by-zone pressure, note irregular spray patterns, and listen for hissing.
Check valve boxes, fittings, and exposed pipes for moisture or pooling.
Use a pressure gauge at the backflow or mainline and compare readings to normal operating values.
Repairing or replacing damaged pipes, fittings, and heads
Begin repairs by isolating the damaged zone and relieving any residual pressure before opening lines; this prevents further water loss and reduces risk while evaluating breaks.
Inspect for cracks, split fittings, or warped heads.
Cut out and replace compromised pipe sections with proper couplings, reseat or replace fittings, and install new sprinkler heads.
Pressure-test repaired segments and restore service gradually, checking for leaks.
When to call a professional irrigation technician
When should a homeowner call a professional irrigation technician for frozen or burst pipes?
A technician is warranted when leaks, bulging, or flowing water appear, when thawing risks further damage, or when underground lines require excavation.
Professionals should handle complex valve or manifold failures, inaccessible breaks, persistent pressure loss, or when prior DIY attempts fail.
Prompt expert repair minimizes water damage and system loss.
Seasonal maintenance checklist
A concise seasonal checklist helps prevent freeze damage and streamlines maintenance responsibility.
Recommended actions include:
- Pre-winter: schedule system blowout, drain valves, and insulating exposed components.
- Mid-winter: check weekly for visible leaks, pressure changes, and buried valve access.
- Spring start-up: inspect for damage, restore water, and run each zone to verify operation.
Pre-winter tasks to perform (schedule and items)
Several key tasks should be completed before the first hard freeze to protect irrigation systems and minimize spring repairs.
Inspect valves, backflow preventer and controllers; tighten loose fittings.
Drain or blow out lines per manufacturer guidance.
Insulate aboveground components, shut off and drain zone-specific supply lines, and program controller for winter mode.
Document dates and performed actions for spring reference.
Mid-winter monitoring tasks (frequency and what to check)
How often should the system be checked during cold spells to prevent damage? Inspect weekly during prolonged freezes and after rapid temperature swings.
Check visible aboveground components for ice buildup, cracked heads, exposed valves, and wet spots indicating leaks.
Confirm insulation remains intact on pipes and backflow assemblies.
Record findings and promptly schedule repairs to prevent burst lines and further deterioration.
Spring start-up tasks after thaw (inspection and testing)
When freezes ease and ground thaws, the irrigation system requires a focused spring start-up to verify integrity and restore normal operation.
Technicians should inspect valves, backflow devices, zones, and emitters for cracks, leaks, or soil displacement.
Restore water supply slowly, check pressure and controller settings, run each zone to confirm coverage, adjust heads, and document repairs before regular seasonal use.
Cost considerations and DIY vs. professional services
When weighing winterization choices, typical costs for methods like manual draining, antifreeze, and compressed-air blowouts vary widely and influence whether a homeowner attempts a DIY job or hires a contractor. DIY blowouts can save money but require the right equipment and risk if done improperly, while professionals add cost for expertise, liability coverage, and time savings. The following quick reference compares typical expenses and key pros and cons.
| Item | Typical cost / note |
|---|---|
| Manual draining | Low cost — often free |
| Antifreeze use | Low–moderate — product cost |
| DIY blowout | Moderate cost — equipment purchase/rental |
| Contractor blowout | Moderate–high — labor and service fee |
| Risk/benefit | DIY saves money but risks damage; pros offer warranty and speed |
Typical costs for common winterization methods
Costs vary widely depending on the method chosen, the size and complexity of the irrigation system, and regional labor rates.
Typical costs: DIY manual draining or insulated valve covers often under $50–$200 for materials; compressed-air blowouts require rented compressors $50–$150/day or purchase $300–$1,200; professional winterization services generally $75–$250 for basic systems, rising with zones and complexity.
Pros and cons of DIY blowout vs. hiring a contractor
Weighing a DIY compressed-air blowout against hiring a contractor requires balancing upfront expenses, skill and equipment needs, and potential risks;
DIY can save money for capable homeowners with the right compressor and knowledge, while professionals offer speed, warranty and lower risk of damage at a higher price.
DIY pros: lower cost, control; cons: equipment purchase, injury or pipe damage.
Contractor pros: expertise, guarantees; cons: higher fee.
Common mistakes to avoid when protecting sprinklers from freezing
Mistakes during winterization can nullify precautions and damage the system if not recognized.
Common errors include:
- Over-pressurizing during air blowout
- Forgetting to shut off the main water or isolate zones
- Using improper insulation or temporary fixes that trap moisture
Awareness of these pitfalls helps prioritize safe procedures and prevent costly repairs.
Over-pressurizing during air blowout
During air blowout, applying excessive pressure can damage sprinkler components, rupture pipes, and force debris into heads, undermining the very protection sought.
Technicians should follow manufacturer pressure limits, use regulated compressors or air machines, and employ short bursts while monitoring gauges.
Gradual depressurization and post-blowout inspections catch leaks or displaced seals, preventing costly repairs and ensuring reliable winterization without introducing new risks.
Forgetting to shut off main water or isolate zones
After addressing the risks of over-pressurizing during air blowout, attention must turn to basic shutoff and isolation procedures that are equally prone to error.
Forgetting to shut the main valve or isolate individual zones leaves pipes vulnerable to residual flow and freeze damage.
Consistent checklist routines, labeled valves, and verified zero-flow confirmation prevent accidental supply and reduce winterization failures.
Improper insulation or temporary fixes that trap moisture
Use proper materials and methods rather than quick patches when insulating sprinkler components, because temporary fixes that trap moisture accelerate corrosion and freeze damage.
Moisture-retaining wraps, plastic bags, or compressed foam can hold water against valves and backflow preventers. Instead, use breathable, weatherproof insulation and secure drainage.
Periodically inspect seals and replace compromised insulation to prevent hidden rot, rust, and frozen failures.
Conclusion
As winter tightens its grip, the homeowner’s irrigation system becomes a quiet soldier bracing for battle. By following timely precautions, thorough winterization, and prompt repairs when needed, costly damage is largely avoidable. Like a blanket wrapped around a sleeping child, simple covers, drainage, and shutoffs safeguard vulnerable pipes and components. With routine maintenance and informed choices about DIY versus professional help, sprinklers can emerge each spring ready to perform without the chill’s bitter surprises.