
How to Clean Bathroom Walls for Painting: Step-by-Step Prep to Remove Mildew, Soap Scum & Grease
To ensure a successful paint job on your bathroom walls, it’s essential to clean them properly. This involves ventilating the area, removing fixtures, and addressing issues like mildew, soap scum, and grease. Follow these steps for optimal preparation: start with a dry brush to remove loose dirt, treat any mildew with diluted bleach or hydrogen peroxide, scrub, and rinse. For soap scum, use white vinegar or a nonabrasive cleaner, and for grease, apply a mild alkaline cleaner or rubbing alcohol. After rinsing thoroughly, neutralize any residues, repair imperfections, and apply a stain-blocking primer. Detailed instructions will follow.
What to Know Before You Start Cleaning Bathroom Walls for Painting
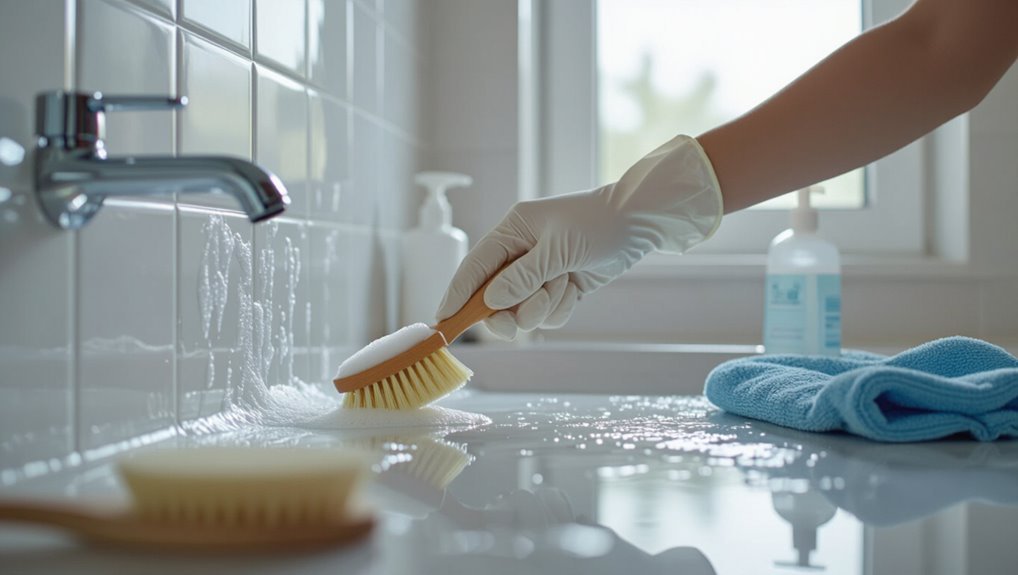
Before cleaning begins, one must recognize that thorough preparation directly affects paint adhesion and the final appearance.
Different bathroom substrates—painted drywall, tile, plaster, cement board, and PVC—require tailored cleaning methods, while common contaminants like mildew, soap scum, hard water stains, grease, and body oils demand specific treatments.
Safety precautions such as adequate ventilation, appropriate PPE, and careful handling of cleaning chemicals are essential.
Why thorough cleaning matters for paint adhesion and finish
Proper surface cleaning guarantees paint adheres evenly and delivers a smooth, durable finish, because dirt, soap scum, oils, and mildew interfere with primer and topcoat bonding.
Before painting, understanding how to clean bathroom walls for painting prevents peeling, blotchy coverage, and accelerated wear.
Removing contaminants secures uniform absorption, improves adhesion, extends coating life, and reduces the need for costly repainting or repair.
Types of wall surfaces in bathrooms (painted drywall, tile, plaster, cement board, PVC)
Surface type strongly influences which cleaning methods and products will remove contaminants without damaging the substrate. Therefore, identifying whether walls are painted drywall, ceramic tile, plaster, cement board, or PVC is the first practical step after recognizing the need for thorough cleaning.
Each material tolerates different cleaners, abrasives, and moisture levels: painted drywall is delicate, tile is durable with grout, plaster may be porous, cement board is robust, and PVC resists water but can scratch.
Common contaminants: mildew, soap scum, hard water stains, grease, body oils
Bathrooms commonly collect mildew, soap scum, hard water deposits, grease, and body oils, each requiring different cleaning approaches.
Mildew appears as dark spots; bleach or mildew cleaners remove spores.
Soap scum is filmy and benefits from acidic or surfactant cleaners.
Hard water leaves mineral buildup needing descalers.
Grease and body oils require degreasers or alkaline cleaners to restore paint adhesion and surface cleanliness.
Safety considerations: ventilation, PPE, and chemical handling
Before cleaning begins, guarantee adequate ventilation, appropriate personal protective equipment (PPE), and careful chemical handling to prevent respiratory irritation, skin burns, and accidental mixing of incompatible cleaners.
Open windows, run exhaust fans, and use an N95 or chemical respirator for strong cleaners. Wear gloves, eye protection, and impermeable clothing.
Read labels, never mix bleach with ammonia or acids, and store chemicals securely away from children and pets.
Tools and Cleaning Supplies You’ll Need
A concise checklist of essential tools—sponges, scrub brushes, microfiber cloths, buckets, ladders, and protective gear—sets the stage for effective wall cleaning.
Guidance follows on recommended cleaning solutions (mild detergent, TSP alternatives, bleach for mold) and the appropriate situations for each.
The section also compares eco-friendly and DIY options, outlining their advantages and limitations.
Essential tools checklist
Cleaning for paint begins with assembling the right tools and supplies: microfiber cloths, a stiff-bristled brush, a non-abrasive sponge, a bucket, a pH-neutral cleaner or trisodium phosphate (TSP) substitute, rubbing alcohol or degreaser, painter’s tape, drop cloths, and a putty knife for loose paint.
Essential checklist focuses on function and safety:
- Protective gloves and goggles
- Sturdy ladder or step stool
- Sandpaper (120–220 grit)
- Sealable waste bags
Recommended cleaning solutions and when to use them
Several common cleaners cover most bathroom-wall soils: a mild pH-neutral soap for general dust and grime, a TSP substitute for heavy soap scum and mildew stains, rubbing alcohol or a commercial degreaser for greasy areas, and diluted bleach for persistent mold (used sparingly and with ventilation).
- Mild soap — routine cleaning
- TSP substitute — heavy residue
- Degreaser/alcohol — grease
- Diluted bleach — stubborn mold
Eco-friendly and DIY alternatives with pros and cons
Eco-friendly options and DIY mixes offer effective, low-toxicity ways to prepare bathroom walls for painting while minimizing fumes and environmental impact.
These alternatives address mildew, soap scum, and grease with simple ingredients.
Pros: safer, cheaper, biodegradable.
Cons: may require more elbow grease or repeat applications.
- White vinegar solution
- Baking soda paste
- Castile soap mix
- Hydrogen peroxide spray
How to Prepare the Area Before Cleaning
Before cleaning begins, fixtures and hardware are removed and light switch plates and outlet covers are unscrewed to expose the bare wall.
Floors, trim, and remaining fixtures are protected with drop cloths and painter’s tape to prevent damage and staining.
A small, inconspicuous area is tested to confirm the chosen cleaner and method do not harm the surface.
Removing fixtures, coverings, and hardware
Start by clearing the work area: remove towels, rugs, shower curtains, and any movable decor to create an unobstructed space for cleaning and painting.
Next, detach switch plates, outlet covers, towel bars, robe hooks, and shower rods where possible.
Unscrew mirrors or light fixtures that impede access.
Label small parts and store screws in a container.
Make certain plumbing fixtures remain undisturbed.
Protecting floors, trim, and fixtures
Lay down a continuous layer of reinforced drop cloths or builder’s plastic over the floor, extending slightly up the baseboards, and secure edges with low-tack painter’s tape to prevent slipping and paint seepage.
Cover trim and remaining fixtures with tape and plastic sheeting; remove or mask vents, outlet covers, and mirrors.
Confirm all coverings are tight, labeled, and pathways remain clear for safe movement.
Testing a small inconspicuous area for surface compatibility
With floors and fixtures secured, attention turns to verifying how the cleaning agent interacts with the wall surface. A small, hidden spot is treated and allowed to dry.
Observers check for discoloration, softening, peeling, or residue. If adverse effects appear, an alternative cleaner or gentler dilution is chosen.
Document results before proceeding to full-area cleaning to prevent damage.
Step-by-Step Cleaning Process to Remove Mildew, Soap Scum & Grease
The cleaning sequence begins with dry removal of loose dust and debris to expose underlying stains.
Next, mildew and mold are treated, followed by targeted removal of soap scum, hard water deposits, and body oils using appropriate cleaners.
A final rinse and neutralization step guarantees surfaces are residue-free and ready for priming and painting.
Step 1 Dusting and dry removal of loose debris
Begin by removing loose dust, cobwebs, and surface particles from walls using a soft-bristle broom, dry microfiber cloth, or vacuum with a brush attachment to prevent grit from scratching paint or interfering with subsequent cleaning.
Work top-to-bottom, corners first. Tap light fixtures and vents gently. Collect debris in a dustpan or vacuum.
Inspect for remaining residue before proceeding to wet cleaning steps.
Step 2 Treating and removing mildew and mold stains
Because moisture often lingers in bathrooms, mildew and mold must be addressed before painting to guarantee adhesion and prevent health risks.
Wear gloves and eye protection. Apply a diluted bleach solution (1:3 bleach to water) or a commercial mold remover, scrub with a stiff brush, rinse thoroughly, and allow to dry.
Repeat stubborn areas and discard contaminated sponges or cloths.
Step 3 Removing soap scum and hard water deposits
Once mildew and mold have been addressed, attention shifts to soap scum and hard water deposits, which form stubborn, filmy layers on tiles, grout, and fixtures that impede paint adhesion.
Use a nonabrasive cleanser or diluted white vinegar, scrub with a nylon brush or scouring pad, rinse thoroughly, and dry.
Repeat spots until residue is gone and surfaces feel smooth.
Step 4 Degreasing and removing body oils
Degreasing targets the thin films of body oils and lotions that linger on bathroom walls and prevent primer and paint from bonding properly. These residues are most common around light switches, towel areas, and near sinks.
Use a mild degreaser or trisodium phosphate substitute, apply with a soft sponge, agitate stubborn spots gently, then wipe away dissolved oils.
Allow surfaces to dry before proceeding.
Step 5 Final rinse and neutralization
A thorough final rinse removes cleaning residues and restores a neutral surface ready for primer or paint.
Using clean water and a fresh sponge or microfiber cloth, the wall is rinsed from top to bottom. Multiple passes guarantee detergent, bleach, or degreaser traces are gone.
A mild acidic rinse (diluted vinegar) may neutralize alkaline cleaners, then water-rinse again.
Step 6 Drying and ensuring surface is paint-ready
After the final rinse, the wall should be allowed to dry completely before any primer or paint is applied.
Ventilation and fans speed drying; open windows and run the exhaust fan.
Check for dampness by touching and using a moisture meter if available.
Confirm surface is uniformly dry, free of residue, and smooth; repair imperfections, sand glossy spots, and remove loose debris before priming and painting.
How to Handle Stubborn or Extensive Mildew and Mold
For stubborn or extensive mildew and mold, choices between bleach, hydrogen peroxide, or commercial removers depend on surface type and ventilation requirements.
Effective removal often requires firm scrubbing with nylon brushes or abrasive pads and appropriate protective gear to reach deep stains.
Professional remediation should be considered when mold covers large areas, penetrates behind walls, or when occupants have health concerns.
When to use bleach vs hydrogen peroxide vs commercial mold removers
When mold or mildew resist routine cleaning, selecting between bleach, hydrogen peroxide, and commercial removers depends on surface type, stain severity, ventilation, and occupant sensitivity.
Bleach is a fast, broad-spectrum sanitizer best for nonporous surfaces.
Hydrogen peroxide is less corrosive and safer around fabrics and colored finishes.
Commercial formulations often combine fungicides and surfactants for persistent or widespread infestations.
Choose bleach for tile, peroxide for painted or delicate areas, and products labeled for mold when infestation is extensive or recurring.
Scrubbing techniques and tools for deep stains
Tackle stubborn mildew and mold with firm, controlled scrubbing using the proper tools and cleaners to avoid spreading spores or damaging surfaces.
Use nylon-bristle brushes, nonabrasive pads, and extendable handles for reach; avoid wire brushes on drywall or painted surfaces.
Apply cleaner, let dwell, then scrub in small sections. Rinse thoroughly, dry with towels or fans, and repeat until stains lift.
When to call a professional for remediation
Recognize the limits of DIY cleaning: call a professional if mildew or mold covers more than about 10 square feet, recurs after repeated treatments, penetrates behind walls or under tiles, or is accompanied by a musty odor, water damage, or health symptoms among occupants.
Professionals assess structural moisture, perform containment, remove contaminated materials, and remediate safely.
Obtain written scope, clearance testing, and warranty before hiring.
Surface Repair and Preparation After Cleaning
After cleaning, the wall surfaces should be inspected for damage such as bubbles, peeling paint, or soft drywall that indicate underlying moisture issues.
Small holes and damaged areas need to be patched, glossy spots sanded, and seams smoothed to create an even substrate for paint.
Finally, appropriate priming must be chosen based on the contamination type—stain-blocking or mildew-resistant primers for mold-affected areas, and standard primers for clean, sound surfaces.
Inspecting for damage: bubbles, peeling, or soft drywall
Begin by closely examining the cleaned wall for signs of damage—look for bubbling paint, areas where the coating is peeling away, and sections of drywall that feel soft or crumbly when gently pressed.
Note locations, size, and patterns. Check around fixtures, corners, and near plumbing for moisture-related deterioration.
Photograph severe spots for reference and determine whether replacement or targeted repair is required.
Patching holes, sanding glossy areas, and smoothing seams
Repairing and refining the cleaned surface prepares it for a durable, professional finish.
Small holes are filled with spackling or lightweight compound, left to dry, then trimmed flush.
Glossy paint is dulled with fine-grit sanding for adhesion.
Seams and tape joints are feathered with joint compound, sanded smooth, and wiped clean.
Final inspection guarantees uniform texture before painting.
Priming requirements for different contamination types
When contamination varies—mildew, nicotine stains, soap scum, or tannin bleed—a tailored priming strategy guarantees adhesion and stain-blocking before painting.
Use mildew-resistant primer after thorough cleaning and bleach treatment.
Apply oil-based or shellac primers for nicotine and severe stains.
For soap scum residue, use a bonding latex primer.
Tannin bleed requires a shellac or stain-blocking acrylic primer to prevent bleed-through.
Choosing the Right Primer and Paint for Bathroom Walls
Selecting appropriate primer and paint is essential to protect bathroom walls from moisture and stains.
Recommendations typically compare stain-blocking and mold-inhibiting primers, paint sheens such as satin or semi-gloss for washability, and options labeled mildew- or antimicrobial-resistant.
Guidance also covers compatible additives and specialty coatings that enhance mildew resistance without compromising finish or adhesion.
Primer types and stain-blocking options
Choose a primer based on wall condition and expected moisture exposure: latex primers are suitable for clean, lightly stained surfaces and offer mildew resistance, while oil-based primers excel at sealing severe stains (smoke, tannin, water marks) and bonding to glossy finishes; shellac primers provide the best stain blocking and fast drying for stubborn odors or heavy water damage but require solvent cleanup and stronger ventilation.
| Type | Strength | Use |
|---|---|---|
| Latex | Mildew resistance | Light stains |
| Oil | Sealing stains | Glossy surfaces |
| Shellac | Superior blocking | Heavy damage |
Best paint finishes for bathrooms (satin, semi-gloss, mold-resistant)
Because bathrooms face frequent moisture, splashes, and the occasional scrub, paint finish choice focuses on durability and cleanability: satin and semi-gloss finishes resist water and wipe-clean staining better than flat sheens, while specially formulated mold- and mildew-resistant paints add biocidal protection and longer-lasting performance in high-humidity areas.
Satin offers subtle sheen and easier touch-ups; semi-gloss provides maximum scrubbability and durability for trim and wet zones.
Antimicrobial and mildew-resistant paint additives and coatings
Evaluate primers and paints that advertise antimicrobial or mildew-resistant properties by examining their active technologies, tested efficacy, and suitability for bathroom substrates.
Consider EPA-registered additives, silver-ion or zinc-based biocides, and factory-applied coatings with laboratory data.
Match product recommendations to ventilation, humidity levels, and common cleaning agents.
Follow manufacturer surface-prep, application, and recoat guidelines to preserve long-term performance and warranty.
Common Mistakes to Avoid When Cleaning for Painting
Common mistakes during bathroom wall preparation can compromise paint adhesion and finish.
Failing to spot-test cleaners or rinse surfaces thoroughly may leave residues, while painting over mildew or soap film leads to peeling and discoloration.
Using cleaners that are chemically incompatible with the wall material can etch or soften surfaces, creating long-term problems.
Skipping spot tests or inadequate rinsing
Skipping spot tests or failing to rinse thoroughly often leads to paint adhesion problems and uneven finishes.
Professionals note that cleaning agents can discolor surfaces, strip primer, or leave residues that repel paint. Small-area tests confirm compatibility; thorough rinsing removes cleaning chemical traces.
Omitting these steps risks bubbling, peeling, and visible imperfections that necessitate rework and added expense.
Painting over remaining mildew or soap film
Painting over remaining mildew or soap film guarantees premature failure: paint applied to contaminated surfaces will not adhere properly, leading to blistering, peeling, or visible stains.
Surfaces must be fully cleaned, treated with a mildew killer where needed, and rinsed until residue-free. Ignoring this risks costly repainting, compromised finish, and persistent staining that bleach or paint cannot hide.
Using incompatible cleaners that damage wall surfaces
After ensuring mildew and soap residues are fully removed, attention must turn to the cleaners themselves: some household chemicals and abrasive products react with drywall, plaster, or paint finishes and cause softening, discoloration, or surface erosion.
Choosing pH-appropriate, noncaustic cleaners prevents damage. Test any product in an inconspicuous spot, follow manufacturer instructions, rinse thoroughly, and avoid bleach/acid mixes or scouring pads on delicate surfaces.
Maintenance Tips to Prevent Future Mildew, Soap Scum, and Grease
Effective prevention focuses on controlling moisture through ventilation and humidity management.
A simple routine cleaning schedule using mildew-resistant and grease-cutting products keeps surfaces from accumulating buildup.
Long-term fixes—such as water softeners, upgraded exhaust systems, and choosing non-porous or treated wall surfaces—further reduce recurrence.
Ventilation and humidity control strategies
Good ventilation and steady humidity control are essential to prevent mildew, soap scum, and grease buildup on bathroom walls.
Install or upgrade an exhaust fan sized for the room, run it during and 15–30 minutes after showers, and guarantee ducts vent outdoors.
Use a hygrometer, maintain indoor RH below 50%, and seal leaks; encourage airflow by keeping doors or windows ajar when practical.
Routine cleaning schedule and recommended products
With ventilation and humidity controlled, a simple routine helps keep bathroom walls free of mildew, soap scum, and grease.
Recommended schedule: weekly light wipe, monthly deep clean, spot treatment as needed, and quarterly inspection.
Recommended products balance effectiveness and safety: mild detergent, bleach solution for mildew, non-abrasive scouring paste for soap scum, and citrus-based degreaser for greasy buildup.
- Weekly wipe
- Monthly deep clean
- Spot treat
- Quarterly inspect
Long-term solutions: water softeners, exhaust upgrades, and surface choices
Investing in long-term fixes like a water softener, an upgraded exhaust system, and mildew-resistant surface choices reduces the frequency and severity of buildup on bathroom walls.
Hard-water minerals, humidity, and porous finishes contribute most to soap scum and mildew. A softener prevents spots, a powerful, properly ducted fan controls moisture, and nonporous paints or tile simplify cleaning, extending intervals between deep maintenance.
Quick Troubleshooting Guide
Common causes and remedies for paint peeling—such as poor surface prep, trapped moisture, or incompatible primers—are outlined so problems can be identified and fixed quickly.
Persistent stains that bleed through new paint are explained with corrective steps like stain-blocking primers and spot-cleaning techniques.
Simple measures to neutralize lingering cleaning or paint odors, including ventilation, odor-absorbing materials, and low-VOC products, are summarized for immediate use.
Paint peeling after application: likely causes and fixes
Diagnose paint peeling promptly to prevent larger repairs: peeling after application usually signals surface contamination, moisture intrusion, improper surface preparation, or use of incompatible products.
Inspect adhesive failure patterns. Remove loose paint, clean with detergent or TSP substitute, dry thoroughly, sand to feather edges, prime with appropriate bonding or mildew-resistant primer, and repaint with compatible interior bathroom paint.
Address leaks or ventilation if moisture-related.
Persistent stains showing through paint and corrective steps
After addressing peeling—removing loose paint, cleaning, sanding, and priming—attention turns to stains that bleed through fresh coatings.
Identify oil, nicotine, rust, tannin, or mildew using visual cues.
Spot-prime with an appropriate stain-blocking primer (shellac or solvent-based for severe stains).
Sand primed areas smooth, then repaint.
If staining recurs, repeat blocking primer and inspect for underlying moisture or contamination.
Odors after cleaning and paint: mitigation techniques
Start by recognizing that lingering odors after cleaning or repainting are usually caused by trapped moisture, residual cleaning agents, or off-gassing from paint and primers.
Improve ventilation, use fans and open windows, and allow full drying before repainting.
Rinse surfaces thoroughly, neutralize with diluted vinegar solution, and choose low-VOC or odor-sealing primers.
Use activated charcoal or baking soda to absorb persistent smells.
Conclusion
Every speck of grime surrendered as if the walls had confessed to a lifetime of showers and midnight snacks; now they stand pristine, almost scandalously ready for paint. The room breathes relief, as if a tiny army of scrubbing sprites marched away with soap scum and mildew in tow. With proper prep, stubborn stains bow out and fresh primer and paint glide on like silk—bathroom walls reborn, poised to resist future messes with theatrical confidence.
