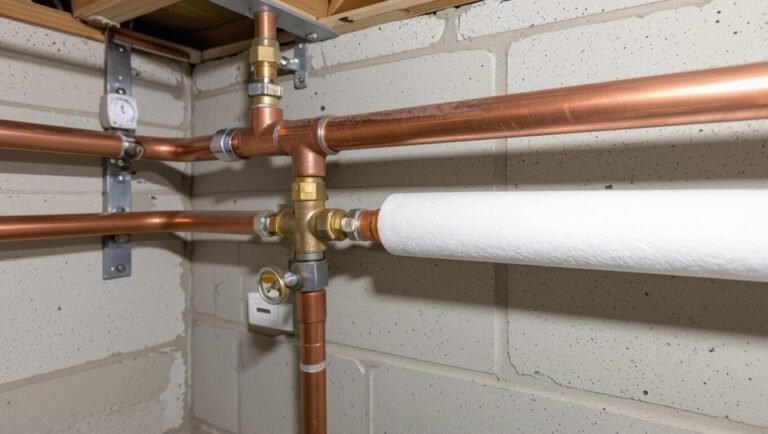
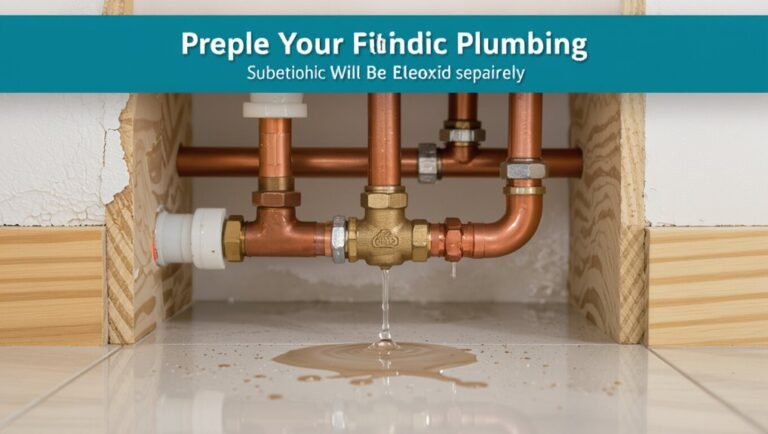
How to Install a Gas Boiler Safely: Step-by-Step Guide for Homeowners
Installing a gas boiler safely requires careful planning and execution. Begin by evaluating your home’s compatibility with a gas boiler, securing the necessary permits, and hiring a licensed gas installer. The installation process includes isolating gas and power, removing the old boiler, positioning the new unit, and connecting all necessary components—gas, water, condensate, flue, and controls—according to code. After installation, commissioning involves conducting leak tests, combustion analysis, and system balancing to ensure safe operation. To maintain safety and warranty, schedule annual servicing and keep proper documentation. For a comprehensive, step-by-step guide and practical checklists, continue reading.
What a Gas Boiler Installation Involves
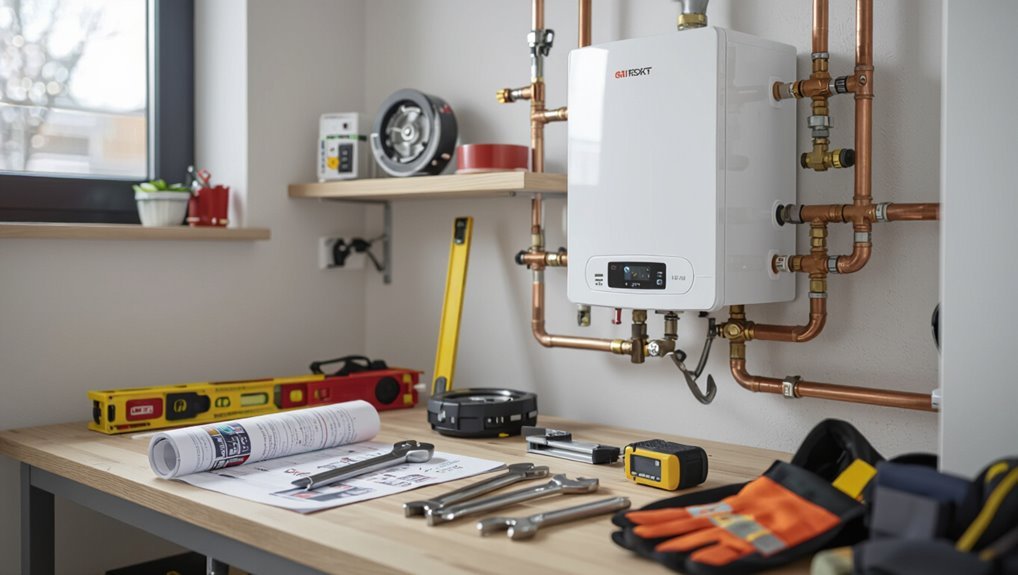
A gas boiler installation requires fitting the boiler itself plus associated components such as the flue, gas supply, condensate pipe, controls, and various valves.
Choices between combi, system, and conventional boilers affect layout and ancillary equipment needs.
Professional certification is legally required for gas work that affects the supply or safety systems and should be confirmed before installation.
Overview of parts and components (boiler, flue, gas supply, condensate, controls, valves)
Clear identification of each component is essential before any installation work begins; the boiler, flue, gas supply, condensate drain, controls, and safety valves each perform distinct functions and must be correctly matched and sited.
The guide outlines how to install a gas boiler by describing each part’s role: combustion chamber, exhaust path, meter connection, condensate routing, thermostats/timers, pressure and safety valves, and required clearances.
Differences between combi, system, and conventional boilers
When selecting a boiler type, installers must consider how combi, system, and conventional units differ in components, pipework, and installation complexity.
Combi boilers combine heating and hot water in one compact unit, requiring fewer pipes and no cylinder.
System boilers need a separate hot water cylinder but simpler pipework.
Conventional boilers require tanks and more extensive cold feed and expansion plumbing.
When professional certification is legally required
Who is legally required to certify a gas boiler installation depends on national regulations and the scope of the work.
Typically a registered gas engineer or licensed installer must certify installations, major modifications, and safety-critical repairs. Certification guarantees compliance with safety standards, warranty validity, and insurance requirements.
Homeowners should verify installer credentials, obtain written certificates, and file any required notifications with local authorities.
Is a Gas Boiler Right for Your Home
Before committing to a gas boiler, one should assess the household’s heating and hot-water demand to guarantee correct boiler sizing.
The condition and layout of existing pipework, radiators, and venting must be evaluated for compatibility or required upgrades.
Available space and the flue location also influence feasibility and regulatory compliance.
Assessing heating and hot-water needs
Deciding whether a gas boiler suits a home requires evaluating both space-heating demand and domestic hot-water usage: size of the property, insulation levels, number of occupants, and peak hot-water requirements determine the boiler capacity and efficiency needed.
A load calculation estimates kW demand; consider future changes (extensions, family growth).
Compare combi, system, and conventional boiler outputs to match peak flow rates and recovery times.
Evaluating existing pipework, radiators, and venting
Having determined the required boiler output and hot‑water profile, the next step is to inspect the home’s existing pipework, radiators, and venting to confirm compatibility and identify any upgrades.
Assess pipe material, diameter, and condition; check radiator sizes, valve types, and balancing; verify venting routes, clearances, and termination points.
Note corrosion, leaks, inadequate flow, or undersized components requiring replacement or modification.
Space and flue location considerations
Although room layout and available clearance often determine whether a gas boiler is appropriate, careful measurement and planning are essential to guarantee safe installation and maintenance access.
The boiler requires clearances per manufacturer and codes; flue termination must avoid windows, doors, and air intakes, maintain required heights, and consider prevailing winds.
Locate the unit for service access and safe condensate/drain routing.
Safety and Legal Requirements Before You Start
Before any work begins, the installer must verify applicable gas safety regulations and local building codes to guarantee compliance.
Necessary permits and notifications should be obtained and the job assigned to a Gas Safe–registered or otherwise licensed professional.
Appropriate safety equipment and personal protective equipment (PPE) must be selected and available to protect installers and occupants.
Gas safety regulations and building codes
When planning a gas boiler installation, compliance with current gas safety regulations and local building codes is essential to protect occupants and avoid legal penalties.
Regulations dictate appliance placement, ventilation, combustion air, flue routing, carbon monoxide detection, and clearances.
Building codes require approved materials, proper condensate disposal, and seismic restraints where applicable.
Adherence guarantees safety, passing inspections, and reducing liability risks.
Permits, notifications, and Gas Safe / licensed installer rules
Several jurisdictions require permits and formal notifications for gas boiler installation, and work must be carried out or certificated by a Gas Safe–registered (or locally licensed) engineer to meet legal and safety obligations.
Homeowners should check local authority requirements, obtain necessary permits, and confirm installer credentials and insurance.
Failure to comply can void warranties and incur fines or unsafe installations requiring remedial action.
Required safety equipment and personal protective equipment (PPE)
A small set of essential safety items and personal protective equipment (PPE) must be on hand and used consistently during any gas boiler installation to reduce risk and meet legal requirements.
Required items include gas detectors, fire extinguisher, carbon monoxide alarm, insulated gloves, safety goggles, ear protection, and safety footwear.
Respiratory protection and high-visibility clothing are advised when working in confined or noisy environments.
Tools, Materials, and Checklist
A concise list of essential installation tools, from adjustable wrenches to flaring tools and a gas leak detector, sets the foundation for a safe job.
Equally important are consumables and spare parts—pipe sealant, flexible connectors, pressure relief valves, and correctly sized fittings—that should be ordered before work begins.
A pre-installation site checklist covering ventilation, clearances, gas supply isolation, and structural support confirms readiness and prevents delays.
Essential tools for installation
Proper preparation begins with assembling the specific tools and materials required for a safe, code-compliant gas boiler installation.
A concise kit guarantees efficiency and safety.
- Adjustable wrenches, pipe cutters, thread sealant, flaring tools, and leak detector.
- Multimeter, insulated screwdrivers, voltage tester, and clamp meter.
- Spirit level, torque wrench, mounting hardware, and personal protective equipment.
Consumables and parts to order beforehand
One should order a precise list of consumables and replacement parts before beginning a gas boiler installation to prevent delays and guarantee code compliance.
Suppliers, model specifics, and local codes determine quantities.
Typical orders include:
- Seals, gaskets, and flexible connectors.
- Flue components, isolation valves, and pressure relief valve.
- Copper pipe, fittings, flux, thread sealant, and spare sensors.
Pre-installation site checklist
Before work begins, the installation area must be assessed and prepared to guarantee safety, accessibility, and code compliance.
Necessary tools, materials, permits, and clearances are confirmed. Ventilation, gas shutoff, and electrical supply are verified; floor and wall supports checked.
A waste plan is established.
Checklist items:
- Tools and PPE
- Gas, water, electrical access
- Venting, clearances, permits
Preparing the Installation Site
Before any work begins, the installer isolates gas and electrical supplies and drains the existing system to allow safe removal of the old boiler.
Gas lines and fittings are inspected and pressure-tested for leaks prior to connection.
The proposed flue route and room ventilation are checked and prepared to meet clearance and combustion air requirements.
Isolating gas and electrical supplies
Several essential steps guarantee safe isolation of gas and electrical supplies prior to boiler work.
A qualified engineer locates and shuts the gas isolation valve, confirms supply is off with a calibrated gas detector, and tags the valve.
For electricity, the mains isolator and relevant circuit breakers are switched off and locked out.
Verification with a voltage tester and clear labeling complete isolation.
Draining the existing system and removing old boiler
Drain the heating system methodically and remove the old boiler only after isolation has been confirmed and all necessary permits are in place.
Depressurize radiators, open drain valves, and collect coolant into approved containers for disposal.
Disconnect water, condensate and electrical connections per safety protocol.
Support and unbolt the unit, remove flue components, and clear the area for inspection and new boiler siting.
Inspecting and testing gas lines and fittings
With the old boiler removed and the area cleared, inspection of the gas supply becomes the immediate priority.
A qualified technician checks pipe condition, supports, joints and shutoff valve accessibility. All fittings are examined for corrosion, damage or incorrect materials.
Pressure testing with approved equipment and gas-tightness checks follow. Any defects are repaired or replaced before proceeding, and records are documented.
Preparing flue route and ventilation
Before any components are fitted, the flue route and ventilation layout must be surveyed and verified to meet clearance, combustion-air, and termination requirements.
The installer assesses rigid or flexible flue paths, checks structural penetrations, seals joints, and guarantees adequate fresh-air supply and room ventilation.
External termination locations are confirmed to prevent exhaust recirculation and comply with local codes and manufacturer specifications.
Step-by-Step Boiler Installation Process
The installation proceeds through a sequence of precise actions beginning with correctly positioning and mounting the boiler.
Technicians then make safe connections to the water and central heating loop, attach the gas supply with an isolation valve, and fit the flue and condensate drain.
Finally, controls, thermostats, and the programmer are installed and configured before testing and commissioning.
Positioning and mounting the boiler
Choose a location that balances accessibility, ventilation, and proximity to existing pipework and flues to minimize routing and heat loss.
Ascertain wall strength and clearances meet manufacturer specifications.
Position for safe condensate and flue termination, avoiding combustible materials.
Use appropriate mounting brackets, level the unit, and secure fixings with corrosion-resistant anchors.
Verify access for future servicing and compliance with local regulations.
Connecting water supply and central heating loop
With the boiler secured and clearances verified, attention turns to connecting the potable water feed and the central heating loop.
The potable inlet requires a filtered, pressurised supply with a shutoff valve and backflow prevention.
Attach insulated flow and return pipes, observing correct orientation and gradient.
Fit expansion vessel connections, bleed valves and pressure gauges.
Test for leaks and purge air before commissioning.
Connecting the gas supply and installing isolation valve
Begin by isolating the gas meter and verifying the supply is depressurised before any fittings are disturbed.
A qualified engineer connects the gas pipework using appropriate materials, tightening joints to manufacturer torque.
An accessible isolation valve is fitted upstream for maintenance.
All joints are leak-tested with approved methods, pipe supports installed, and the supply pressure confirmed to match boiler requirements before commissioning.
Installing and routing flue and condensate drain
After the gas supply is secured and tested, attention moves to routing the flue and condensate drain to guarantee safe exhaust removal and condensate disposal.
The installer positions the flue with correct fall and seals, following manufacturer clearances and local regulations.
Condensate pipework must slope to the drain, use correct materials and traps, and be frost-protected and accessible for inspection and maintenance.
Installing controls, thermostats, and programmer
Installers now connect the boiler to its controls, thermostats, and programmer, ensuring the system responds correctly to user settings and safety inputs.
They mount devices in accessible positions, run low-voltage wiring per manufacturer diagrams, and link room and cylinder thermostats.
Commissioning includes configuring schedules, temperature limits, and frost protection, then testing inputs, outputs, and lockout behaviors before sealing connections and documenting settings for the homeowner.
Pressureing and filling the system, bleeding radiators
With controls configured and thermostats tested, attention shifts to pressurising and filling the heating circuit to prepare for commissioning.
The installer opens the filling loop, monitors the system pressure to manufacturer specification (typically 1–1.5 bar cold), checks for leaks, then isolates and secures the loop.
Each radiator is bled systematically until steady water flows and air is expelled, confirming stable pressure and proper circulation.
Electrical connections and bonding
Proceed to the boiler’s electrical connections and bonding, guaranteeing all live work is carried out only after isolation and verification of dead supply.
Connect mains and controls per manufacturer wiring diagram, observe correct polarity and Earth conductor sizing.
Install a dedicated fused spur if required.
Verify equipotential bonding to nearby metalwork, tidy cable routes, secure connections, and test continuity and insulation before restoring supply.
Initial gas leak test and purging air from system
Begin by isolating the gas supply and performing a controlled pressure test to detect any leaks at joints, fittings, and the appliance inlet using an approved leak-detection fluid or electronic gas detector.
After verifying integrity, purge trapped air from the boiler and heating circuit via manufacturer-specified bleed valves and purge points, venting to safe discharge.
Recheck pressure and seals before commissioning.
Commissioning and First Start-Up
The commissioning and first start-up require a strict checklist to confirm safe operation before leaving the site.
Technicians must verify flame stability, measure combustion efficiency and CO levels, and set system pressures and temperatures to manufacturer specifications.
Finally, the installer should complete any required registration or notification with local authorities.
Commissioning checklist for safe start-up
A concise commissioning checklist guarantees each safety-critical step is verified before a gas boiler is energised and lit.
It affirms system integrity, correct settings, and documented approvals prior to ignition.
- Verify gas supply isolation, pipework tightness, and correct connections.
- Confirm electrical isolation, earthing, and control wiring.
- Check water fill, pressure, venting, safety valve operation, and accessible documentation.
Testing flame, CO levels, and combustion efficiency
Start combustion tests only after all pre-start checks are complete and written approvals obtained.
A qualified technician observes ignition, stable flame pattern and correct burner operation. Measure carbon monoxide at appliance and ambient locations, ensuring concentrations remain well below safety limits.
Conduct combustion analysis—oxygen, CO2, and stack temperature—to verify efficiency and proper air/gas ratios. Record results, adjust combustion settings, and certify safe operation.
Setting system pressures and temperatures
Begin by bringing the boiler and system up to their designated commissioning conditions: verify cold-fill pressure, set expansion vessel pre-charge, and confirm boiler control parameters before introducing heat.
Gradually increase temperature while monitoring system pressure, bleed radiators, and check for stable readings.
Adjust filling loop to maintain operating pressure, verify safety and relief valve operation, and document final pressures and temperature setpoints.
Registering the installation with authorities (where required)
When local regulations require notification, the installer must register the completed boiler installation with the appropriate authority promptly after commissioning.
Documentation should include installation details, safety checks, test results, serial numbers, and the installer’s credentials.
Timely registration guarantees compliance, validates warranties, and permits safe operation.
Homeowners should retain copies and confirm registration status to avoid fines and verify official records are accurate.
Common Problems and Troubleshooting After Installation
After commissioning, the installer or homeowner should systematically address common issues such as no heat or hot water with basic diagnostic steps, low system pressure, visible leaks, and unusual noises.
Attention must also be given to poor performance or frequent cycling to identify airflow, pump, or control faults.
Any detection of gas smells or activation of carbon monoxide alarms requires immediate evacuation and contacting qualified emergency services.
No heat or hot water diagnostic steps
Troubleshooting no heat or hot water starts with a systematic check of the boiler and system controls to isolate common faults such as power loss, thermostat settings, low pressure, or airlocks.
Next, confirm the boiler display and reset history, guarantee timers and zone valves operate, verify the pilot/ignition sequence, and inspect condensate drain and pressure gauge for anomalies.
Document observations for technician handover.
Low pressure, leaks, and unusual noises
A sudden drop in boiler pressure, visible leaks, or unfamiliar clanking and kettling noises are common indicators that a recently installed system requires attention.
Inspect visible joints, valves and condensate pipe for drips. Check the pressure gauge and top up per manufacturer instructions if low.
Investigate trapped air via bleeding radiators. If leaks, persistent noise, or pressure loss continue, isolate the unit and contact a Gas Safe–registered engineer.
Poor performance or frequent cycling
Detecting poor heating performance or frequent on/off cycling often signals issues with system balance, control settings, or component faults rather than the installation itself.
Troubleshooting should include checking thermostat placement and programming, verifying pump operation and flow rates, inspecting diverter/zone valves, and confirming correct boiler modulation and sensor function.
If adjustments don’t resolve cycling, consult a qualified technician for diagnostic testing and component replacement.
Detecting and responding to gas smells or CO alarms
Recognize gas odors or a triggered carbon monoxide (CO) alarm as urgent safety hazards that require immediate action: evacuate occupants and pets from the premises, avoid using electrical switches, open windows and doors if it can be done without delaying evacuation, and call the gas emergency number and emergency services from a safe location.
Once authorities declare the area safe, arrange inspection and repair by a qualified gas-safe/certified technician before reoccupying or operating the boiler.
Afterward, document incidents, replace faulty detectors, test ventilation, and schedule routine servicing to prevent recurrence.
Maintenance and Care to Keep the Boiler Safe
Routine visual inspections and basic tests that a homeowner can perform help catch leaks, pressure drops, and unusual noises early.
Regular professional servicing—typically annually, with more frequent checks for older systems—ensures safe combustion, proper venting, and efficient operation.
Before winter or extended shutdowns, specific steps such as draining vulnerable components, protecting exposed pipes, and following manufacturer storage guidance reduce freeze and corrosion risks.
Routine checks homeowners should perform
A few simple checks performed monthly can keep a gas boiler running safely and prevent costly breakdowns.
Homeowners should observe, record, and act on basic indicators to maintain safe operation.
- Check for leaks, corrosion, and clear flue paths.
- Verify pressure and thermostat responsiveness.
- Listen for unusual noises; inspect pilot/ignition and vent seals.
Recommended professional service intervals
Annual inspections by a qualified heating engineer are recommended to guarantee a gas boiler remains safe and efficient; more frequent checks may be necessary for older systems or properties with high usage.
Routine servicing usually occurs annually, with thorough safety checks, flue and combustion testing, pressure and leak inspections, and component cleaning.
Follow manufacturer and warranty service intervals and retain service records for safety and compliance.
Winterizing and long-term storage precautions
Preparation for winterizing and long-term storage protects the boiler from freeze damage, corrosion, and mechanical deterioration when it will be idle for extended periods.
Drain water, flush system, and add manufacturer-approved antifreeze.
Isolate and disconnect fuel and electrical supplies, ventilate per guidelines, and seal openings.
Apply corrosion inhibitors, inspect seals, and document conditions.
Schedule post-storage professional inspection before reactivation.
Cost, Timeframe, and Choosing the Right Installer
A clear overview of typical installation costs — including equipment, labor, permits, and any required pipework or flue modifications — helps homeowners budget accurately.
The expected timeline from initial assessment through installation and commissioning is outlined so readers know what to expect and when the system will be fully operational.
Practical guidance on questions to ask potential installers and red flags to watch for supports selection of a qualified, safe professional.
Typical installation cost breakdown
Several factors determine the typical cost and timeframe of a gas boiler installation, including boiler type and output, complexity of pipework, flue and ventilation requirements, necessary safety upgrades, and local labor rates; together these influence both the final price and the expected duration, while installer selection affects warranty validity, compliance, and long-term performance.
| Item | Typical range |
|---|---|
| Boiler unit | £700–£3,000 |
| Labor | £400–£1,500 |
| Materials | £100–£500 |
| Safety upgrades | £150–£1,000 |
| Total estimate | £1,350–£6,000 |
Expected timeline from assessment to commissioning
One clear timeline from initial assessment to final commissioning typically spans one to three weeks for straightforward replacements, extending to several weeks for complex installs that require permits, structural work, or major pipe rerouting.
Initial survey and quote: 1–3 days.
Permit processing: days to weeks.
Equipment delivery and installation: 1–5 days.
Commissioning and safety checks: 1 day.
Contingencies add time.
Questions to ask potential installers and red flags
Why ask targeted questions before hiring an installer? A homeowner learns to verify cost transparency, schedule realism, credentials, and warranties.
Ask:
- What is the full price breakdown and payment schedule?
- What is the expected start-to-finish timeframe and contingency plan?
- Are you certified, insured, and can you provide references and a written warranty?
Watch for vague answers, high upfront demands, or no proof of credentials.
Energy Efficiency and Long-Term Considerations
Selecting a high-efficiency boiler and smart controls reduces fuel use and long-term operating costs.
Proper insulation, upgraded controls, and targeted system improvements further improve performance and comfort.
Responsible recycling and correct disposal of old boilers and components minimize environmental impact and may recover value.
Choosing an efficient boiler and controls
Because fuel costs and maintenance add up over a boiler’s lifetime, choosing a high-efficiency unit and appropriate controls is essential for reducing operating expenses and environmental impact.
Homeowners should prioritize modulating condensing boilers with high AFUE ratings, compatible smart thermostats, and zoning capability.
Evaluate reputable brands, certified installers, and warranty terms.
Balance initial cost against projected fuel savings and maintenance requirements for long-term value.
Insulation, controls, and system upgrades to save energy
Several straightforward upgrades can greatly reduce heat loss and energy consumption across a heating system.
Insulating pipework, tank and loft spaces minimizes distribution losses.
Upgrading to thermostatic radiator valves, smart thermostats and weather-compensating controls improves zoning and prevents overheating.
Adding a magnetic filter and balancing radiators enhances efficiency and longevity.
Regular commissioning and scheduled servicing guarantee continued peak performance and savings.
Recycling and disposal of old boilers and parts
Dispose of an old boiler and its components responsibly to prevent environmental harm and comply with local regulations.
Homeowners should drain fluids, disconnect gas and electrical supplies, then arrange certified removal via accredited waste contractors.
Metals, copper, and recyclable parts should be separated for scrap; hazardous materials—insulation, PCB-containing components, refrigerants—require licensed disposal.
Retain receipts and notify local authority if regulations mandate reporting.
Safety Resources and Emergency Contacts
The section outlines immediate actions to take in a gas emergency, including evacuation, shutting off the gas supply if safe, and contacting emergency services.
It also lists useful contacts such as local gas emergency numbers, licensed installers, and regional utilities.
Finally, it provides key certification bodies and regulatory authorities by country to help verify qualified professionals.
What to do in a gas emergency
In any suspected gas emergency, occupants should evacuate the premises immediately, avoiding any action that could create a spark.
Once safely away, the following steps should be followed:
- Call the gas emergency number from a safe location and report the leak.
- Do not re-enter the building until cleared by emergency services.
- Seek medical attention for symptoms like dizziness or nausea.
Useful contacts and certification bodies by country
After evacuating and notifying emergency services, occupants should keep a list of national and local contacts for follow-up, including gas suppliers, emergency numbers, and certified installers. Contacts should list emergency hotlines, gas companies, and recognized certification bodies by country for verification and follow-up.
| Country | Certification body |
|---|---|
| UK | Gas Safe Register |
| US | NATE / local utility |
Conclusion
A homeowner’s new boiler stands like a steady lighthouse at dusk—its pipes the careful veins, its pilot light a vigilant ember. When legal checks and safety routines are upheld, the machine becomes more than metal: a promise of warmth and quiet assurance. Regular maintenance is the keeper trimming the sail; professional installation is the charted map. Together they turn a potentially risky spark into a reliable hearth, guiding the household through cold nights.