How to Replace Toilet Chain in 5 Easy Steps (No Plumber Needed)
To replace a toilet chain easily without a plumber, follow these five straightforward steps: shut off the water supply, drain the toilet tank, remove the lid, detach the old chain and flapper, and then attach a new chain with slight slack. Make sure to test flush and adjust the tension as needed. Use pliers and a replacement flapper if necessary. This ensures a proper fit, preventing issues like running toilets or weak flushes. Continue reading for detailed step-by-step instructions and troubleshooting tips.
What a Toilet Chain Does and Why It Might Need Replacing
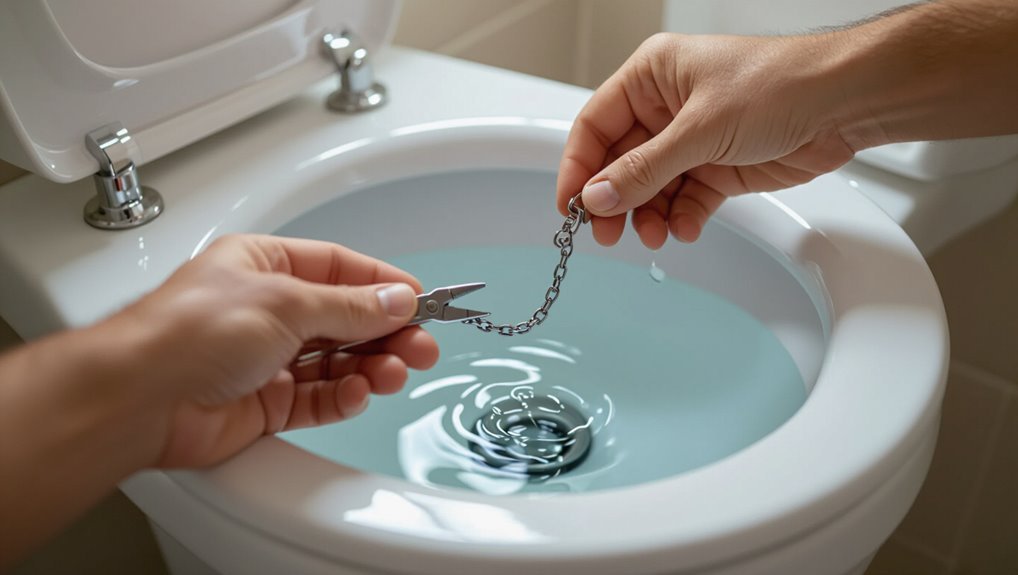
The toilet chain links the handle to the flapper so that lifting the handle raises the flapper and allows the tank to empty.
Common signs the chain needs replacement include slipping off, breaking, rusting, or being too long or too short to operate the flapper properly.
A damaged or improperly sized chain can cause weak flushes, continuous running, or water waste.
How the flapper, lift chain, and handle work together
Several simple parts inside a toilet tank—flapper, lift chain, and handle—work together to control flushing: the handle pivots when pressed, pulling the lift chain and raising the flapper to release water into the bowl.
Releasing the handle allows the flapper to reseal as the tank refills. Understanding this linkage is essential when learning how to replace toilet chain safely and effectively.
Common signs your toilet chain needs replacement
Many toilet chains show clear signs before failing, indicating when replacement is needed. Common indicators include a chain that slips off the flapper, rusted or corroded links, frequent detachment, stretched or kinked sections, inconsistent flushing, or a handle that feels loose or unresponsive.
Visible wear, broken links, or difficulty achieving full lift warrant timely replacement to restore reliable operation.
Risks of a damaged or improper chain length
A damaged or improperly adjusted toilet chain can prevent the flapper from sealing or lifting correctly, causing weak flushes, continuous running water, or complete failure to flush.
Consequences include higher water bills, wasted water, mineral buildup, potential tank overflow, and accelerated wear on the fill valve.
Ignoring chain issues risks costly repairs and sanitation problems; timely adjustment or replacement restores efficient operation.
Quick Answer: Replacing a Toilet Chain in 5 Easy Steps
The five-step process is outlined as: shut off water and empty the tank, remove the old chain, attach and adjust the new chain, test the flush, and trim any excess.
This task typically takes 10–20 minutes and requires only basic hand tools and minimal DIY experience.
The instructions that follow assume a novice can complete the repair with simple guidance.
Overview of the five steps
Five concise steps outline the process for replacing a toilet chain:
- Shut off and drain the tank.
- Remove the old chain and assess parts.
- Attach the new chain to the flush lever and flapper.
- Adjust chain length for proper travel.
- Test the flush for smooth operation.
Each step focuses on safety, correct connections, suitable parts, proper slack to avoid binding, and a final functional check.
Typical time required and skill level
Frequently, this simple repair takes about 10–30 minutes for someone with basic DIY experience: shutting off and draining the tank, swapping the chain, adjusting slack, and testing can be completed quickly if parts are accessible.
No special tools are required; basic mechanical aptitude suffices. Less experienced users may need 30–60 minutes.
Complicated setups or corroded parts can extend time and may warrant professional help.
Tools and Materials You’ll Need
The section lists the essential tools and replacement parts required for a toilet chain swap, including pliers, a new chain or lift wire, and replacement clips.
It also notes optional items that can simplify the task, such as adjustable wrenches, a flashlight, or needle-nose pliers.
The aim is to prepare the reader with the right supplies before beginning the repair.
List of essential tools and parts
A clear list of tools and parts helps confirm the toilet chain replacement goes smoothly and avoids mid-job trips to the store.
The following essentials enable a straightforward swap and secure reattachment without extra purchases. Proper selection guarantees fit and function for common tank mechanisms.
- New toilet chain or lift wire sized to the flapper
- Adjustable pliers
- Replacement flapper compatible with the tank
Optional tools that make the job easier
Consider adding a few optional tools to streamline the replacement: a small flashlight for better visibility inside the tank, needle-nose pliers for fine adjustments, a basin wrench for tight bolts, a utility knife to trim excess chain or lift wire, and silicone grease to ease reassembly of rubber parts.
A small magnetic pickup retrieves dropped screws, a towel protects porcelain, and a spare clip prevents delays.
Step 1 Turn Off Water and Prepare the Toilet
The homeowner first locates and turns the shutoff valve at the base of the toilet clockwise until water flow stops.
Before opening the tank, the area around the toilet is cleared of toiletries and a towel or mat is placed under the tank to protect surfaces and catch drips.
A quick flush confirms the water is off and the tank is partially emptied for safer access.
How to shut off the water supply safely
Before any repairs begin, locate and close the toilet’s shutoff valve to stop water flow and prevent accidental flooding.
Confirm closure by gently turning the toilet handle until no water enters the bowl. If no external valve exists, shut off the home’s main water supply.
Keep a towel nearby for residual drips and wear gloves to avoid contact with tank water.
Tips for clearing the tank area and protecting surfaces
With the shutoff valve closed and the handle gently turned to relieve incoming water, attention shifts to clearing and protecting the area around the tank.
Remove toiletries, lids, and loose items.
Lay down absorbent towels or a waterproof mat to catch drips.
Use painter’s tape to secure edges and protect nearby surfaces.
Keep a bucket and sponge handy for quick cleanup.
Step 2 Remove the Tank Lid and Inspect the Old Chain
The tank lid is lifted straight up with both hands and set on a flat, protected surface to prevent chips or cracks.
Once removed, the chain should be inspected for fraying, stiff rust, or corrosion.
Also check that the chain connects at the correct lift hook and is not twisted, too long, or caught on other components.
How to lift and set the lid safely
Lift the tank lid straight up using both hands, placing one near the front and one near the back to keep it balanced.
Move slowly to avoid tipping.
Set the lid on a soft, flat surface nearby or lean it against a wall padded with a towel.
Confirm the lid is stable and out of the work area to prevent chips, cracks, or accidental knocks.
What to look for: chain wear, rust, incorrect attachment points
A quick visual inspection reveals whether the chain is serviceable: look for stiff links, rust spots, fraying where the chain rubs against the flush lever, or stretched sections that no longer sit taut.
Check attachment points—hooked loop, clip, or ring—for wear or improper positioning causing snagging.
Note corrosion near the flapper and any kinked links; these indicate replacement is needed.
Step 3 Detach the Old Chain and Choose the Correct Replacement
The old chain is unhooked by detaching its clip from the handle lever and unfastening the hook or clip on the flapper.
Attention should be given to chain type (metal link, ball chain, or nylon) and correct length—short chains can hold the flapper open, long chains can prevent a proper seal.
The appropriate replacement is chosen based on compatibility with the flapper and handle, matching length or using an adjustable assembly when needed.
How to unhook the chain from the flapper and handle
Begin by tracing the chain from the handle lever down to the flapper to identify its attachment points before unhooking.
Using pliers or fingers, unhook the chain from the handle catch, then detach it from the flapper ring or clip.
Remove any rusted split rings. Inspect hooks for wear.
Keep removed connectors for reference when selecting a replacement, noting attachment styles.
Differences between chain types and length considerations
Choices among toilet chains and correct length matter because they directly affect flush reliability and flapper seating.
Metal link, nylon, and coated chains differ in durability, corrosion resistance, and noise. Length should allow slight slack so the flapper seals fully but lift easily when the handle is pressed.
Excess slack or too-short chains cause leaks or incomplete flushes; adjust accordingly.
How to select the right replacement chain or flapper-assembly
Once the old chain is detached, inspect the tank hardware and flapper to determine whether a simple chain replacement or a complete flapper-and-chain assembly is required.
Measure chain length from handle lever to flapper eye, note clip or hook connectors, and check flapper type (rubber, molded, or universal).
Choose matching material and length; replace flapper with assembly if warped, cracked, or mismatched for reliable seal.
Step 4 Install the New Chain and Adjust Length
The new chain is hooked onto the flapper eye and the handle lever, ensuring secure clips or twists at both ends.
Length is set so the chain has about 1/2 to 1 inch of slack when the flapper is seated, measured with the flapper closed to prevent tension.
Adjustments are made by repositioning the clip or using spare links until the flapper opens fully without binding or catching on the tank components.
How to attach the chain to the flapper and handle lever
Attach the new chain by first hooking one end to the flapper’s eyelet, then link the other end to the handle lever’s hole or clip; this establishes the basic connection before any length adjustments.
Ascertain clips face away from moving parts and secure any excess links with a small twist or secondary clip to prevent tangling.
Verify the flapper lifts freely without binding.
Proper chain length: measuring and ideal slack
With the chain hooked to both the flapper and the handle lever, attention turns to setting the correct length so the flapper seals fully but lifts without excess tension.
Measure slack so the flapper rests flat on the seat and allows a full lift when the handle is pressed. Ideal slack is about 1/2 to 1 inch of loose chain at rest.
Common adjustment methods and avoiding binding
Check the chain for smooth movement before finalizing its length, and use simple adjustments to prevent binding.
The technician shortens by relocating the clip on chain links or lengthens by adding a small connector.
Verify the chain clears the overflow tube and lift arm without rubbing.
Test multiple flushes, tweak clip position incrementally, and secure excess slack to avoid catching or snagging during operation.
Step 5 Test the Flush and Final Adjustments
The tank should be cycled several times to verify the flapper seals properly and the bowl flushes with one full handle pull.
If the flush is weak, runs, or the flapper sticks, common fixes include shortening or lengthening the chain, repositioning the flapper, or replacing a worn seal.
Finally, fittings and connections should be rechecked and tightened as needed after a few uses to confirm the repair holds.
How to cycle the tank and check for proper seal and flush
Cycle the tank several times to verify the flapper seats correctly and the chain length allows a full flush without dragging on the bowl or preventing a seal.
Observe refill valve shutoff, listen for continuous flow, and watch for low-water overflows.
Adjust chain slack or hook position if lift is insufficient.
Confirm each flush clears waste and the flapper reseals promptly between cycles.
Troubleshooting common issues after replacement
After testing the new chain and flapper, inspect for common problems that affect sealing and flush performance.
Confirm the chain has slight slack—too tight keeps the flapper open; too long causes failure to lift.
Check flapper seating for warped or debris-coated surfaces and clear buildup.
Verify the flush lever moves freely and that the flapper returns fully when water pressure stabilizes.
When to recheck or tighten connections
When should connections be rechecked or tightened during the final flush test? The installer observes for slow fill, weak flush, leaks, or chain slipping.
If the flapper lifts incompletely, adjust chain length; if water trickles or fittings weep, tighten nuts or replace washers.
Reinspect after several flushes and a few hours of normal use to confirm seals remain secure.
Troubleshooting and When to Replace More than the Chain
If the flapper fails to seal or the handle feels loose or corroded, the flapper or handle should be replaced rather than just the chain.
Persistent leaks, constant refilling, or visible tank cracks point to a faulty fill/flush valve or structural tank issues that require larger repairs.
Distinguishing quick temporary fixes from necessary permanent replacements helps prevent repeated problems and wasted effort.
Signs the flapper or handle needs replacement
A few clear indicators show that the problem extends beyond a stretched or broken chain: a flapper that won’t seal, a handle that feels loose or sticks, repeated phantom flushing, or water continuously running into the bowl.
Detached observation suggests replacement when wear, corrosion, or misalignment cause persistent leaks, sluggish operation, or visible deterioration.
- Worn flapper edges or calcium buildup
- Loose, bent, or corroded handle lever
- Flapper fails to reseat after flush
Problems that indicate a larger valve or tank repair
How can one tell that a toilet problem goes beyond a simple chain replacement?
Persistent running after flapper seating, continuous water flow into the bowl, visible tank cracks, mineral-clogged or warped fill valves, and repeated flapper failures suggest deeper valve or tank issues.
Unusual noises, slow refill, or water level instability indicate internal component wear or damage requiring valve or tank repair rather than chain replacement.
Temporary fixes vs. permanent repairs
When signs point beyond a stretched or broken chain—such as persistent running after the flapper seats, slow refills, or visible tank damage—it’s important to distinguish short-term workarounds from lasting fixes.
Temporary fixes—kinking, adjusted chain length, or sealant—buy time but may fail.
Permanent repairs replace flapper, fill valve, or entire tank assembly, restoring reliability and preventing water waste; opt for permanent when problems recur or components show wear.
Maintenance Tips to Prevent Future Chain Problems
A regular inspection schedule—such as a quick monthly check of chain tension and connections—helps catch wear before it causes failure.
Simple care tips, like keeping the chain free of mineral buildup and avoiding overtightening, will extend component life.
Following a few routine checks and light maintenance can greatly reduce future chain problems.
Recommended inspection schedule
Why inspect the toilet chain on a regular timetable? Regular inspections deter failures, detect wear, and identify misalignment before leaks or continuous running occur.
Inspect monthly in high-use bathrooms and every three months in low-use areas. Include visual checks of chain length, clip condition, and attachment points.
Document findings and replace components showing corrosion, fraying, or slack beyond acceptable limits.
Simple care tips to extend component life
Moving from scheduled inspections to routine care, simple maintenance steps can greatly prolong the life of the toilet chain and related hardware.
Regularly clean the tank interior to remove mineral buildup, rinse or replace corroded clips, and adjust chain slack for smooth operation.
Lubricate pivot points sparingly with plumber-approved lubricant and check for frayed links.
Promptly replace worn parts to prevent failures.
Estimated Cost and When to Call a Plumber
Typical replacement parts such as chains, clips, and flappers usually cost under $10 to $20, allowing homeowners to save by doing the repair themselves.
However, persistent leaks, damaged flush valves, or uncertain adjustments that affect tank operation are situations where professional diagnosis and repair are recommended.
Calling a plumber is also advised when multiple components fail or when water damage or sewer odors are present.
Typical part costs and DIY savings
A basic toilet chain and flapper kit commonly costs between $5 and $15, while higher-quality or specialty replacement parts run $20 to $40. Typical DIY savings versus hiring a plumber often equal $50–$150, depending on labor rates and trip fees. Parts are inexpensive; time and basic tools are the main investment.
| Item | Typical Cost |
|---|---|
| Chain & Flapper | $5–$15 |
| Premium parts | $20–$40 |
| Tools | $0–$20 |
| Savings | $50–$150 |
Scenarios that warrant professional help
When recurring flushing problems, persistent leaks, damaged tank components, or unclear causes are present, homeowners should consider calling a plumber rather than attempting further DIY fixes.
Professional assessment is advised if the fill valve, flush valve, or tank cracks are involved, water damage appears, or repeated repairs fail.
Expect labor plus parts costs; emergency visits and complex valve replacements increase total expense.
Common Mistakes to Avoid
The following section outlines common mistakes to avoid when replacing a toilet chain.
It highlights problems such as over-tightening or leaving too much slack, installing incompatible parts, and ignoring early signs of tank corrosion.
Recognizing these issues helps guarantee a reliable and long-lasting repair.
Over-tightening or too much slack
Over-tightening or leaving the chain too slack both impair flush performance and accelerate wear.
If too tight, the flapper cannot seal properly and may stay partially open; if too loose, the flapper won’t lift fully, causing weak flushes.
Adjust to allow slight slack—enough for full lift without tension.
Recheck after several flushes to confirm consistent, reliable operation.
Using incompatible parts
Choose compatible replacement parts to avoid performance issues and wasted time.
Using mismatched chains, connectors, or hooks can cause slipping, binding, or premature failure. Parts must match length, clip style, and material; universal-looking pieces may not seat properly.
Confirm fit with the flapper and lever before installation. Incorrect choices lead to repeated adjustments and potential water waste.
Ignoring signs of tank corrosion
Rust spots and mineral crust around bolts or the overflow tube are clear early warnings that a tank is deteriorating; ignoring them risks sudden leaks, part failures, and costly water damage.
Homeowners should inspect for pitting, flaking paint, or softened plastic.
Replacing corroded tanks or fittings promptly prevents chain misalignment and repeated repairs, ensuring reliable flush mechanics and avoiding emergency replacements.
Quick Reference Checklist
A concise checklist outlines the step-by-step process for replacing the toilet chain, from shutting off the water to testing the flush.
A separate parts-and-tools list specifies chain options, connectors, pliers, and any replacement clips to simplify ordering.
The checklist is presented for quick reference during the repair.
Step-by-step checklist for replacing a toilet chain
Several clear steps guide replacing a toilet chain to restore reliable flushing: gather tools, shut off water, drain the tank, remove the old chain and lift, attach the correct-length replacement, test the lift mechanism and flush, then adjust tension and trim excess.
The checklist follows logically to prevent leaks or misalignment and guarantees smooth operation after reassembly.
- Confirm chain length and clip placement
- Verify lift arm movement
- Recheck flapper seal and perform final flush
Parts and tools checklist for store or online ordering
After confirming chain length, clip placement, and flapper seal from the prior checklist, assemble a compact shopping list to guarantee the repair proceeds without delays.
The list prioritizes compatibility, durability, and simple installation. Include measurements and model notes for online orders, and pack basic spares for on-the-spot adjustments.
- Replacement chain (adjustable length)
- Flapper compatible with tank model
- Float clip and small pliers
Conclusion
In the end, the toilet chain—hero of porcelain dramas—receives a dignified replacement without summoned plumbers or melodrama. One snug clip, a polite knot, and the flapper performs like a rehabilitated vaudevillian; water bows, tank applauds. Household triumphs accrue: pride, slightly damp fingers, and the faint scent of victory (and bleach). Life resumes its quiet plumbing choreography, with one less household mystery reserved for soap-opera repairs.