How to Replace a Blanco Faucet Cartridge: Step-by-Step Guide for DIY Repairs
To replace a Blanco faucet cartridge, first, shut off the water supply. If your faucet is leaking, stiff, or mixing water erratically, it’s time for a replacement. Begin by removing the handle and decorative parts. Next, unclip or unscrew the cartridge retainer to extract the old cartridge. Before inserting the new one, compare and lubricate the seals, and clean the inlet screens. Align the new cartridge with the marks, secure it, and reassemble the faucet. Finally, restore the water supply slowly, check for leaks, and ensure everything operates correctly. For ongoing performance, follow simple maintenance steps as needed.
What a Blanco Faucet Cartridge Is and When It Needs Replacing
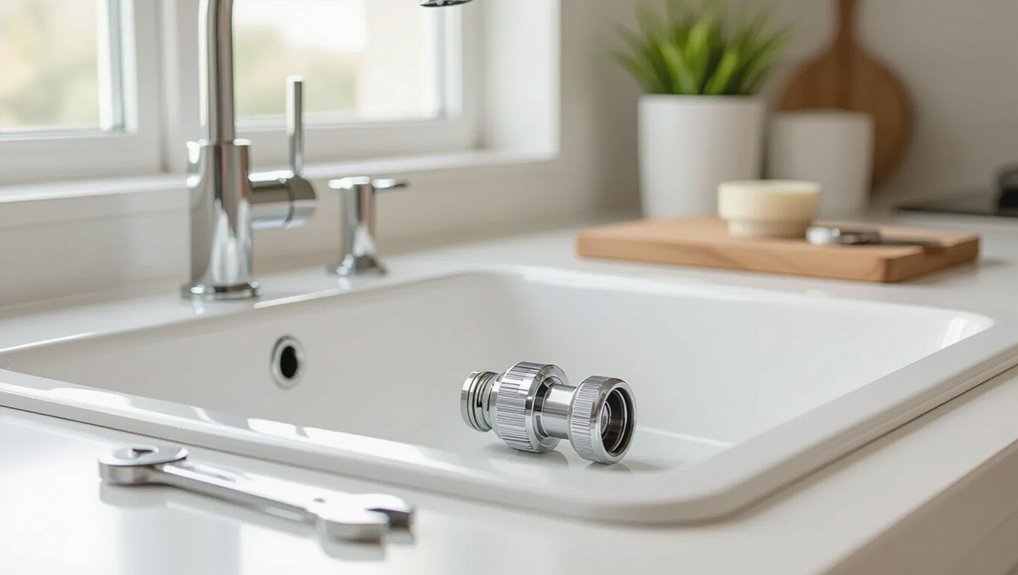
A Blanco faucet cartridge controls water flow and temperature in single-handle models by regulating internal passages and seals.
Typical signs of cartridge failure include persistent leaks, reduced water flow, or a stiff, difficult-to-move handle.
To confirm the cartridge is at fault, one checks supply lines, aerator and valve stems, and isolates the cartridge by shutting off water and testing operation after removal.
Function of the cartridge in Blanco single-handle faucets
The cartridge in a Blanco single-handle faucet controls water flow and mix by regulating the passage between hot and cold supply lines and sealing the valve when the handle is at rest.
It houses ceramic or rubber seals and a spindle that translates handle movement into proportional flow.
Understanding this mechanism helps diagnose issues and informs how to replace Blanco faucet cartridge correctly and efficiently.
Common signs the cartridge is failing (leaks, low flow, stiffness)
Several clear symptoms indicate a failing Blanco faucet cartridge: visible leaks around the spout or base, reduced water pressure despite fully open handle, erratic temperature mixing, and increasing stiffness or roughness when operating the handle.
Other signs include intermittent drips after shutoff, noisy operation or grinding, and sudden loss of smooth rotational movement.
Prompt attention prevents further damage and water waste.
How to confirm the cartridge is the problem vs. other parts
How can one tell whether a Blanco faucet’s cartridge is at fault rather than another component?
Inspect for persistent drips with the handle centered, uneven hot/cold control, or stiff movement—signs pointing to the cartridge.
Isolate supply lines and test water pressure to rule out valves or aerator clogs.
Remove and visually examine the cartridge for wear, mineral buildup, or damaged seals to confirm replacement is necessary.
Tools, Parts, and Safety Preparations
The section lists the essential and optional tools needed for a cartridge replacement, from adjustable wrenches and Allen keys to cartridge pullers and plumber’s grease.
It explains how to identify the Blanco faucet model and verify the correct replacement cartridge by checking model stamping, serial numbers, or online parts guides.
It also covers safety and workspace setup, including shutting off the water, protecting the sink and finishes with towels or tape, and clearing the area for parts and runoff.
Required tools and optional helpful tools
Begin by gathering the tools and parts needed for the job to guarantee work proceeds efficiently and safely.
Required: adjustable wrench, allen keys or screwdriver (handle set screw), replacement Blanco cartridge, plumber’s grease or O-rings.
Optional: basin wrench, small flashlight, needle-nose pliers, silicone sealant for reassembly.
Follow manufacturer torque guidance and keep a tray for small parts.
How to identify your Blanco faucet model and correct cartridge part number
Which Blanco model is installed will determine the exact cartridge needed; identify it before disassembly to avoid mismatches.
Examine faucet branding, model number on underside or escutcheon, and measure cartridge dimensions if visible. Photograph the faucet and existing cartridge.
Consult Blanco manuals or their parts lookup online using model or serial.
Cross-reference OEM part numbers and approved aftermarket equivalents before ordering.
Safety and workspace setup: water shutoff, protecting sink and finishes
After confirming the Blanco model and cartridge part, attention shifts to preparing the work area and ensuring safety before any disassembly.
Shut off both hot and cold water supply valves and test faucet.
Place towels and a rubber mat to protect sink and finishes. Use a bucket for residual water.
Gather tools, replacement cartridge, and safety glasses.
Work under adequate lighting and ventilated conditions.
Step-by-Step Guide to Removing the Old Cartridge
First, the water supply should be shut off and any residual pressure relieved to prevent leaks during disassembly.
Next, the handle and trim are removed carefully to avoid marring finishes, then the retaining clip, nut, or screws are accessed and removed.
Finally, the cartridge is extracted with appropriate tools and the valve seat and seals are inspected for wear or debris.
Turning off water and relieving pressure
Shut the water supply to the faucet and relieve pressure before disassembling the handle to prevent leaks and water damage.
Close both hot and cold shutoff valves under the sink.
Open the faucet to drain residual water and reduce pressure.
If valves are stuck, use the main house shutoff.
Place a towel and bucket beneath the faucet to catch any remaining drips.
Removing handle and decorative components without damage
Begin by inspecting the faucet assembly to identify the handle type and any visible set screws, caps, or trim pieces that must be removed.
Protect surrounding finish with tape.
Pry off decorative caps gently with a flat tool.
Loosen hidden set screws using the correct hex or screwdriver.
Lift handles straight off, avoiding twisting or levering against escutcheons to prevent scratching or bending.
Accessing and removing the retaining mechanism (clip, nut, screws)
Locate the cartridge retaining mechanism and assess its type—spring clip, retaining nut, or mounting screws—so the correct removal method and tools can be chosen.
Clear surrounding debris and use needle-nose pliers for clips, an adjustable wrench for nuts, or a screwdriver for screws.
Protect finishes with tape, apply steady pressure, and set removed parts aside in order for reassembly.
Extracting the cartridge safely and inspecting related components
With the retaining clip, nut, or screws removed and set aside, the cartridge can be withdrawn carefully to avoid damaging seals or surrounding plumbing.
- Grip cartridge with pliers wrapped in cloth, pull straight upward.
- Inspect O-rings, seats, and seals for nicks or wear.
- Clean bore with a lint-free cloth and vinegar if mineral deposits exist.
- Note orientation and replace damaged parts before installing new cartridge.
Inspecting and Preparing Replacement Parts
The replacement cartridge should be inspected and matched against the removed unit to confirm correct size, orientation, and ports.
O-rings, seals, and inlet screens must be checked for damage or missing pieces and replaced if worn.
Before installing the new cartridge, the valve body and water passages should be cleaned of debris and mineral buildup to guarantee a proper seal and flow.
Inspect new cartridge and compare to old unit
Compare the new cartridge side-by-side with the removed unit before installation.
The technician verifies dimensions, mounting tabs, and actuator alignment, ensuring ports, retaining grooves, and spindle length match.
Visual inspection confirms material, part number, and absence of defects or debris.
Any mismatch or damage prompts returning the part or obtaining the correct model to prevent leaks or malfunction after reassembly.
Checking O-rings, seals, and inlet screens for wear
Inspect O-rings, seals, and inlet screens for cracks, flattening, mineral buildup, or tears before installation.
Replace any O-rings that feel brittle, compressed, or sticky; lubricate new ones with silicone grease.
Check seals for warping or nicks and swap if compromised.
Remove and inspect inlet screens for debris or corrosion; replace screens showing deformation or persistent clogging to guarantee proper sealing and flow.
Cleaning the valve body and water passages before installation
Begin by flushing and wiping the valve body and water passages to remove mineral deposits, sediment, and old lubricant that can impede flow or prevent a proper seal.
Then proceed with cleaning and inspection using these steps:
- Rinse passages with distilled water to dislodge debris.
- Use a soft brush and vinegar for mineral buildup.
- Dry thoroughly with lint-free cloth.
- Inspect for pitting or corrosion before installing.
Installing the New Blanco Cartridge
The new Blanco cartridge is seated with attention to its orientation and alignment markings to guarantee proper valve function.
The technician secures the cartridge with the retaining clip or nut, tightening to the manufacturer’s torque recommendation and avoiding overtightening.
After reassembling the handle and decorative pieces without scratching, the water supply is restored and a brief functional check verifies smooth operation and leak-free joints.
Correct orientation and alignment of cartridge
Carefully position the new Blanco cartridge so its tabs and slots align precisely with the faucet body’s corresponding grooves; proper orientation guarantees smooth handle operation and prevents leaks.
Confirm the cartridge’s keyed flat or notch matches the valve housing, seating it fully without tilt.
Verify rotational stop alignment for temperature limits and confirm the cartridge sits flush before securing fasteners or reinstalling the handle.
Replacing retaining clip/nut and torque/care guidance
Slide the retaining clip or threaded nut into place to secure the cartridge, ensuring the clip’s curved edge seats in the cartridge groove or the nut engages threads evenly without cross-threading.
Hand-tighten the nut or press the clip fully home, then apply specified torque if recommended (use a calibrated driver).
Avoid overtightening; snug plus manufacturer torque prevents leaks and protects plastic components.
Reassembling handle and decorative pieces without scratching
With the cartridge secured, attention turns to reinstalling the handle and decorative trim while protecting finished surfaces from scratches.
Use soft cloth or painter’s tape over metal edges, seat cosmetic escutcheons gently, and slide the handle onto the stem aligning splines.
Tighten set screws or retaining nuts gradually, checking alignment.
Remove protective coverings and wipe surfaces with a microfiber cloth.
Restoring water supply and initial functional check
Turn the water back on slowly to pressurize the lines and observe the new Blanco cartridge for leaks and proper operation.
Cycle hot and cold, move the handle through full range, and watch connections for seepage.
Check under-sink supply lines and shutoffs.
Verify steady stream, correct temperature response, and smooth handle movement.
Tighten fittings if minor drips appear, then recheck.
Post-Installation Testing and Fine-Tuning
After reassembling the faucet, the installer checks for leaks and confirms the hot and cold sides respond in the correct orientation.
They adjust handle limit stops and any flow-restriction settings to achieve the desired range of motion and water output.
Finally, the aerator is flushed and inspected to verify clear water and acceptable flow quality.
Checking for leaks and proper hot/cold orientation
Begin by restoring water supply lines and operating the faucet slowly to pressurize the system while observing all visible connections, the spout base, and the handle area for any drips or wetness.
Verify hot and cold correspond to their usual sides by briefly opening each direction; check under-sink supply fittings and hose connections for leaks.
Tighten fittings or reseat seals if any seepage appears.
Adjusting handle limit stops and flow if applicable
With leaks checked and hot/cold orientation confirmed, attention shifts to fine-tuning the handle travel and flow limits to match user preferences and local codes.
The technician adjusts internal limit stops to restrict maximum hot position, tests handle smoothness, and sets any flow restrictors or aerator inserts if permitted.
Final checks confirm consistent temperature range and compliant maximum flow without introducing drips.
Flushing aerator and verifying water quality
Flush the aerator thoroughly and inspect the water quality to remove debris and confirm the installation did not introduce contaminants.
Run both hot and cold lines for several minutes, checking flow and temperature.
Remove and clean the aerator screen if particles appear.
Reassemble, then sample water again for clarity and odor.
If issues persist, recheck cartridge seating and supply line debris.
Troubleshooting Problems After Replacement
If issues appear after replacing the cartridge, the guide directs the reader to first recheck seals, O-rings, and fittings for persistent leaks.
It then outlines steps to clear aerators and lines and to purge air to restore proper flow.
Finally, it recommends simple adjustments and lubrication or realignment to correct handle stiffness or misalignment.
Persistent leaks: where to recheck seals and fittings
Although a replaced cartridge often seems to fix the problem, persistent leaks usually indicate an overlooked seal or loose fitting that requires reinspection.
- Check cartridge O-rings and replace if nicked or flattened.
- Inspect valve seat and clean mineral deposits.
- Tighten mounting nuts and supply line connections evenly.
- Verify spout base gasket and retighten or reseat to eliminate hidden paths for water.
Low flow or air in line: steps to resolve
Address low flow or trapped air by systematically isolating likely causes and restoring normal pressure and purge paths.
Check supply stops fully open, inspect aerator for debris and clean or replace, and flush lines by running hot and cold separately with aerator removed.
Verify cartridge seating and inlet screens for sediment.
If low flow persists, test upstream shutoffs and consider briefly increasing supply pressure to purge remaining air.
Handle stiffness or misalignment: quick fixes
Check for simple causes of stiffness or misalignment by first verifying that the handle assembly is seated correctly and that retaining nuts, set screws, and trim pieces are tightened to manufacturer torque specifications.
Loose or overtightened fasteners, misaligned spline engagement, or trapped debris often produce resistance or off-center travel and can usually be corrected without disassembly.
If persistent, inspect cartridge indexing, apply plumber’s grease to splines, and retest.
When to Call a Professional and Warranty Considerations
A homeowner should call a plumber for complex damage, persistent leaks, or when underlying water- or structural issues are suspected, weighing the higher immediate cost against DIY savings.
They should also review Blanco warranty terms and use OEM parts to avoid voiding coverage, keeping receipts and dated photos as proof of service.
A brief cost comparison of DIY versus professional replacement helps decide whether time, tools, and risk justify hiring a pro.
Situations that warrant a plumber (complex damage, persistent leaks)
When leaks persist after replacing seals or cartridges, or when corrosion, broken valve stems, or damaged valve bodies are present, homeowners should hire a licensed plumber. Such conditions often require specialized tools, soldering or part fabrication, and professional diagnostics to prevent further damage.
A plumber assesses hidden damage, secures proper replacements, guarantees safe water shutoffs, and documents repairs for compliance and future reference.
Blanco warranty, OEM parts, and proof-of-service tips
Many Blanco faucets and sinks carry manufacturer warranties that can be voided by non‑OEM parts or improper repairs.
Homeowners should confirm coverage terms before attempting work. Use genuine Blanco cartridges and keep purchase receipts.
Document repairs with dated photos and service notes. If warranty terms are unclear or damage seems beyond routine replacement, consult Blanco support or a licensed plumber to preserve warranty rights.
Cost comparison: DIY vs. professional replacement
Having confirmed warranty status and gathered OEM documentation, homeowners can weigh the costs and risks of replacing a cartridge themselves versus hiring a pro. DIY saves on labor (often $0–$100) but risks voiding warranty or causing damage. Professionals cost $100–$350 including parts, labor, and warranty protection.
| Option | Typical Cost | Key Consideration |
|---|---|---|
| DIY | $0–$100 | Risk to warranty |
| Pro | $100–$350 | Warranty and guarantee |
| Hybrid | $50–$150 | Parts DIY, pro install |
Maintenance Tips to Extend Cartridge Life
Routine cleaning to remove mineral deposits and the use of water-softening measures can greatly slow cartridge wear.
Seasonal inspections of seals and O-rings are recommended, with preemptive replacement when cracking or stiffness appears.
Keeping a small kit of compatible cartridges, extra seals, and O-rings on hand reduces downtime when service is needed.
Routine cleaning and mineral-deposit prevention
Prevent mineral buildup by establishing a simple cleaning routine that targets visible deposits and the water-exposed surfaces of the cartridge assembly.
- Wipe exterior surfaces weekly with a soft cloth and mild detergent.
- Soak removable parts monthly in a vinegar solution to dissolve scale.
- Rinse thoroughly and dry before reassembly to prevent corrosion.
- Inspect aerator and inlet screens regularly and clean to maintain flow.
Seasonal checks and when to replace seals preemptively
Although seasonal weather changes are often subtle, they can accelerate wear on cartridge seals and warrant scheduled inspections. A brief check each spring and fall helps identify hardened, cracked, or flattened O-rings and gaskets before leaks begin.
Technicians should inspect for stiffness, shrinkage, or residue, perform lubrication where appropriate, and replace compromised seals proactively to prevent emergency repairs and water damage.
Recommended spare parts to keep on hand
A small kit of commonly needed replacement parts keeps repairs fast and minimizes downtime: extra O-rings and seat seals sized for the specific cartridge, a spare cartridge or core assembly for the model in use, replacement springs and retaining clips, and a few universal neoprene washers.
Include a small tube of silicone grease, a compact crosshead/hex driver set, and labeled bags for organized storage.
Quick Parts and Compatibility Reference
A quick reference lists common Blanco cartridge part numbers alongside the faucet lines they fit, helping readers identify compatible replacements.
It also explains how to measure key dimensions and photograph the faucet clearly for accurate parts ordering.
Clear measurements and labeled photos reduce returns and guarantee the correct cartridge is obtained.
Common Blanco cartridge part numbers and compatible faucet lines
This reference lists the common Blanco cartridge part numbers alongside the faucet lines with which they are compatible, enabling quick identification for repairs or replacements. Common cartridges include ceramic and pressure balance types matched to specific series. Use this table to match OEM numbers to lines before ordering.
| Part Number | Faucet Line | Notes |
|---|---|---|
| 116022 | Linus | Single-handle ceramic |
| 116023 | Culina | Pull-down models |
| 116024 | Precis | Two-handle models |
How to measure and photograph your faucet for ordering parts
After identifying the correct Blanco cartridge number and compatible faucet line, measuring and photographing the faucet guarantees the replacement matches mounting, dimensions, and finish.
Use clear shots and precise measurements to order exact parts.
- Photograph front, side, underside, and close-ups of markings.
- Measure spout reach, base diameter, and hole spacing.
- Note finish code and model stamping.
- Save photos with filenames and timestamps.
Conclusion
A well-fitted Blanco cartridge is a small compass steering household waters; its smooth rotation restores order where drips once mapped chaos. Replacing it is a hinge between neglect and care, each tightened screw a stitch mending a tired seam. When the new part seats true, the faucet’s quiet flow becomes a small river of reliability—proof that simple attention can turn worn fixtures into steady, unassuming guardians of the kitchen’s rhythm.