How to Tell If an Electric Hot Water Heater Is On: 7 Simple Checks to Confirm It
To determine if your electric hot water heater is functioning, follow these simple checks: First, confirm that the power is at the breaker and ensure the correct breaker is switched ON. Look for indicator lights or listen for sounds from the thermostat and heating elements. Run hot water from multiple taps to check for consistent temperatures, and feel exposed pipes or the tank surface for warmth. Inspect for any tripped breakers, burned connections, or leaks. If you’re qualified, use a multimeter to test, but always shut off the power first. Continue with practical checks, safety precautions, troubleshooting tips, and know when to call a professional for assistance.
How to Quickly Tell if an Electric Hot Water Heater Is On
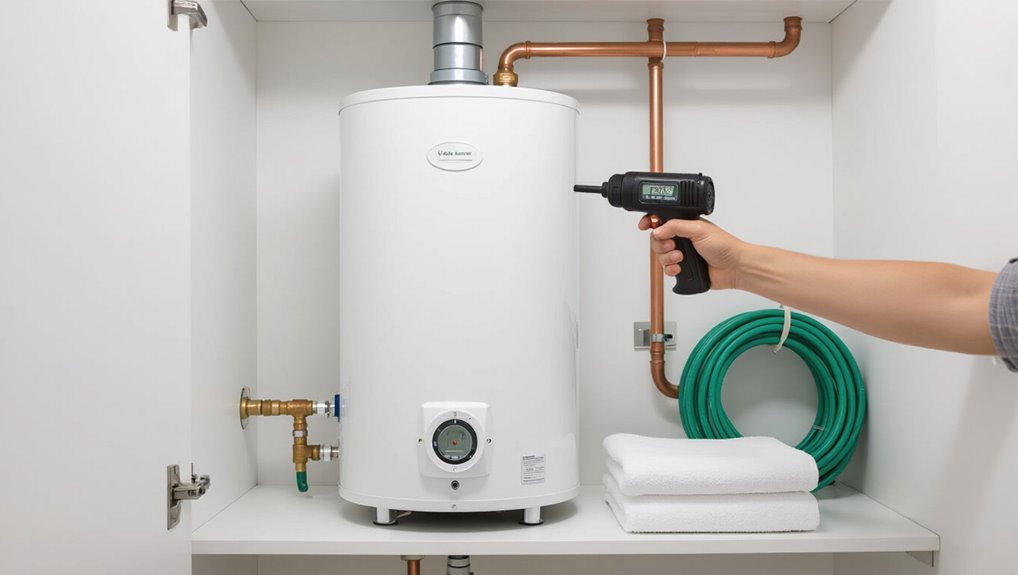
A concise one-line checklist helps confirm at a glance whether an electric hot water heater is operating.
It should include checking power at the breaker, feeling for warm pipes or tank surface, and noting any indicator lights or sounds.
These quick steps allow a reliable initial assessment before further troubleshooting.
One-line checklist to confirm the heater is operating
When confirming an electric hot water heater is operating, follow a concise checklist: verify breaker on, check pilot/indicator, test hot tap, and listen for heating. This quick guide helps determine how to tell if electric hot water heater is on without tools.
| Check | Action |
|---|---|
| Breaker | Confirm switch is ON |
| Indicator | Look for light/label |
| Tap | Run hot water |
| Sound | Listen for element hum |
##
Signs of operation on an electric hot water heater include steady piping warmth, a faint humming from the tank, and periodic cycling of the thermostat-controlled elements.
- Check hot water at several taps for consistent temperature.
- Inspect the breaker and control panel for normal indicator positions.
- Feel the tank surface for uniform warmth without cold spots.
- Listen for regular element cycling, not continuous noise or silence.
How an Electric Hot Water Heater Works (Basics You Need to Know)
An electric hot water heater uses thermostats and one or more heating elements to raise tank temperature, with electric models differing from gas units that have a pilot light.
Normal operation can be judged by faint clicking or humming from the elements and predictable electrical behavior at the breaker and access panels.
Typical checks include inspecting thermostat settings, testing element continuity, and examining the wiring and access points for loose connections or tripped breakers.
Key components and indicators (thermostats, heating elements, pilot vs. electric)
A working electric water heater relies on a few simple components—thermostats, heating elements, wiring, and controls—that together determine whether water is being actively heated. Thermostats signal elements; elements convert electricity to heat. Electric units lack pilots; gas units use pilots and burners. Simple indicators include thermostat settings, visible element access panels, and correct breaker position.
| Component | Indicator |
|---|---|
| Thermostat | Dial/setting |
| Element | Access panel |
| Wiring | Breaker |
| Pilot vs Electric | Pilot absent |
Normal operational sounds and electrical behavior
Electric water heaters produce a few predictable sounds and electrical behaviors that indicate normal operation: low humming or buzzing from the tank as the elements energize, occasional faint clicking when thermostats cycle, and a steady current draw from the breaker while an element is active.
Brief gurgling as water heats, subtle expansion noises, and consistent element cycling intervals further signal proper function without visible faults.
Typical wiring and access points to check
Under the access panel and junction box, the typical wiring layout includes a dedicated double-pole breaker feeding two heating elements via separate thermostats, with incoming supply wires landed in a metal or plastic junction box secured to the tank.
Visual checks focus on breaker labeling, tight wire connections, intact insulation, proper grounding, and secure junction-box covers; access panels reveal thermostats and elements for continuity testing.
Seven Simple Physical Checks to Confirm the Heater Is On
A few straightforward physical checks can quickly confirm whether an electric hot water heater is operating.
The person should test a faucet for hot water, cautiously feel the tank surface and connected pipes for warmth, and check the circuit breaker and electrical panel for tripped switches.
They can also inspect the heater’s power switch and indicator lights and listen for element cycling or a faint humming sound.
Check for hot water at a faucet (proper testing method)
Run a hot-water tap to verify whether the tank is producing heated water: open the faucet fully, wait a minute to allow flow, then test water temperature cautiously with the back of the hand or a thermometer.
Note whether temperature rises above ambient. Repeat at a nearby faucet to confirm distribution.
If water remains cold after sufficient run time, further inspection of the heater is warranted.
Feel the tank surface and pipes for warmth safely
Feel the exterior of the water heater and its supply pipes to check for warmth, taking care to use the back of a hand briefly rather than prolonged contact. Notice warmth gradient: tank warmer near element access panels; inlet should be cooler than outlet. Stop if very hot. Use gloves if needed and avoid touching electrical components.
| Location | Expected feel |
|---|---|
| Tank middle | Warm |
| Tank top | Warmer |
| Cold inlet | Cooler |
| Hot outlet | Warm to hot |
Inspect the circuit breaker and electrical panel
Check the home’s electrical panel to verify the water heater’s power supply and position of its dedicated breaker.
Observe whether the breaker is fully in the ON position and aligned with other breakers. Look for labels indicating “water heater” or similar.
If tripped, reset only after ensuring safety and following manufacturer’s guidance.
Note burned smells or loose wires and contact a professional if found.
Examine the heater’s power switch and indicator lights
After confirming the breaker and panel status, the next step is a direct inspection of the water heater’s local controls. The technician checks the power switch position and any LED or pilot indicators for steady power, noting colors and blinking patterns. Record observations and compare to the unit’s label or manual before proceeding.
| Control | Observation |
|---|---|
| Power switch | |
| LED/pilot | |
| Labels | |
| Notes |
Listen for element cycling or humming noises
Listen for subtle sounds from the tank—regular clicking, a low hum, or brief buzzing can indicate the heating element is cycling or the thermostat is calling for heat.
Approach quietly and note patterns: intermittent clicks often correspond to element switching, a steady hum suggests active elements, and sporadic buzzes may reflect relay activity.
Persistent loud noises warrant inspection by a technician.
Use a non-contact voltage tester or multimeter at the access panel
Open the access panel to expose the thermostat and elements, then use a non-contact voltage tester to scan for live circuits before any direct contact.
If the tester indicates voltage, a multimeter can be used at the terminal screws to read incoming voltage and confirm whether the element is being supplied power.
Record voltage, compare to expected supply (typically ~240V), and replace panel securely after testing.
Monitor water temperature with a thermometer at the tap
With electrical checks complete, the next simple verification is to measure the actual water temperature at a tap using a thermometer. Run hot water for a minute, hold the probe under flow, and note temperature. Readings near the heater’s setpoint confirm operation; much lower indicates issues. Repeat other taps to rule out pipe heat loss.
| Tap location | Temperature (°F/°C) |
|---|---|
| Kitchen | |
| Bathroom | |
| Laundry | |
| Outdoor | |
| Test result |
Step-by-Step Safety Precautions Before You Check Anything
Before performing any checks, the power to the water heater should be turned off at the circuit breaker to eliminate electrical risk.
The inspector is advised to wear appropriate protective gear and avoid touching live panels or exposed wiring.
If there is any uncertainty about electrical components or plumbing connections, a licensed electrician or plumber should be contacted.
Turning off power safely at the breaker
Shut off the circuit supplying the electric water heater at the main or subpanel to eliminate electrical hazard before any inspection or service begins.
Confirm the breaker label matches the heater, move the breaker switch to OFF, and secure it if possible.
Verify power removal by checking indicator lights or a non-contact tester at the heater.
Do not restore power until work is complete.
Using protective gear and avoiding live-panel contact
Several simple personal protective equipment items greatly reduce risk when inspecting an electric hot water heater: insulated gloves rated for the panel voltage, safety glasses, and non-conductive footwear. Maintain distance from live panels, use insulated tools, and never touch terminals. Verify power is off before probing.
| Gear | Purpose | Tip |
|---|---|---|
| Gloves | Shock protection | Inspect for damage |
| Glasses | Eye safety | Fit snugly |
| Boots | Insulation | Dry soles only |
When to call a professional electrician or plumber
When should a professional be called depends on the symptom severity and the inspector’s comfort with electrical work; if there is any sign of burning, persistent tripping breakers, exposed wiring, a hot water heater that hums or leaks, or uncertainty about safely isolating the circuit, a licensed electrician or plumber should be contacted immediately to avoid injury or further damage.
They handle diagnostics, repairs, and permit-required work safely.
How to Interpret What You Find
Observations from the tank and controls must be matched to expected patterns to determine whether the heater is operating, merely retains heat, or has malfunctioned.
Clear indicators such as active indicator lights, a warm-to-hot tank and rising water temperature point to normal operation; a cool but warm-feeling tank with no signs of power suggests it is off but still holding heat.
Evidence of burning smells, tripped breakers, scorched wiring, or inconsistent temperature behavior signals possible electrical or component failure requiring immediate attention.
Signs the heater is definitely on
If the heater is producing heat, a few direct, measurable signs confirm it is on: a warm tank surface or nearby pipes, a rising household water temperature after prolonged use, and an audible hum or faint clicking from the unit or its control panel.
Additional indicators include consistent hot water at multiple taps, periodic thermostat cycling, and a slight electrical odor or low-level vibration from the element area.
Signs the heater is off but may still be warm
After noting clear signs that the heater is actively producing heat, attention should shift to situations where the unit feels warm but is not operating.
Residual heat from recent use, insulated tank retaining warmth, or warm piping can cause that sensation.
Absence of thermostat activity, no clicking relays, and lack of power indicator confirm the element is idle despite surface warmth.
Signs of electrical or component failure
Several clear indicators point to electrical or component failure when a hot water heater that should be heating remains cold.
Tripped breakers, blown fuses, burned or corroded connections, or a failed thermostat often accompany no heat.
Buzzing, burning smells, visible scorch marks, or a hot but nonfunctional element suggest component failure.
Repeated cycling or diagnostic error codes on digital models confirm the issue.
Common Problems That Make a Heater Appear Off and How to Diagnose Them
Several common issues can make an electric hot water heater seem off, including a tripped breaker or blown fuse, a faulty thermostat or heating element, loose wiring or bad connections, and sediment buildup that reduces heating efficiency.
Each cause has distinct signs and simple checks—inspect the breaker panel, test thermostat and element continuity, look for loose or corroded terminals, and assess tank sediment through temperature inconsistencies or draining.
Systematic, safety-minded troubleshooting helps pinpoint the problem before calling a professional.
Tripped breaker or blown fuse
Why does a heater that seems dead sometimes return to life with a flip of a switch? A tripped breaker or blown fuse cuts power entirely.
Inspect the home’s breaker panel for a tripped switch or a blown fuse indicator. Resetting a tripped breaker or replacing a fuse can restore power; if trips recur, consult an electrician to identify underlying wiring faults or overloads.
Faulty thermostat or heating element
Check the thermostat and heating elements when a water heater appears dead but has power: a malfunctioning thermostat can fail to signal the element, and a burned-out heating element cannot produce heat even with correct voltage.
Test thermostats for continuity and correct setpoints using a multimeter.
Inspect elements for open circuits; replace any faulty component.
Professional service is advised if unsure.
Loose wiring or bad connections
After verifying thermostats and elements, attention should turn to wiring and connections, since even with functional components a heater can appear dead if power isn’t reliably delivered.
Inspect junctions, terminal screws, and wire insulation for looseness, corrosion, or burning. Use a multimeter to confirm voltage at the thermostat and elements.
Tighten or replace damaged connectors and turn off power before any repairs to prevent shock.
Sediment buildup affecting heating performance
Sediment accumulation at the bottom of a tank can insulate the lower heating element, reducing heat transfer and causing lukewarm or no hot water even though the heater appears to be powered.
Signs include rumbling noises, uneven temperature, and frequent cycling.
Diagnose by draining a few gallons to check debris, inspecting element performance, and scheduling full tank flushing or professional descaling to restore heat efficiency.
Tools and Devices to Make Testing Easier
Basic testing of an electric hot water heater typically requires a multimeter, a non-contact voltage tester, and a thermometer to check electrical supply and water temperature.
For ongoing monitoring or remote alerts, smart controllers, temperature probes, and leak sensors can be installed to report status and trigger notifications.
Choosing between basic handheld tools and smart devices depends on the homeowner’s comfort with diagnostics and desire for continuous monitoring.
Recommended basic tools (multimeter, non-contact tester, thermometer)
When diagnosing whether an electric hot water heater is operating, a small set of handheld tools makes testing faster and safer: a digital multimeter for checking voltage and continuity, a non-contact voltage tester to verify live wires without touching them, and an infrared or probe thermometer to confirm water temperature at the tank or outlet.
Proper use, basic safety gear, and quality probes guarantee reliable readings and faster troubleshooting.
When to use smart devices or leak/temperature sensors
Why consider smart sensors for a hot water heater?
Smart leak and temperature sensors provide continuous remote monitoring, alerting to leaks, abnormal temps, or loss of power.
They suit owners wanting early detection, vacation monitoring, or integration with home automation.
Installation is typically simple; choose devices with battery backup, reliable connectivity, and alert thresholds to reduce damage risk and avoid false alarms.
##
If inspecting the control panel and thermostat for signs of operation, a homeowner should look for illuminated indicator lights, a set temperature display, or labels showing the high and low thermostat settings to determine whether the electric hot water heater is actively powered.
- Check indicator lights for steady glow.
- Verify displayed temperature matches expectations.
- Note thermostat switch position labels.
- Confirm panel shows no fault codes or blank screen.
Quick Troubleshooting Steps to Try Before Calling a Professional
A few basic checks can often reveal why an electric hot water heater appears off.
The homeowner is advised to reset the unit and inspect the circuit breaker, test or replace a tripped reset button and verify thermostat settings, and briefly flush the tank to clear sediment buildup.
If these steps do not restore hot water, professional service should be considered.
Resetting the heater and checking the breaker
Begin by cutting power to the water heater at the breaker panel and visually inspecting the breaker for a tripped position; many interruptions are caused by a single flipped switch or a slightly off-center handle.
After confirming power is off, wait briefly, then reset the breaker by switching it fully off and back on.
Restore power and observe heater operation, listening for startup noise or checking for warming.
Replacing a tripped reset button or checking thermostats
After resetting the breaker and confirming power is restored, attention should turn to the heater’s internal safety controls: the high-limit (reset) button and the adjustable thermostats.
If the red reset button is tripped, press it; if it won’t stay, replace the button or element assembly.
Verify thermostat settings and continuity with a multimeter; replace faulty thermostats before calling a technician.
Flushing the tank briefly to reduce sediment issues
Flush the tank briefly to clear accumulated sediment that can reduce heating efficiency and cause noises or premature element failure.
A short flush involves turning off power, attaching a hose to the drain valve, opening a hot faucet and the valve until water runs clearer, then closing and restoring power.
This simple maintenance can improve performance and reveal leaks but requires caution and basic tools.
When to Call a Professional and What Information to Provide
If the heater shows signs of leaking, burning smells, exposed wiring, or persistent lack of hot water after basic checks, a professional should be contacted immediately.
When calling, the homeowner should report the specific symptoms, any troubleshooting steps already taken, and the unit’s make, model, capacity, and age.
Providing this information upfront helps the technician diagnose the issue and bring appropriate parts and tools.
Emergency situations requiring immediate help
When a hot water heater shows signs of gas smell, electrical sparking, severe leaks, or any sudden loss of hot water paired with strange noises, immediate professional help is required.
Residents should evacuate if gas odor persists, cut power at the breaker if safe, and keep clear of flooding.
Contact emergency services or a licensed plumber/electrician promptly; prioritize safety over attempts at repair.
What to tell the technician (symptoms, checks you performed, model info)
What details should be prepared before the technician arrives?
A concise list:
- model and serial number
- purchase/installation date
- warranty status
- observed symptoms (no heat, noisy tank, leaks, tripping breaker)
- checks performed (power at breaker, thermostat setting, pilot/light status, reset attempts)
- frequency and timing of issue
- any recent work or power events.
Provide access and contact information.
Maintenance Tips to Keep Your Electric Water Heater Operating Reliably
A basic maintenance routine helps guarantee consistent performance and long service life.
Homeowners are advised to follow a regular inspection schedule to check for leaks, corrosion, and proper thermostat operation, and to flush the tank and inspect the anode rod periodically to prevent sediment buildup and corrosion.
Recommended thermostat settings (around 120°F) and simple energy-saving practices can reduce costs while keeping the heater reliable.
Routine inspection schedule and what to look for
Several simple inspections carried out on a regular schedule can prevent most common electric water heater problems.
Monthly visual checks for leaks, corrosion, and insulation gaps are recommended.
Quarterly verification of thermostat settings, circuit breaker condition, and indicator lights helps detect electrical issues.
Annually, inspect access panels, wiring connections, pressure relief valve exterior, and surrounding area for moisture or pests to guarantee reliable operation.
Regular flushing and anode rod checks
Following the routine inspections, attention should turn to sediment management and anode rod condition, since both directly affect tank longevity and heating efficiency. Regularly flushing removes buildup that reduces capacity and causes noise; inspecting or replacing the sacrificial anode prevents corrosion. Schedule annual flushes; check the anode every 2–3 years.
| Concern | Action | Feeling |
|---|---|---|
| Sediment | Flush | Relief |
| Anode | Replace | Confidence |
| Corrosion | Prevent | Calm |
Recommended temperature settings and energy-saving tips
How hot should the tank be set to balance comfort, safety, and efficiency? The recommended setting is 120°F (49°C) for general households: hot enough for comfort and scald prevention, yet efficient.
Lowering to 115°F saves energy; raising to 140°F may be needed for sanitization but requires mixing valves.
Insulate the tank and pipes, fix leaks, and use a programmable thermostat to reduce consumption.
Conclusion
Like the steady hum of a lighthouse guiding a ship, a working electric water heater quietly signals comfort through warmth, sound, and simple signs. By checking power, thermostat, element access, and pipes, one can read those signals like a map. If the clues falter, safety-first troubleshooting or a trained technician will restore the beacon. Regular care keeps the heater reliable, turning chilly uncertainty into dependable warmth for the home.