How to Stop Condensation in Bathroom: 12 Simple Fixes That Actually Work
To stop condensation in your bathroom, take immediate steps like using an exhaust fan during and after showers, cracking a window, and squeegeeing wet surfaces. For long-term solutions, consider upgrading ventilation, insulating cold surfaces, sealing leaks, and using a dehumidifier or anti-condensation paint. These actions will help prevent mold and damage, ensuring a drier bathroom environment. The following guide offers practical, step-by-step options to effectively manage bathroom condensation.
Why Bathroom Condensation Happens
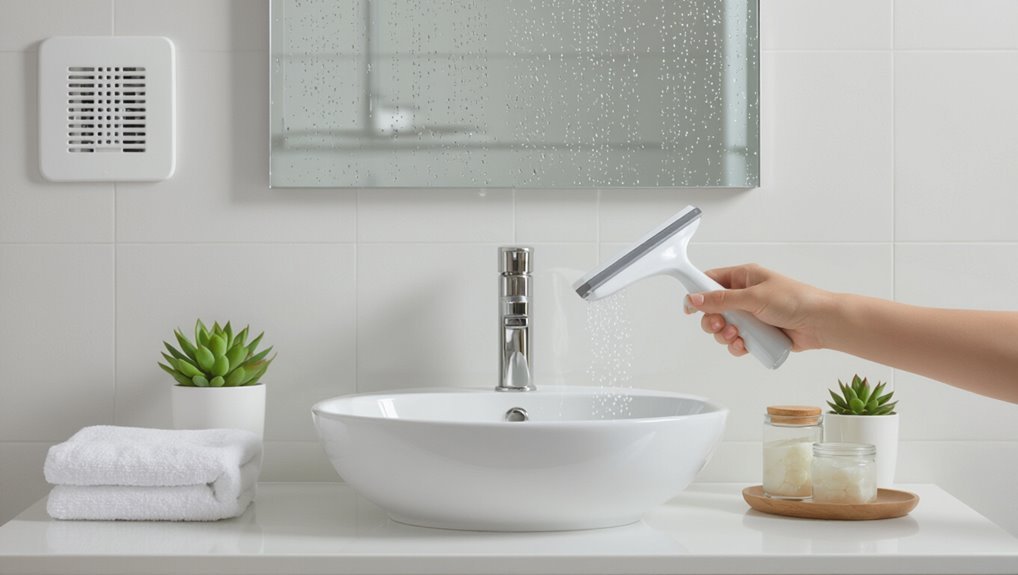
Bathroom condensation arises when warm, humid air meets cooler surfaces, a process governed by the interaction of humidity, temperature, and ventilation.
Common household activities—showers, baths, and even hot water from sinks—are primary sources of moisture that increase indoor humidity.
If left unchecked, condensation promotes mold growth, structural damage, and persistent odors.
How humidity, temperature, and ventilation interact
When warm, moist air from showers or baths meets cooler surfaces, its capacity to hold water vapor falls and condensation forms.
The extent of this process depends on the absolute humidity, the temperature difference between air and surfaces, and how effectively the space exchanges air with the outside.
Balance humidity, raise surface or air temperature slightly, and improve ventilation to reduce condensation—key steps in how to stop condensation in bathroom.
Common sources of moisture in bathrooms
Reducing humidity, warming surfaces, and improving airflow addresses how condensation forms, but understanding where the moisture originates explains why those measures are needed.
Common sources include hot showers and baths, running taps, steam from laundry or kettles nearby, leaks in plumbing or roof, damp towels and rugs, and inadequate drying of grout and fixtures.
Occupant breathing and poor ventilation compound humidity buildup.
Consequences of unchecked condensation (mold, damage, odor)
Unchecked condensation invites a range of problems that go beyond damp windows: persistent moisture fosters mold and mildew growth, accelerates material decay (paint, drywall, grout, wooden fixtures), and produces musty odors that are difficult to eliminate.
Left unchecked, structural weakening, stained surfaces, respiratory health risks, and reduced indoor air quality follow, raising repair costs and lowering property value unless timely ventilation and remediation occur.
Quick Fixes You Can Do Today to Reduce Condensation
Small, immediate actions can noticeably reduce bathroom condensation and prevent moisture buildup. The following simple habits require no tools and can be started after the next shower.
Consistent use of these measures keeps surfaces drier and lowers the chance of mold.
- Wipe down wet surfaces with a towel after showers.
- Run the exhaust fan during and for a few minutes after bathing.
- Crack a window or open a door briefly to vent humid air.
- Use a squeegee on glass and tiles and hang towels outside the bathroom to dry.
Wipe down wet surfaces after showers
Wiping down wet surfaces immediately after a shower removes droplets that would otherwise evaporate onto mirrors, tiles, and fixtures, cutting short the condensation cycle.
Using a squeegee or microfiber cloth, one can clear glass, tile grout, and counters quickly.
Regular wiping prevents moisture pooling, reduces mold risk, and minimizes streaks.
Consistent, brief action yields noticeable reduction in bathroom dampness.
Run exhaust fan during and after bathing
Run the exhaust fan during and for 10–20 minutes after bathing to expel humid air before it condenses on surfaces.
Consistent use prevents moisture buildup on mirrors, tiles, and paint. Confirm the fan vents outdoors, not into an attic.
Clean and test the fan regularly; replace undersized units with higher-capacity models (CFM matched to bathroom size) to improve extraction efficiency.
Crack a window or open a door briefly
Crack a window or open the bathroom door for 5–10 minutes after bathing to quickly exchange humid indoor air with drier outdoor air, reducing the chance of condensation on mirrors, tiles, and painted surfaces.
This simple step speeds drying, lowers humidity spike, and complements mechanical ventilation.
It’s best used when outdoor air is considerably drier and when privacy or security concerns are managed.
Use a squeegee on glass and tiles
Pulling a squeegee across wet glass and tile immediately after showering removes most surface water before it can cool and condense, cutting down streaks and persistent moisture that lead to mold and damage.
Regular squeegeeing reduces humidity load on ventilation, speeds drying, and prevents mineral buildup.
Store the squeegee nearby for routine use; wipe edges and rinse periodically to keep it effective.
Hang towels outside the bathroom to dry
Hang damp towels outside the bathroom to dry immediately after use to prevent excess moisture from lingering in the room.
This reduces humidity spikes that cause condensation on mirrors, windows, and tiles.
Use a clothesline, balcony rail, or ventilated drying rack nearby.
Regularly wash towels and avoid cramming multiple damp items together to guarantee quicker drying and lower indoor moisture levels.
12 Practical Remedies That Actually Work
Practical, proven steps can greatly cut bathroom condensation and protect surfaces from mould and damage. The following remedies focus on improving ventilation, controlling humidity, and raising surface temperatures to prevent moisture buildup.
Each option can be adapted to suit different budgets and installation constraints.
- Install or upgrade an exhaust fan to increase air exchange.
- Add a humidity-sensing timer switch so fans run only when needed.
- Improve natural ventilation with window or trickle vents.
- Use a bathroom-specific dehumidifier or increase heating (e.g., heated towel rail).
Install or upgrade an exhaust fan
Install or upgrade an effective exhaust fan to remove humid air at its source and prevent condensation from forming on walls and fixtures.
Proper sizing for room volume, ducting to the outdoors, and minimal bends guarantee efficient extraction.
Choose a quiet, energy-efficient model rated for bathroom use.
Regular cleaning and occasional motor inspection maintain performance and reduce lingering moisture that causes mold and damage.
Add a humidity-sensing timer switch to fans
Once a properly sized, vented fan is in place, pairing it with a humidity-sensing timer switch guarantees the fan runs only as long as needed to clear excess moisture.
The sensor detects relative humidity spikes from showers and keeps the fan running until levels drop to a preset threshold, preventing overuse, reducing energy waste, and minimizing lingering condensation that causes mold and damage.
Improve natural ventilation with window vents or trickle vents
Improve airflow by fitting window vents or trickle vents, which provide a constant, controlled pathway for moist air to escape without fully opening a window.
These passive vents reduce condensation risk by maintaining low-level background ventilation, preventing moisture buildup between uses.
They are discreet, simple to install in existing frames, and compatible with double glazing, offering an energy-conscious alternative to frequent window opening.
Use a bathroom-specific dehumidifier
Consider a compact, bathroom-specific dehumidifier to rapidly lower humidity levels after showers and baths.
These units extract moisture quickly, reducing surface condensation on mirrors, tiles, and ceilings.
Choose a model sized for the room, with an auto shutoff, washable filter, and simple controls.
Empty or plumb the water tank regularly and position the unit where airflow is unobstructed for best performance.
Increase bathroom heating or install a heated towel rail
After lowering ambient humidity with a dehumidifier, raising the bathroom’s temperature or adding a heated towel rail helps prevent residual moisture from condensing on cold surfaces.
Warmer surfaces reduce relative humidity at contact points, cutting fogging on mirrors and tiles. A heated towel rail also dries fabrics quickly, reducing lingering damp.
Use thermostatic control or timed heating to balance comfort and energy use.
Apply anti-condensation paint or insulation to walls and ceilings
Apply anti-condensation paint or add insulation to walls and ceilings to raise surface temperatures and interrupt the cycle of moisture buildup.
Anti-condensation paints contain insulating binders that reduce cold spots; applied correctly, they deter surface droplet formation.
Adding thin internal insulation panels or breathable insulating plaster improves thermal performance without trapping moisture.
Both methods complement ventilation and reduce visible mold risk when properly installed.
Insulate cold water pipes and exterior walls
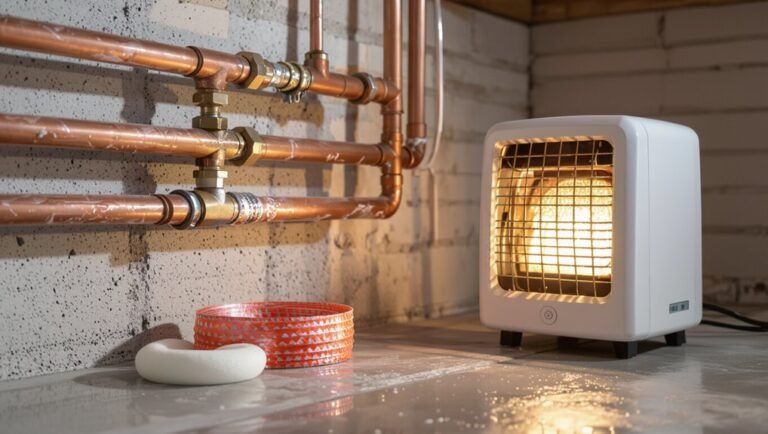
Insulating cold water pipes and exterior walls stops warm, humid air from meeting cold surfaces where condensation forms, reducing dripping, mold growth, and heat loss.
Foam pipe sleeves and lagging around exposed plumbing limit surface cooling.
Cavity wall insulation or rigid board on exterior walls raises surface temperature, cutting condensation risk and improving energy efficiency.
Properly sealed seams and professional installation guarantee lasting performance.
Replace single-pane windows with double glazing
Upgrade single-pane windows to double glazing to greatly reduce condensation by raising the interior surface temperature of the glass.
Double glazing creates an insulated air or gas gap that limits heat transfer, cutting dew formation. It also improves overall bathroom insulation, reducing cold spots and moisture buildup.
Professional installation guarantees proper sealing and thermal performance, preventing drafts that can negate benefits.
Install a shower door with water-repellent coating
Replacing single-pane windows reduces cold surfaces that attract moisture; addressing shower enclosure surfaces is the next practical step.
A water-repellent coated shower door sheds droplets, minimizing film and subsequent condensation on glass and surrounding tiles. Coatings reduce cleaning frequency and improve visibility.
Professional application or quality factory-coated doors offer durable protection; reapply or replace when coating degrades to maintain effectiveness and prevent lingering moisture buildup.
Use moisture-absorbing products (silica gel, desiccant bags)
A few well-placed moisture-absorbing products—such as silica gel canisters, desiccant bags, or moisture-absorbing tubs—can quickly reduce bathroom humidity hotspots and prevent surface condensation.
They are portable, low-cost, and suitable for cabinets, corners, and behind toilets. Replace or recharge per manufacturer guidance.
Use multiple small units for even coverage; combine with ventilation for best results without addressing grout or leak repairs.
Reseal grout and fix leaks to eliminate hidden moisture sources
Inspect the grout lines and plumbing for cracks or gaps that allow water to penetrate behind tiles and into walls or subflooring.
Replace damaged grout, apply new silicone caulk at joints, and tighten or repair leaking fixtures.
Verify waterproof membrane integrity where accessible.
Promptly addressing these hidden moisture sources prevents mold, structural decay, and ongoing condensation caused by persistent wet substrates.
Rearrange fixtures to improve airflow and reduce cold surfaces
Repositioning bathroom fixtures can meaningfully improve airflow and raise surface temperatures, reducing condensation risk.
Moving towel rails, cabinets, or storage away from windows and vents prevents cold pockets and allows warm, moist air to circulate toward exhaust fans.
Placing radiators or heated rails near exterior walls warms surfaces.
Small layout changes and strategic placement of vents, heaters, and shelves reduce persistent dampness efficiently.
How to Choose the Right Solution for Your Bathroom
Choosing the right condensation fix depends on bathroom size, layout, and budget, and should weigh DIY feasibility against when to hire a professional. Consider energy use and ongoing maintenance for each option to guarantee long-term effectiveness and cost-efficiency. The following table summarizes common solutions and helps match them to typical needs.
| Solution Type | Best For | Notes |
|---|---|---|
| Ventilation fan | Small to medium bathrooms | Low cost; may need professional wiring |
| Window or passive vent | Layouts with exterior walls | Low energy; limited control |
| Dehumidifier | Large or poorly ventilated spaces | Ongoing electricity and maintenance |
| Insulation & heating | Cold surfaces causing condensation | Higher upfront cost; low running cost |
| Professional retrofit | Complex layouts or recurring problems | Higher cost; guarantees code compliance |
Match solutions to bathroom size, layout, and budget
Because bathrooms vary widely in size, layout, and ventilation options, the most effective condensation strategy depends on matching measures to those specific constraints. Small spaces may need compact extractors; large bathrooms benefit from zoned ventilation. Budget guides choices from inexpensive dehumidifiers to integrated systems.
| Size | Typical solution | Cost range |
|---|---|---|
| Small | Inline fan | Low |
| Medium | Wall extractor | Medium |
| Large | Ducted system | High |
When to DIY vs. when to hire a professional
After matching ventilation and dehumidification options to bathroom size, layout, and budget, the next decision is whether to attempt installation or hire a professional.
Simple tasks—mounting fans, sealing gaps, adding passive vents—suit competent DIYers with basic tools.
Complex electrical work, structural changes, or uncertain ducting require licensed contractors to guarantee safety, code compliance, and lasting effectiveness.
Energy and maintenance considerations for each option
While upfront cost and complexity often drive the selection, long‑term energy use and maintenance demands determine the true value of a condensation solution.
Low‑energy options like passive ventilation require minimal upkeep but may be less effective in cold climates.
Mechanical extractors and dehumidifiers consume power and need filter or fan servicing.
Insulation and double glazing reduce running costs but entail higher installation and occasional maintenance.
Step-by-Step Guide to Installing an Exhaust Fan
The section outlines how to select a properly sized exhaust fan by matching CFM to bathroom volume and usage.
It lists required tools and materials, highlights safety and electrical precautions, and differentiates ceiling- and wall-mounted installation procedures.
It concludes with testing steps and solutions for common troubleshooting scenarios.
Assess fan size and airflow requirements (CFM)
Determining the correct fan size begins with calculating the room’s volume and the desired air changes per hour (ACH); for most bathrooms, code and industry guidance recommend 8 ACH or using a simpler rule of thumb of 1 CFM per square foot for standard 8-foot ceilings.
Multiply volume by ACH and divide by 60 to get required CFM.
Add capacity for long ducts, multiple fixtures, and peak humidity.
Tools and materials checklist
A concise list of tools and materials guarantees the installation proceeds efficiently and safely.
Required items include an exhaust fan kit sized per earlier assessment, ducting, exterior vent cap, mounting brackets, screws, wire connectors, and silicone sealant.
Tools: drill, hole saw or reciprocating saw, screwdriver set, tape measure, level, utility knife, and ladder.
Optional: insulation and vibration-damping pads.
Safety and electrical considerations
Before any cutting or wiring begins, confirm that power to the bathroom circuit is fully shut off at the breaker and locked or tagged if possible.
Ensure that the installer will use a non-contact voltage tester to verify zero voltage at the fixture location.
All electrical work should follow local code, use GFCI protection where required, maintain proper wiring gauges, secure connections in approved boxes, and vent to outdoors.
Installation steps for ceiling-mounted and wall-mounted fans
Installers should follow a clear, step-by-step sequence when fitting ceiling- or wall-mounted bathroom exhaust fans, beginning with precise location selection, measuring and marking cut lines, and confirming structural and ducting constraints.
Cut opening, install framing or support, run and seal ductwork to exterior, connect wiring following codes, secure fan housing, mount grille, and insulate or air-seal gaps.
Finish with trim and label circuit.
Testing and common troubleshooting
Begin post-installation verification by running the exhaust fan through its full range of functions and inspecting performance against expected criteria.
Check airflow with a smoke test or anemometer, confirm vent termination outdoors, and listen for unusual noise or vibration.
Verify switch, timer, and humidity sensor operation.
Common fixes: tighten mounts, clear duct obstructions, reseal duct joints, and replace faulty motors or controls.
Preventing Recurring Condensation Problems
Preventing recurring condensation requires consistent habits, periodic checks, and strategic upgrades.
Recommended practices include daily and weekly routines to lower humidity, seasonal inspections and maintenance, and planning long-term improvements that reduce moisture buildup.
Combining routine care with targeted upgrades helps keep the bathroom dry and limits repeat problems.
Daily and weekly routines to control humidity
A simple daily and weekly routine can greatly reduce bathroom humidity and prevent recurring condensation.
After showers, surfaces should be quickly wiped and the fan run for 20–30 minutes. Windows and doors opened when weather permits.
Weekly tasks: launder bath mats and shower curtains, clear vent grilles, and check for damp spots.
Consistent habits stop moisture buildup before it becomes a problem.
Seasonal checks and maintenance tasks
When seasons change, scheduled inspections and simple maintenance tasks keep small moisture issues from becoming persistent condensation problems.
Inspect seals, grout, and caulking for gaps; clear exhaust fan intakes and ducting; check window and vent operation; replace worn weatherstripping; service humidity sensors and timers; clean shower curtains and mats; and address minor leaks promptly to prevent mold and recurring dampness.
Long-term upgrades to minimize moisture buildup
Upgrade strategies focused on the building envelope and mechanical systems offer the most durable defense against recurring bathroom condensation.
Improvements include upgrading ventilation to higher-capacity, humidity-sensing fans; increasing insulation and installing vapor barriers; replacing single-pane windows with insulated units; repairing leaks and improving drainage; and specifying moisture-resistant finishes.
Combined, these measures reduce indoor humidity sources and prevent surface cooling that leads to condensation.
Signs You Need Professional Help
If mold keeps returning despite regular cleaning and humidity control, professional assessment is advisable.
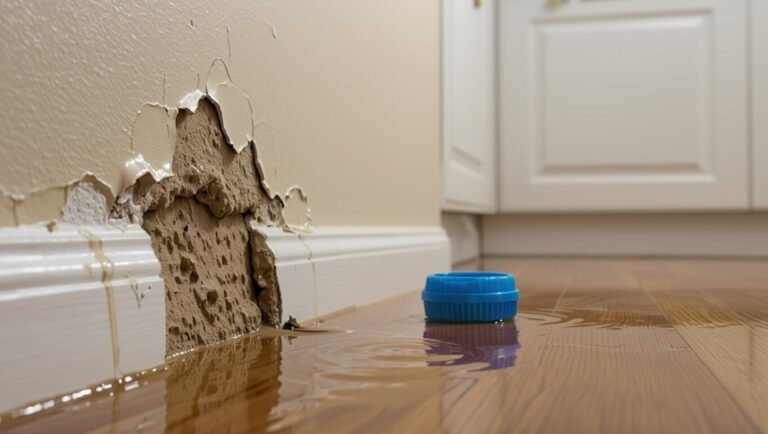
Visible structural damage—such as peeling paint, warped surfaces, or compromised drywall—also indicates the need for expert repair.
When remedies require complex ventilation upgrades or electrical work, a qualified contractor should be consulted.
Persistent mold despite fixes
Recognize persistent mold as a signal that basic ventilation and cleaning measures have failed to resolve an underlying moisture problem. Recurring growth, especially in hidden areas like behind tiles or inside walls, suggests structural leaks, compromised insulation, or HVAC issues that require professional assessment and remediation.
A professional can detect concealed sources, test air and surfaces, recommend targeted repairs, and safely remove hazardous mold to prevent recurrence.
Structural damage, peeling paint, or warped surfaces
Visible structural damage—cracked grout, peeling paint, bulging drywall, or warped baseboards—indicates that moisture has penetrated beyond superficial condensation and is compromising building materials.
Such problems often require assessment for rot, hidden mold, and insulation or framing deterioration. A professional can diagnose extent, recommend targeted repairs, and guarantee structural safety and proper drying to prevent recurrence, rather than relying on cosmetic touch-ups.
Complex ventilation or electrical work requirements
Consider professional help when bathroom condensation problems intersect with complex ventilation or electrical tasks that exceed typical DIY scope.
A qualified contractor or licensed electrician can assess duct sizing, fan capacity, wiring, and code compliance. They identify hidden issues like backdrafts, inadequate exhaust routing, or shared vents.
Professional intervention prevents safety hazards, guarantees effective moisture control, and provides durable, code-compliant solutions.
Cost Estimates and ROI of Common Fixes
Cost and return on investment are compared so readers can weigh upfront cost ranges against expected lifespans of common fixes. Energy savings and improved indoor air quality are noted as measurable benefits that shorten payback periods. The table below summarizes typical costs, lifespans, and likely ROI factors.
| Item | Typical range / notes |
|---|---|
| Exhaust fan replacement | $100–$600; lifespan 5–15 years |
| Ventilation upgrade (ducting) | $200–$1,200; lifespan 10–20 years |
| Insulation / vapor barrier | $150–$800; lifespan 10–30 years |
| Humidity-sensing controls | $50–$300; reduce runtime and energy use |
Upfront cost ranges and expected lifespan
When evaluating solutions for bathroom condensation, homeowners should weigh typical upfront cost ranges against expected lifespans to determine value and return on investment. Typical costs and lifespans vary: low-cost fixes (vent fans, sealants) last 5–15 years; mid-range (upgraded ventilation, insulation) 10–25 years; high-end (window replacement, mechanical ventilation) 15–30+ years.
| Fix | Cost/Lifespan |
|---|---|
| Sealant | $10–$50 / 5–10 yrs |
| Fan | $50–$400 / 5–15 yrs |
| Insulation | $100–$800 / 10–25 yrs |
| Window | $300–$1,200 / 15–30 yrs |
| MVHR | $2,000–$8,000 / 15–30+ yrs |
Energy savings and improved indoor air quality benefits
Having reviewed upfront costs and lifespans, attention shifts to how those investments translate into measurable energy savings and improved indoor air quality.
Upgrading ventilation, sealing leaks, and adding insulation reduce heating demand and mold risk. Lower energy bills and fewer moisture-related repairs offset initial expenses over time.
Healthier indoor air reduces allergens and respiratory issues, improving occupant comfort and long-term value.
Real-Life Examples and Before/After Scenarios
The article presents three concise case studies that illustrate practical outcomes: a small bathroom where a ventilation upgrade reduced nightly condensation, an older home where added insulation and window replacement eliminated persistent damp, and an apartment where non-invasive fixes produced noticeable improvement.
Each example compares conditions before and after interventions and notes costs, disruption, and effectiveness. Readers can use these scenarios to gauge which approaches match their space and constraints.
Small bathroom: ventilation upgrade case study
Several small bathrooms in an aging apartment block underwent targeted ventilation upgrades that transformed persistent condensation problems into consistent dryness.
Exhaust fans were upgraded to properly sized units with timed switches, ducting was straightened and insulated, and intake pathways were clarified.
Post-work measurements showed reduced surface moisture, faster drying times, and fewer mold sightings, validating the cost-effective retrofit approach for compact spaces.
Older home: insulation and window replacement case study
In an older two-story house with single-pane windows and minimal wall insulation, targeted upgrades—installed cavity insulation, sealed attic penetrations, and replaced drafty windows with double-glazed units—cut indoor humidity peaks and eliminated frequent mirror and ceiling condensation.
Post-upgrade measurements showed lower surface dew points, reduced staining, and faster drying after showers.
Occupants reported fewer mold spots and noticeably warmer bathroom surfaces.
Apartment: non-invasive fixes that worked
A handful of tenants in compact urban apartments resolved persistent bathroom condensation without structural work by using targeted, low‑cost measures: timed exhaust fans, adhesive‑backed weatherstripping for windows, moisture‑absorbing canisters, and temporary ventilation routines.
Before intervention, mirrors fogged and paint blistered; after, humidity spikes dropped, surfaces dried faster, mildew stopped reappearing, and tenants reported fewer musty smells and reduced need for deep cleaning.
Quick Checklist to Stop Bathroom Condensation Today
A concise checklist helps prevent moisture buildup immediately and over time, and signals when professional help is needed.
The following items outline quick post-shower steps, routine maintenance, and escalation points for persistent condensation. Use this as a practical starting point to reduce dampness today.
- Wipe down walls and mirror and run the exhaust fan for 10–15 minutes after showers.
- Open a window or crack the door briefly to ventilate while the room cools.
- Weekly: clean vents, check seals, and inspect for mold or peeling paint.
- Contact a professional if condensation persists, moisture stains appear, or ventilation seems inadequate.
Immediate actions to take after a shower
Towel off excess water, ventilate the room, and cool surfaces promptly to prevent steam from condensing into dripping moisture and lingering dampness.
Open windows or run the fan for ten to fifteen minutes, wipe mirrors and tiles, hang wet towels outside the bathroom, and leave the door ajar to equalize temperature.
Check under sinks and around fixtures for pooling water and dry any remaining spots.
Weekly maintenance checklist
Weekly checks keep bathroom humidity and hidden moisture from becoming persistent problems by catching issues early and maintaining airflow and dry surfaces.
Inspect vents and fans for dust; run and time exhaust fans. Wipe mirrors, tiles, and grout dry.
Check seals around tubs, sinks, and windows for gaps. Empty and dry bath mats.
Note recurring damp spots for follow-up.
When to escalate to professional assessment
If routine checks and simple fixes—cleaning vents, wiping surfaces, timing exhaust fans, and resealing obvious gaps—do not reduce persistent condensation, then professional assessment should be considered.
Engage a qualified HVAC or building envelope specialist when mold recurs, moisture stains persist, ventilation appears inadequate, or structural dampness is suspected.
Professionals diagnose hidden leaks, insulation deficits, and ventilation design flaws and recommend targeted remediation.
Conclusion
He stares at the mirror’s fog as if it were a modern art installation—ephemeral, smug, utterly useless. Society applauds steam as character-building; the towel rack sobs. Practicality sneaks in: vents, squeegees, a sensible exhaust fan that does not philosophize. Moisture retreats, mildew sulks, tiles breathe. Victory is small, domestic, and quietly bureaucratic. In the end, condensation loses interest and most people, at last, reclaim their mirror.