
How to Turn On Different Types of Showers: Step-by-Step Guide for Electric, Mixer, Valve & Digital Models
How to Turn On Different Types of Showers: A Step-by-Step Guide
This guide provides clear instructions for safely using electric, mixer, valve (thermostatic and pressure-balancing), and digital showers.
- Electric Showers: Power on the unit, ensure both water and electrical supplies are connected, then set your desired temperature and flow.
- Mixer Showers: Start with the cold water tap, then gradually add hot water while adjusting the handle to achieve your preferred temperature.
- Valve Showers: Choose your desired temperature setting first, then activate the water flow.
- Digital Showers: Utilize preset options or app controls to start the shower, making sure to confirm safety limits are in place.
Continue reading for detailed step-by-step operation, troubleshooting tips, and safety recommendations tailored to each shower type.
Overview When and Why Knowing How to Turn On Different Showers Matters
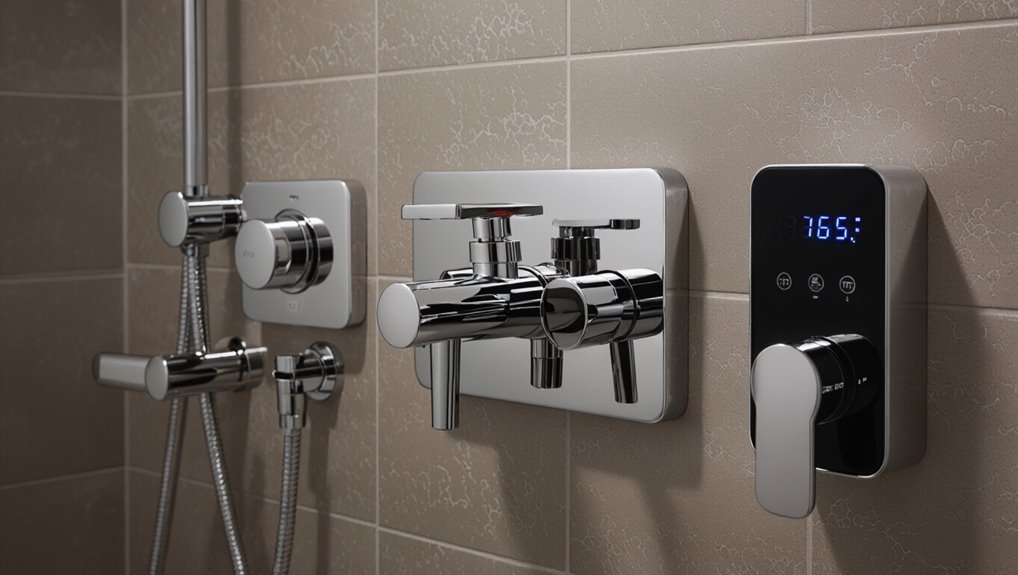
Although many people assume all showers operate the same, understanding the specific controls and mechanisms of different types prevents wasted time, water waste, and potential plumbing issues.
Knowing how to turn on different types of showers equips users to adjust temperature, conserve water, and avoid damage. This knowledge supports safety, efficient maintenance, and informed choices when encountering unfamiliar electric, mixer, valve, or digital systems.
Quick Guide How to Turn On Each Type of Shower (At-a-Glance)
A concise checklist presents single-step actions for common shower types to aid quick operation.
For electric showers: switch on power and set the temperature knob;
mixer showers: open the mixer tap to blend hot and cold;
valve showers (thermostatic/push-button): activate the control or press the button to the preset temperature.
For digital showers: use the control panel or app to select power and desired temperature.
Electric shower single quick steps
Press the power button or turn the rotary switch to the on position, select the desired temperature or power setting, then pull or turn the shower control to start water flow.
The user confirms settings, listens for steady heating, and adjusts flow for comfort.
- Verify water heats within a few seconds.
- Adjust power if temperature is too low.
- Turn off after use.
Mixer shower single quick steps
Turn the mixer control to the on position and set the temperature knob or lever to the desired mix of hot and cold.
Then pull or push the diverter or flow control to start water. The user adjusts flow and temperature until balanced, then tests spray pattern briefly before stepping in.
- Set mix, then open flow
- Fine-tune temperature
- Verify steady pressure
Valve (thermostatic/push-button) shower single quick steps
Operate the thermostatic or push-button valve by selecting the temperature control first, then activate flow using the push-button, rocker, or separate on/off lever.
The user confirms temperature, depresses or toggles to start water, and adjusts flow as needed. Follow built-in safety stops and reset procedures if fitted.
- Set desired temperature
- Press or toggle to start
- Adjust flow or stop
Digital shower single quick steps
Select the preset or use the touchscreen to choose temperature and flow settings, then start the shower using the dedicated on/off control or app.
The unit will confirm settings, warm water to the set temperature, and maintain flow automatically.
Follow prompts for adjustments or voice control if available.
- Verify preset and safety limits
- Press start or tap app icon
- Adjust as needed
Electric Showers Step-by-Step Startup and Operation
An overview of electric shower startup explains the unit’s main parts—heater element, water inlet, thermostat, and safety cut-outs—so readers understand how water heats on demand.
Before switching on, checks should confirm the electrical supply, water feed and pressure, and that safety features like RCDs are functional.
A clear step‑by‑step startup covers powering the unit, selecting flow and temperature, reading common indicators, and basic troubleshooting for issues such as no heat, low flow, or tripping.
How an electric shower works (basic components)
A typical electric shower heats water on demand by passing the incoming cold supply through a compact instant heater assembly that contains a heating element, a flow sensor or switch, thermostatic or temperature-regulating controls, and an internal pressure relief and safety cut-out.
Water flow activates the element; temperature is adjusted via user controls; thermostatic regulation and safety cut-outs prevent overheating or dry-run conditions; outlet routes heated water to the showerhead.
Pre-checks before switching on (electrical, water supply, safety)
Before switching on an electric shower, perform a concise set of pre-checks covering electrical integrity, water supply, and safety devices to guarantee reliable and safe operation.
Inspect supply isolation switch, RCD/MCB condition and labeling.
Confirm water mains and inlet pressure, no leaks, and closed thermostatic or mixing isolation valves.
Verify shower unit is dry, correctly earthed, and commissioning paperwork present.
Detailed step-by-step to turn on and adjust temperature
Begin by confirming that all pre-checks are complete and the isolation switch feeding the electric shower is in the OFF position; then proceed to energize the unit only when the water supply is available and secure.
The operator then powers on, opens the inlet, and adjusts temperature gradually, allowing stable flow before finalizing settings.
- Power on the shower unit.
- Open water inlet fully.
- Adjust temperature slowly to desired level.
Common indicators and controls (power, temperature, flow)
Several clear indicators and intuitive controls guide users through electric shower operation: a power/status LED or dial shows electrical readiness, a temperature control adjusts heating element output or flow mixing, and a flow lever or button regulates water volume.
Additional indicators include warning LEDs for fault or low pressure, plus tactile or marked knobs for precise setpoints and an eco or economy mode for reduced power.
Troubleshooting common problems and fixes
Troubleshooting electric showers focuses on diagnosing a short list of recurring issues—no power, inconsistent temperature, low flow, and leaks—and applying targeted fixes that prioritize safety and component checks.
- Verify power: check RCD, circuit breaker, wiring connections.
- Restore flow: clean or replace filters, inspect inlet valves and plumbing obstructions.
- Temperature faults: test heating element, thermostatic controls, and replace faulty components.
Mixer Showers Step-by-Step Startup and Operation
Mixer showers blend hot and cold supplies through an internal cartridge to deliver the chosen temperature and pressure.
Before use, the plumbing and pressure balance should be checked, then the controls adjusted step by step to reach the desired temperature while monitoring for low-pressure or temperature swings.
Routine maintenance of cartridges and seals can prevent issues, but persistent problems warrant a plumber.
How mixer showers work (hot and cold blending)
Begin by understanding that a mixer shower combines hot and cold water supplies through an internal valve to deliver a single, temperature-controlled outlet.
The valve adjusts proportions from each supply as the handle moves, producing the desired temperature and flow.
Thermostatic or manual mechanisms maintain balance; diverter components route water to the head or handset.
Operation depends on inlet temperatures and user setting.
Pre-checks before use (plumbing, pressure balance)
Before activating the shower, inspect the plumbing connections, valves, and visible seals to verify they are intact and leak-free.
Validate hot and cold supply isolation valves operate smoothly.
Check for adequate mains pressure and consistent flow from other fixtures to guarantee balance.
Confirm anti-scald/pressure‑balancing cartridge condition and absence of debris.
Note any irregularities and address them before use.
Detailed step-by-step to turn on and get desired temperature
One clear sequence guides the user through starting a mixer shower and achieving the desired temperature: open the cold supply slightly, introduce hot flow gradually, allow the cartridge to stabilize, then fine-tune using small incremental adjustments to the control handle while checking outlet temperature with a hand or thermometer.
- Open cold, then add hot gradually.
- Wait for cartridge stabilization.
- Make micro-adjustments until temperature is steady.
Handling low pressure and temperature swings
Troubleshoot low pressure and temperature swings by first confirming supply pressures and valve settings, since inconsistent inlet flow or partially closed stops are the most common causes.
If both supplies read adequate pressure, inspect the shower cartridge and any check valves for debris or wear that can cause imbalance.
Then stabilize operation by slowly cycling the control between hot and cold while allowing the thermostat or cartridge to re-seat and the system to equalize before making fine adjustments.
Maintenance notes and when to call a plumber
Maintain a simple routine of periodic checks—inspect seals, clean strainers, and cycle the control—to preserve performance and spot wear early.
Replace worn cartridges, tighten fittings, and clear mineral buildup promptly.
Note persistent leaks, pressure loss, strange noises, or temperature instability as signs to contact a plumber.
Professional service is advised for internal valve repairs, complex thermostatic faults, or when isolation and safe water shutoff are uncertain.
Valve Showers (Thermostatic and Pressure-Balancing) Step-by-Step
The section compares thermostatic and pressure‑balancing valves, outlines necessary pre‑checks and safety steps, and provides separate step‑by‑step procedures for each valve type.
It then covers common reset methods and troubleshooting for valve‑related problems.
Readers will learn how to operate, diagnose, and safely restore both thermostatic and pressure‑balancing shower systems.
Differences between thermostatic and pressure-balancing valves
Valve showers rely on either thermostatic or pressure‑balancing mechanisms to keep water temperature stable under varying supply conditions.
Thermostatic valves maintain a set temperature by modulating hot and cold flow independently, responding to temperature changes.
Pressure‑balancing valves react to pressure shifts, keeping the hot/cold ratio constant.
Thermostatic offers finer control and safety; pressure‑balancing is simpler and often less expensive.
Pre-checks and safety considerations
Before beginning work, inspect the shower area and water supplies to confirm that shutoff valves function, pipes show no visible leaks or corrosion, and the hot water temperature at a nearby faucet is within a safe range (typically below 120°F/49°C).
Verify electrical isolation if applicable, guarantee adequate lighting and ventilation, wear protective gloves and eye protection, and have basic tools and a thermometer ready for safe diagnostics.
Step-by-step operation for thermostatic valve showers
Begin by verifying that the thermostatic control and associated shutoffs are accessible and that the shower’s supply pressures are within the manufacturer’s specified range.
Then operate controls in sequence to establish flow and temperature, adjusting the thermostat limiter if needed.
- Open cold then hot supply slowly to balance temperature.
- Set desired temperature on the thermostatic dial.
- Confirm stable temperature before leaving.
Step-by-step operation for pressure-balancing valve showers
Operate the pressure-balancing shower by first confirming both hot and cold supplies are open and that inlet pressures are within the manufacturer’s recommended range.
Rotate the control to start flow, then adjust toward desired temperature; the valve maintains balance during pressure shifts.
Finish by setting flow mode if applicable and monitoring temperature briefly for stability.
- Start flow, then adjust temperature
- Observe stability during use
- Set spray mode if available
Resetting and troubleshooting valve-related issues
After verifying normal operation of a pressure‑balancing valve, attention should turn to resetting and troubleshooting valve-related issues for both thermostatic and pressure‑balancing showers.
Inspect for debris, mineral buildup, or worn seals; clean or replace cartridges.
Reset thermostatic stops per manufacturer instructions and recalibrate temperature limits.
Check supply pressures, balance adjustments, and thermostatic element function.
Test thoroughly and consult a professional if problems persist.
Digital and Smart Showers Step-by-Step Startup and Features
Digital and smart showers use electronic controls, mobile apps, and saved presets to manage temperature, flow, and timing.
Before startup, a user should check power and network connections and confirm water supply. Then power on the unit, select or create a preset, and fine-tune settings via the panel or app.
Pairing and calibration steps enable voice assistant integration, and common errors—lost connectivity, sensor faults, or software glitches—are typically resolved by rebooting, re-pairing, or consulting the manufacturer’s troubleshooting guide.
What makes a shower digital (controls, app, presets)
Although modern showers may look similar on the outside, a shower is considered digital when its temperature, flow, and modes are controlled through electronic interfaces rather than solely by mechanical valves.
Digital features include touchscreen or button controllers, smartphone apps for remote control and scheduling, programmable presets for preferred temperatures and spray patterns, and integrations with smart-home systems for voice commands and automation.
Pre-start checks (power, network, water)
Before powering on a smart shower, a brief set of pre-start checks guarantees safe, reliable operation:
verify mains power isolation, confirm RCD/GFCI protection and correct voltage supply,
verify the device’s network indicator or router shows connectivity,
check incoming cold and hot water supplies for adequate pressure and no leaks,
and confirm filters and valves are open and debris-free before initial activation.
Turning on, selecting presets, and adjusting via controls or app
Power the unit using its primary control or companion app, then choose a preset or manual mode to begin a session. The system confirms temperature, flow, and duration; adjustments apply instantly via touchscreen, dial, or app sliders.
Users may switch presets mid-shower and save favorites.
- Tap presets for instant settings.
- Use sliders or knobs to fine-tune.
- Save adjustments as custom scenes.
Pairing, calibration, and voice assistant integration
After presets are selected and adjustments saved, pairing and calibration prepare the digital or smart shower for accurate, repeatable performance and voice control.
The user pairs via the manufacturer app using Bluetooth or Wi‑Fi, follows guided calibration to set flow and temperature limits, and grants voice assistant permissions.
Finally, assign routines and test voice commands to confirm reliable activation and safety lock responses.
Common digital errors and how to resolve them
Troubleshooting common digital errors begins with identifying clear symptoms—unresponsive controls, inconsistent temperature, connectivity drops, or calibration failures—and matching each symptom to likely causes such as firmware issues, network interference, sensor drift, or app permission problems.
Recommended actions include updating firmware, restarting devices and routers, re-calibrating sensors, checking app permissions, resetting to factory defaults if needed, and consulting support for persistent hardware faults.
Comparison of Shower Types Controls, Safety, Cost, and Performance
Different shower types are compared across controls, safety, cost, and performance to identify the best options for families, the elderly, and low-pressure homes. The table below summarizes key trade-offs to guide selection and highlight practical considerations. Readers can use this snapshot to match a shower type to specific household needs.
| Shower Type | Strengths | Best For |
|---|---|---|
| Mixer | Simple controls, moderate cost | Families |
| Thermostatic | Stable temperature, safety stop | Elderly |
| Pump-assisted | Maintains flow in low pressure | Low-pressure homes |
Best shower type for specific needs (families, elderly, low-pressure homes)
Choosing the right shower type depends on household composition and plumbing constraints, so comparing controls, safety features, cost, and performance quickly clarifies which models suit families, elderly users, or low-pressure homes.
- Families: thermostatic mixers offer stable temperature, multiple outlets, moderate cost.
- Elderly: valve or digital showers with anti-scald, easy controls, accessible fittings.
- Low-pressure homes: electric or pump-assisted units maximize flow despite weak mains.
Safety Precautions for All Shower Types
The piece highlights key safety measures across all shower types, including electrical precautions and the necessity of RCD protection for electric and digital units.
It notes the importance of thermostatic controls and other scald-prevention features to maintain safe water temperatures.
It also outlines clear emergency steps to follow for loss of hot water, leaks, or suspected electrical faults.
Electrical safety and RCD requirements for electric and digital showers
Because electric and digital showers connect directly to a home’s electrical supply, compliance with electrical safety standards and the use of a dedicated residual current device (RCD) are essential to prevent fatal shocks and fire risks.
Installations must follow national wiring regulations, use correct cable sizing, earth bonding, and a dedicated RCD or RCBO.
Only qualified electricians should install or test these showers.
Scald prevention and thermostatic controls
After addressing electrical safeguards for electric and digital showers, attention shifts to preventing scalding across all shower types.
Thermostatic mixing valves maintain set temperatures, limiting hot water surge when cold supply fluctuates. Regular testing, correct installation, and temperature limits (typically 38–41°C for showers) reduce risk, while anti-scald devices and user education provide additional protection without compromising performance.
Steps to take in an emergency (no hot water, leaks, electrical faults)
If an emergency occurs—such as sudden loss of hot water, a visible leak, or an electrical fault—occupants should immediately prioritize isolation, shutdown, and safe evacuation as appropriate.
Turn off the shower, isolate water at the stopcock, and cut power at the consumer unit for electric models.
Contain minor leaks with towels, avoid using appliances, and contact a qualified plumber or electrician for assessment and repair.
Common Mistakes People Make When Turning On Showers and How to Avoid Them
Many users misjudge shower controls, leading to bursts of scalding or icy water, wasted time, and damaged fixtures; recognizing common errors—such as abrupt lever movements, skipping the warm-up phase, forcing stuck valves, or ignoring pressure-balancing issues—helps prevent discomfort and costly repairs.
- Avoid sudden full-turns; adjust incrementally.
- Let systems reach temperature before use.
- Use proper tools; never force jammed components.
Quick Maintenance Checklist to Keep Every Shower Type Working Smoothly
A concise checklist helps maintain different shower types—fixed, handheld, rain, and digital—so they function reliably and safely.
Regular visual inspections, cleaning aerators and heads, and checking seals prevent buildup and leaks. Follow simple monthly tasks to extend lifespan and maintain performance.
- Inspect fittings, hoses, and seals for wear or leaks.
- Clean showerheads and filters to remove mineral buildup.
- Test controls, thermostats, and safety cutoffs for proper operation.
When to Repair vs Replace Your Shower Practical Signs and Cost Considerations
Several clear indicators help determine whether a shower warrants repair or full replacement: persistent leaks, recurrent clogs or mineral buildup despite cleaning, malfunctioning temperature controls, visible corrosion, and frequent part failures.
Cost, age, warranty status and frequency of service guide the choice. Evaluate total repair estimates versus replacement value and long-term reliability.
- Repair when issues are isolated and inexpensive.
- Replace if multiple systems fail or aging causes chronic faults.
- Prioritize safety, efficiency, and resale impact.
Conclusion
Knowing how to turn on different showers keeps daily routines smooth and safe, and mastering each type prevents wasted time and frantic cold-water surprises. This guide condenses essential steps for electric, mixer, valve, and digital showers into clear actions and safety checks. With proper maintenance and timely repairs, showers can last for years—almost forever, one might say—provided users follow simple precautions and recognize when professional help is warranted.
